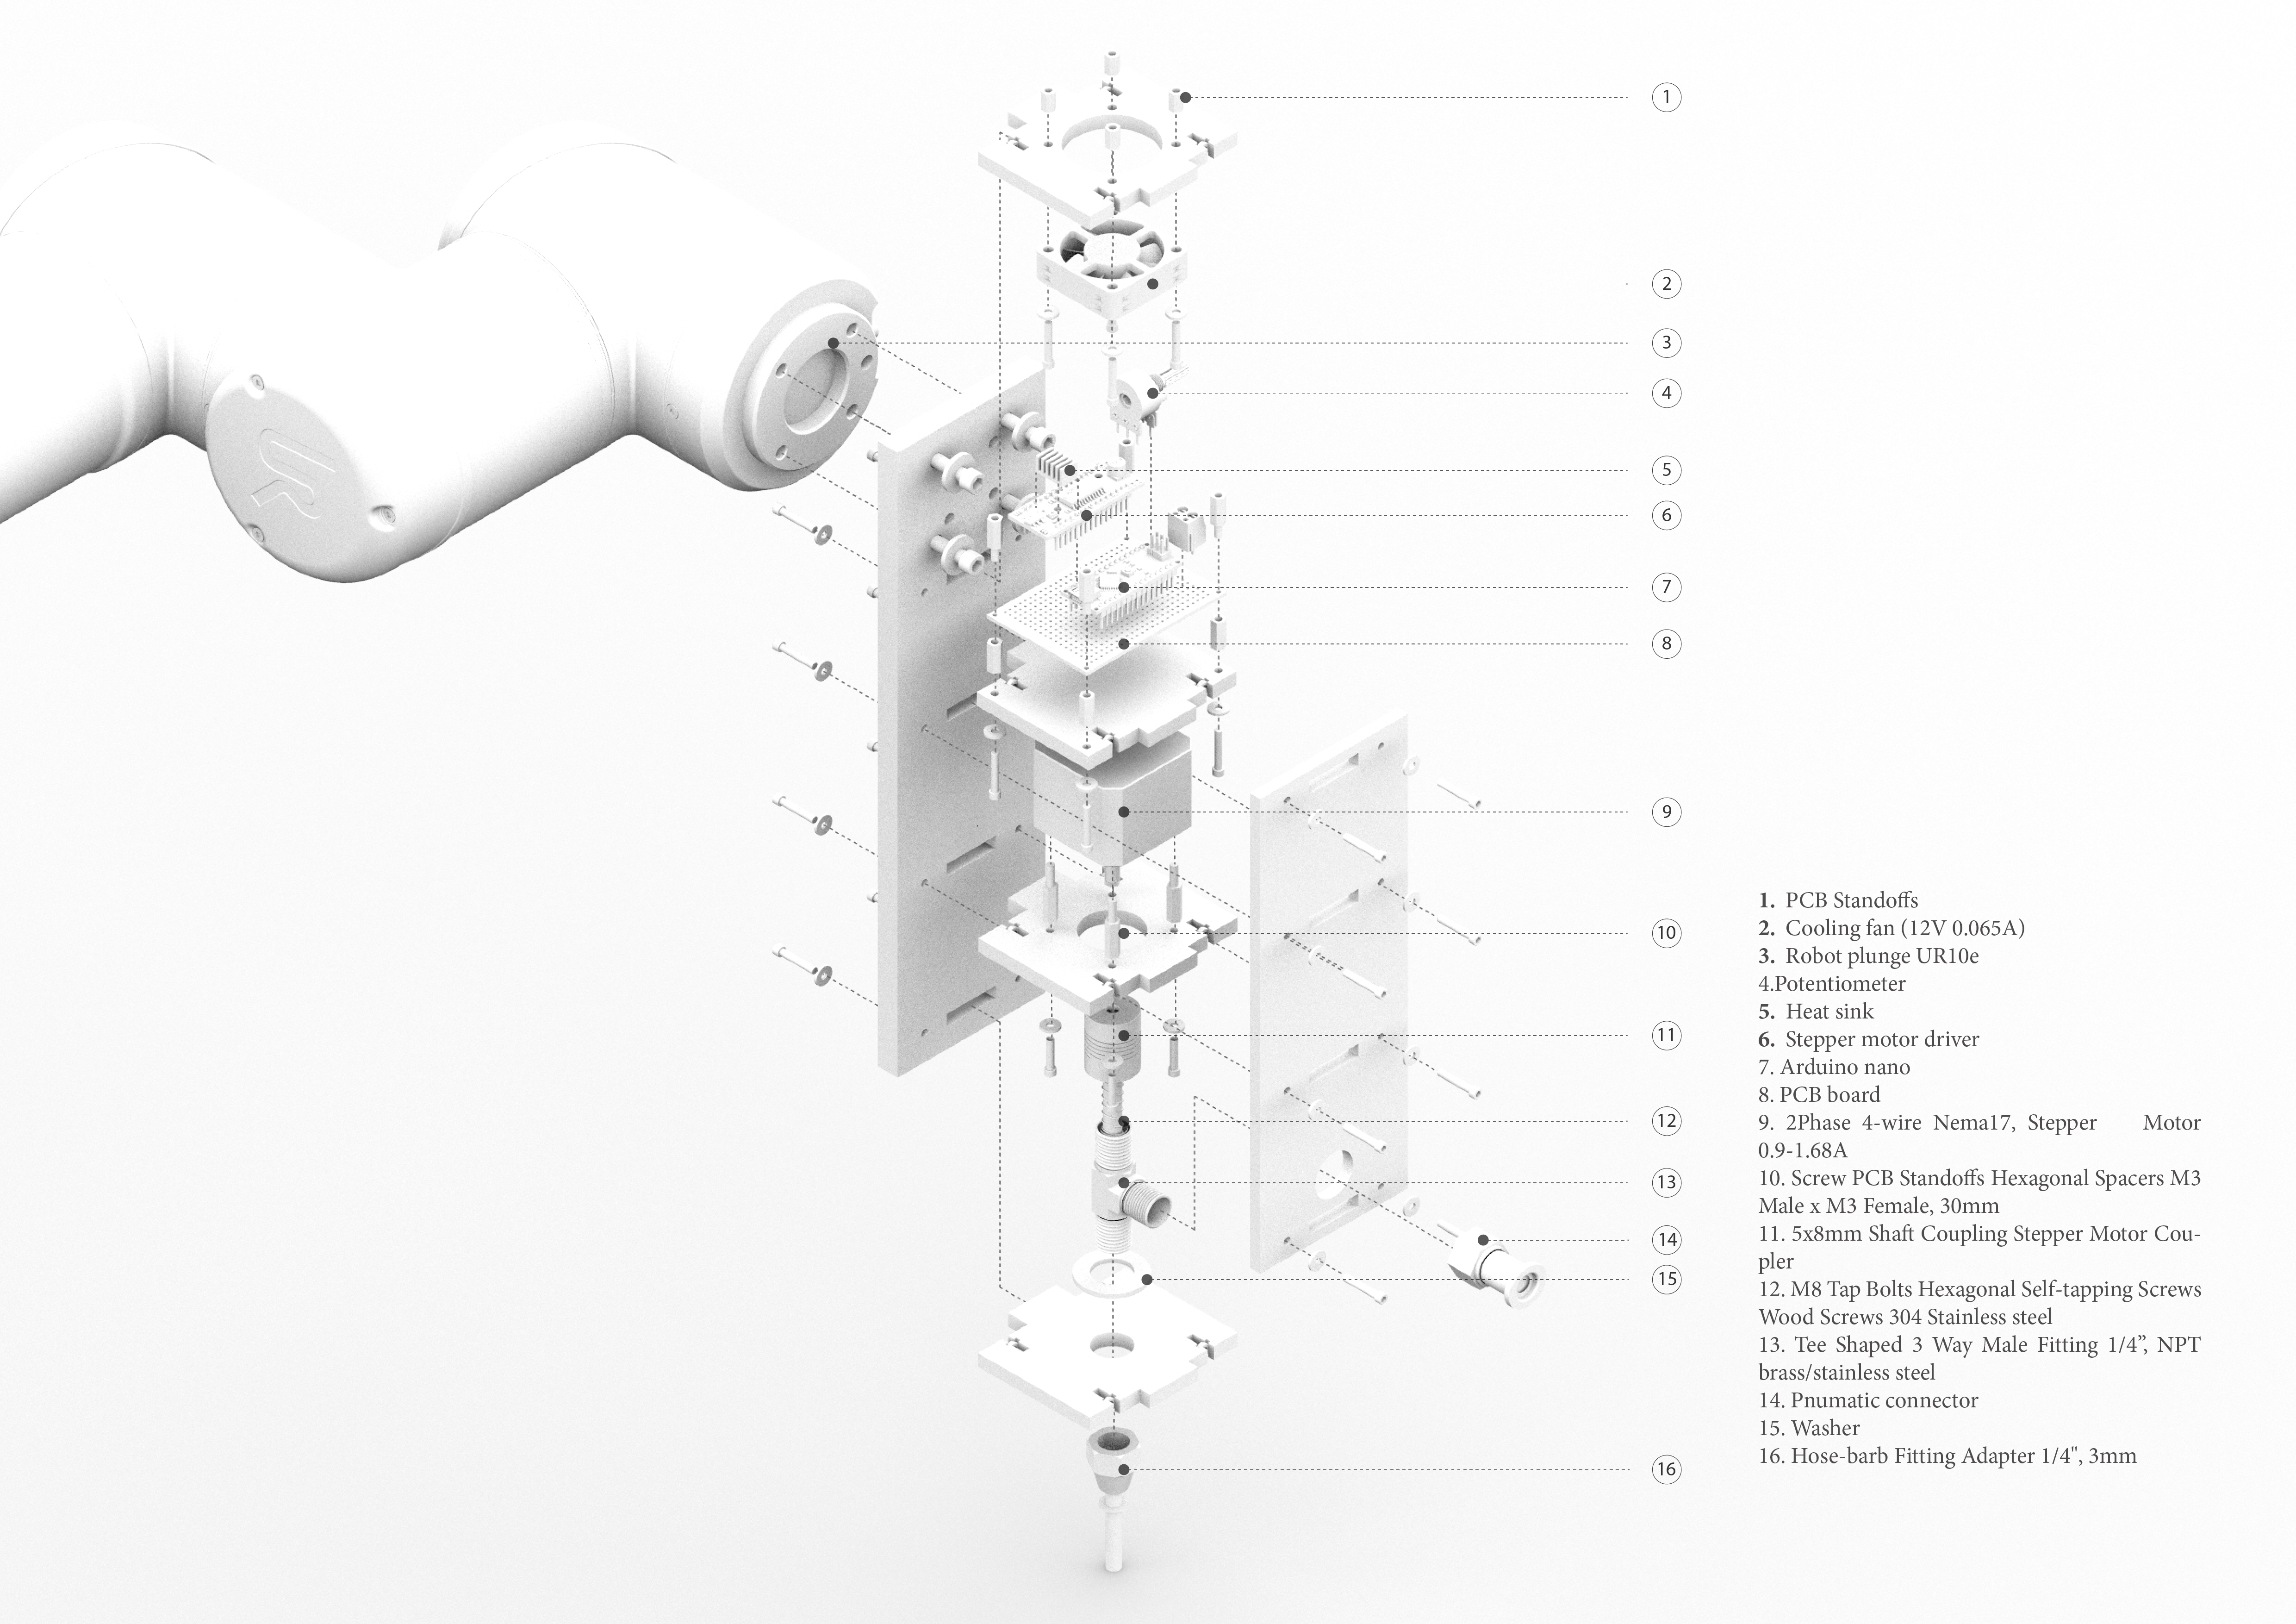
The Clay Extruder is meant for controlling the flow of the pumped clay for extruding using a robot. The flow rate is controlled manually through a knob and it also includes an I/O digital input for cutting off the flow.
This extruder uses an Auger Screw to push the clay with control out of the nozzle. For this reason an Arduino-controlled stepper motor was used to power up the screw.
-
-
- Arduino (Nano or Uno)
- Stepper (Nema 17)
- Stepper Driver
- Optocoupler
- Potentiometer
- 12V Power Supply
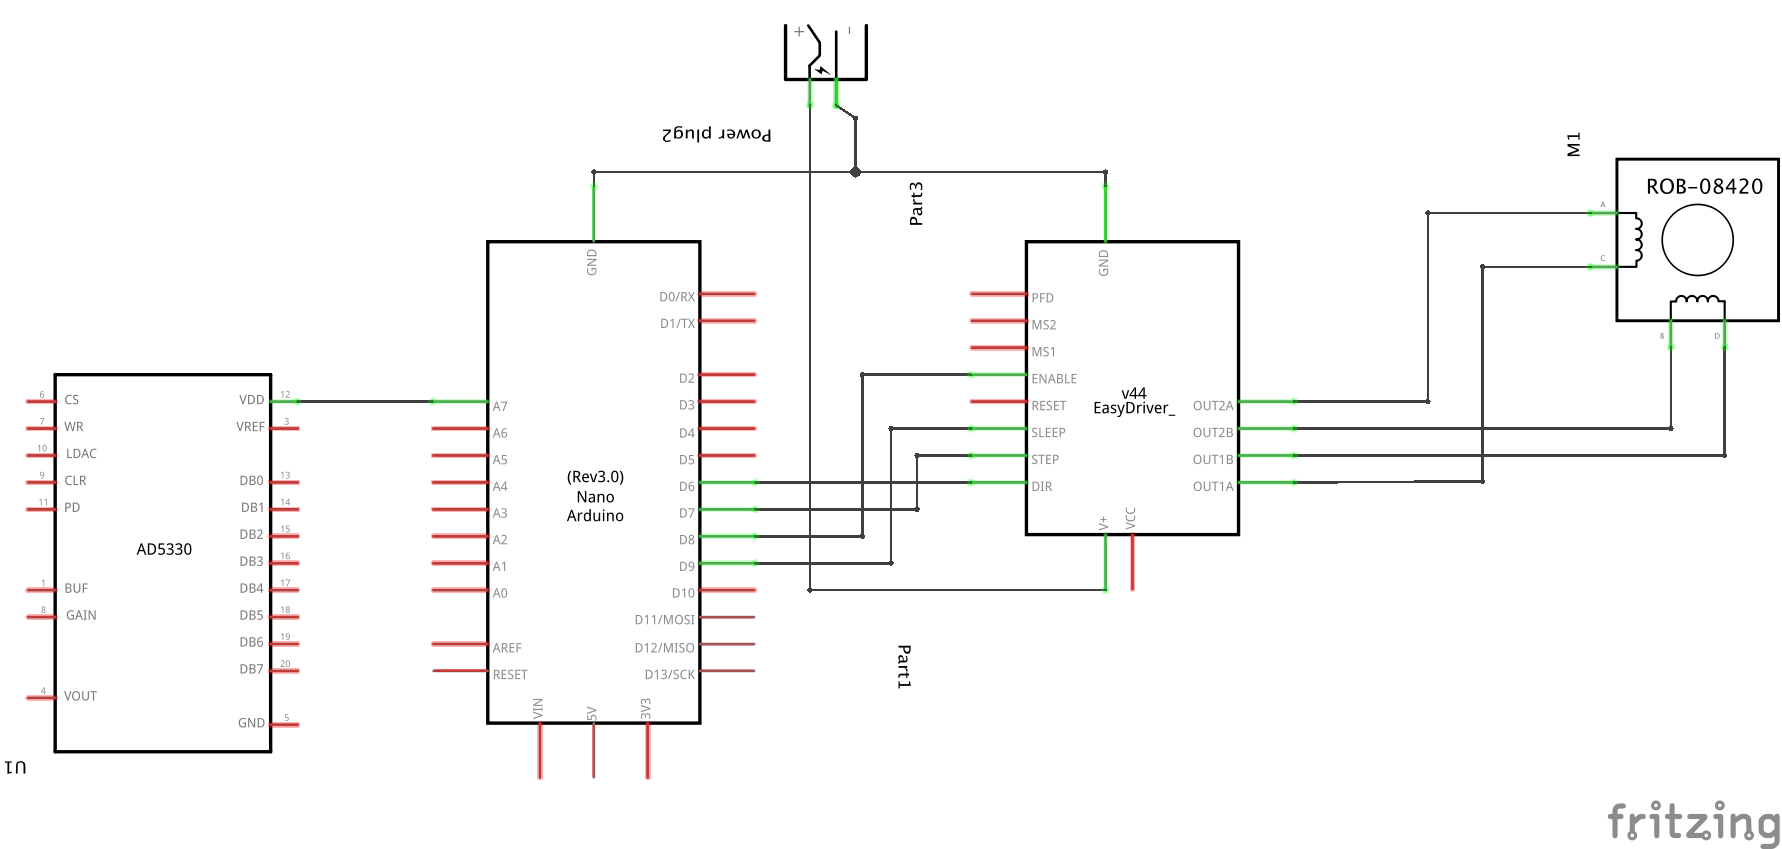


This project uses an Optocoupler to convert the 24V signals from a robot-arm into 5V logical level signal for the Arduino in order to introduce an I/O control for the extruder. Also a Potentiometer is used to control the flow speed manually.
-
// Arduino NANO

#include <SPI.h>

volatile byte state = true;
const byte interruptPin = 2;

const int st_1 = 4;
const int dr_1 = 5;
const int en_1 = 8;
const int sl_1 = A2;

volatile int spd_2 = 500;
int actual_spd_1 = 500;
unsigned long t_1;

void setup() {
  Serial.begin(9600);
  pinMode(st_1, OUTPUT);
  pinMode(en_1, OUTPUT);
  pinMode(dr_1, OUTPUT);
  pinMode(sl_1, OUTPUT);

  digitalWrite(dr_1, HIGH);
  digitalWrite(sl_1, LOW);
  digitalWrite(en_1, LOW);

  pinMode(interruptPin, INPUT);

  attachInterrupt(digitalPinToInterrupt(interruptPin),
                  motorsState, CHANGE);

  state = digitalRead(interruptPin);
  t_1 = micros();
}

void loop() {
  if (state) {
    if (micros() - t_1 > spd_1) {
      t_1 = micros();
      digitalWrite(st_1, HIGH);
    }
    else if (micros() - t_1 > 50) {
      digitalWrite(st_1, LOW);
    }
  }
}

void motorsState() {
  state = !digitalRead(interruptPin);

  if (state) {
    digitalWrite(sl_1, LOW);
    digitalWrite(sl_2, LOW);
  } else {
    digitalWrite(sl_1, HIGH);
    digitalWrite(sl_2, HIGH);
  }

  Serial.print("Working?");
  Serial.print("\t");
  Serial.print(state);
  Serial.println();
}
- [Sample text](Sample text)
- [Sample text](Sample text)
