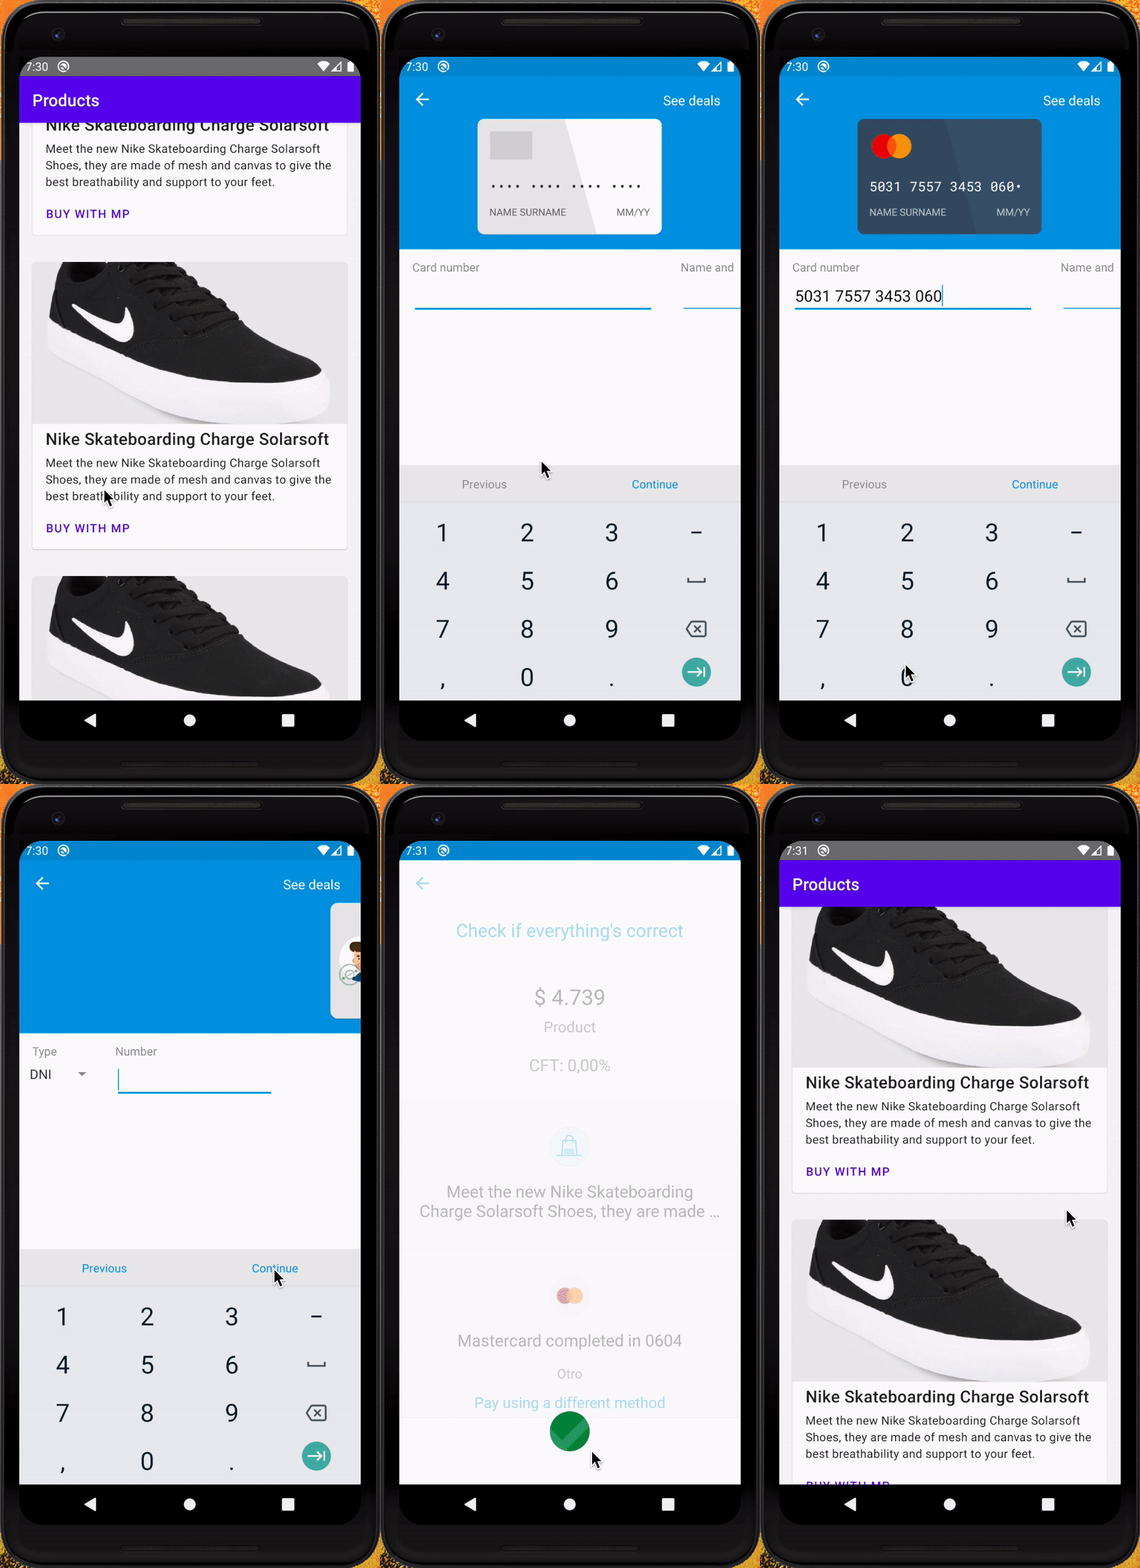
RN bridge to integrate MercadoPago checkout into a RN app.
Currently, MercadoPago only brings OSS support for Native SDKs. There's currently not support for RN. Our library uses both SDKs, android and ios, to enable a bridge for calling MercadoPago Checkout from RN land.
We previously developed react-native-mercadopago-checkout. This newer library will suppose a deprecation of the older repository, we don't have plans for maintainance.
- Use Case
- Compatibility
- Pre Requisites
- Installation
- Library Setup
- Example Usage
- Realistic Example
- A Note on Security
- API
- Troubleshooting
- Issues
- Contributing
- License
You're using RN for building an app, and you need to integrate MercadoPago checkout in your app.
Our package currently supports apps with RN >= 0.61.5. We don't have a plan currently to support olders ones, but if you need we're open to support it.
As a pre requisite you'll need the following before integrating the library:
- A MercadoPago Account
- A
publicKeyfrom your MercadoPago Account - A
preferenceIdobtained from your servers
If you don't have any of the followings, you can start from here:
- Creating a MercadoPago Account
- Creating a MercadoPago Application
- Creating a MercadoPago preference for Checkout Payment
For Testing Purposes we provide a cURL example on how to create a Preference:
curl -X POST \
    'https://api.mercadopago.com/checkout/preferences?access_token=ACCESS_TOKEN' \
    -H 'Content-Type: application/json' \
    -d '{
      "items": [
        {
          "title": "Dummy Item",
          "description": "Multicolor Item",
          "quantity": 1,
          "currency_id": "ARS",
          "unit_price": 10.0
        }
      ],
      "payer": {
        "email": "payer@email.com"
      }
    }'
You'll need to replace ACCESS_TOKEN with your application account access token.
If you've more doubts you can read more documentation in this portal:
You can install this library via NPM or YARN.
npm i @blackbox-vision/react-native-mercadopago-pxyarn add @blackbox-vision/react-native-mercadopago-pxSetting up this library is a little bit trickier for IOS rathen than Android.
Modify your app delegate like the following:
- self.window.rootViewController = rootViewController;

+ UINavigationController *navController = [[UINavigationController alloc] initWithRootViewController:rootViewController];

+ [navController setToolbarHidden:YES animated:YES];
+ [navController setNavigationBarHidden:YES];

+ self.window.rootViewController = navController;Modify the IOS target like the following:
- platform :ios, '9.0'
+ platform :ios, '10.0'Add disable input output paths like the following:
platform :ios, '10.0'
+ install! 'cocoapods', :disable_input_output_paths => trueDisable module headers for DoubleConversion, Glog and Folly like the following:
- pod 'DoubleConversion', :podspec => '../node_modules/react-native/third-party-podspecs/DoubleConversion.podspec'
- pod 'glog', :podspec => '../node_modules/react-native/third-party-podspecs/glog.podspec'
- pod 'Folly', :podspec => '../node_modules/react-native/third-party-podspecs/Folly.podspec'

+ pod 'DoubleConversion', :podspec => '../node_modules/react-native/third-party-podspecs/DoubleConversion.podspec', :modular_headers => false
+ pod 'glog', :podspec => '../node_modules/react-native/third-party-podspecs/glog.podspec', :modular_headers => false
+ pod 'Folly', :podspec => '../node_modules/react-native/third-party-podspecs/Folly.podspec', :modular_headers => false
Add support for module headers like the following:
use_native_modules!
+ use_modular_headers!
Install pods by running the following commands:
cd ios
pod deintegrate
pod install
With those steps fully completed, you should be able to build the IOS app accordangly.
After reading and performing the previous steps, you should be able to import the library and use it like in this example:
import Env from 'react-native-config';
import React, { useState } from 'react';
import { StyleSheet, View, Text, TouchableOpacity, Alert } from 'react-native';

import MercadoPagoCheckout from '@blackbox-vision/react-native-mercadopago-px';

import styles from './styles';

// You should create the preference server-side, not client-side but we show client-side for the sake of simplicity
const getPreferenceId = async (payer, ...items) => {
  const response = await fetch(
    `https://api.mercadopago.com/checkout/preferences?access_token=${Env.MP_ACCESS_TOKEN}`,
    {
      method: 'POST',
      body: JSON.stringify({
        items,
        payer: {
          email: payer,
        },
      }),
    }
  );

  const preference = await response.json();

  return preference.id;
};

export default function App() {
  const [paymentResult, setPaymentResult] = useState(null);

  const startCheckout = async () => {
    try {
      const preferenceId = await getPreferenceId('payer@email.com', {
        title: 'Dummy Item Title',
        description: 'Dummy Item Description',
        quantity: 1,
        currency_id: 'ARS',
        unit_price: 10.0,
      });

      const payment = await MercadoPagoCheckout.createPayment({
        publicKey: Env.MP_PUBLIC_KEY,
        preferenceId,
      });

      setPaymentResult(payment);
    } catch (err) {
      Alert.alert('Something went wrong', err.message);
    }
  };

  return (
    <View style={styles.container}>
      <TouchableOpacity onPress={startCheckout}>
        <Text style={styles.text}>Start Payment</Text>
      </TouchableOpacity>
      <Text style={styles.text}>Payment: {JSON.stringify(paymentResult)}</Text>
    </View>
  );
}We provide a more real sample app here.
For the sake of simplicity in our examples we show the generation of the MercadoPago payment preference from the frontend side. That isn't ideal in the case you want your app to reach a production environment.
You should move the preference creation from the frontend to your own backend.
The function lets you start a MercadoPago Checkout Flow Activity/UI Controller depending on the platform that is running.
The function receives the following parameters:
options: PaymentOptionspublicKey: stringpreferenceId: stringadvancedOptions: AdvancedOptionsamountRowsEnabled: booleanbankDealsEnabled: booleanproductId: string
trackingOptions: TrackingOptionssessionId: string
The createPayment function is async, its return value will be always a Promise, but if you unwrap the promise contents you will access the following result object:
payment: Paymentid: stringstatus: string
Yes. It does! But to be able to work with Expo, you need to do the following adjustment in your Podfile.
After the following line:
install! 'cocoapods', :disable_input_output_paths => trueThen, run the following commands:
cd ios
pod deintegrate
pod install
After this change you should be able to run your Expo ejected app.
We're still investigating but when Flipper is enabled in IOS some strings from translations aren't loaded.
Please, open an issue following one of the issues templates. We will do our best to fix them.
If you want to contribute to this project see contributing for more information.
Distributed under the MIT license. See LICENSE for more information.

