Yao Huang, Yinpeng Dong, Shouwei Ruan, Xiao Yang, Hang Su and Xingxing Wei.
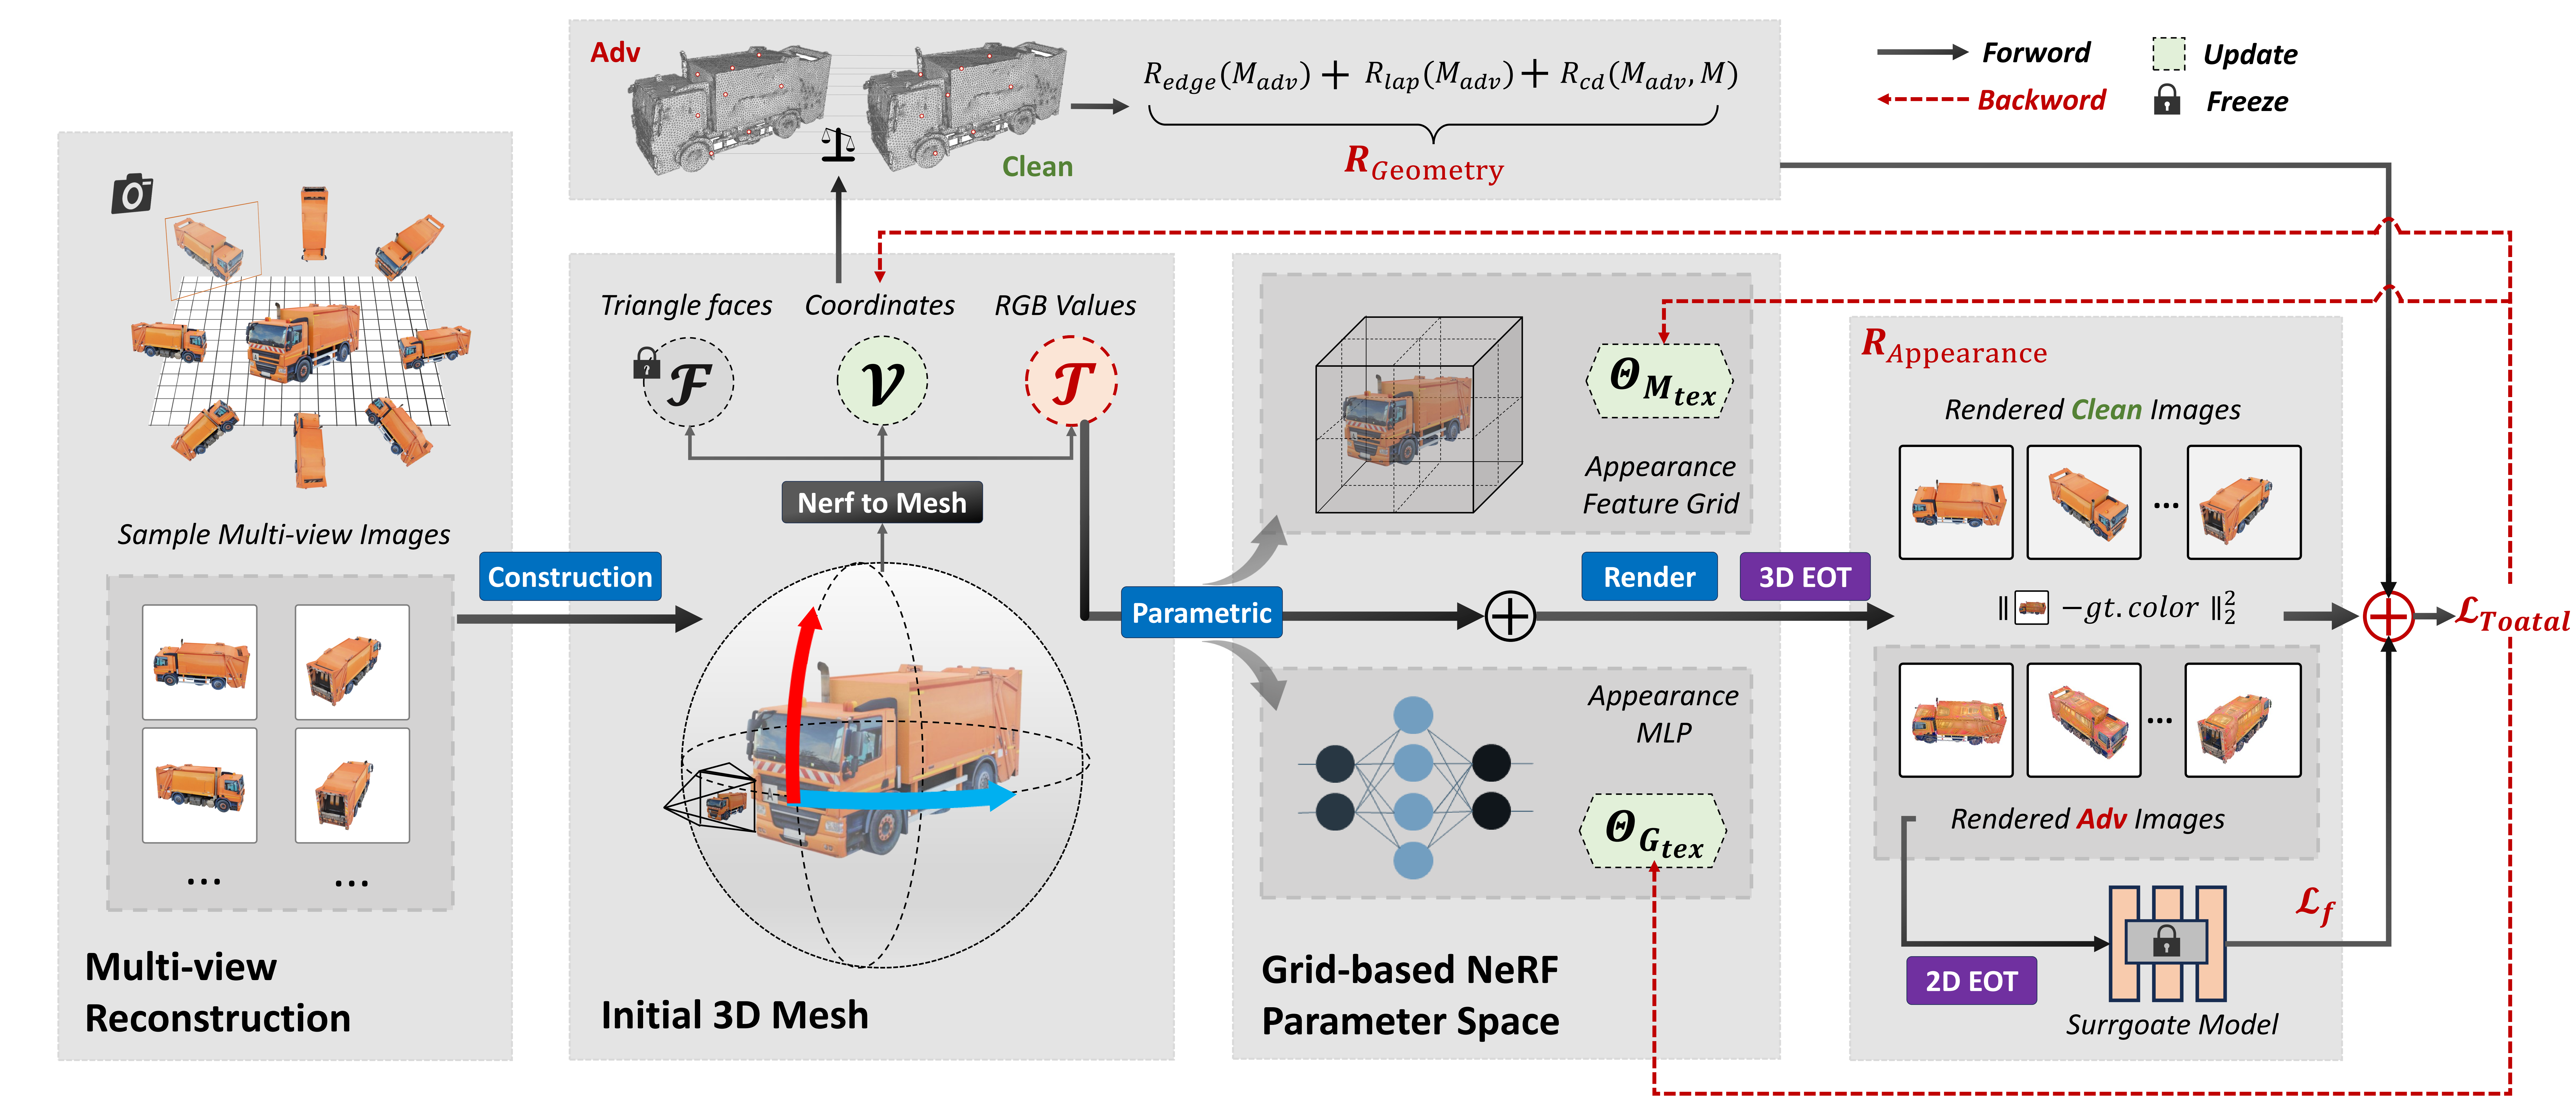
This repository is the official implementation for "Towards Transferable Targeted 3D Adversarial Attack in the Physical World" (CVPR, 2024). We design a novel framework named TT3D that could rapidly reconstruct from few multi-view images into Transferable Targeted 3D textured meshes.
- clone this repo:
git clone https://github.com/Aries-iai/TT3D.git- install dependents:
cd TT3D

pip install -r requirements.txt

# tiny-cuda-nn
pip install git+https://github.com/NVlabs/tiny-cuda-nn/#subdirectory=bindings/torch

# nvdiffrast
pip install git+https://github.com/NVlabs/nvdiffrast/

# pytorch3d
pip install git+https://github.com/facebookresearch/pytorch3d.gitThe dataset we used were from two parts: Viewfool (NIPS 2022) and IM3D (ICCV 2023), the source files can be downloaded in such two repos and extracted in the following format by randomly selecting 100 objects:
-- TT3D/
   -- dataset/
      -- object_1/
         -- train/
         -- test/
         -- val/
      -- object_2/
         -- train/
         -- test/
         -- val/
      ...
      -- object_100/
         -- train/
         -- test/
         -- val/
To first reconstruct a clean 3D object, you could run the reconstruction script as follows:
bash scripts/run_reconstruction.sh $metadata_path $workspace_pathUsing object_1 as an example, you should:
- replace the
$metadata_pathwithdataset/object_1 - replace the
$workspace_pathwithresult/trial_syn_object_1.
This configuration guides the script to correctly access the metadata for
object_1and outputs the results to a designated workspace
Note: If you get a path-related error during runtime, e.g., file not found error. you may need to change the path to absolute path fromat.
Then, to customize your 3D adversarial object optimization:
-
Setting the Target Label: By default, the target is chosen randomly from ImageNet indices (0 to 999). To specify a target, edit the
run_adv_optimization.shscript, replacing 'random' with the desired index, such as --target_label 1 for "goldfish". -
Setting the Surrogate Model: By default, the surrogate model is set as 'resnet' (ResNet 101) and you could change to 'densenet' (DenseNet 121) or some other surrogate models.
-
Adjusting Regularization Parameters: Modify regularization parameters directly in the script:
- Laplacian Regularization: Set --lambda_lap, e.g., --lambda_lap 0.001.
- Chamfer Distance: Adjust with --lambda_cd, e.g., --lambda_cd 3000.
- Edge Length: Change --lambda_edgelen, e.g., --lambda_edgelen 0.01.
Finally, you could run the adversarial optimization script as follows:
bash scripts/run_adv_optimization.sh $metadata_path $workspace_pathAfter running the adversarial optimization, you can find the logs in the logs/adv_optimization/ directory. The logs are named according to the format ${OBJECT_NAME}_${TARGET_NUMBER}:${TARGET_LABEL}.log, where ${OBJECT_NAME} is derived from the last segment of your $metadata_path, ${TARGET_NUMBER} is the specified index and ${TARGET_LABEL} is the actual ImageNet label. This naming convention helps you easily track and review the optimization outputs for different objects and corresponding target labels.
Evaluation of 3D Adversarial Objects: To evaluate the effectiveness of our 3D adversarial objects, we utilize three rendering tools: Nvdiffrast, Blender, and Meshlab. Images are generated from randomly sampled viewpoints to ensure diverse visual representations. For automated rendering, Nvdiffrast is used, where the process is integrated into our pipeline. You could run the evaluation script as follows:
bash scripts/run_evaluation.sh $metadata_path $workspace_pathBy default, the evaluation model is set as 'resnet' (ResNet 101) and you could change to any other classification models (pretrained on ImageNet).
For Blender, a comprehensive 3D tool available at Blender.org, and Meshlab, which can be accessed at Meshlab.net, the 3D models and textures are manually imported and screenshots are captured from various perspectives.
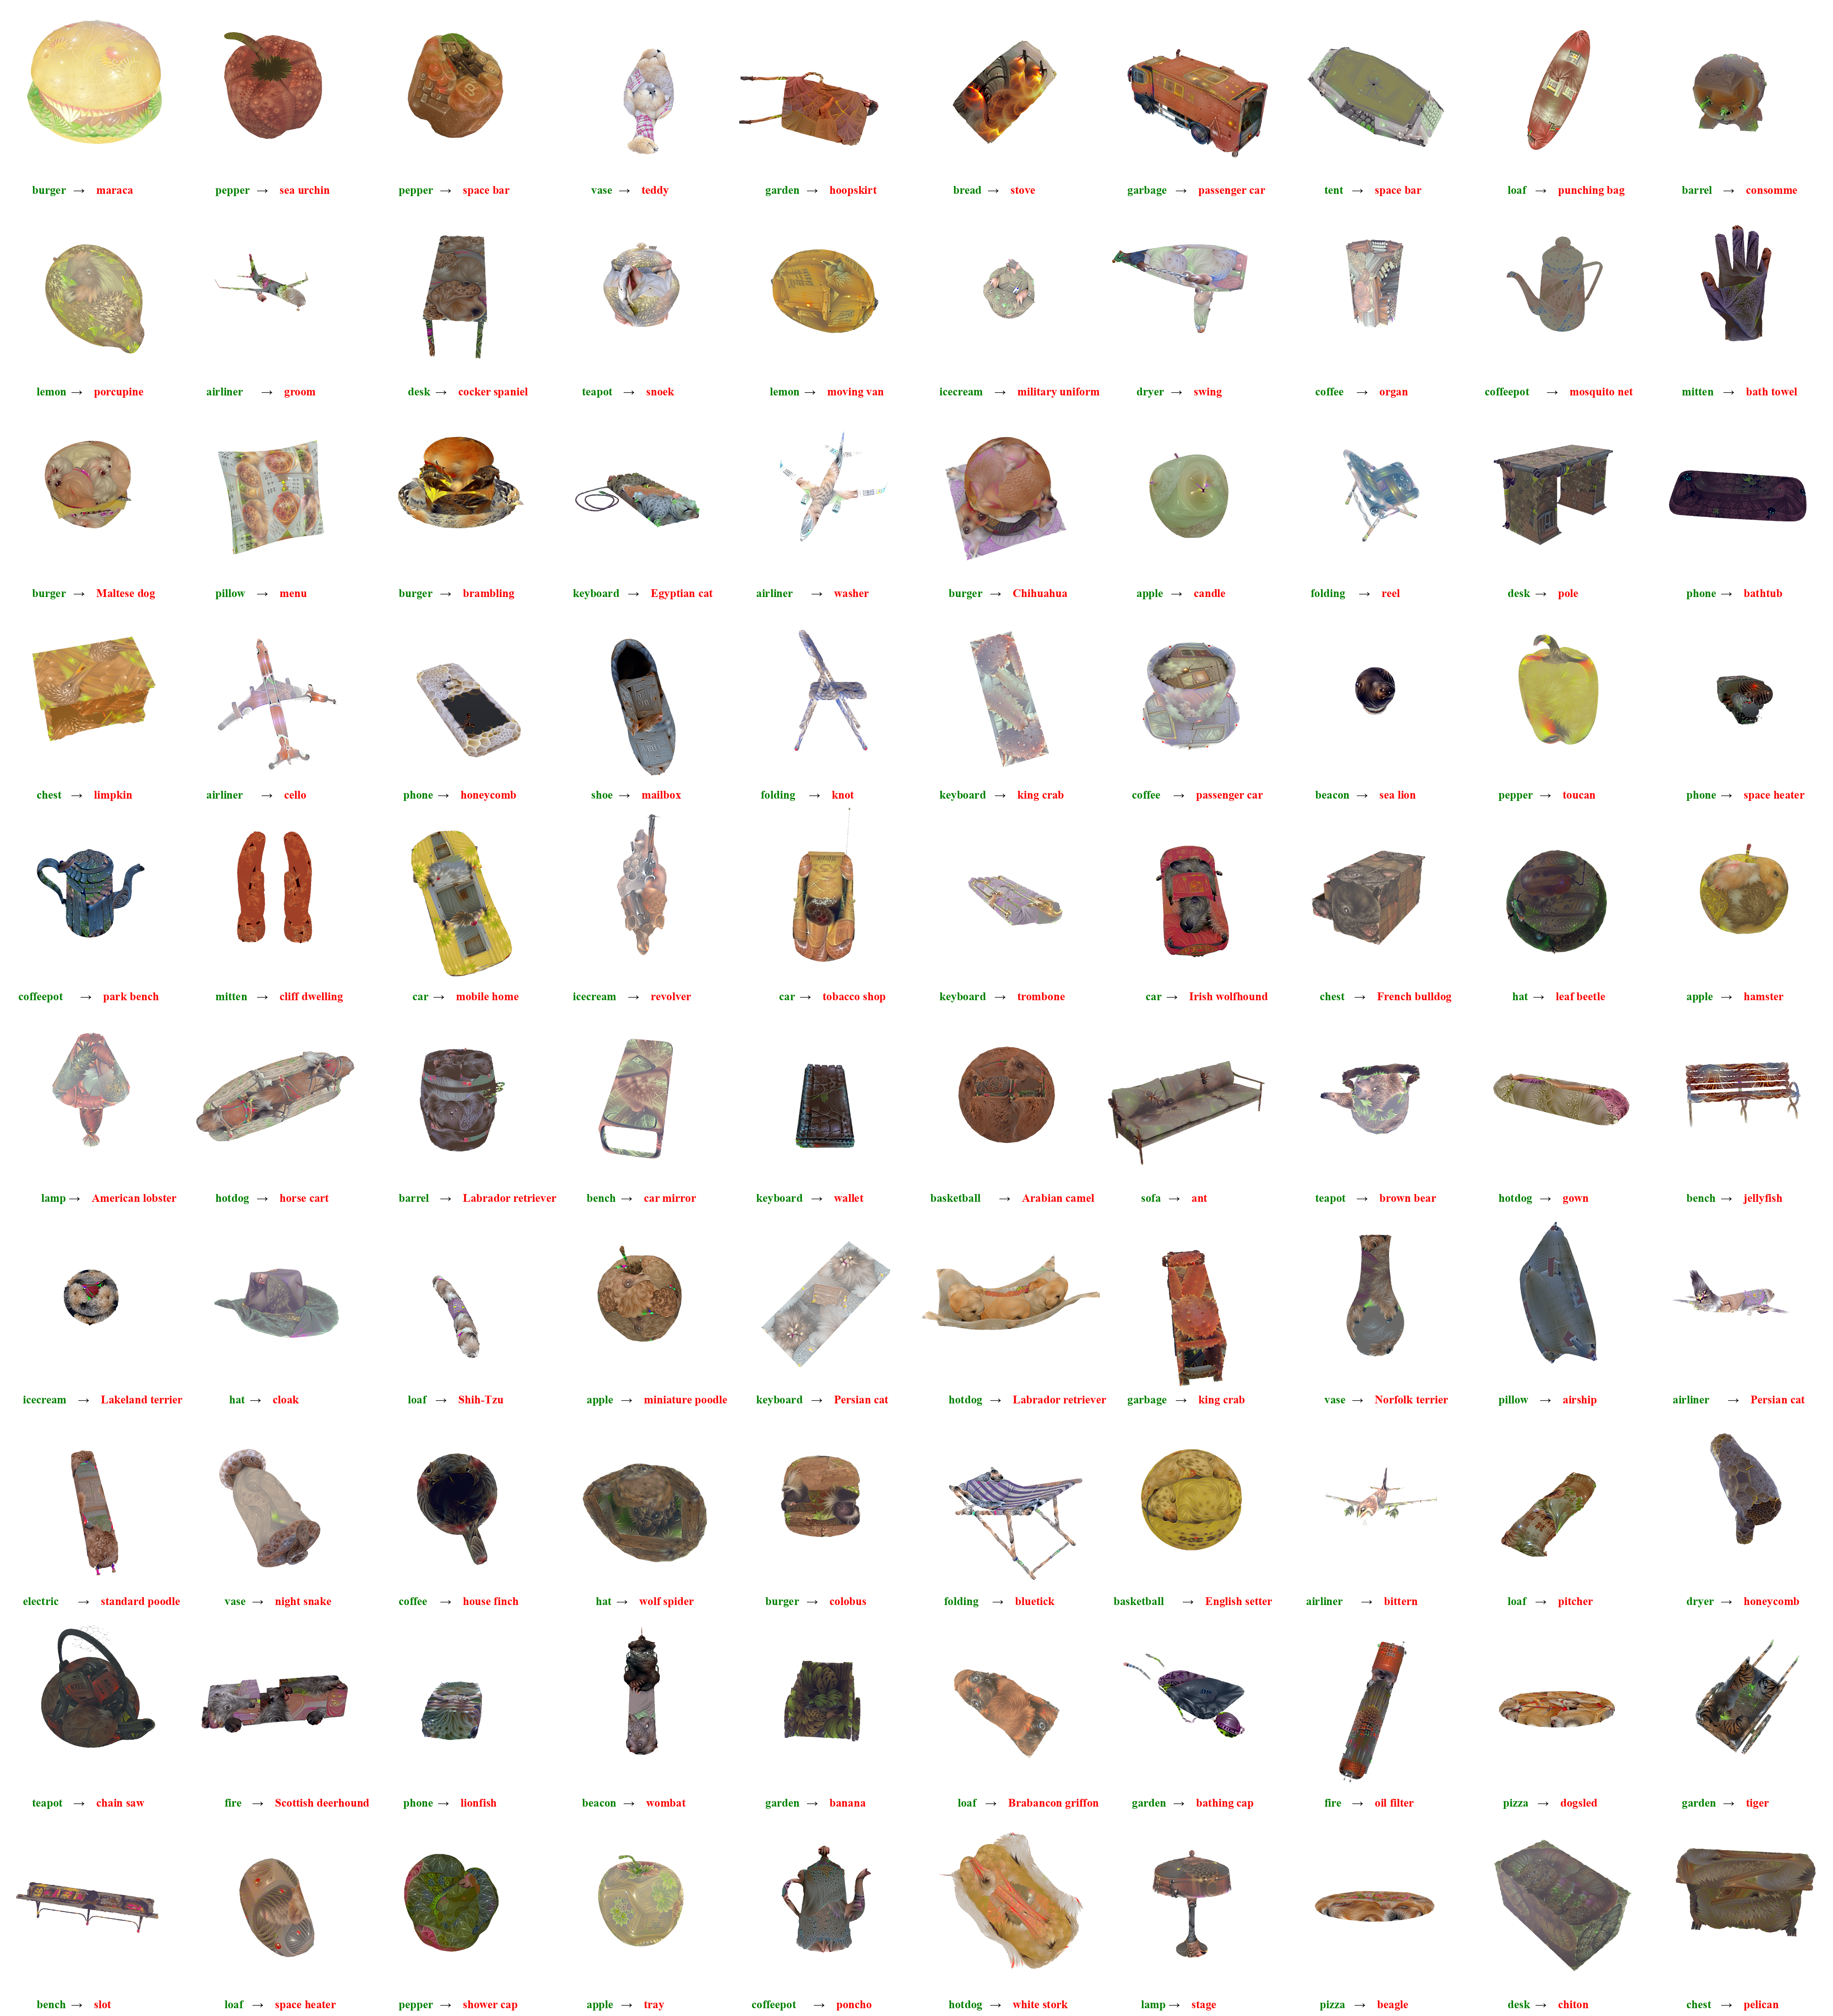
Some visual examples are as follows:
If you find our work useful, please consider citing our paper:
@inproceedings{huang2024towards,
  title={Towards Transferable Targeted 3D Adversarial Attack in the Physical World},
  author={Huang, Yao and Dong, Yinpeng and Ruan, Shouwei and Yang, Xiao and Su, Hang and Wei, Xingxing},
  booktitle={Proceedings of the IEEE/CVF Conference on Computer Vision and Pattern Recognition},
  pages={24512--24522},
  year={2024}
}
Reconstruction code is from nerf2mesh(ICCV 2023). Thanks for such a great project !


