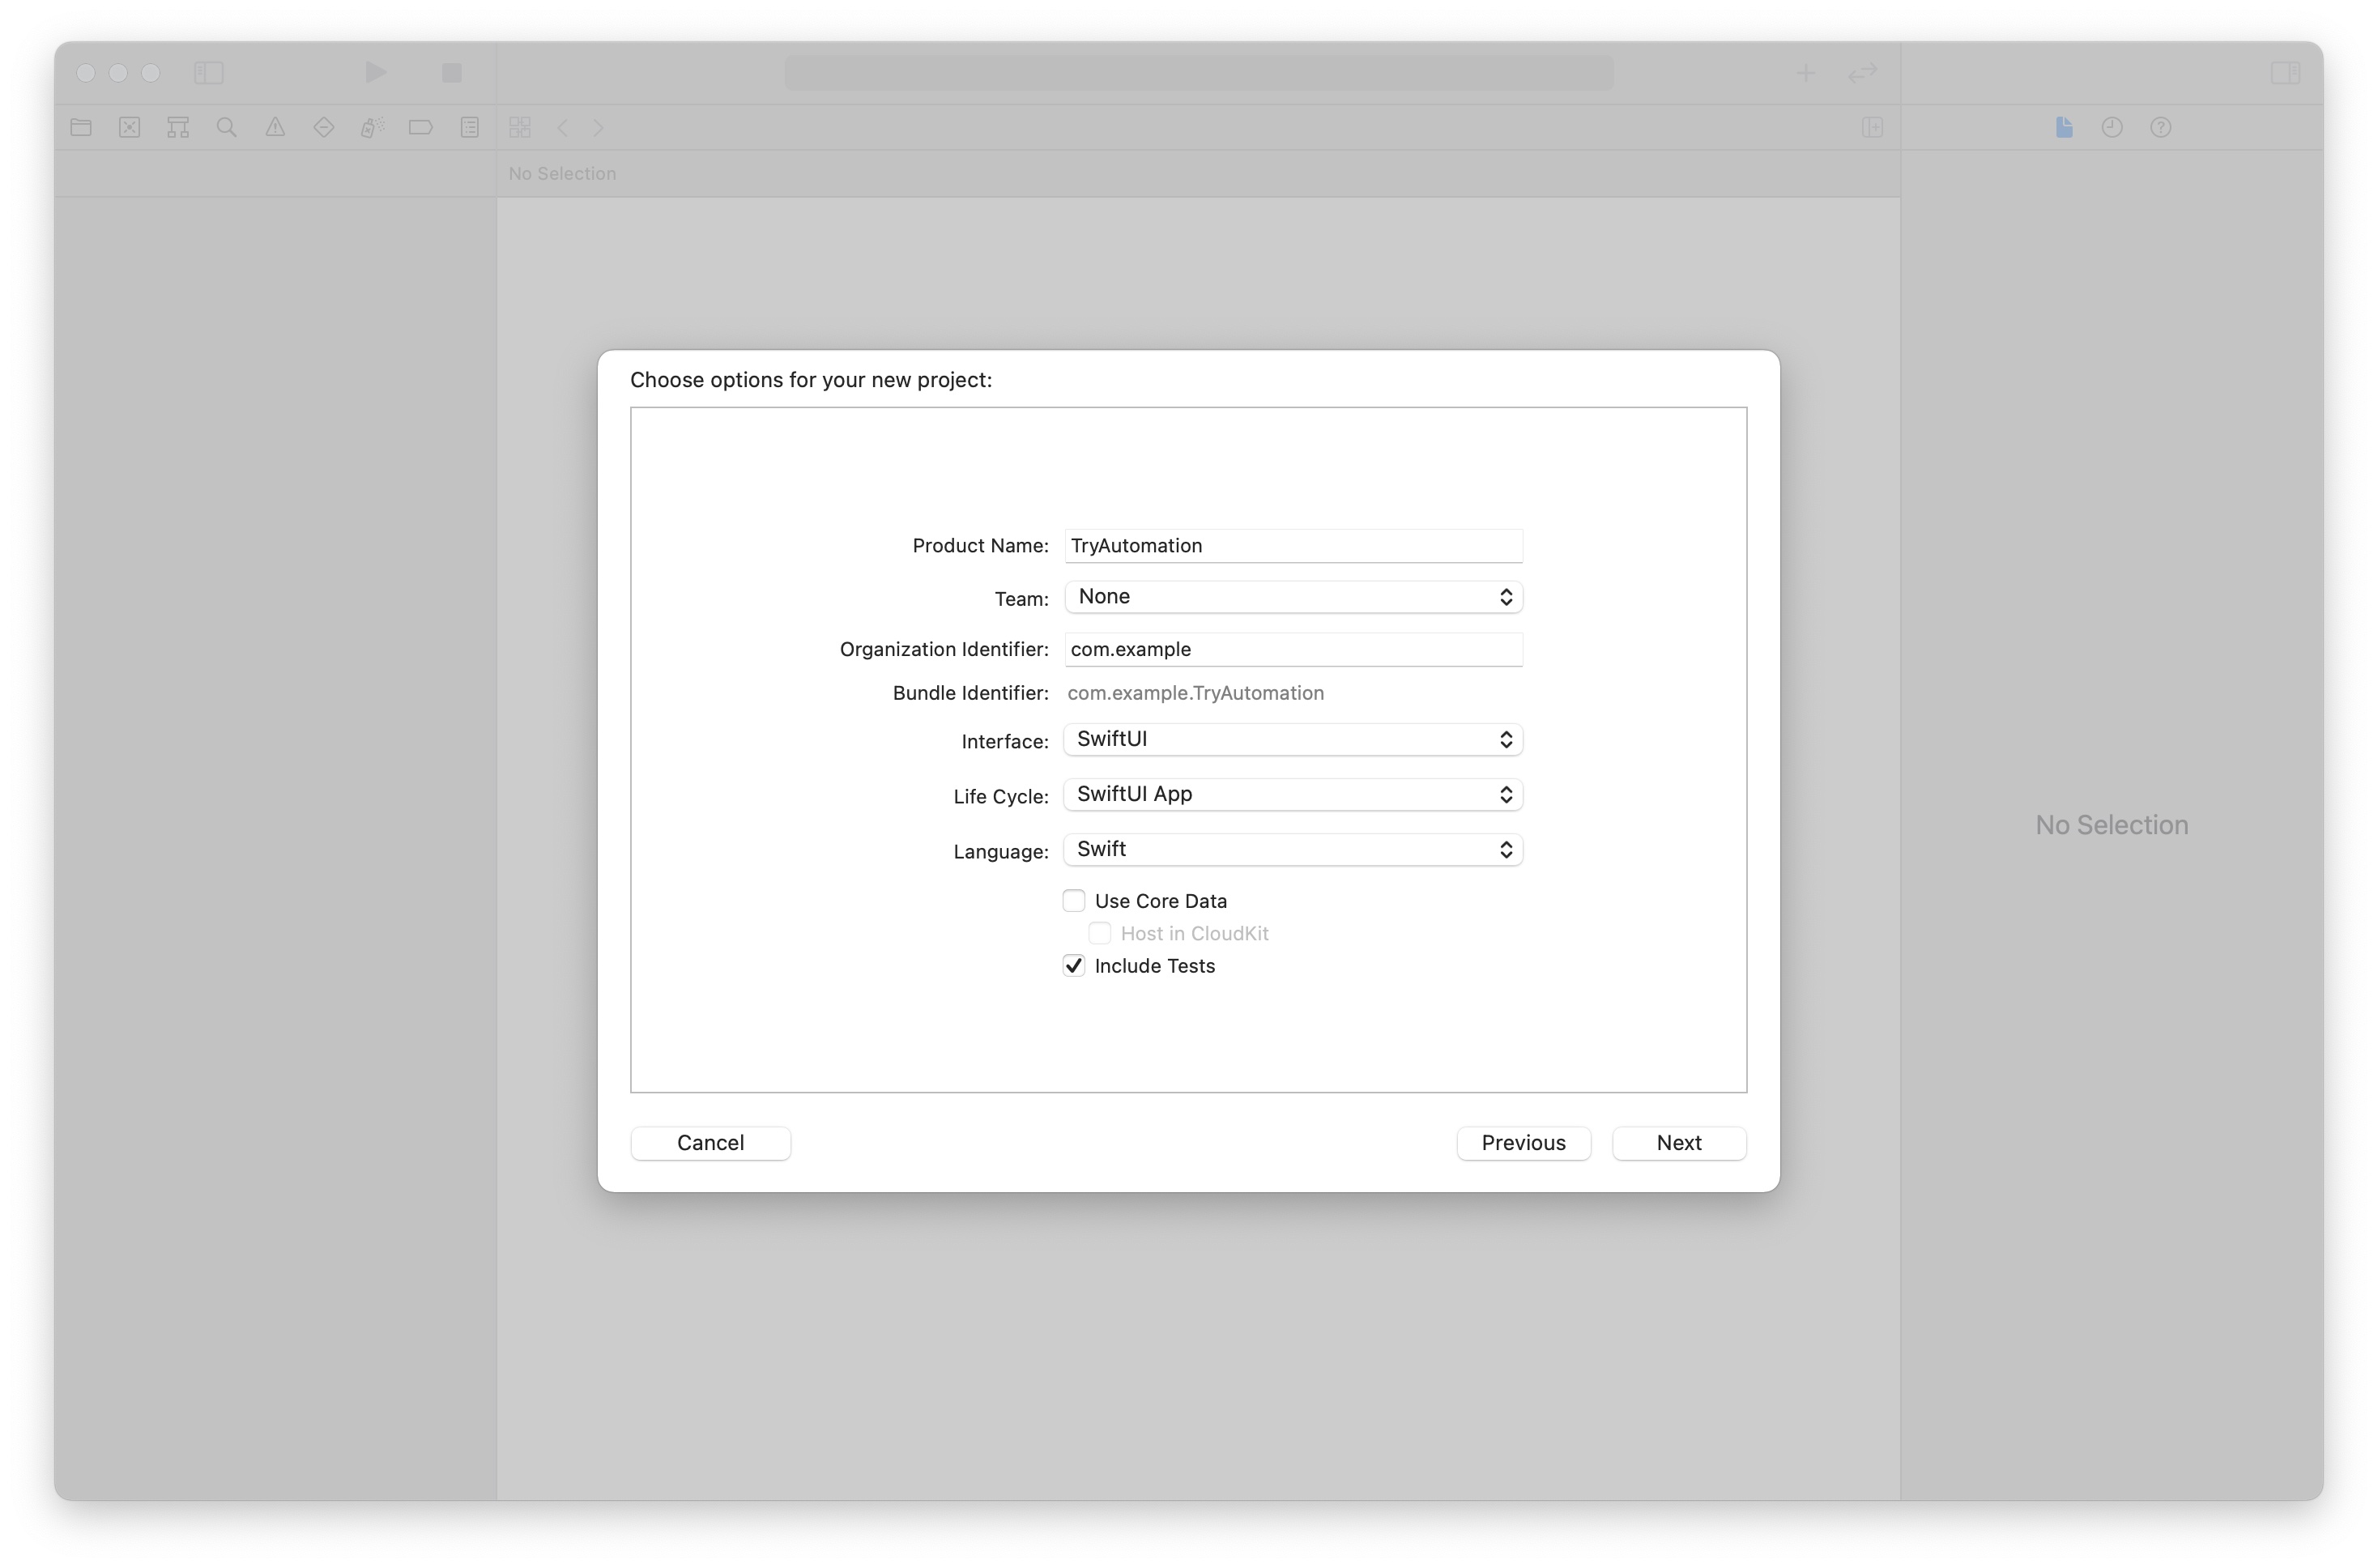
Xcodeプロジェクトを作成する際はInclude Testsを選択します。(画像上)
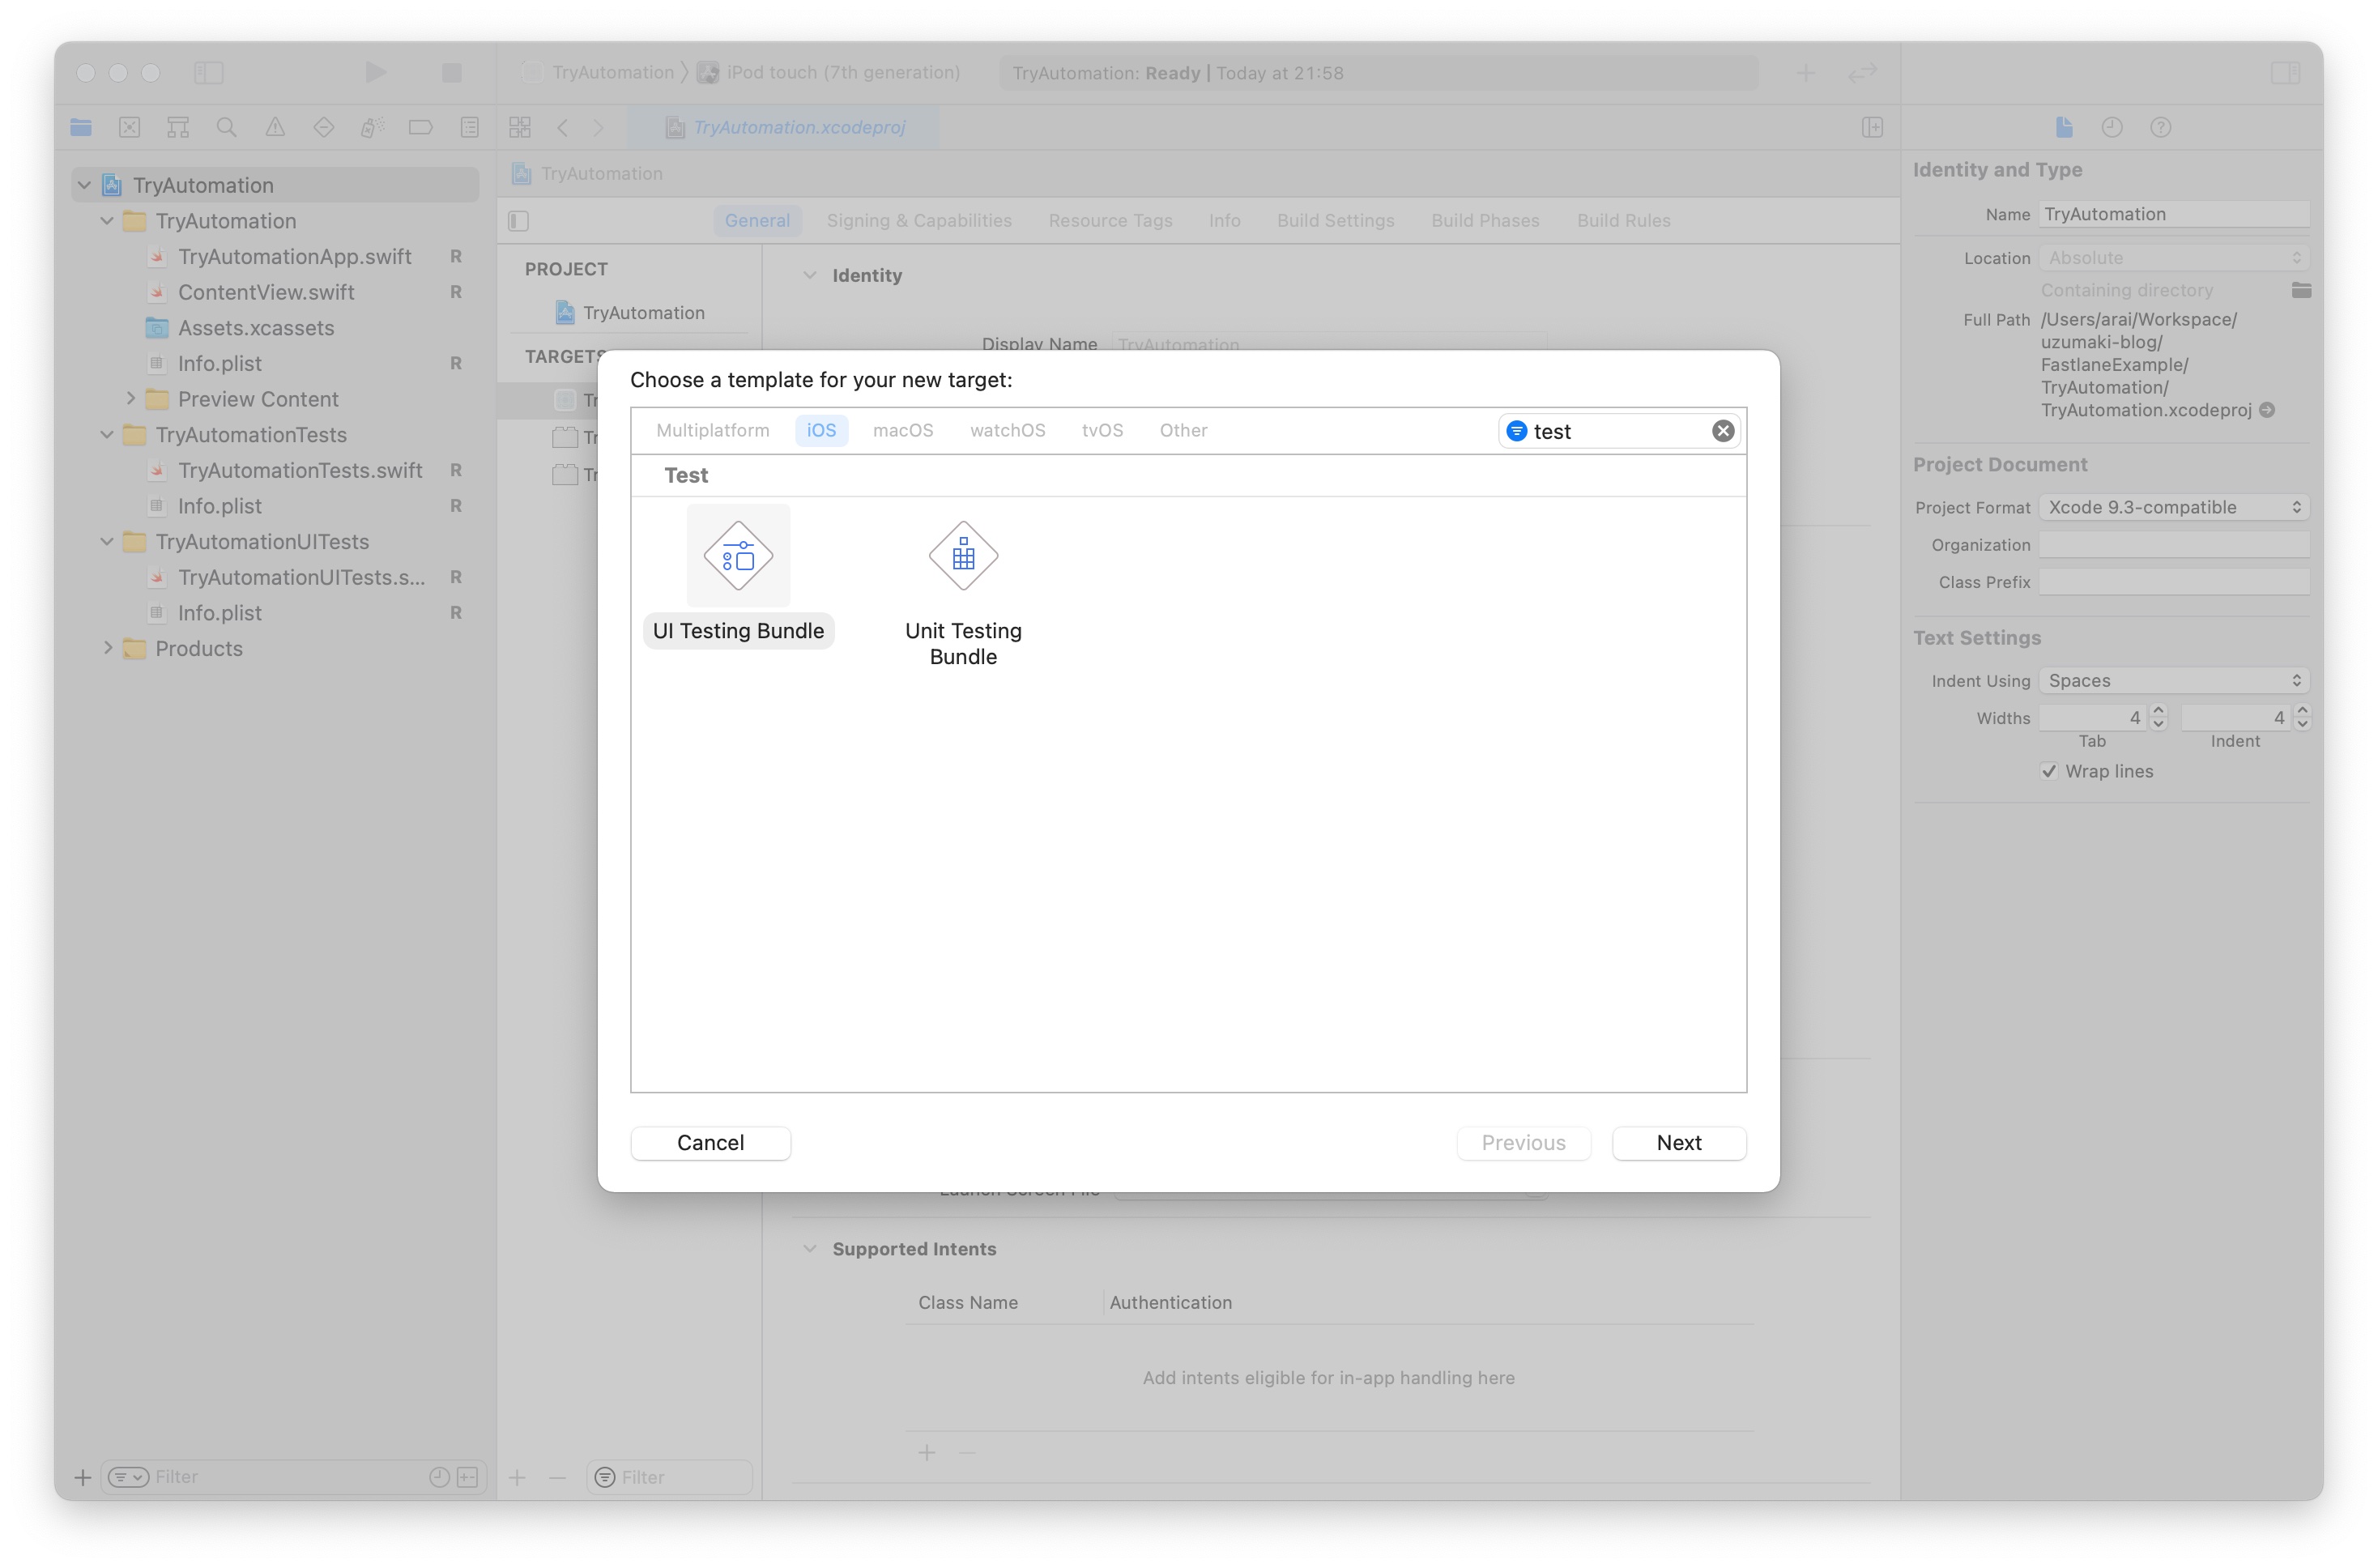
作成済みのプロジェクトの場合は、TargetのUnit Testing BundleとUI Testing Bundleを追加します。(画像下)
この章で追加したターゲットは、後の第5章「テストを実行する」で使用します。
Setup - fastlane docs を参考にご自身で環境構築しても良いですが、この記事ではmacOSに標準でインストールしてあるソフトウェアに依存しない方法を極力選ぶながら説明します。
2-1.
Homebrew のインストールがまだの場合は、まずこのスクリプトをターミナルで実行します。
/bin/bash -c "$(curl -fsSL https://raw.githubusercontent.com/Homebrew/install/HEAD/install.sh)"2-2.
本来は後述の手順を踏んで各種ソフトウェアをインストールする必要があるのですが、この記事では fast-ruby-install のスクリプトを用いてまとめてインストールと環境構築を行います。
(本来の大まかなインストール手順)
- Homebrewで、rbenvとrbenv/ruby-buildをインストールする。
- rbenvで、ruby及びrubygemsをインストールする。
- rubygemsで、bundlerをインストールする。
--ruby 2.7.3 --gem 3.2.28 --bundlers 2.2.28 にインストールしたいソフトウェアバージョンを指定して、ターミナルで実行します。
この記事ではrubyは2.7.3、rubygemsとbundlerは最新バージョンの3.2.28と2.2.28に指定しています。
curl -fsSL https://raw.githubusercontent.com/Tea-and-Coffee/fast-ruby-install/master/install.sh | bash -s -- --ruby 2.7.3 --gem 3.2.28 --bundlers 2.2.282-3.
プロジェクト内で使用するrubyバージョンを指定するため、.ruby-versionファイルを作成してバージョンを記述します。
echo "2.7.3" > .ruby-version2-4.
続いてbundlerの設定ファイルを作成します。
実行後にGemfileというテキストファイルが作成されます。
bundle init2-5.
Gemfileをテキストとして開き、後述を参考に編集します。この記事では現状の最終バージョンを指定しています。
詳細なバージョン指定方法については知りたい場合は Bundler: gemfile を参照して下さい。
source "https://rubygems.org"

gem "fastlane", "~> 2.195.0"
CocoaPodsやxcpretty/xcode-installもインストールする場合はこの様になります。
source "https://rubygems.org"

gem "fastlane", "~> 2.195.0"
gem "cocoapods", "~> 1.11.2"
gem "xcode-install", "~> 2.8"
2-6.
Gemfileの編集が済んだら、Gemfileに記載のソフトウェアをインストールするために実行します。
bundle installvendor/bundle配下にgem(fastlaneやその依存関係のあるRubyのプログラム)がインストールされますので、必要に応じて.gitignoreにvendor/を追記します。
fastlaneの動作環境が整いましたので、fastlaneのセットアップを行います。
3-1.
fastlaneの初期ファイルを生成します。
bundleでインストールしたgemを実行するには、bundle exec <gem> *というシンタックスを用います。
bundle exec fastlane init実行中の以下の様な質問には、"Manual setup"の4を入力し、Enterキーを投下します。
What would you like to use fastlane for?
1. 📸 Automate screenshots
2. 👩✈️ Automate beta distribution to TestFlight
3. 🚀 Automate App Store distribution
4. 🛠 Manual setup - manually setup your project to automate your tasksその後も3回ほどEnterキーを求めれるので、Enterキーを投下します。
Continue by pressing Enter最後まで実行が完了すると、fastlane配下にAppfile, Fastfileが生成されます。
3-2.
手始めにFastfileを開き、before_all block, after_all block, error blockを追加します。
レーンを実行した際にそれぞれ、レーン実行前・レーン実行後後・エラー発生時に呼ばれるblockになります。
各blockの公式情報はFastfile - fastlane docsになります。
# This file contains the fastlane.tools configuration
# You can find the documentation at https://docs.fastlane.tools
#
# For a list of all available actions, check out
#
#     https://docs.fastlane.tools/actions
#
# For a list of all available plugins, check out
#
#     https://docs.fastlane.tools/plugins/available-plugins
#

default_platform(:ios)

platform :ios do

  before_all do |lane|
  end

  after_all do |lane|
  end

  error do |lane, exception|
  end

endfastlaneを実行する際にXcodeバージョンが正しいか確認してから実行したい場合は、.xcode-versionファイルを作成し、before_all blockにfastlane/ensure_xcode_versionを追記します。
ensure_xcode_versionにはこれらの効果があるので追記することを強くおすすめします。
- チームメンバー内で使用するXcodeバージョンを統一する。
- プロダクト毎に違うバージョンを使用している場合に、バージョン切り替え忘れを防ぐ。
- ローカルマシンとCIで使用しているバージョンが違う場合に検知出来る。
echo "12.5.1" > .xcode-version before_all do |lane|
ensure_xcode_version
endビルドが通り、テストが成功するかを自動化したいと思います。
5-1.
テストを実行するには、fastlane/scanを用います。
projectには.xcodeprojのファイルパス。schemeとconfigurationにはテスト実行時に使用している環境を指定します。
環境変数が不明な場合はxcodebuild -list -jsonを実行すると出力されるので、その中から選ぶ様にします。
なおcleanにtrue指定すると、実行時にクリーンビルドになります。
  lane :test do |options|
    scan(
      project: "TryAutomation.xcodeproj",
      scheme: "TryAutomation",
      configuration: "Debug",
      clean: true
    )
  end
※ CocoaPodsを使用している等の理由で*xcworkspaceファイルがある場合は、"projectとxcodeproj"の部分が"workspaceとxcworkspace"に置き換わります。
  lane :test do |options|
    scan(
      workspace: "TryAutomation.xcworkspace",
      scheme: "TryAutomation",
      configuration: "Debug",
      clean: true
    )
  end
xcodebuild -list -jsonの出力例:
$ xcodebuild -list -json
{
  "project" : {
    "configurations" : [
      "Debug",
      "Release"
    ],
    "name" : "TryAutomation",
    "schemes" : [
      "TryAutomation"
    ],
    "targets" : [
      "TryAutomation",
      "TryAutomationTests",
      "TryAutomationUITests"
    ]
  }
}
5-2.
もしschemeが共有状態になっていない場合は、"Scheme > Manage schemes..."と進み、Sharedにチェックをします。
5-3.
ここまででscanを実行する順が整いましたので、fastlaneを実行します。
暫くすると本来実行したいlane番号の入力を求められるので、該当する数字を入力しEnterキーを投下します。
$ bundle exec fastlane
[✔] 🚀
------------------------------
--- Step: default_platform ---
------------------------------
Welcome to fastlane! Here's what your app is set up to do:
+--------+-----------+------------------------------+
|              Available lanes to run               |
+--------+-----------+------------------------------+
| Number | Lane Name | Description                  |
+--------+-----------+------------------------------+
| 1      | ios test  |                              |
| 0      | cancel    | No selection, exit fastlane! |
+--------+-----------+------------------------------+
Which number would you like run?
CompileやBuildの後、テストが実行され、"Test Results"にテスト結果が出力されます。
"fastlane summary"には今回実行したActionと実行時間の一覧が出力されます。
+--------------------+---+
|      Test Results      |
+--------------------+---+
| Number of tests    | 4 |
| Number of failures | 0 |
+--------------------+---+


+------+----------------------+-------------+
|             fastlane summary              |
+------+----------------------+-------------+
| Step | Action               | Time (in s) |
+------+----------------------+-------------+
| 1    | default_platform     | 0           |
| 2    | ensure_xcode_version | 1           |
| 3    | scan                 | 122         |
+------+----------------------+-------------+

fastlane.tools finished successfully 🎉

