Configure Powershell
- Install Powershell.
- Install VSCode - 1.70.0
- Setup Powershell Terminal with oh-my-posh
- Install Git
- Install PSReadLine - Autocompletion in Powershell
- Install Terminal-icons
- Install Posh-Git
Here.
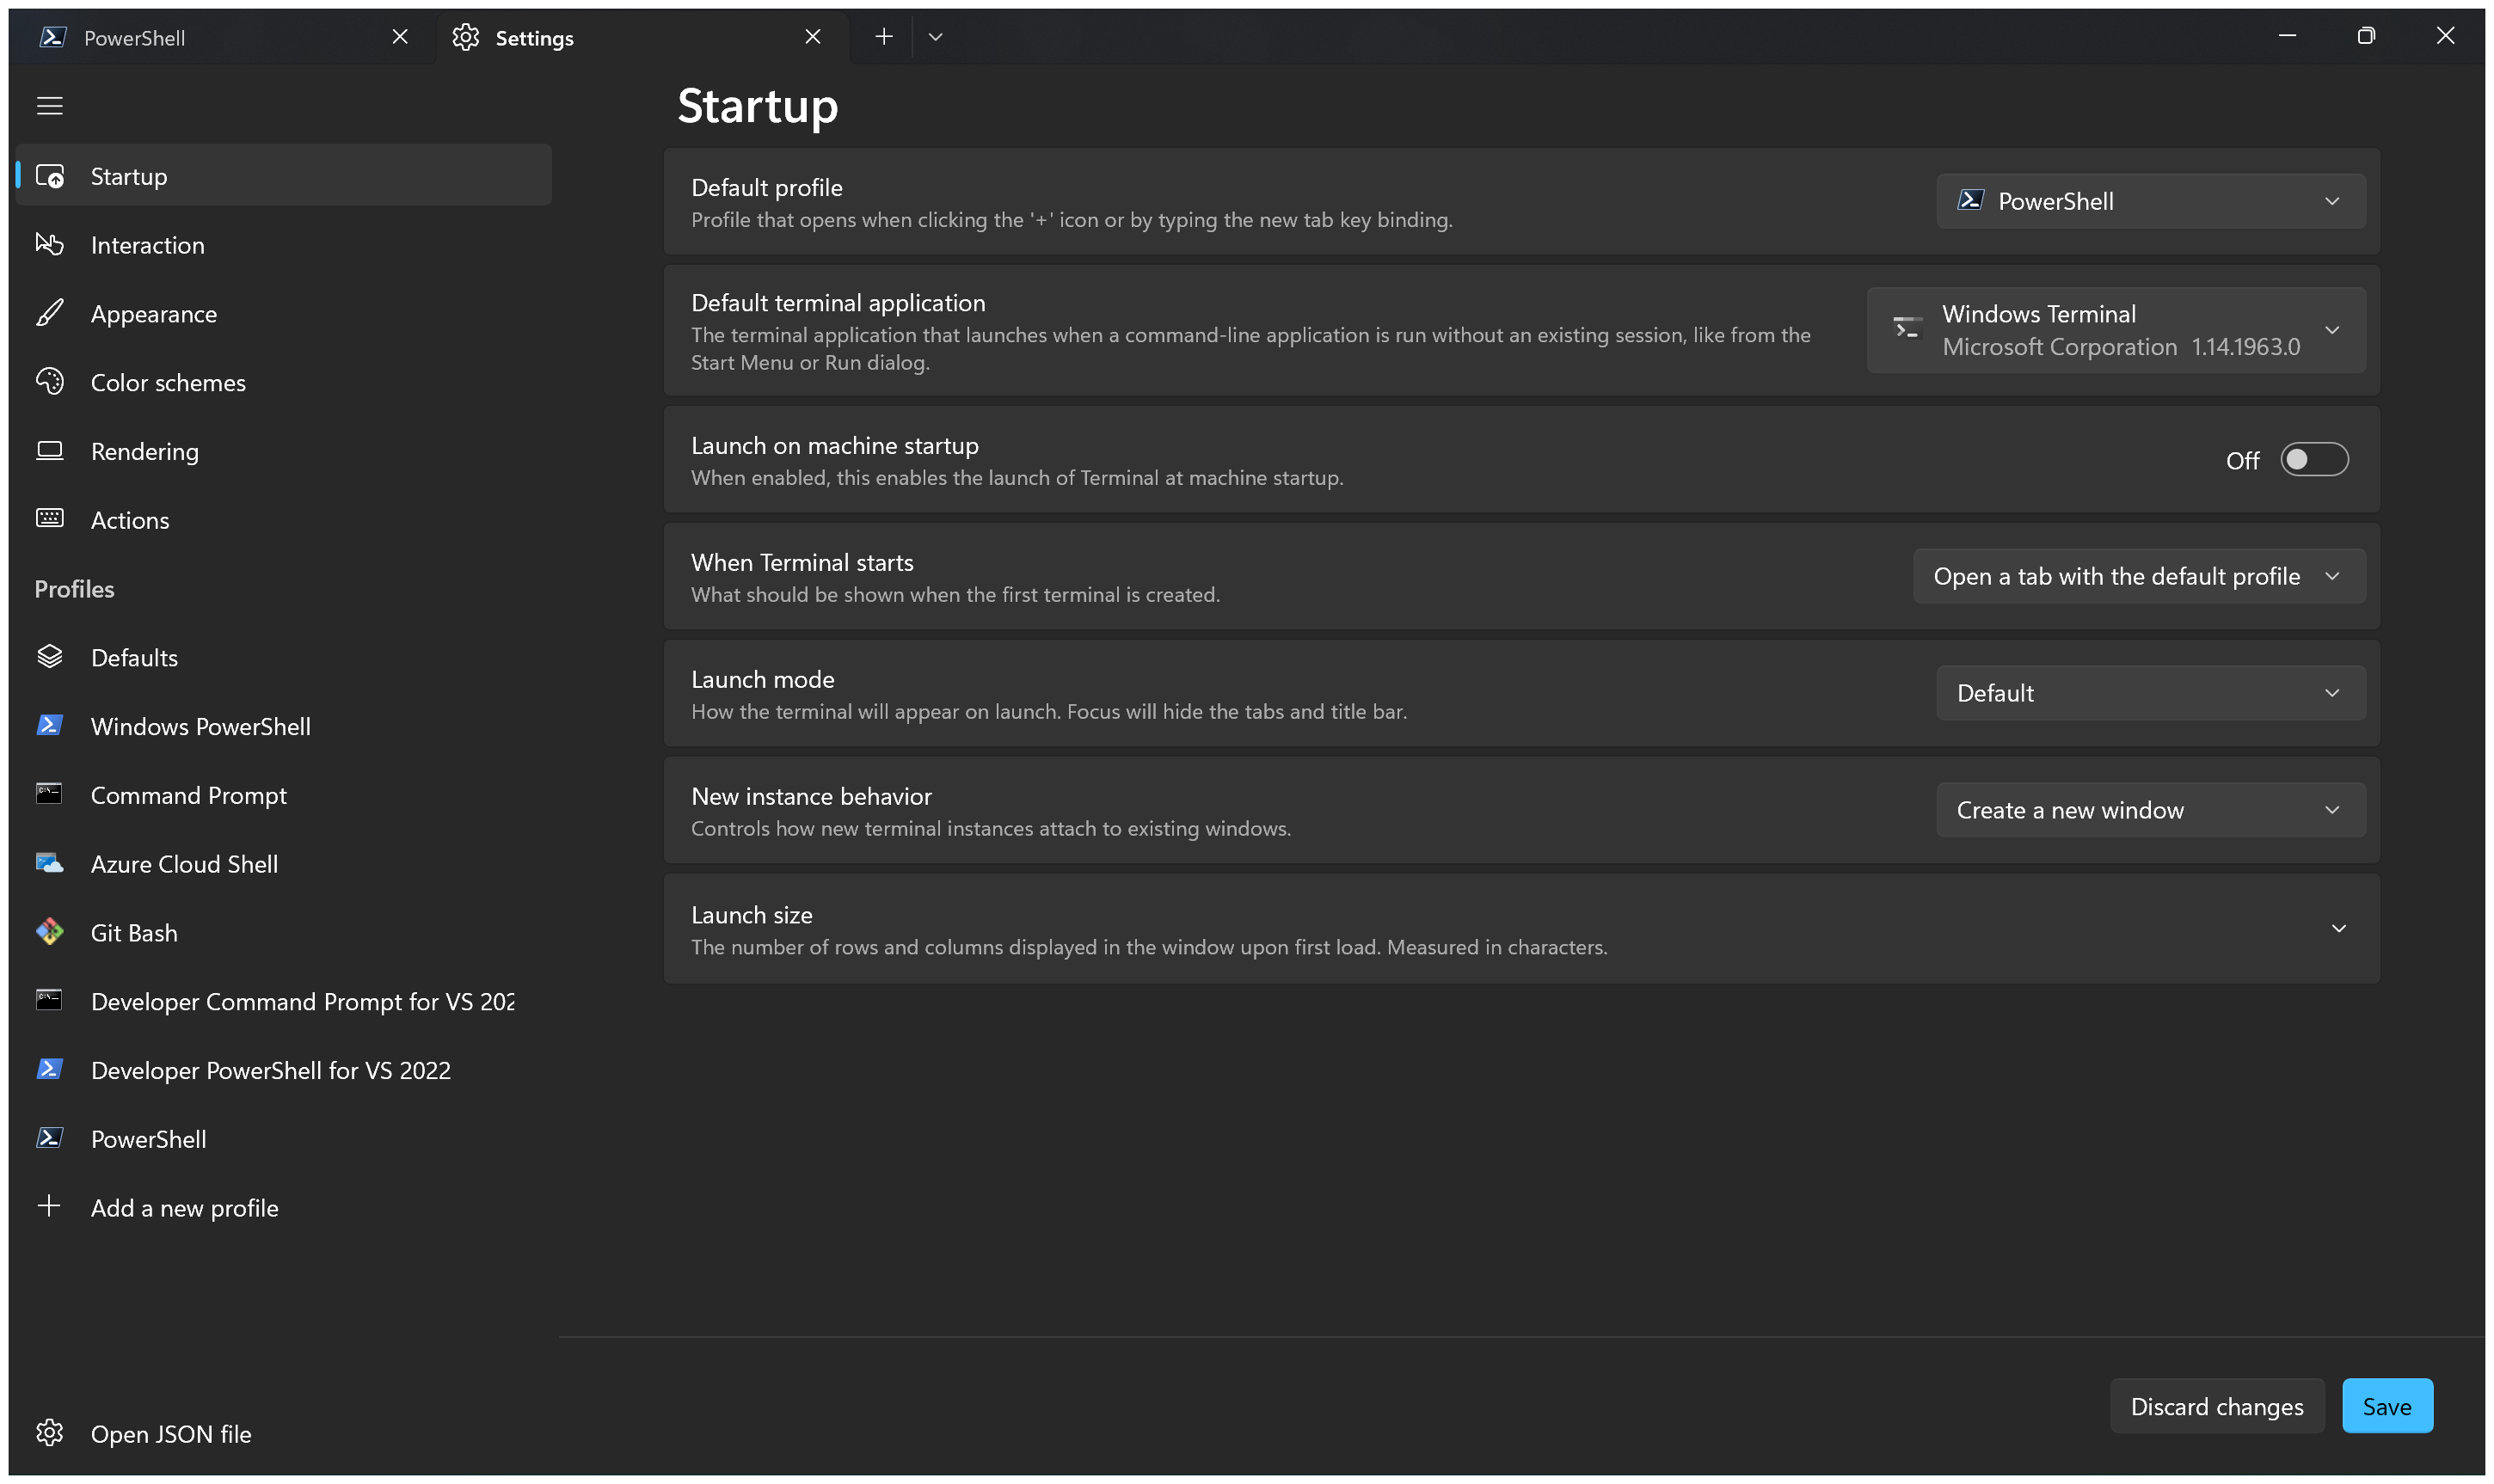
In Windows Terminal, change the default profile to Powershell. To open the setting, press Ctrl + ,.
In the terminal, type
winget install JanDeDobbeleer.OhMyPosh -s winget
Launch new Powershell with administrator.
oh-my-posh font install
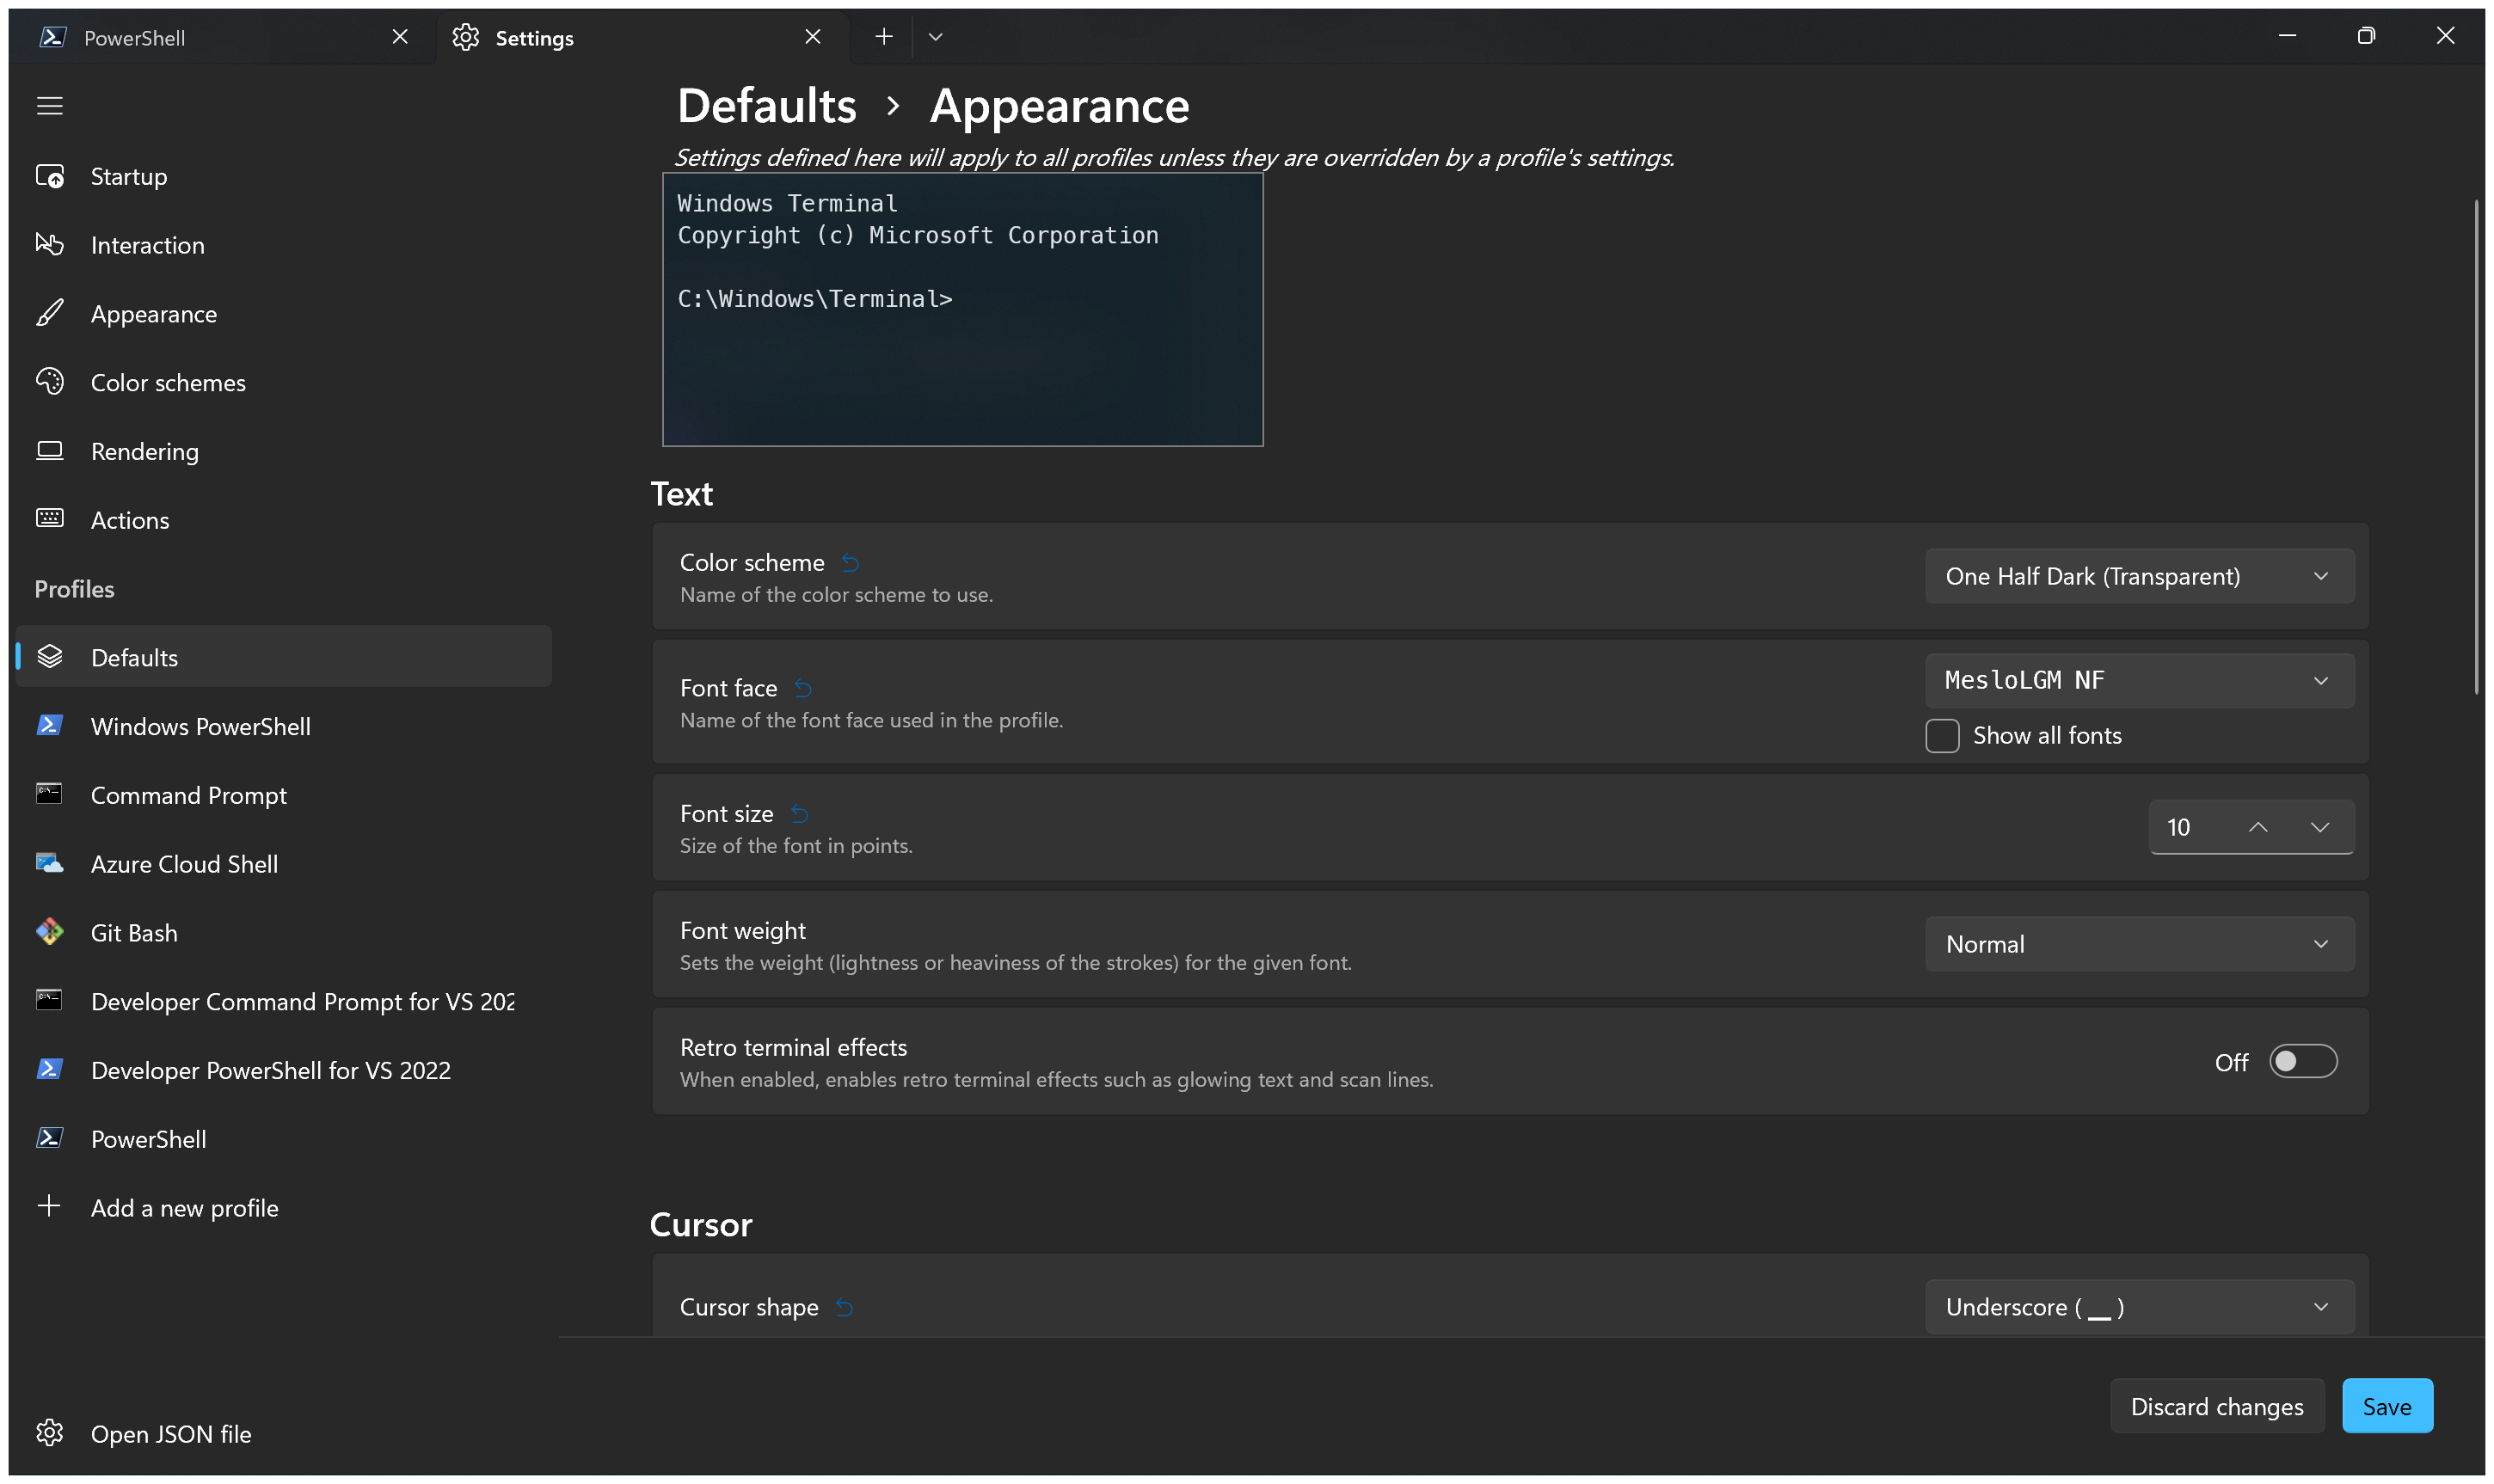
In the font list, install FiraCode and Meslo.
Then change the font in Windows Terminal. To open the setting, press Ctrl + ,.
We need to change font for the terminal to render the icon needed for oh-my-posh themes.
To see available themes and apply it to terminal, enter the following command,
Get-PoshThemes
oh-my-posh init pwsh --config $env:POSH_THEMES_PATH\amro.omp.json | Invoke-Expression
But above theme change will be disappeared everytime you launch new terminal. To make changes everytime,
code .\.config\powershell\user_profile.ps1
In the file, write the following code snippet and save.
# oh-my-posh prompt
oh-my-posh init pwsh --config $env:POSH_THEMES_PATH\amro.omp.json | Invoke-Expression
Go back to your terminal, type
code $PROFILE.CurrentUserCurrentHost
In the file, write the following command and save.
. ${env:USERPROFILE}\.config\powershell\user_profile.ps1
Launch the powershell.
winget install --id Git.Git -e --source winget
Launch the powershell.
Install-Module -Name PSReadLine -AllowPrerelease -Scope CurrentUser -Force -SkipPublisherCheck
Set options for PSReadLine
Reopen the user_profile.ps1.
code .\.config\powershell\user_profile.ps1
In the file, add the following contents, and save.
# PSReadLine
Set-PSReadLineOption -EditMode Emacs
Set-PSReadLineOption -BellStyle None
Set-PSReadLineKeyHandler -Chord 'Ctrl+d' -Function DeleteChar
Set-PSReadLineOption -PredictionSource History
Set-PSReadLineOption -PredictionViewStyle ListView
Launch the Powershell.
Install-Module -Name Terminal-Icons -Repository PSGallery -Force
Launch the Powershell.
Install-Module posh-git -Scope CurrentUser
Note that importing modules when the user launch the powershell will slow down the powershell startup time.
That's why I put it inside the command called init-mod. If you want to load the modules, please invoke the above commmand.
Final user_profile.ps1 will look like below
View File Content
# oh-my-posh prompt
oh-my-posh init pwsh --config $env:POSH_THEMES_PATH\amro.omp.json | Invoke-Expression

# PSReadLine
Set-PSReadLineOption -EditMode Emacs
Set-PSReadLineOption -BellStyle None
Set-PSReadLineKeyHandler -Chord 'Ctrl+d' -Function DeleteChar
Set-PSReadLineOption -PredictionSource History
Set-PSReadLineOption -PredictionViewStyle ListView

# Alias
Set-Alias grep findstr
Set-Alias bash 'C:\Program Files\Git\bin\bash.exe'
Set-Alias tig 'C:\Program Files\Git\usr\bin\tig.exe'
Set-Alias less 'C:\Program Files\Git\usr\bin\less.exe'

# Command - which
function which ( $command ) {
    Get-Command -Name $command -ErrorAction SilentlyContinue |
        Select-Object -ExpandProperty Path -ErrorAction SilentlyContinue
}

# Command - init-mod
# For Importing Modules
function init-mod () {
    Import-Module posh-git
    Import-Module -Name Terminal-Icons
}
Install OpenCV in Windows
Here.
Please select Add Cmake to the system path for all users during installation.
Download from here. Install and Open the visual studio installer.
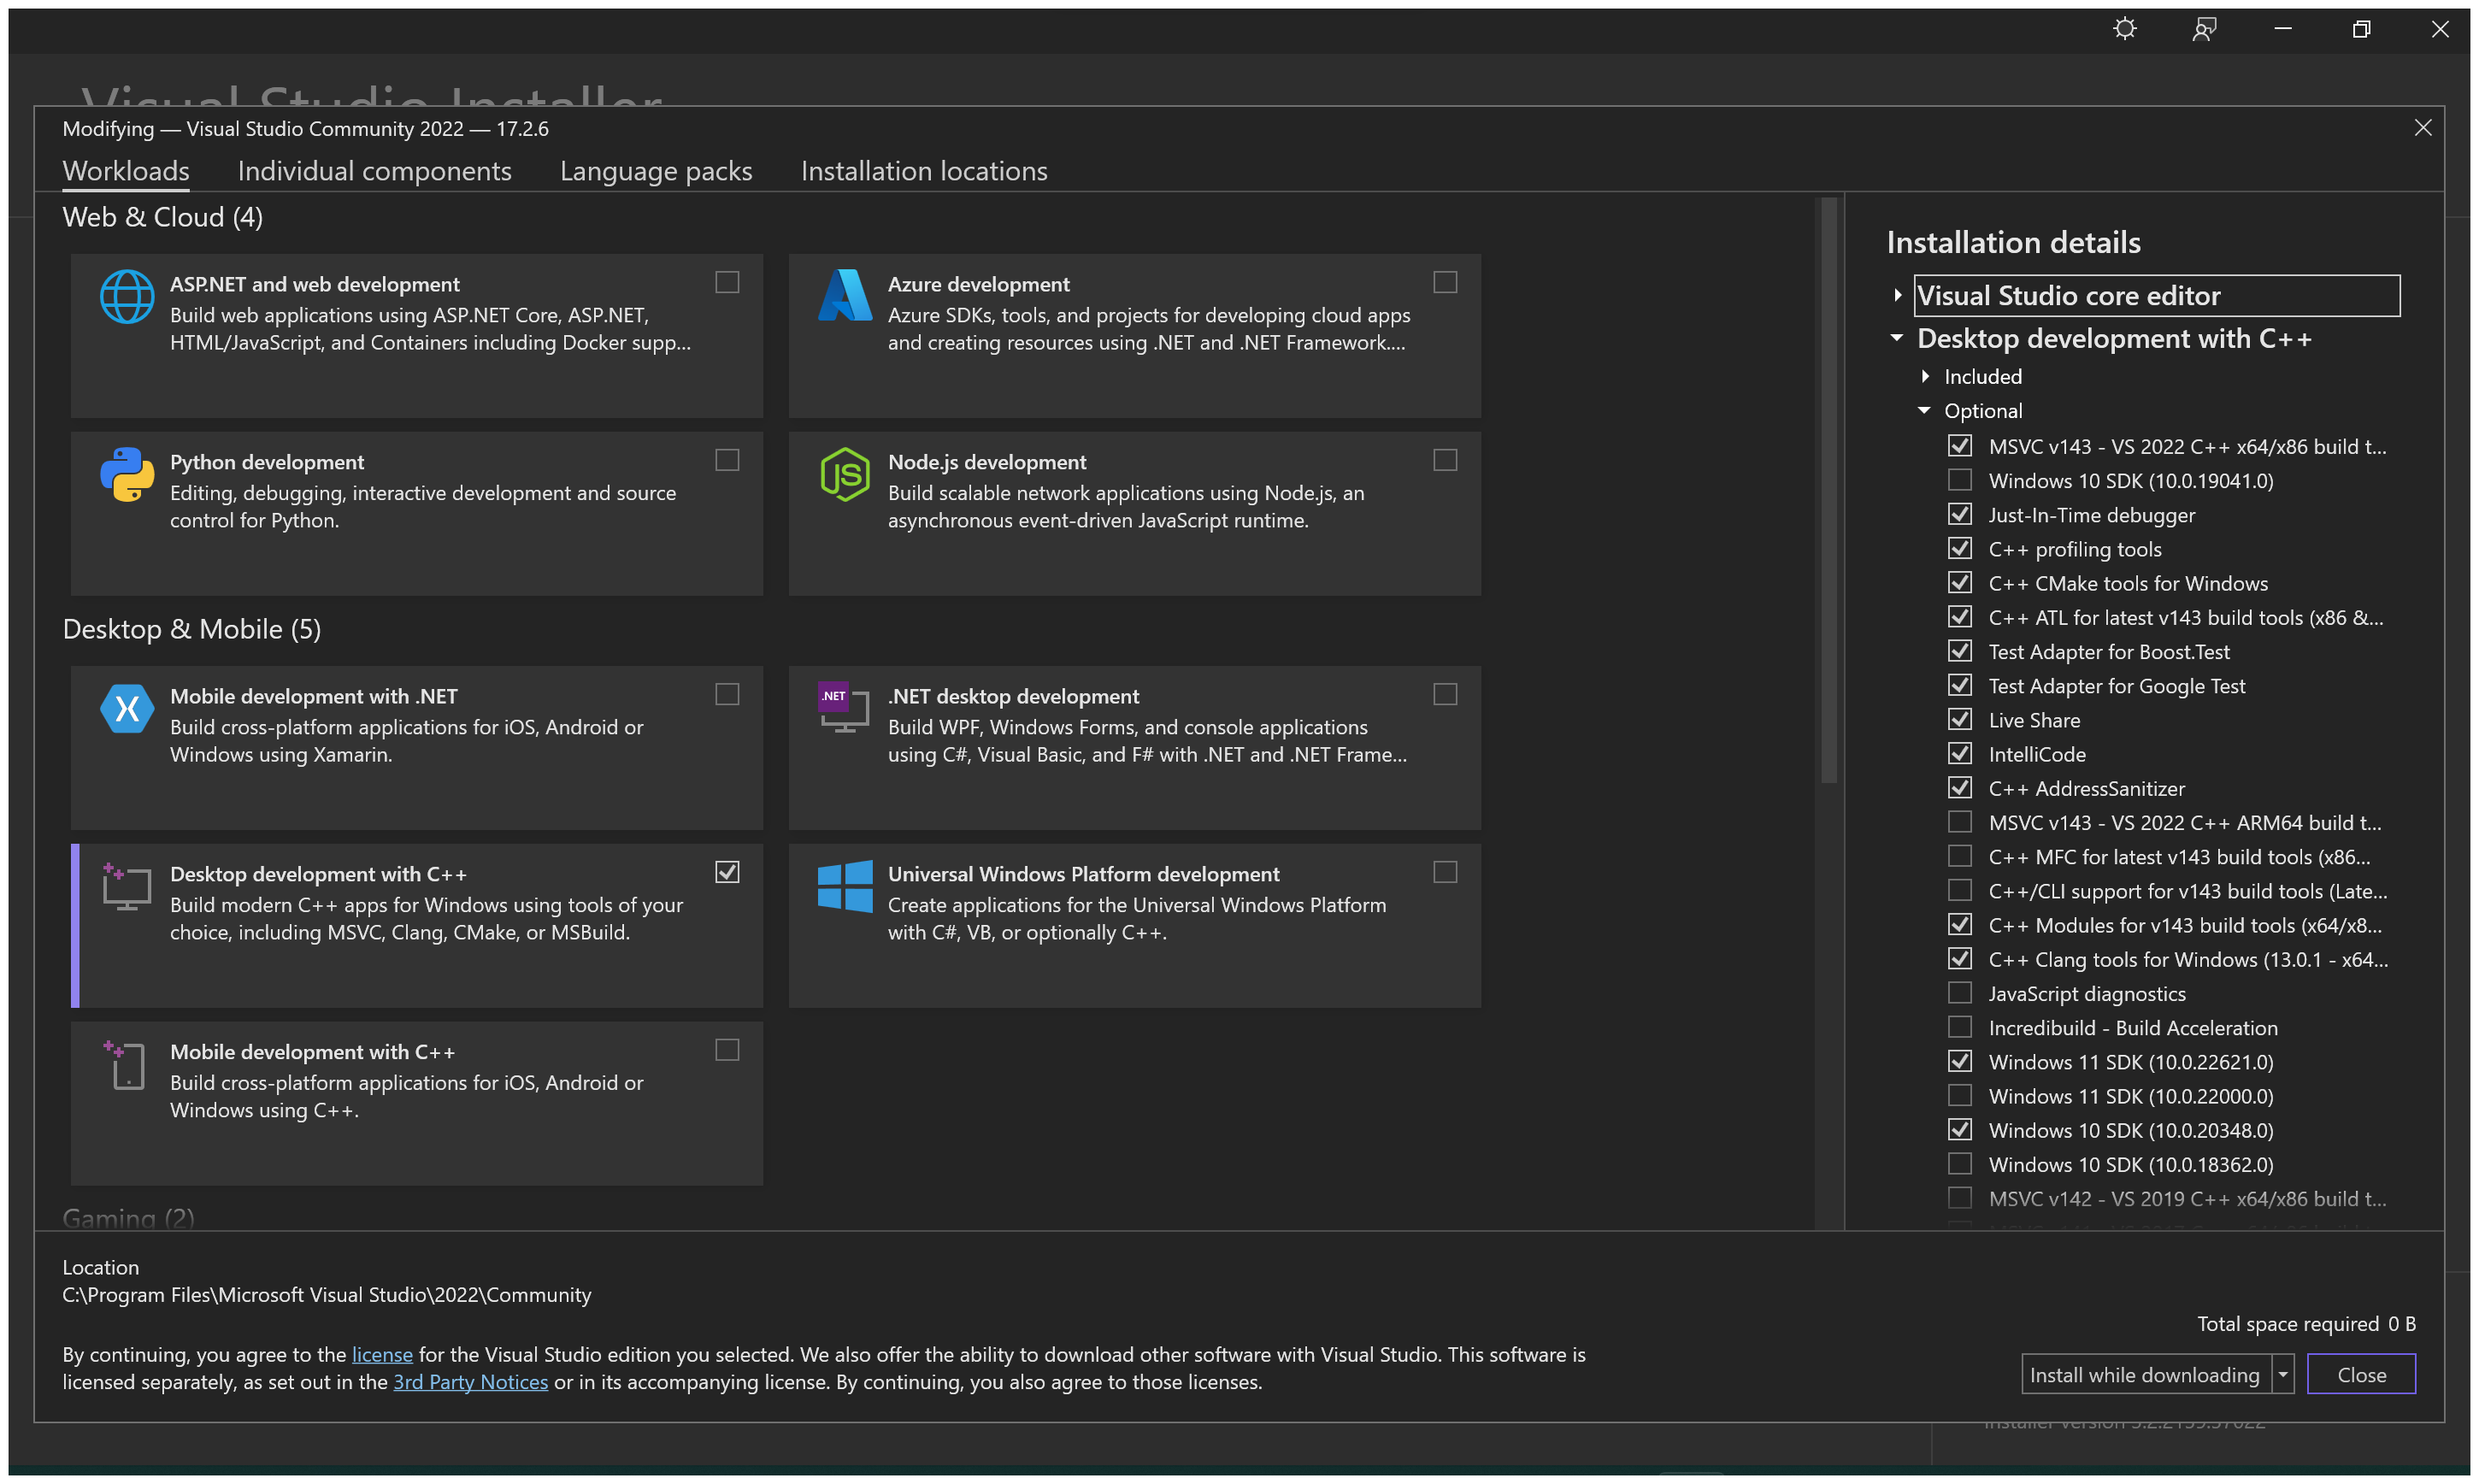
In Visual Studio Installer, search for Desktop Development with C++. Please check and install the tools according to the following image.
After installation is completed, please check the environment variable in the powershell.
echo $Env:VCINSTALLDIR
This should print - "C:\Program Files\Microsoft Visual Studio\2022\Community\VC". If not, please open environment variable window to set the variable.
- OpenCV - 4.6.0
- OpenCV-contrib - 4.6.0
- Extract both zip files to folder.
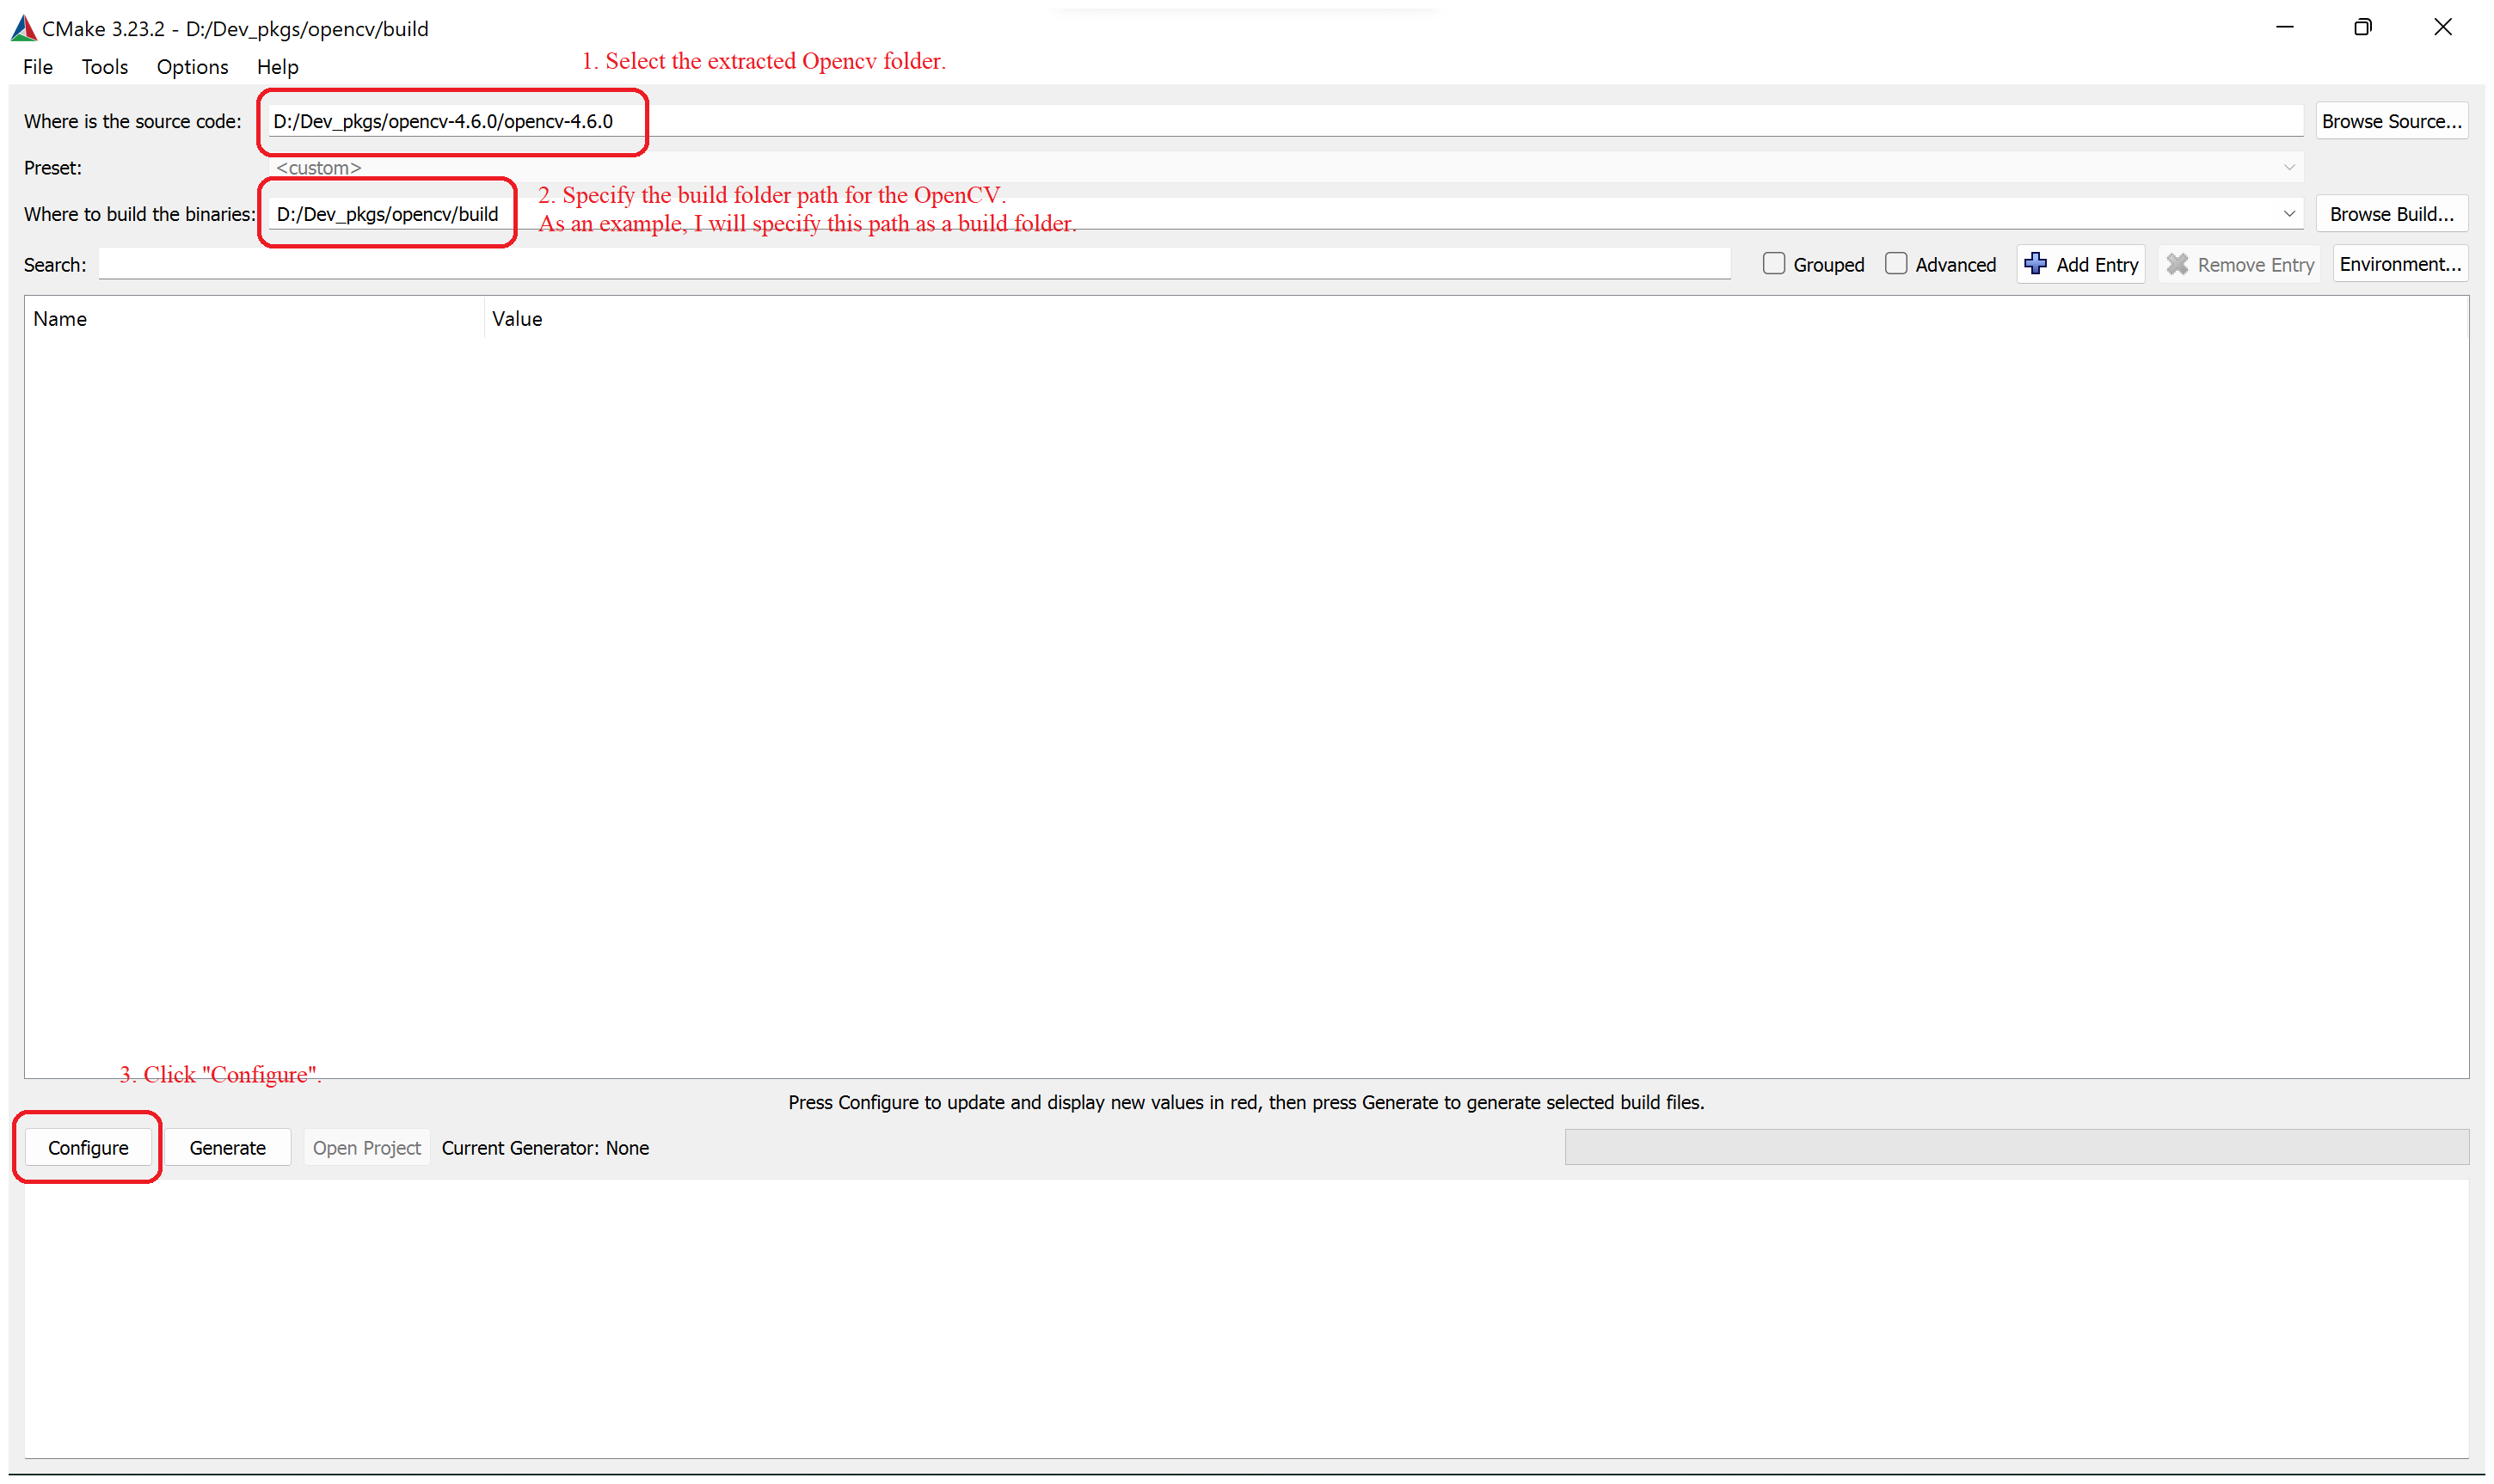
- Open CMake-Gui application.
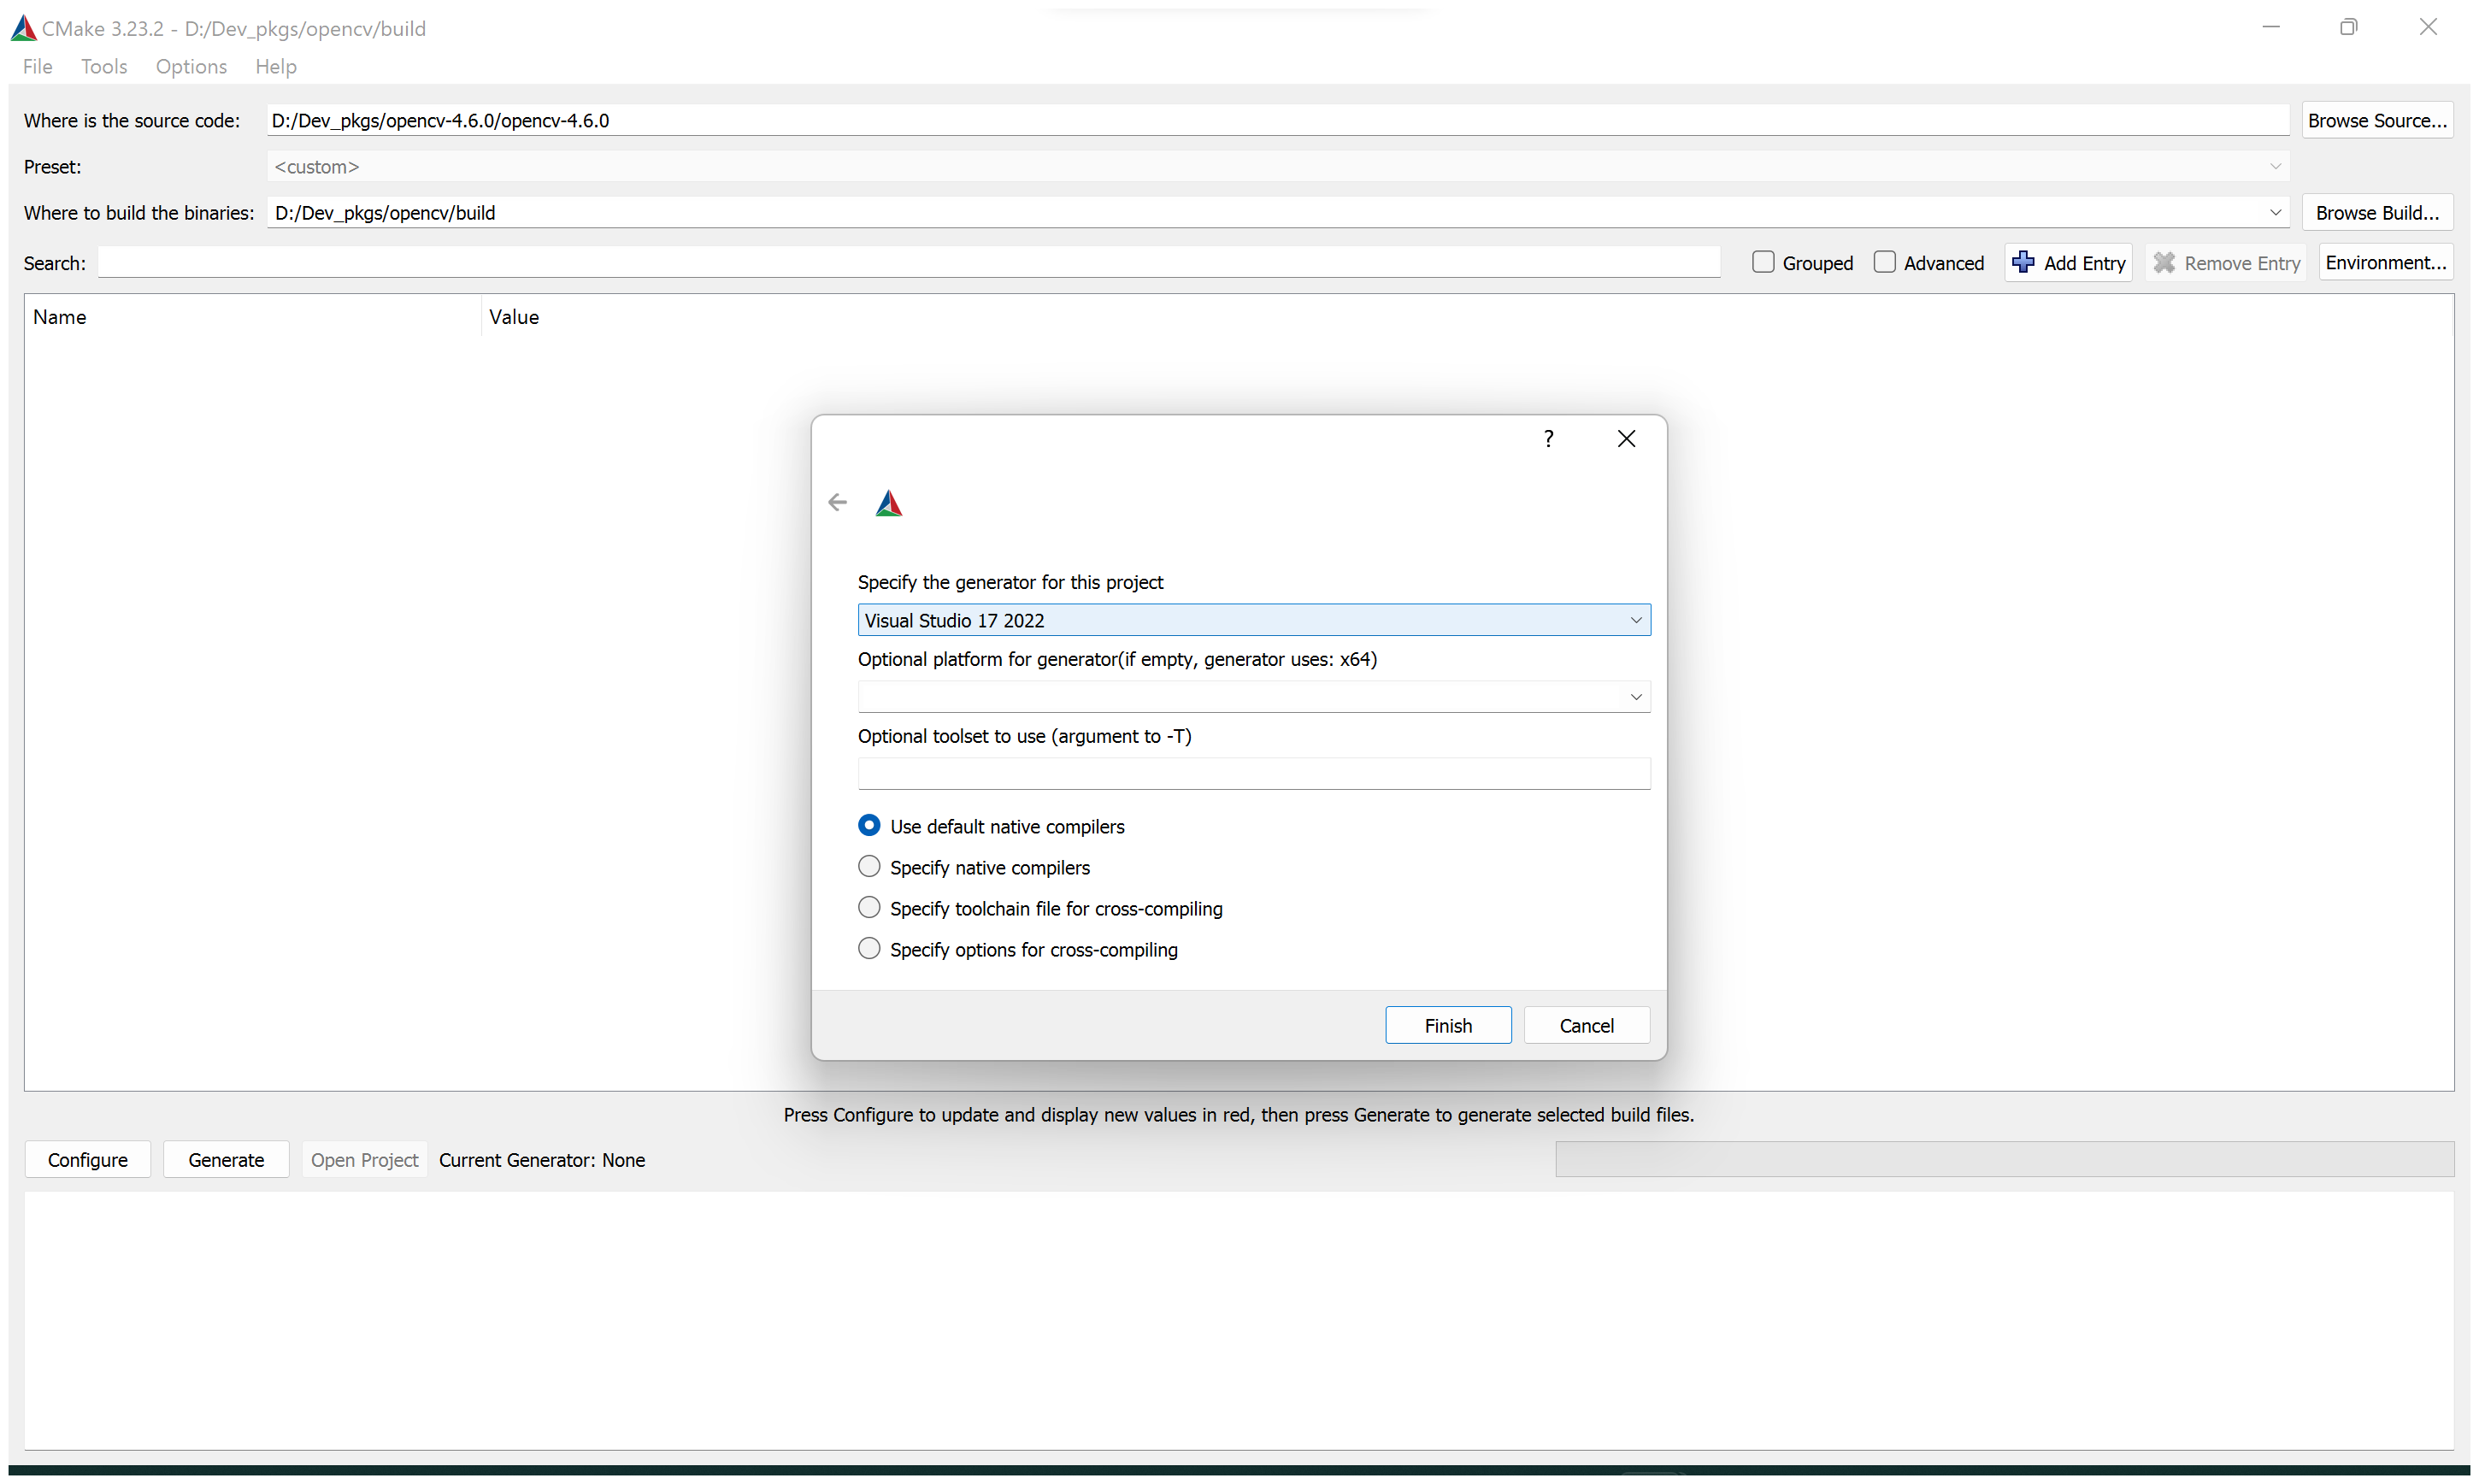
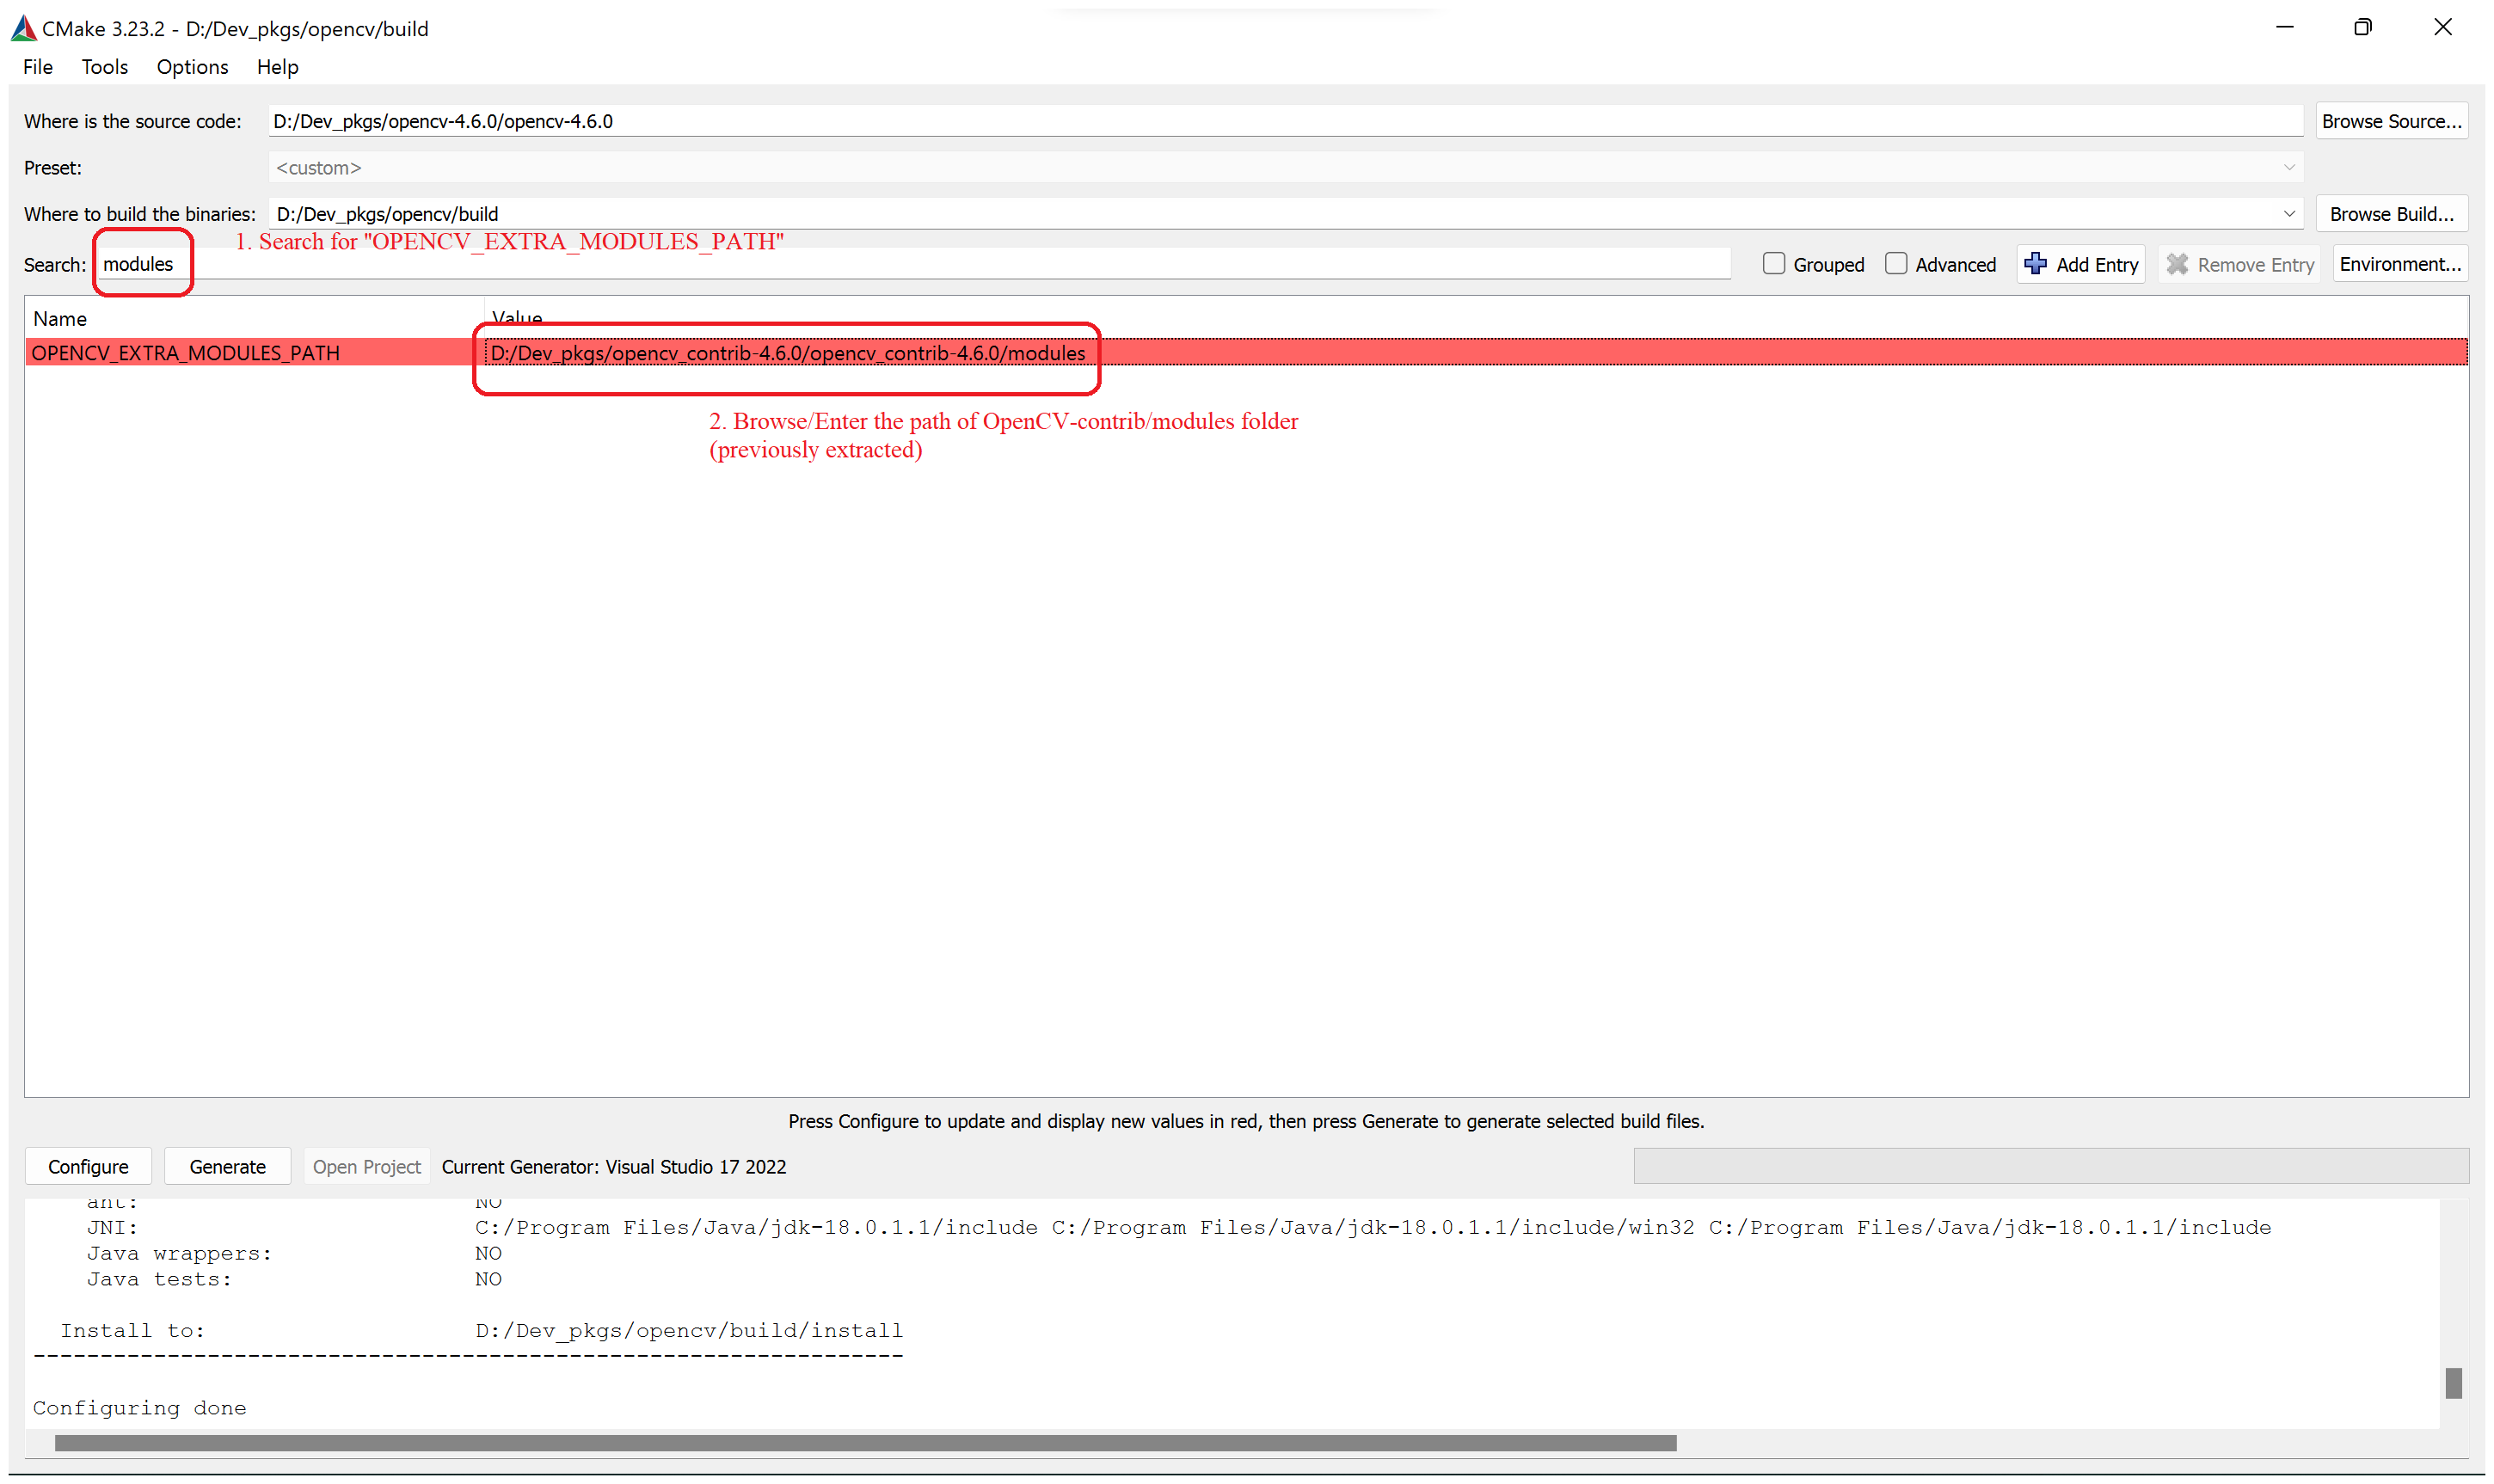
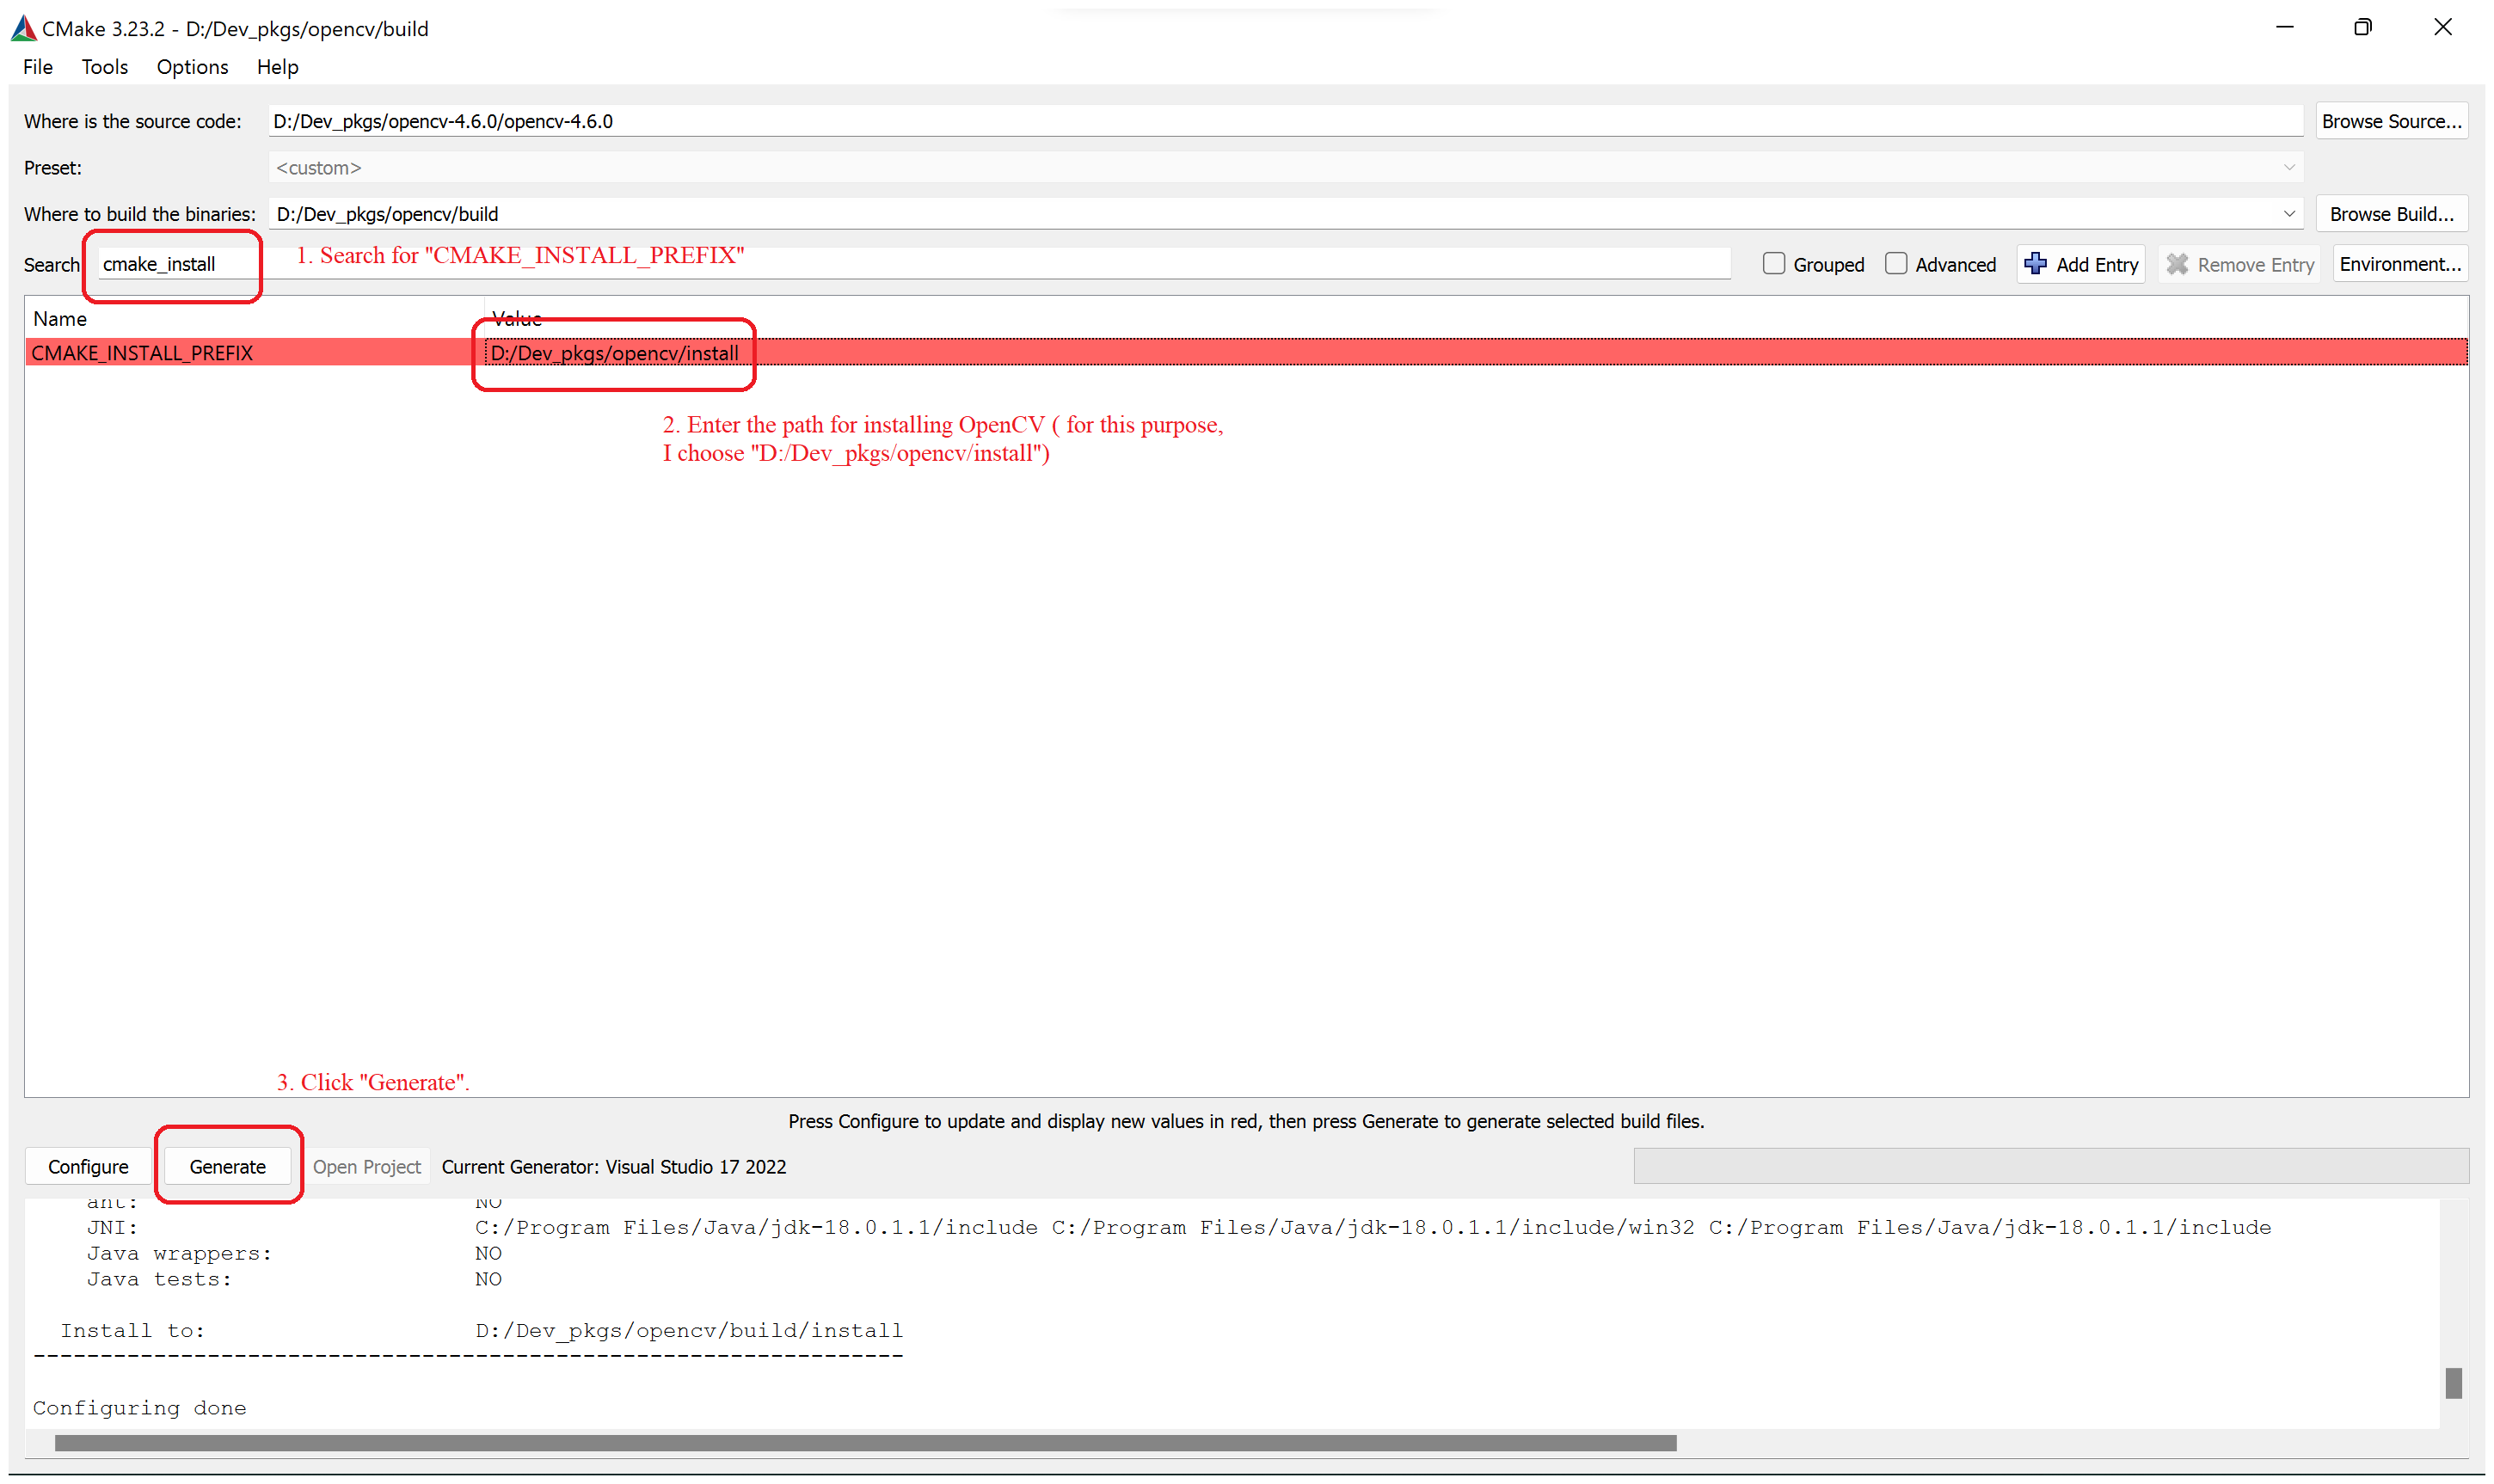
- Please proceed according to the figures below.
- After clicking "Configure", you will be asked for build folder creation ( "Yes" ) and choose compiler. Please select "Visual Studio 17 2022"
- Please wait for configuration to be done and then, search for "opencv_extra_modules_path" and "cmake_install_prefix". Then Click "Generate" button to begin the generation process.
-
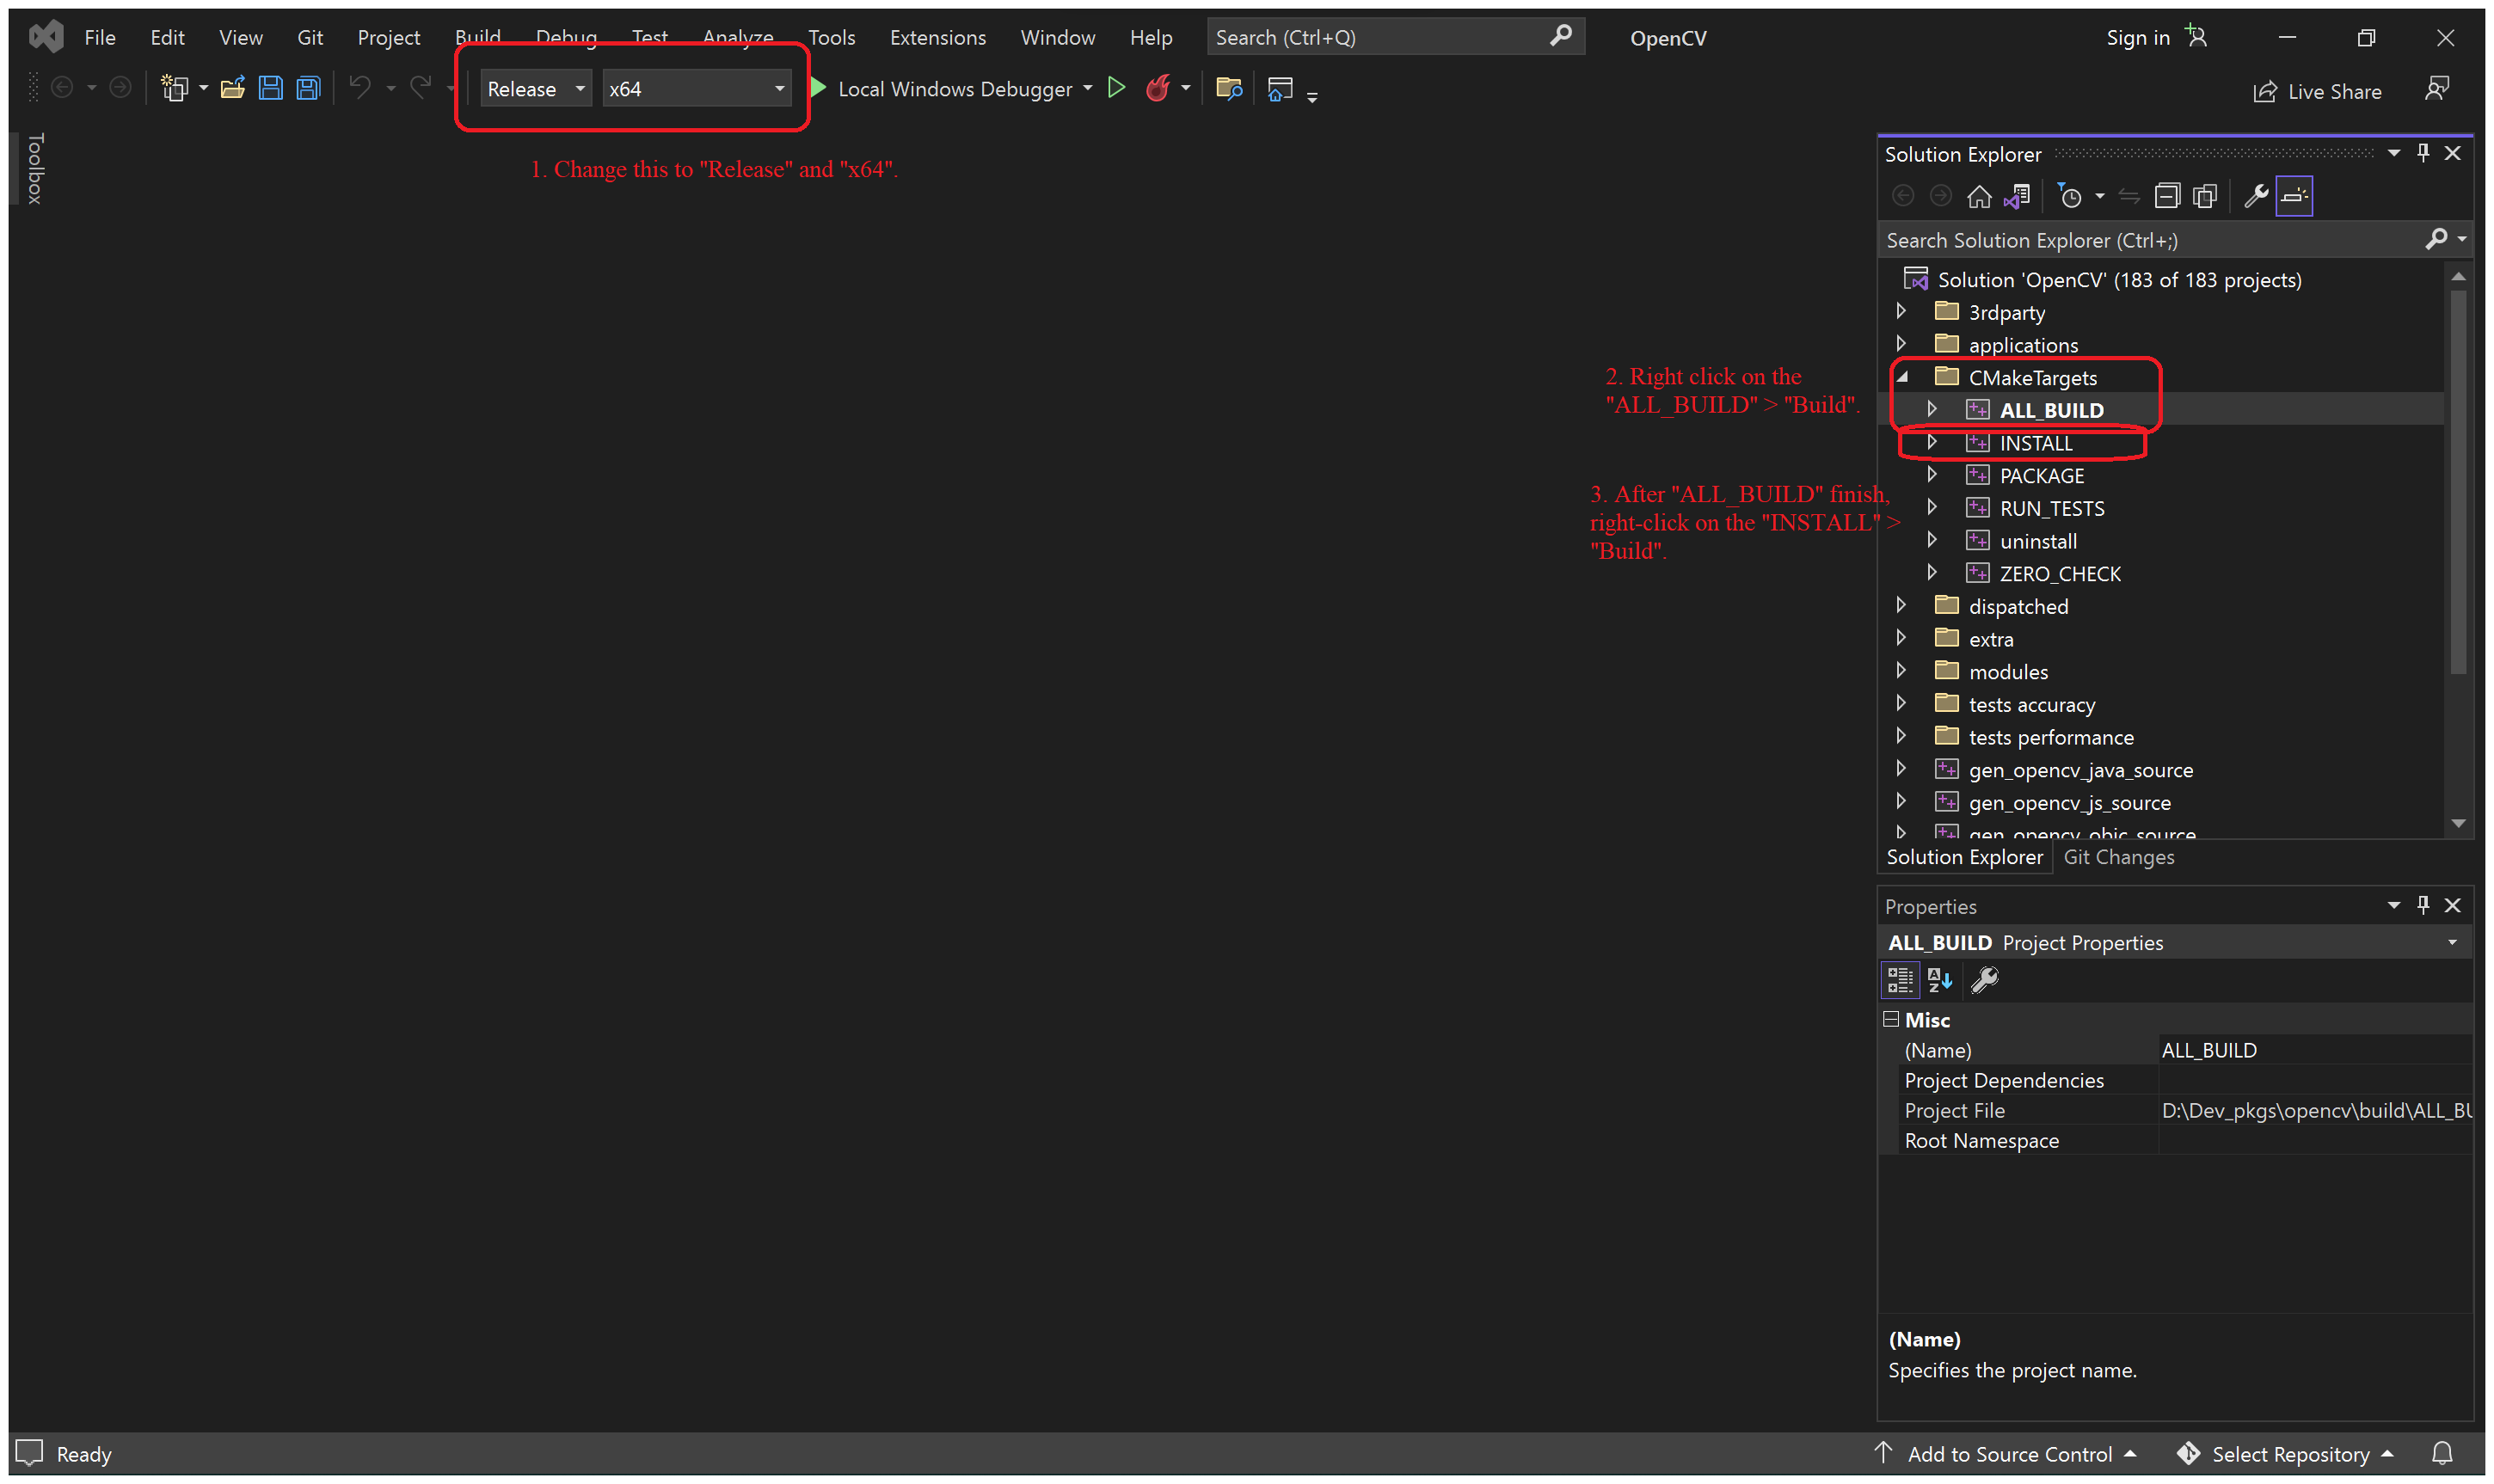
After generation process is finished, click the "Open Project" button besides "Generate" button. This will open up the "Visual Studio".
-
In "Visual Studio",
You've done setting up OpenCV for Windows. If you have any questions, please open an issue.
Install Bazel in Windows
Here.
- Rename the "bazel-5.2.0-windows-x86_64.exe" to "bazel.exe".
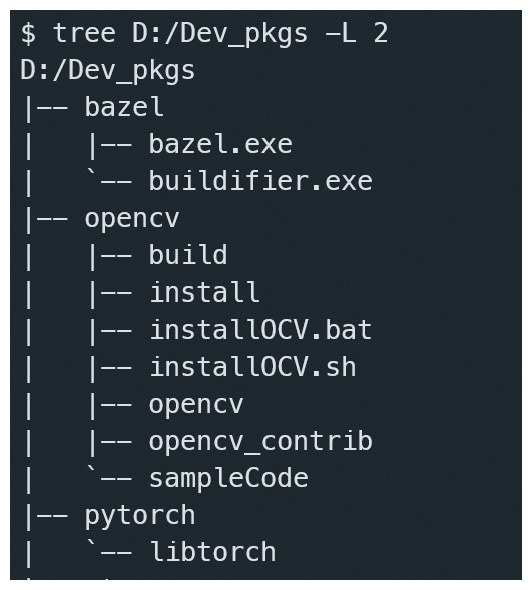
- Move the exe file to under "D:/Dev_pkgs/bazel/".
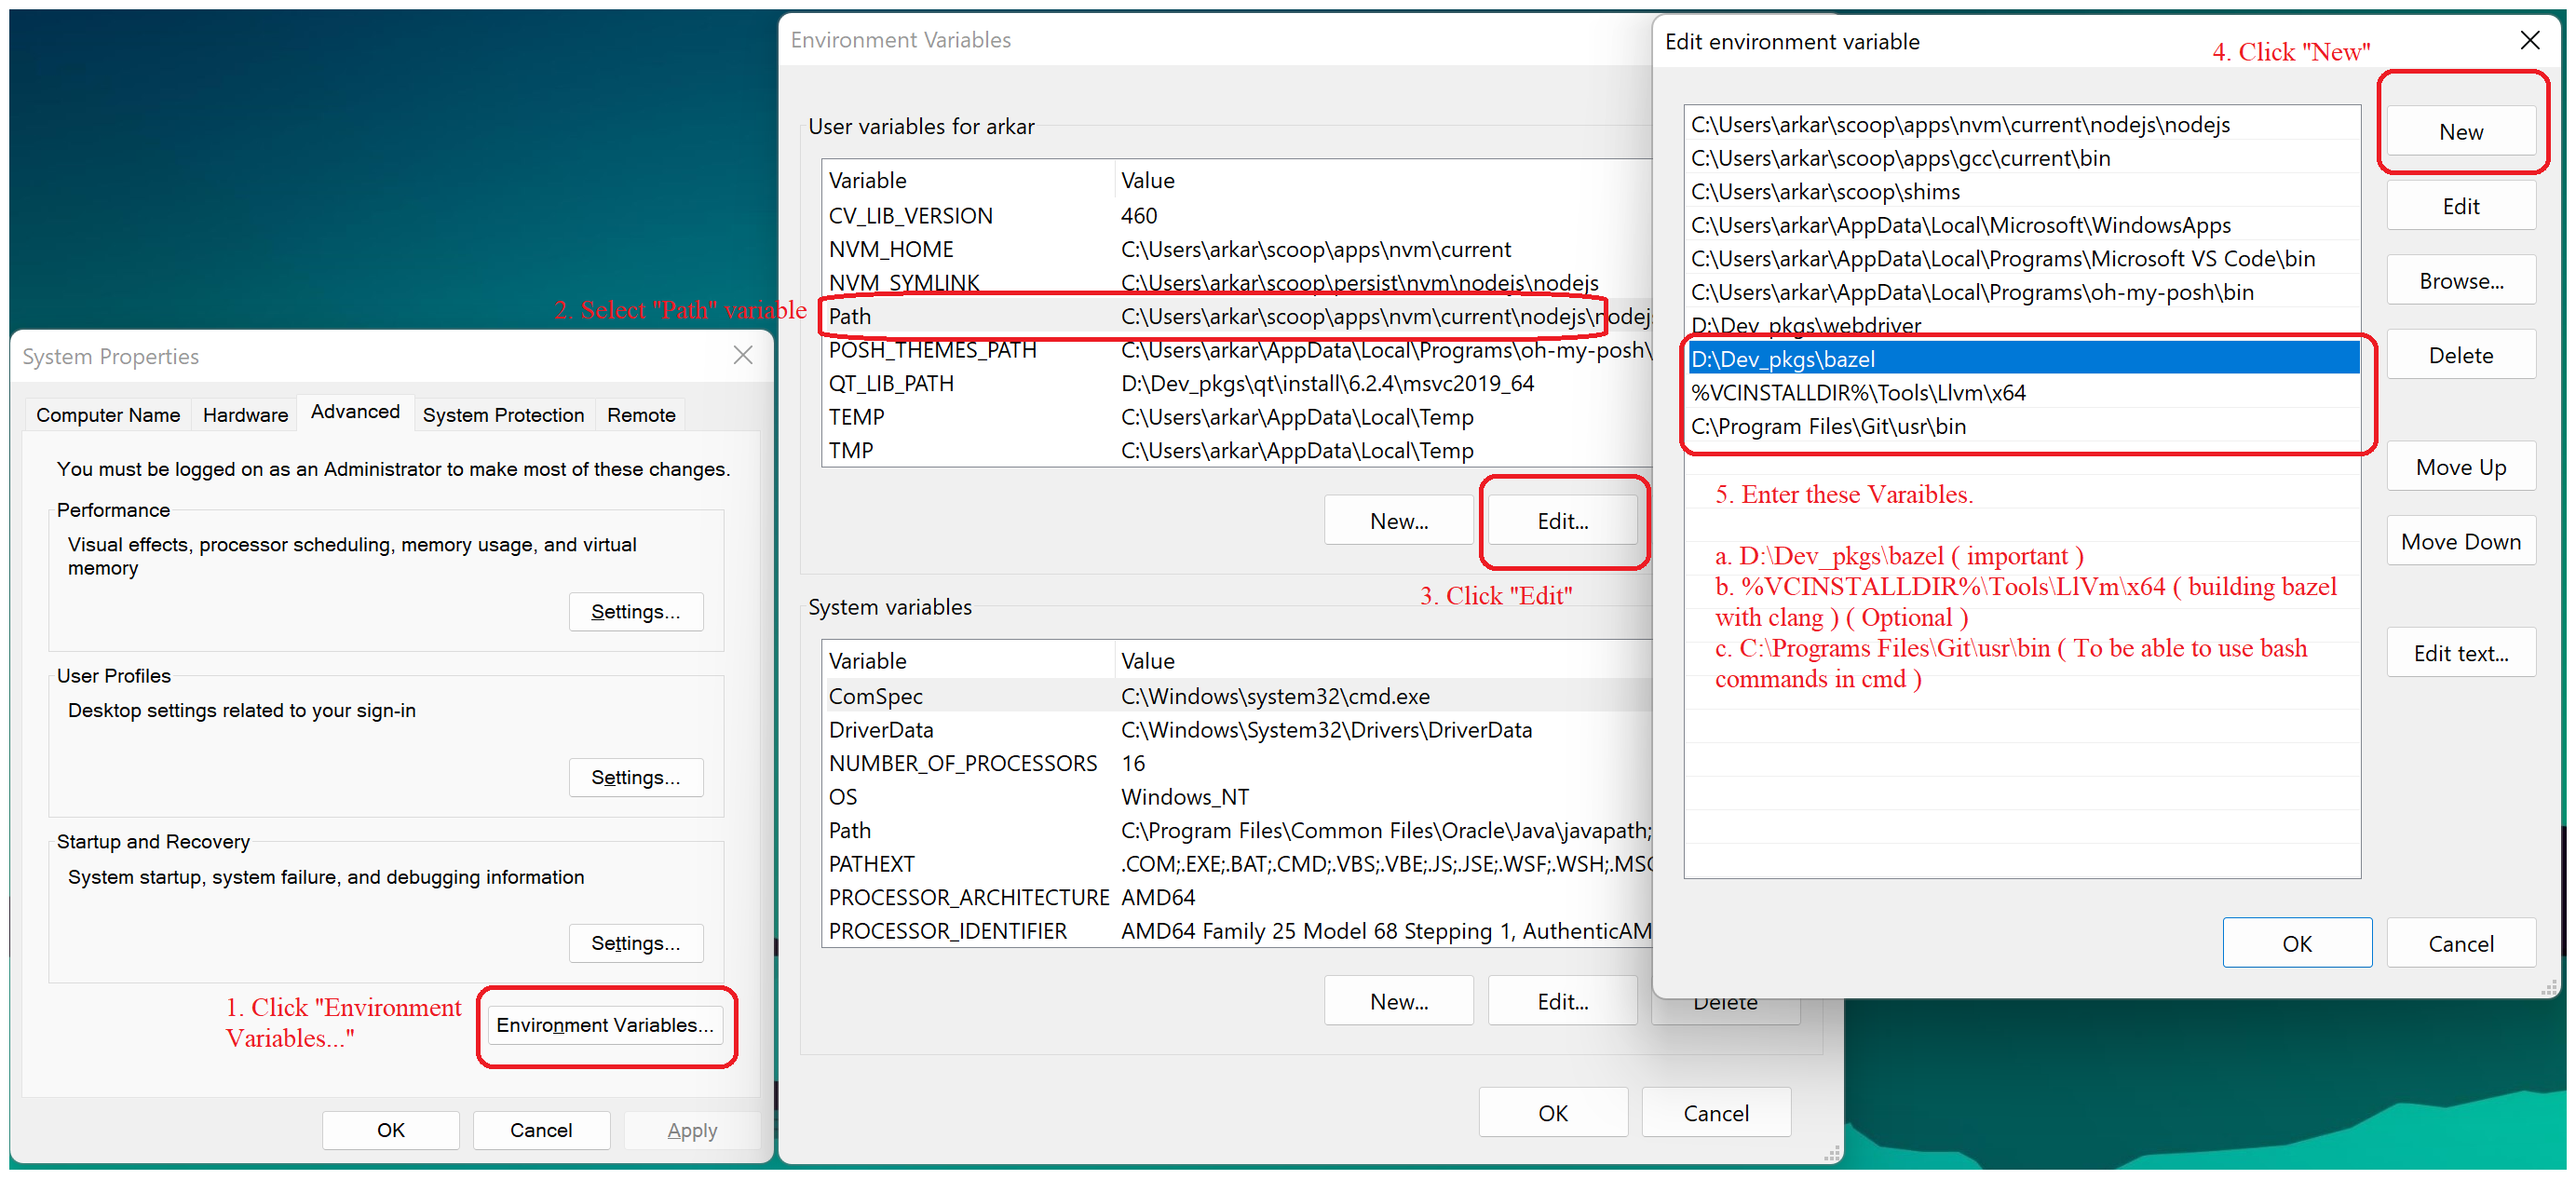
- Update the PATH environment variable of user variable, please check below image.
You can check the bazel whether it is working or not by calling this command.
Launch new powershell.
bazel --version # bazel 5.2.0
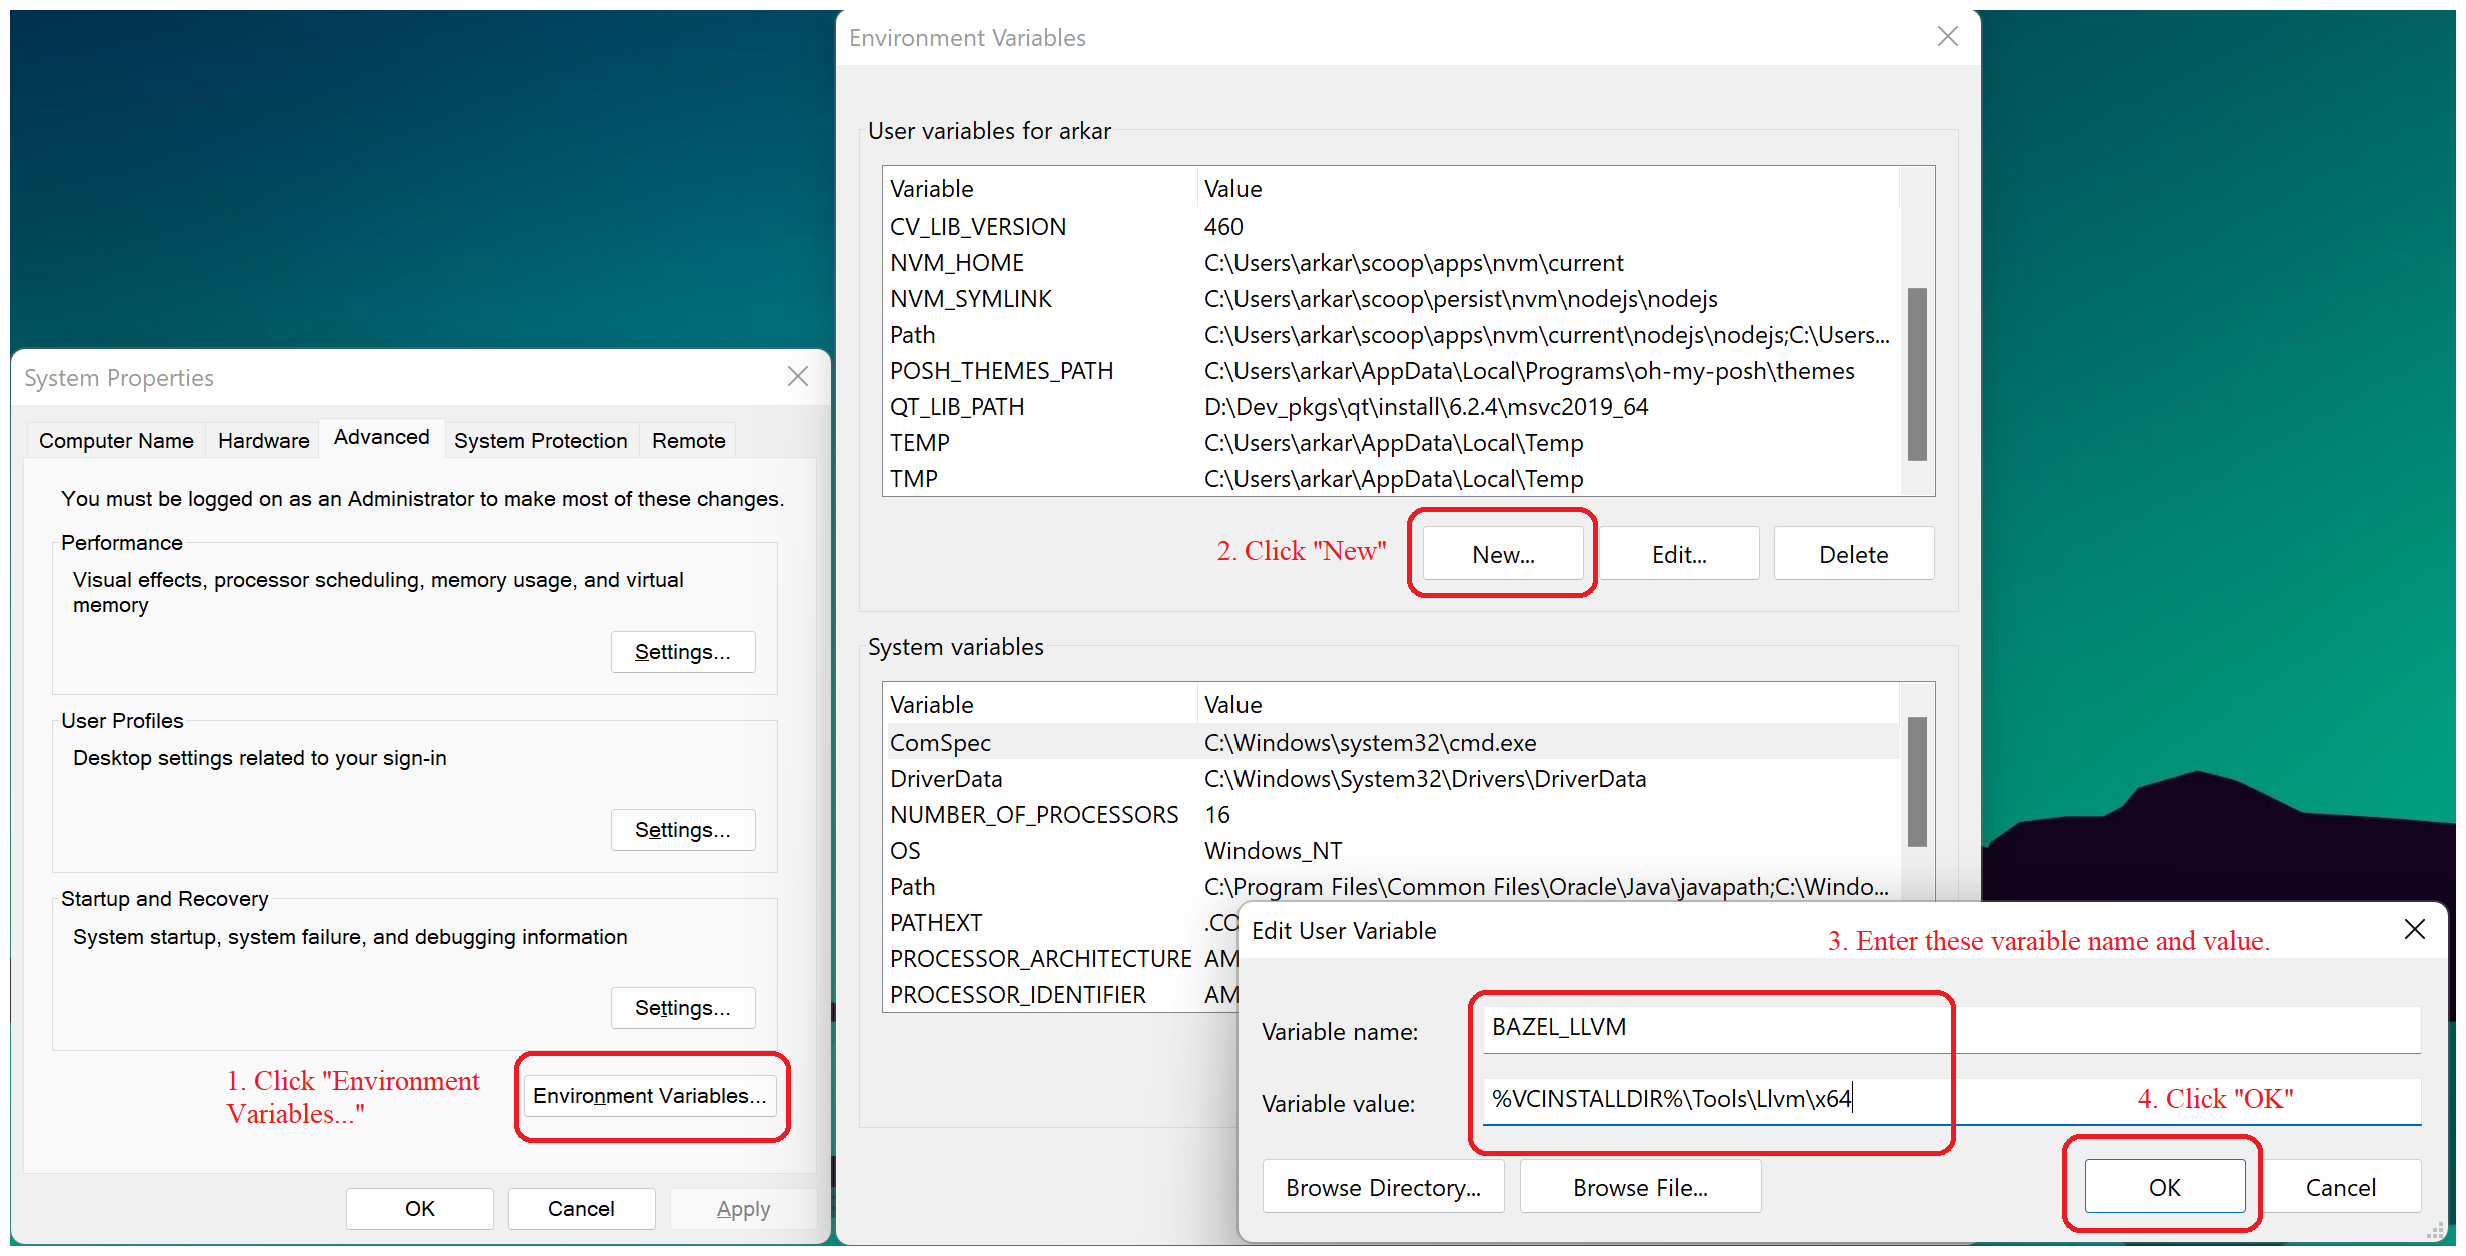
- If you want to use bazel with "Clang", you must do the following step.
Install Libtorch in Windows
Download here.
This will download a libtorch CPU version. For CUDA version, please refer to this page.
- Extract the zip file.
More Features in Future.
You're all set. Good to go. Happy coding! 😄
