spring-boot-maven-jmeter-performance-test
Purpose : Create a new maven profile to execute only JMeter performance tests with jmeter-maven-plugin.
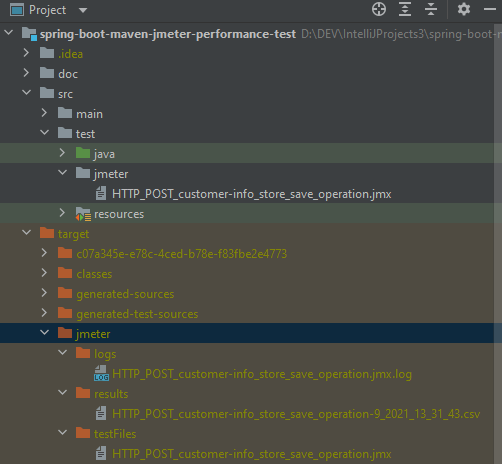
Reason : jmeter-maven-plugin parses and executes all the JMeter Test scripts saved in "src/test/jmeter" directory and generates a performance report in a separate jmeter maven performance execution.
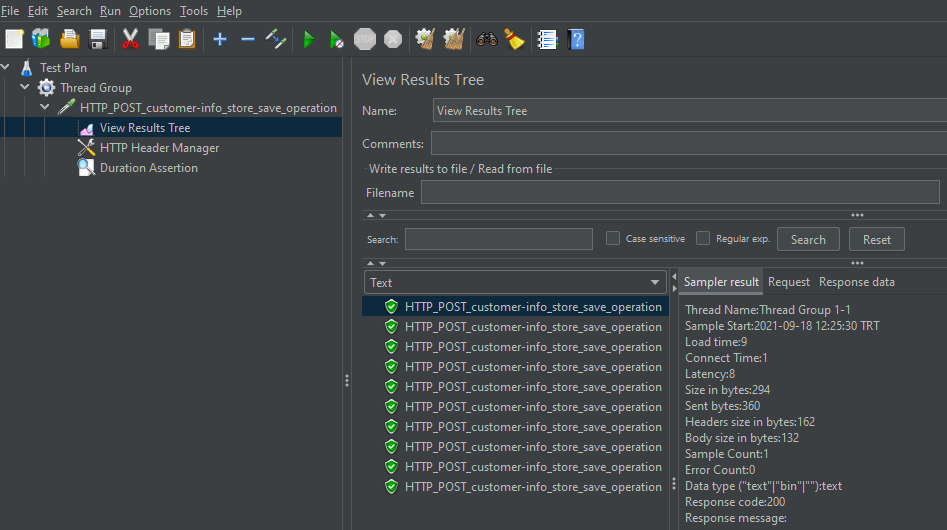
Steps to follow for preparing JMeter test scripts.
1- Download apache-jmeter-5.4.1 .
2- Start JMeter GUI.
3- Create a new Test Plan and add a new Thread Group with the following values :
– The number of Threads (users) : 10
– Ramp-up time : 10
– Loop count : 1
4- Add HTTP Request to Thread Group with the following values :
- protocol : http
- server name or IP : localhost
- port number : 8080
- HTTP Request : POST
- path : /customer-info/store/save
- body data :
{
"name": "jeans_store",
"products": [ { "name": "prod1" } ]
}
5- Add View Results Tree to HTTP Request.
6- Add HTTP Header Manager to HTTP Request with Name/Value as Content-Type=application/json.
7- Add Duration Assertion to HTTP Request with duration in milliseconds 30 to assert.
8- Create a performance test and save it as HTTP_POST_customer-info_store_save_operation.jmx file.
9- Create jmeter directory under src/test folder.
10- Copy your jmeter HTTP_POST_customer-info_store_save_operation.jmx file & move to src/test/jmeter.
### Local run steps
NOT : Because it is a local test do not forget to start your API before running performance tests.
1- Start Spring Boot API from main method containing class CustomerInfoApplication.java .
2- Alternatively you can start your Docker container by following the commands below.
3- To execute only jmeter performance tests from the console run the following maven command :
NOT : Execute maven command from where the pom.xml is located in the project directory.
$ mvn clean install -P performance-test
[INFO] --- jmeter-maven-plugin:3.4.0:results (jmeter-check-results) @ spring-boot-maven-jmeter-performance-test ---
[INFO]
[INFO] -------------------------------------------------------
[INFO] S C A N N I N G F O R R E S U L T S
[INFO] -------------------------------------------------------
[INFO]
[INFO] Will scan results using format: CSV
[INFO]
[INFO] Parsing results file as type: CSV
[INFO] Number of failures in 'HTTP_POST_customer-info_store_save_operation-9_2021_13_31_43.csv': 1
[INFO] Number of successes in 'HTTP_POST_customer-info_store_save_operation-9_2021_13_31_43.csv': 9
[INFO]
[INFO] -------------------------------------------------------
[INFO] P E R F O R M A N C E T E S T R E S U L T S
[INFO] -------------------------------------------------------
[INFO]
[INFO] Result (.csv) files scanned: 1
[INFO] Successful requests: 9
[INFO] Failed requests: 1
[INFO] Failures: 10.0% (2.0% accepted)
[INFO]
4- jmeter-maven-plugin results can be accessed from the application directory : "target/jmeter/results"
Tech Stack
Java 11
H2 Database Engine
spring boot
spring boot starter data jpa
spring boot starter web
spring boot starter test
hibernate
logback
maven
jmeter-maven-plugin
springfox-swagger-ui
datasource-proxy
Docker
Docker build run steps
NOT : Execute docker commands from where the DockerFile is located.
$ docker system prune

$ docker build . --tag demo

$ docker run -p 8080:8080 -e "SPRING_PROFILES_ACTIVE=dev" demo:latest
API OPERATIONS
Save store with products successfully to database
Method : HTTP.POST
URL : http://localhost:8080/customer-info/store/save
Request :
curl --location --request POST 'http://localhost:8080/customer-info/store/save' \
--header 'Content-Type: application/json' \
--data-raw '{
  "name": "jeans_store",
  "products": [
    {
      "name": "prod1"
    },
    {
      "name": "prod2"
    },
    {
      "name": "prod3"
    }
  ]
}'
Response :
HTTP response code 200
{
    "id": 1,
    "name": "jeans_store",
    "products": [
        {
            "id": 1,
            "name": "prod3"
        },
        {
            "id": 2,
            "name": "prod1"
        },
        {
            "id": 3,
            "name": "prod2"
        }
    ]
}
List Store saved to database
Method : HTTP.GET
URL : http://localhost:8080/customer-info/store/list
Request :
curl --location --request GET 'http://localhost:8080/customer-info/store/list'
Response :
HTTP response code 200
[
    {
        "id": 1,
        "name": "jeans_store",
        "products": [
            {
                "id": 1,
                "name": "prod3"
            },
            {
                "id": 2,
                "name": "prod1"
            },
            {
                "id": 3,
                "name": "prod2"
            }
        ]
    }
]

