This repository has been deprecated and migrated to https://github.com/autodesk-platform-services/aps-assets-exchange-excel
This sample demonstrates the following use cases:
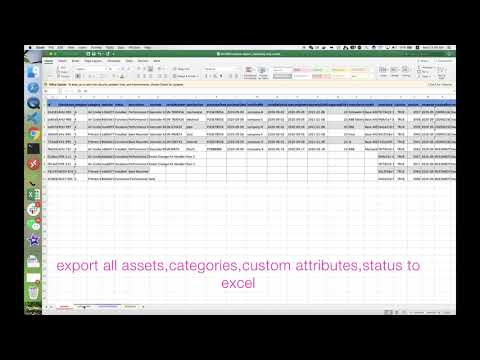
- Export assets, categories definitions,custom attributes definitions and status definitions to excel file. The custom attributes values will be also extracted. In addition, the linked resources (issue, checklist, attachment) of asset are extracted by Relationship API. They will be listed in as collection. In web view, each resource is enclosed with hyperlink for end user to navigate directly.
- Create new assets, or modify old assets from the list of excel
- Delete assets from the list of excel
The web app provides two options to display the ID properties either in Raw data and Human readable form.
This sample is implemented based on Node.js version of Learn Forge Tutorial, please refer to https://learnforge.autodesk.io/ for the details about the framework.

https://bim360-asset-exchange-excel.herokuapp.com/
Watch this video on how to play the demo.
- Forge Account: Learn how to create a Forge Account, activate subscription and create an app at this tutorial.
- BIM 360 Account: must be Account Admin to add the app integration. Learn about provisioning.
- BIM 360 Asset Management: Create BIM 360 project, activate Asset Management module, setup project to create Category Definitions,Status Set Definitions and Custom Attributes Definitions according to the guide
- Node.js: basic knowledge with Node.js.
- JavaScript basic knowledge with jQuery
For using this sample, you need an Autodesk developer credentials. Visit the Forge Developer Portal, sign up for an account, then create an app. For this new app, use http://localhost:3000/api/forge/callback/oauth as Callback URL. Finally take note of the Client ID and Client Secret.
Install NodeJS, version 8 or newer.
Clone this project or download it (this nodejs branch only). It's recommended to install GitHub desktop. To clone it via command line, use the following (Terminal on MacOSX/Linux, Git Shell on Windows):
git clone https://github.com/autodesk-forge/forge-bim360.asset.exchange.excel
Install the required packages using npm install.
Environment variables
Set the enviroment variables with your client ID & secret and finally start it. Via command line, navigate to the folder where this repository was cloned and use the following:
Mac OSX/Linux (Terminal)
npm install
export FORGE_CLIENT_ID=<<YOUR CLIENT ID FROM DEVELOPER PORTAL>>
export FORGE_CLIENT_SECRET=<<YOUR CLIENT SECRET>>
export FORGE_CALLBACK_URL=<<YOUR CALLBACK URL>>

npm start
Windows (use Node.js command line from Start menu)
npm install
set FORGE_CLIENT_ID=<<YOUR CLIENT ID FROM DEVELOPER PORTAL>>
set FORGE_CLIENT_SECRET=<<YOUR CLIENT SECRET>>
set FORGE_CALLBACK_URL=<<YOUR CALLBACK URL>>

npm start
OR, set enviroment variables of launch.json for debugging.
Define the socket endpoint same to your host at this line, e.g.
socketio = io('http://localhost:3000');
- Open the browser: http://localhost:3000.
Please watch the Video for the detail setup and usage, or follow the steps.
- After user logging, select a project. The code will start extracting the first page of assets records (about 50 records), and display them in web view. Switch Raw data and Human readable to check IDs data.
- Click Export option and excute to export all assets, categories, status, custom attributes definitions to excel.
- Click Import option and execute. Select one excel that contains assets data. Please ensure these columns are available:
- clientAssetId
- category id
- status id
The recommendation is to reuse the skeleton in step #1. To create new assets leave the column id empty. After importing, the new assets will be created, the old assets will be updated with new values. A notification will appears in top-right corner of client side. It indicates how may assets are imported succesfully. Go to BIM 360 UI to vefify.
- Click Delete option and execute. Select one excel that contains assets data (at least ids). The recommendation is to reuse the skeleton in step #1. After deleting, go to BIM 360 UI to vefify. A notification will appears in top-right corner of client side. It indicates how may assets are deleted succesfully.
To deploy this application to Heroku, the Callback URL for Forge must use your .herokuapp.com address. After clicking on the button below, at the Heroku Create New App page, set your Client ID, Secret and Callback URL for Forge.

- In excel, because one cell does not support multiple hyperlinks, the exported linked resources (issue/checklist/attachment) are only string with resources names.
- To import or delete assets, the suggested way is to export an excel file first, update the properties within the file, then import it back to BIM 360 Asset.
- The import (create or patch) and delete are using Batch-xxx endpoints of version 2. This is highly recommended way if you want to batch import/delete. Please DO NOT use single post/patch/delete for large number of assets because it will hit rate limit. The other benifit of using Batch-xxx endpoints is the performance is very good.
- From version 2, some previously standard attributes of assets (such as warranty date, vendor etc. ) are now moved to custom attributes. However, these definitions are not created by default, so please ensure the definitions have been created.
- From version 2, the select or multi-select types of custom attributes will return options values as guid. It also require guid if updating the values. So the code maps the option display name and ids.
- Cannot see my BIM 360 projects: Make sure to provision the Forge App Client ID within the BIM 360 Account, learn more here. This requires the Account Admin permission.
Document
Tutorials:
Blogs:
- Forge Blog
- Field of View, a BIM focused blog
This sample is licensed under the terms of the MIT License. Please see the LICENSE file for full details.
Xiaodong Liang @coldwood, Forge Advocate and Support