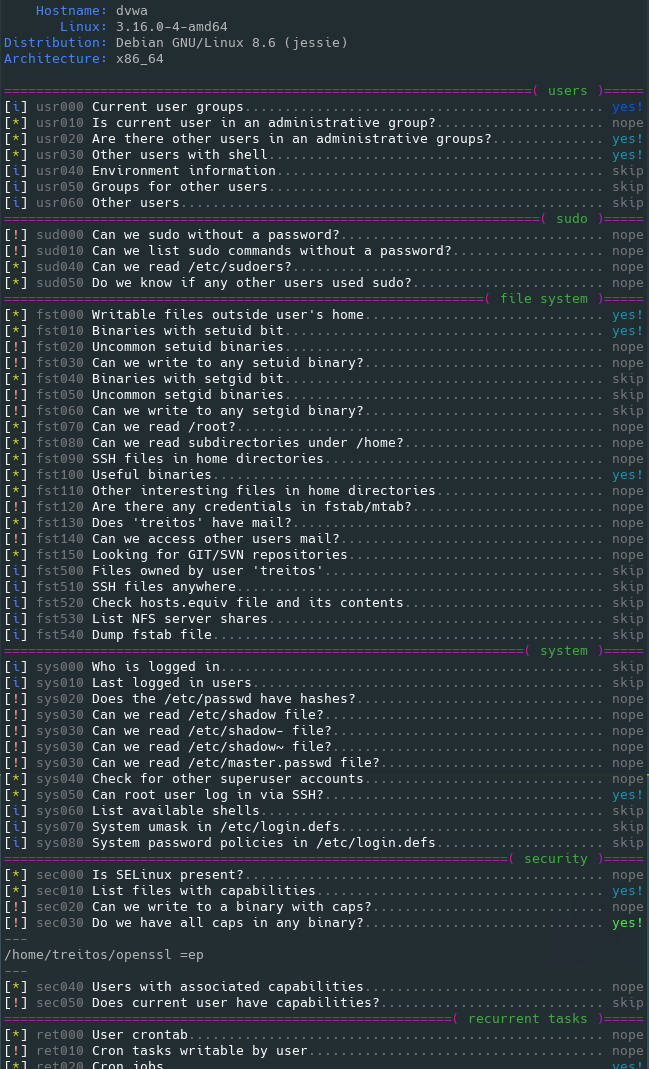
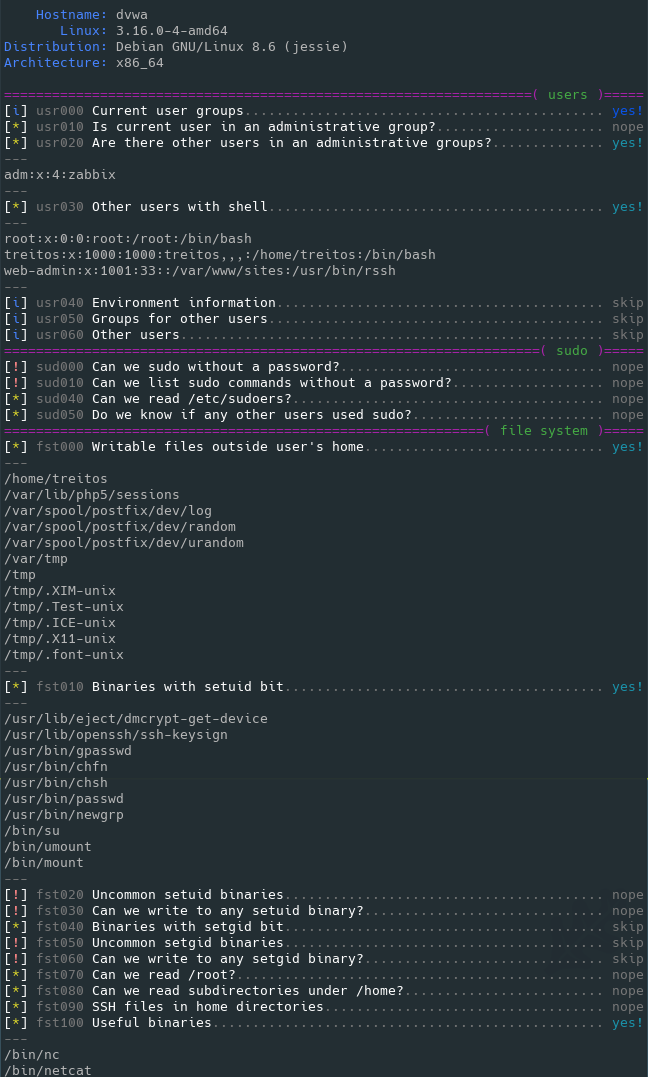
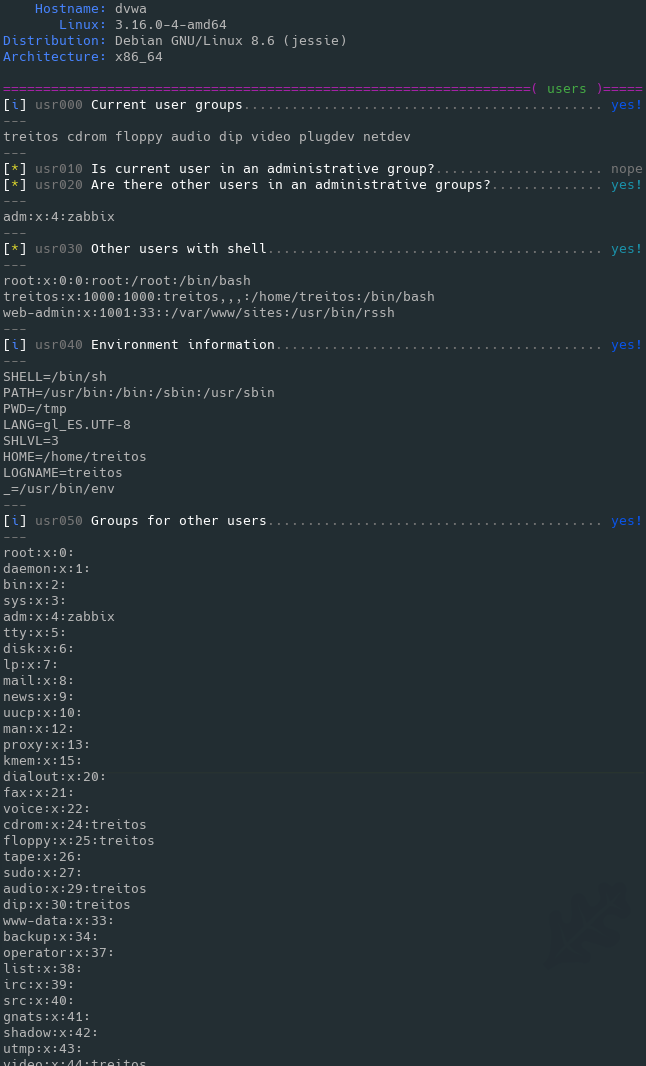
First, a couple of useful oneliners ;)
wget "https://github.com/diego-treitos/linux-smart-enumeration/releases/latest/download/lse.sh" -O lse.sh;chmod 700 lse.sh
curl "https://github.com/diego-treitos/linux-smart-enumeration/releases/latest/download/lse.sh" -Lo lse.sh;chmod 700 lse.sh
Note that since version 2.10 you can serve the script to other hosts with the -S flag!
Linux enumeration tools for pentesting and CTFs
This project was inspired by https://github.com/rebootuser/LinEnum and uses many of its tests.
Unlike LinEnum, lse tries to gradualy expose the information depending on its importance from a privesc point of view.
This shell script will show relevant information about the security of the local Linux system, helping to escalate privileges.
From version 2.0 it is mostly POSIX compliant and tested with shellcheck and posh.
It can also monitor processes to discover recurrent program executions. It monitors while it is executing all the other tests so you save some time. By default it monitors during 1 minute but you can choose the watch time with the -p parameter.
It has 3 levels of verbosity so you can control how much information you see.
In the default level you should see the highly important security flaws in the system. The level 1 (./lse.sh -l1) shows
interesting information that should help you to privesc. The level 2 (./lse.sh -l2) will just dump all the information it
gathers about the system.
By default it will ask you some questions: mainly the current user password (if you know it ;) so it can do some additional tests.
The idea is to get the information gradually.
First you should execute it just like ./lse.sh. If you see some green yes!, you probably have already some good stuff to work with.
If not, you should try the level 1 verbosity with ./lse.sh -l1 and you will see some more information that can be interesting.
If that does not help, level 2 will just dump everything you can gather about the service using ./lse.sh -l2. In this case you might find useful to use ./lse.sh -l2 | less -r.
You can also select what tests to execute by passing the -s parameter. With it you can select specific tests or sections to be executed. For example ./lse.sh -l2 -s usr010,net,pro will execute the test usr010 and all the tests in the sections net and pro.
Use: ./lse.sh [options]

 OPTIONS
  -c           Disable color
  -i           Non interactive mode
  -h           This help
  -l LEVEL     Output verbosity level
                 0: Show highly important results. (default)
                 1: Show interesting results.
                 2: Show all gathered information.
  -s SELECTION Comma separated list of sections or tests to run. Available
               sections:
                 usr: User related tests.
                 sud: Sudo related tests.
                 fst: File system related tests.
                 sys: System related tests.
                 sec: Security measures related tests.
                 ret: Recurren tasks (cron, timers) related tests.
                 net: Network related tests.
                 srv: Services related tests.
                 pro: Processes related tests.
                 sof: Software related tests.
                 ctn: Container (docker, lxc) related tests.
                 cve: CVE related tests.
               Specific tests can be used with their IDs (i.e.: usr020,sud)
  -e PATHS     Comma separated list of paths to exclude. This allows you
               to do faster scans at the cost of completeness
  -p SECONDS   Time that the process monitor will spend watching for
               processes. A value of 0 will disable any watch (default: 60)
  -S           Serve the lse.sh script in this host so it can be retrieved
               from a remote host.
Also available in webm video
Direct execution oneliners
bash <(wget -q -O - "https://github.com/diego-treitos/linux-smart-enumeration/releases/latest/download/lse.sh") -l2 -i
bash <(curl -s "https://github.com/diego-treitos/linux-smart-enumeration/releases/latest/download/lse.sh") -l1 -i
Feel free to buy me a beer if this script was useful ;)
₿: 1DNBZRAzP6WVnTeBPoYvnDtjxnS1S8Gnxk


