Internal links adds attributes to <a.internal-link> HTMLElements with the attributes and values of the target file's frontmatter. Combined with css snippets, it allows a very flexible way to customize the links
It also adds context menu items to modifiy target note's frontmatter properties and "inline fields" (dataview syntax) by right-clicking on the link
The preset values for those properties can be managed globally in the plugin's settings or on a file-by-file basis thanks to fileClass definition (see section 4)
The plugin basically scans the target file of each internal link of the files that are currently opened in your workspace.
It gathers some specific front-matter properties and includes them in the html element of the link, with the value of the property contained in the target note's front matter section.
Complicated 😰.... let's break it down step by step
As a reminder, front-matter section is an optional section of your note written in Yaml. Here is the documentation about front-matter on Obsidian help website https://help.obsidian.md/Advanced+topics/YAML+front+matter
Let's say I have a note about Jim : Jim.md
---
category: people
next-actions: [👥, ☎️, 🍻, say hi]
age: 42
---

Jim is one of my colleagues
Let's say that I want to have a specific display of the internal-links linking to Jim's note to display a blue tag-like rounded rectangle  and display
  when hovering the link
First you'll have to tell the plugin which front-matter kind of properties you want your internal-link to be supercharged with in the Target Attributes for Styling section of the plugin's settings
here are my settings
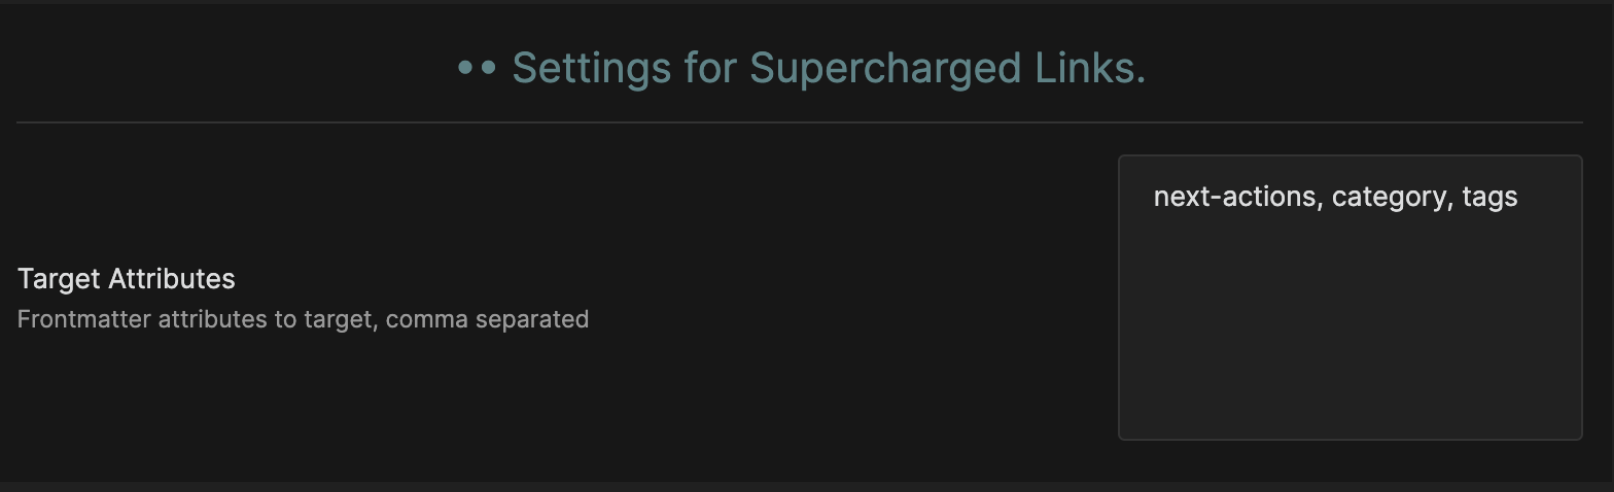
So in this case the plugin will only include category, next-actions and tags in the internal-links
You can choose to exclude the inline fields to be targetted: it ensures that frontmatter attributes are properly red event if the file is very large (60k+ characters)
When a file is opened or when one of the files of your vault has changed, the plugin is "supercharging" all internal-links with the front-matter properties set in the settings, if there are such properties in the file targeted by the link.
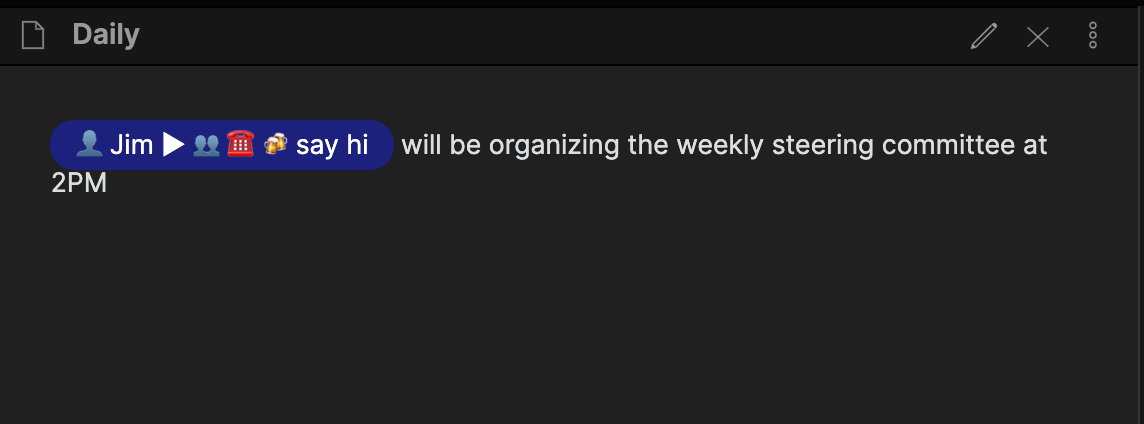
Let's say that I have a file daily.md like this:
Daily.md
[[Jim]] will be organizing the weekly steering committeeWithout the plugin activated, the html link element would normally look like this:
<a data-href="Jim" href="Jim" class="internal-link" target="_blank" rel="noopener">Jim</a>
You wouldn't really know anything about Jim.md's specificity here and therefore wouldn't be able to customize it a lot.
That's where the plugin comes in: it will add two extra properties in the <a> element : category and next-actions.
Since tags is not existing in Jim.md front-matter section, it won't be included.
heads-up the plugin is not adding directly category and next-actions property. Instead, it will prefix them with data-link in order not to potentially conflict with other attribute management ssystem made by other plugins or Obsidian itself.
So... with the plugin activated the <a>element will be supercharged like this: <a data-href="Jim" href="Jim" class="internal-link" target="_blank" rel="noopener" data-link-category="people" data-link-next-actions="👥 ☎️ 🍻 say hi">Jim</a>
As you can see, even if tags is included in settings as a property to track, since it's not included in Jim.md front-matter section, the property data-link-tags isn't included in the <a> element
Now you can enjoy the flexibilty of css to customize your links by setting css properties in a snippet like links.css
exemple:
to put a fancy 👤 emoji before the name of each link to a "category: people" note:
a.internal-link[data-link-category$="People" i]::before{
    content: "👤 "
}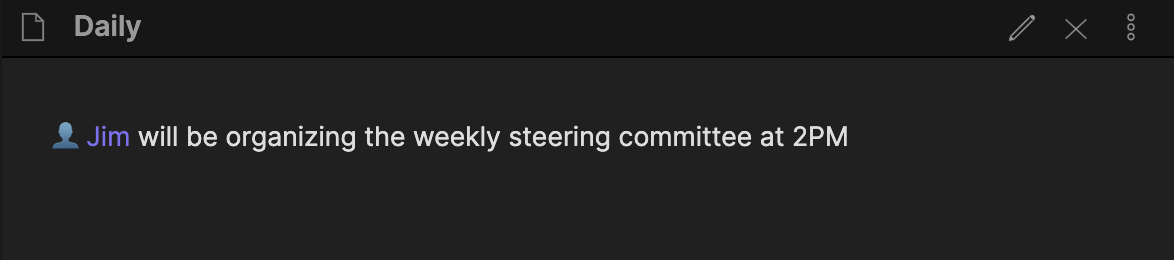
to highlight the link in a tag-like blue rounded rectangle when there is a property next-actions in the target file:
a.internal-link[data-link-next-actions]{
    color: white;
    background-color: rgb(29, 29, 129);
    border-radius: 18px;
    padding: 5px 15px;
}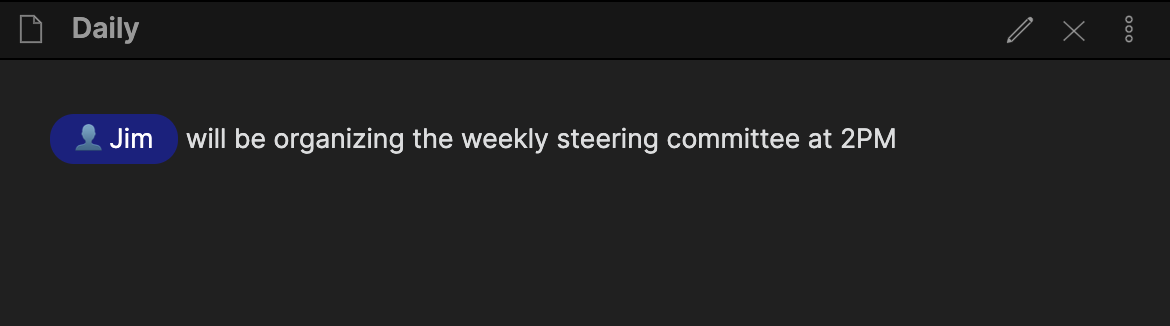
to display the next actions contained in the next-actions property of the target file when hovering the link:
a.internal-link[data-link-next-actions]:hover::after{
    content: " ► "attr(data-link-next-actions)
}
Right click on a link will automatically display an item per target note's frontmatter property and "inline fields" (dataview syntax)
these options are accessible from:
- the context menu of a link,
- the context menu of a calendar day,
- the context menu of a file in the file explorer,
- the "more options" menu of a file
- the command palette "Cmd+P" or by typing the hotkey Alt+O (can be customized in hotkeys settings)
- Right-click on the link
- Click on "Update .... " to change the property's value
- Change the value in the modal's prompt
- Type
enterto save or click X orescto cancel
demo: https://youtu.be/qhtPKstdnhI
- Right-click on the link
- Toggle the swith in the modal to change the value
- Press
escto leave the modal
demo: https://youtu.be/iwL-HqvoNOs
- Right-click on the link
- Change values comma-separated
- Press
enter, the values will be displayed as an array of values in the target note's frontmatter property
this doesn't work with indented lists YAML format
demo: https://youtu.be/WaW6xElq0T4
- Add a new Property Manager in the settings
- Enter the property name
- Add preset values (you can order them once the property has been created)
Back in a note Right-click on the link
- Click on "Update .... " to change the property's value
- The modal will display a dropdown list with preset values
- Change the value in the modal's dropdown
- Click on the save button to save or click X or
escto cancel
demo: https://youtu.be/GryvvJ6qIg4
- In the settings, follow the steps 1 to 3 of previous section
- Toggle the
isMultiswitch
Back in a note Right-click on the link
- Click on "Update .... " to change the property's value
- The modal will display a grid of switches for preset values
- Change the values by toggling the switches in the modal
- Click on the save button to save or click X or
escto cancel
demo: https://youtu.be/iyIG6LmCcuc
- In the settings, follow the steps 1 to 3 of previous section
- Toggle the
isCycleswitch
Back in a note Right-click on the link
- Click on " .. > .. " to change the property's value for the next one in the settings list
demo: https://youtu.be/7BqG4sG15jc
- Right-click on the link
- Click on "Add field at section"
- Select the line in the target file where you want to insert the new field
- Select the field
- Select/input the value for this field (if the field has preset values, you will be prompted to choose one)
demo: https://youtu.be/JYURK2CM3Es
In the settings
- toggle "display field option in context menu" If toggled on, the context menu will include field options If toggled off, the context menu wont include field options
demo: https://youtu.be/PC3MC0CfG0E
In the settings
- Add the fields you don't want to see in your context menu, comma separated
demo: https://youtu.be/eFkxECqBvvY
a class file is basically a simple note the name of the file will be the name of the class the lines of the file will be the fields managed for this class
- Define the folder where you wan't to store your class files
- Create a note in this folder, let say
music.md, containing lines with the name of fields that you want to manage for this class
music.md
=========
genre
difficulty
artist
tone- In a regular note, let's say
Black Dog.md, insert a frontmatter field namedfileClass - The value of
fileClasshas to be the name of the file Class where you have the fields that you want to manage for this note. e.g in our case
---
fileClass: music
---- when right-clicking on a link to
Black Dog.md, the fields in the context menu will be filter to show only the ones that are also included inmusic.md
demo: https://youtu.be/Av7DeYZILUk
You can specify the type of an attribute in a fileClass, and its options. Type and Options are called "attributes settings"
Type can be one of:
- "input" (default) : this field can take any value
- "select" : this field can take one value out of a list of items preset in options (see below)
- "multi" : this field can take 0,1 or multiple values out of a list of items preset in options (see below)
- "cycle" : this field can take one value that can "progress" within a list of items preset in options (see below)
Options is an array of options
An attribute settings is written in JSON and must be written as a value of and "inline (dataview) field"
example: Say you want to set "genre" attribute in music.md fileClass as a "multi" with "rock", "pop" and "jazz" as options, and you want to set "difficulty", "artist" and "tone" as fields that can take any value, your music.md will look like this:
music.md
=========
genre:: {"type":"multi", "options":["rock", "pop", "jazz"]}
difficulty
artist
tone
NB: "input" type attributes dont need a setting, leaving the name of the attribute only will categorize this attribute automatically as an "input" type.
Because it can be overwhelming to remember this syntax, you can manage "type" and "options" for each fields from:
- the context menu of a note that has this fileClass as a frontmatter's fileClass attribute : click on [
⚙️ Manage <music> fields] formusic.mdfrom any file withfileClass: musicset in frontmatter - the more-options menu of a fileClass file
- a command within a fileClass file (
alt+P)
demo: https://youtu.be/U0Bo_x1B2TM
- link context menu to modify frontmatter attributes
- manage indented lists multi-values frontmatter property
- extend options management to iinline-fields
- fileClass fields types and validators