Status: Archive (caffe2 is no longer maintained independently and the official website is closed, so this project is provided as-is)
This repository is a simple tutorial about how to use caffe2 with both C++ and python.
- caffe2 (tag: pytorch v0.4.0)
- opencv-python
- tabulate
If you want to save the graph, try to install the following packages if you need
sudo apt install python-pydot python-pydot-ng graphviz -y
sudo pip3 install pydot
All of the codes have been tested in version tag: pytorch v0.4.0.
tag 0.4.1 or 1.0 can not build the code correclty,
you need to modify them if you must use the latest version.
This tutorial contains 6 parts:
├─ 01_mnist
├─ 02_cifar10
├─ 03_cpp_forward
├─ 04_caffe_to_caffe2
├─ 05_cifar10_multi_gpu
└─ 06_pytorch_to_caffe2
01_mnistwill show you- how to use caffe2 to build a simple networks by using lmdb data
- how to save/load models correctly
- how to use pre-trained model to forward
02_cifar10will show you- how to build a residual network without lmdb data
- just use the memory data sampled from generator
- how to save/load the networks with BN layers
- how to build a residual network without lmdb data
03_cpp_forwardwill show you- how to write a C++ program to load pre-trained model
- how to write
CMakeLists.txtand use it to compile the C++ program - then we will use the C++ program to predict real images
04_caffe_to_caffe2will show you- how to convert caffe model to caffe2 model
- then load it by C++ to predict real images
05_cifar10_multi_gpuwill show you- how to train model with multiple gpus
06_pytorch_to_caffe2will show you- how to convert pytorch model to onnx model, and convert onnx model to caffe2
- then load it by C++ to predict real images
- Make sure you build caffe2 (and protobuf) correctly.
- Make sure you have installed OpenCV if you want compile the C++ programs.
- Install required packages if you get a ImportError e.g.
No module named tabulate
Skip this part if you have successfully installed caffe2, otherwise you can refer to my installation steps:
# Clone Caffe2's source code from Github repository
git clone https://github.com/pytorch/pytorch.git && cd pytorch
# Checkout the tag v0.4.0
git checkout v0.4.0
# Clone third party dependencies
git submodule update --init

# Create a directory to put Caffe2's build files in
mkdir build && cd build

# Configure Caffe2's build
# This looks for packages on your machine and figures out which functionality
# to include in the Caffe2 installation. The output of this command is very
# useful in debugging.
cmake ..

# Compile, link, and install Caffe2 (-j8 is optional)
sudo make install -j8
I just build caffe2 with python3.5, use cmake with
-DPYTHON_EXECUTABLE
-DPYTHON_LIBRARY
-DPYTHON_INCLUDE_DIR
the cmd looks like:
cmake .. -DPYTHON_EXECUTABLE=/usr/bin/python3.5m \
-DPYTHON_LIBRARY=/usr/lib/python3.5/config-3.5m-x86_64-linux-gnu/libpython3.5m.so \
-DPYTHON_INCLUDE_DIR=/usr/include/python3.5m
You may modify the code somewhere to make it work if you build caffe2 with python2.x.
For example:
# python2 version
import cPickle
with open(file, 'rb') as fo:
    dict = cPickle.load(fo)

# python3 version:
import pickle
with open(file, 'rb') as fo:
    dict = pickle.load(fo, encoding='bytes')

z = zipfile.ZipFile(BytesIO(r.content)) # python2 version
z = zipfile.ZipFile(StringIO.StringIO(r.content)) # python3 versionSimply run python3 caffe2_mnist.py, the program will download training data automatically.
Then start training, you will get the final accuracy about 98.90%.
We will also do an predication by using the real images, try to change another one!
Your data folder was not found!! This was generated: ./data
one or both of the MNIST lmbd dbs not found!!
Downloading... http://download.caffe2.ai/databases/mnist-lmdb.zip to ./data
Completed download and extraction.
training data folder:./data
workspace root folder:./model
== Start training... ==
Iter:     0, Loss: 2.3189, Accuracy: 0.1016
Iter:    50, Loss: 1.8367, Accuracy: 0.3984
Iter:   100, Loss: 0.8075, Accuracy: 0.7031
Iter:   150, Loss: 0.7748, Accuracy: 0.7578
Iter:   200, Loss: 0.5473, Accuracy: 0.8281
...
...
Iter:  9800, Loss: 0.1033, Accuracy: 0.9766
Iter:  9850, Loss: 0.1506, Accuracy: 0.9844
Iter:  9900, Loss: 0.1580, Accuracy: 0.9609
Iter:  9950, Loss: 0.0286, Accuracy: 1.0000
== Done. ==
test_accuracy: 0.9890
== saved init_net and predict_net. ==
== loaded init_net and predict_net. ==

Input: (1, 1, 28, 28)
Output: [[0. 0. 0. 0. 0. 0. 0. 0. 0. 1.]]
Output class: 9
Simply run python3 caffe2_cifar10.py default setting.
Feel free to change the parameters:
(python3 caffe2_cifar10.py --help to see more details)
python3 caffe2_cifar10.py --depths 8 \
                          --batch_size 64 \
                          --epochs 100 \
                          --eval_freq 3
You will get test accuracy about 91%
=============== Argument ===============
Namespace(batch_size=128, depths=5, epochs=200, eval_freq=1, init_net='./init_net.pb',
predict_net='./predict_net.pb', test_images=10000, train_images=50000,
use_augmentation=True, use_gpu=True)
=============== Argument ===============

== Loading data ==
Downloading data from http://www.cs.toronto.edu/~kriz/cifar-10-python.tar.gz
...100%, 162 MB, 5002 KB/s, 33 seconds passedDownload finished.
Start extract!
Loading ./cifar-10-batches-py/data_batch_1 : 10000.
Loading ./cifar-10-batches-py/data_batch_2 : 10000.
Loading ./cifar-10-batches-py/data_batch_3 : 10000.
Loading ./cifar-10-batches-py/data_batch_4 : 10000.
Loading ./cifar-10-batches-py/data_batch_5 : 10000.
Loading ./cifar-10-batches-py/test_batch : 10000.
Train data: (50000, 3, 32, 32) (50000,)
Test data : (10000, 3, 32, 32) (10000,)
== Shuffling data ==
== Prepare Finished ==

== Training for 200 epochs ==

----  --------  ---------  --------  ---------  --------  --------
  ep        lr    tr_loss    tr_acc    te_loss    te_acc      time
----  --------  ---------  --------  ---------  --------  --------
   1    0.1000     1.3788   49.1009     1.2785   55.3300   14.0707
   2    0.1000     0.9011   68.2824     0.9446   66.4000   13.5369
   3    0.1000     0.7428   73.9750     1.0327   67.4200   13.5050
   4    0.1000     0.6417   77.8273     0.7475   75.4400   13.5161
   5    0.1000     0.5713   80.0871     0.6454   78.3100   13.5315
graph = net_drawer.GetPydotGraphMinimal(deploy_model)
graph.write_svg('net.svg')
graph.write_svg will save the image of our net's architecture, feel free to check it.
In this part, we just use the pre-trained model(trained by part02) to predict real images.
Change directory to 03_cpp_forward
Then do:
mkdir build && cd build
cmake ../
make
cd ../bg@bg-CGI:~/Desktop/Caffe2_Demo/03_cpp_forward$ mkdir build && cd build
bg@bg-CGI:~/Desktop/Caffe2_Demo/03_cpp_forward/build$ cmake ../
-- The C compiler identification is GNU 5.4.0
-- The CXX compiler identification is GNU 5.4.0
...
...
-- Looking for pthread_create in pthread
-- Looking for pthread_create in pthread - found
-- Found Threads: TRUE
-- Found CUDA: /usr/local/cuda-8.0 (found version "8.0")
-- Found OpenCV: /usr/local (found version "3.4.1")
-- Configuring done
-- Generating done
-- Build files have been written to: /home/bg/Desktop/Caffe2_Demo/03_cpp_forward/build
bg@bg-CGI:~/Desktop/Caffe2_Demo/03_cpp_forward/build$ make
Scanning dependencies of target classifier
[ 50%] Building CXX object CMakeFiles/classifier.dir/main.cpp.o
[100%] Linking CXX executable ../classifier
[100%] Built target classifierThen you can see the executable file classifier
Run ./classifier --file ./test_img/dog.jpg
Then you can see:
== image size: [795 x 732] ==
== simply resize: [32 x 32] ==
== predicted label: dog ==
== with probability: 100% ==
Run ./classifier --file ./test_img/frog.jpg
== image size: [184 x 160] ==
== simply resize: [32 x 32] ==
== predicted label: frog ==
== with probability: 99.7764% ==
Now, we will try to convert an pre-trained ImageNet caffe model to caffe2 model.
-
Download caffe pre-trained model url here (
ResNet-50-deploy.prototxtandResNet-50-model.caffemodel) firstly -
Then, do
python3 caffe_translator.py ResNet-50-deploy.prototxt ResNet-50-model.caffemodel
Now we will see 3 new files
init_net.pb             %[converted init weights]
predict_net.pb          %[converted net]
predict_net.pbtxt       %[converted pb txt]
- Build C++ program
mkdir build && cd build
cmake ../
make
cd ../- Run C++ program with converted caffe2 weights
./classifier --file ./test_img/school_bus.jpg
== image size: [950 x 600] ==
== simply resize: [224 x 224] ==
== predicted label: 779 ==
== label name: school bus ==
== with probability: 99.9992% ==
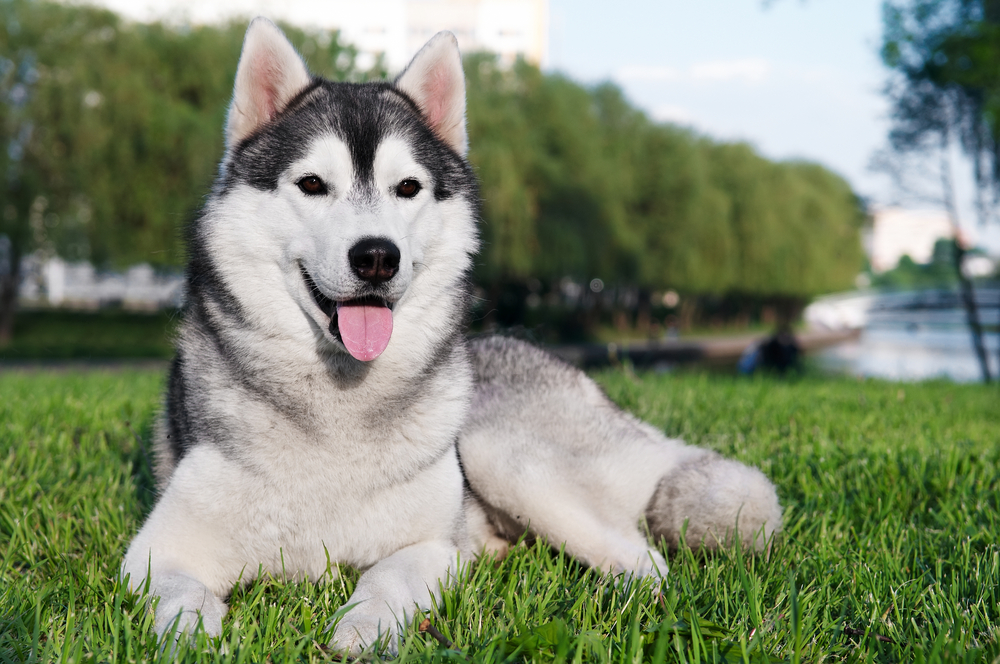
./classifier --file ./test_img/husky.jpg
== image size: [1000 x 664] ==
== simply resize: [224 x 224] ==
== predicted label: 248 ==
== label name: Eskimo dog, husky ==
== with probability: 72.7978% ==
./classifier --file test_img/zebra.jpg
== image size: [319 x 279] ==
== simply resize: [224 x 224] ==
== predicted label: 340 ==
== label name: zebra ==
== with probability: 99.8892% ==
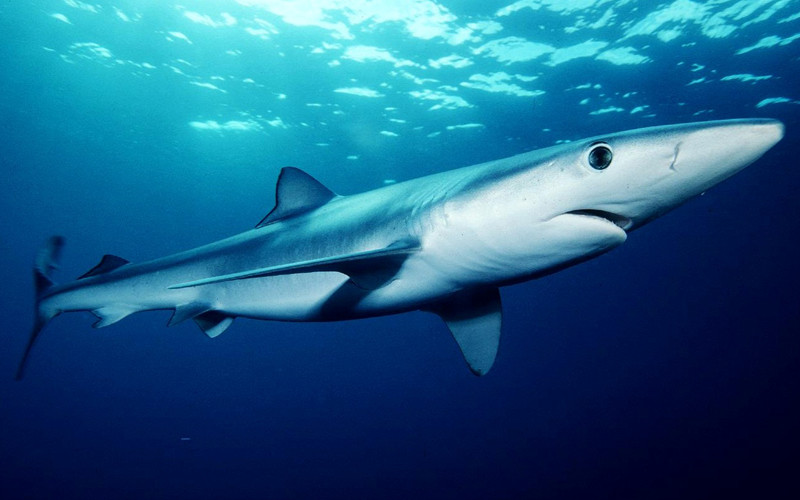
./classifier --file test_img/shark.jpg
== image size: [800 x 500] ==
== simply resize: [224 x 224] ==
== predicted label: 3 ==
== label name: tiger shark, Galeocerdo cuvieri ==
== with probability: 76.2018% ==
Feel free to change the test images, it's fun. 😄
The most important point in multi-gpu training is data_parallel_model.Parallelize_GPU,
The key is to split your model creation code to three functions.
check SynchronousSGD for more details.
Now, let us try to convert pytorch model to caffe2 model.
We will use the tool ONNX(Open Neural Network Exchange).
First, run pytorch2onnx.py, donwload a pytorch model resnet50, convert it to onnx model.
Then, run onnx2caffe2.py convert the onnx model to caffe2 model.
python3 onnx2caffe2.py --onnx-model ONNX_MODEL \
--caffe2-init CAFFE2_INIT \
--caffe2-predict CAFFE2_PREDICT
We will get three files: onnx-predict.pbtxt,
init_net.pb             %[converted init weights]
predict_net.pb          %[converted net]
onnx-predict.pbtxt      %[converted pb txt]
Modify the main.cpp, then compile it by cmake.
./classifier --file ./test_img/school_bus.jpg

== image size: [950 x 600] ==
== simply resize: [224 x 224] ==
== predicted label: 779 ==
== label name: school bus ==
== with acc: 70.0677% ==
fm.bigballon at gmail.com
Please feel free to contact me if you have any questions! 😸
Have a good day!! 😄


