Virtual Environment might be used to run the project. For creating a proper one, the following commands must be executed respectively:
pip install virtualenv
virtualenv --python=python3.7 venv
source venv/bin/activate
export AIRFLOW_HOME=~/airflow
pip install -r requirements.txt
By default, Apache Airflow uses ~/airflow folder. That's why it's exported. In order to initialize Apache Airflow database, the following command must be executed:
airflow initdbAirflow is ready to use right now. The following commands starts the web server and the scheduler:
airflow webserver -p 8080
airflow scheduler
Airflow server can be reached using the following link:
Before running any DAG, Snowflake and S3 connections must be set. In order to do that, click Admin->Connections. Then, click to Create button. You'll see the following form:
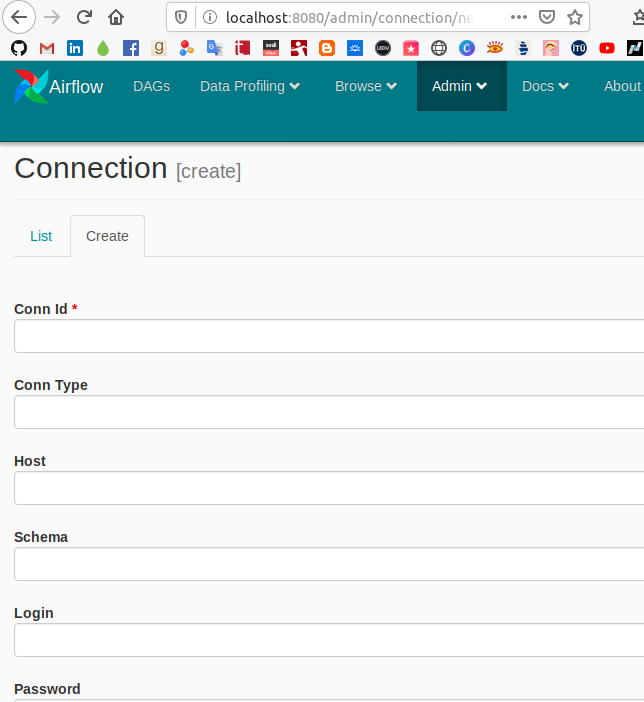
For Snowflake connection, please enter the following values:
"Conn Id": "snowflake_conn"
"Conn Type": "Snowflake"
"Host": YOUR_HOST_ADDRESS
"Login": YOUR_USERNAME
"Password": YOUR_PASSWORD
"Extra": {
    "account": YOUR_ACCOUNT,
    "region": YOUR_REGION
}
For example, if your address is XXXXX-eu-central-1.snowflakecomputing.com, it means your account is XXXXX and your region is eu-central-1
For S3 connection, please enter the following values:
"Conn Id": "aws_s3_conn"
"Conn Type": "S3"
"Extra": {
    "aws_access_key_id": YOUR_ACCESS_KEY,
    "aws_secret_access_key": YOUR_SECRET_ACCESS_KEY
}
If you never created a key for accessing your S3 Storage, you can do it by following this link
As it has been stated above, default folder of Airflow is ~/airflow and created DAGs must be copied to ~/airflow/dags/
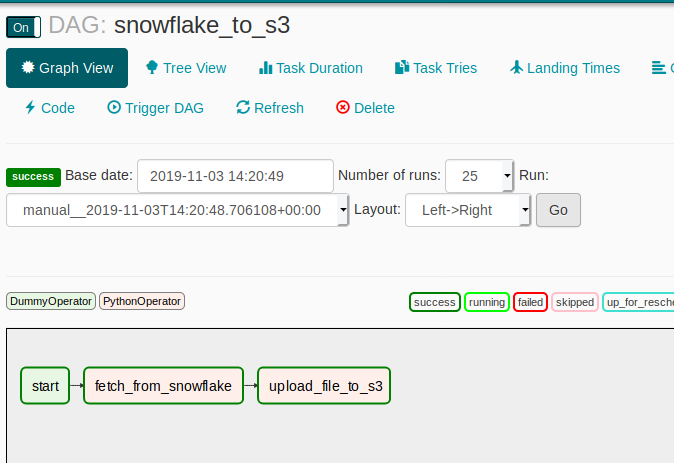
In this repository, dag.py has DAG which uses helper functions in helper.py. Therefore, it is necessary to copy these two files to dags folder. After that, click snowflake_to_s3 and Trigger Dag in order to run it. If you successfully followed the instructions, your DAG will result in success and you will see something like the following image: