Basics Guide for web developers. This is a small overview of what you should know as a web developer.
The code examples in the guide can be found in the listed folders.
- HTML - structure web pages with HTML
- 1.1. Use elements and attributes
- 1.2. Lists
- 1.3. Links
- 1.4. Images
- 1.5. Captions
- 1.6. Tables
- 1.7. Forms
- 1.8. HTML Tags
- CSS - design websites with CSS
- 2.1. Introduction
- 2.2. Include CSS in HTML
- 2.3. Texts
- 2.4. Lists
- 2.5. Tables
- 2.6. Forms
- JavaScript (JS) - making websites interactive with JavaScript
- 3.1. Introduction
- 3.2. Use developer console
- 3.3. Define variables
- 3.4. Define constant
- 3.5. Use data types
- 3.6. Control structures
- 3.7. Use loops
- 3.8. Functions and error handling
- 3.9. Objects and arrays
- Weblogs
- Webformats - use web formats
- 5.1. Data formats
- 5.2. JSON
- 5.3. Vector graphics with SVG format
- 5.4. Audio and video formats
- Web APIs
- 6.1. Select elements
- 6.2. Change elements
- 6.3. Dynamically create a table
- 6.4. Load data asynchronously with Ajax and the Fetch API
- 6.5. JavaScript - HTML DOM Methods
- Accessibility (ally) - Optimize websites for accessibility
- 7.1. Semantically structure web pages
- 7.2. Making forms accessible
- 7.3. Making tables accessible
- 7.4. Define language for web pages
- 7.5. Offer keyboard support
- 7.6. use subtitles
- Single Page Applications (SPA)
- 8.1. Structure of the application
- 8.2. Local state of a component
- 8.3. The life cycle of a component
- 8.4. styling of components
- 8.5. CSS classes and external stylessheets
- 8.6. Component hierarchy
- 8.7. Inverse data flow
- 8.8. Forms
- 8.9. Context API
- 8.10. Routing
- Understanding web architectures
- Programming languages on the server side
- Use Javascript on the server side - Node.js
- 11.1. A simple node.js application
- 11.2. Use built-in modules
- 11.3. Deploy static files
- 11.4. Use web framework Express
- 11.5. Express - customized web server processes the data
- Implementing web services
- 12.1. SOAP (Simple Object Access Protocol)
- 12.2. REST (Representational State Transfer)
- Store data in databases
- 13.1. using relational databases in Node.js
- Testing web applications (Testing)
- 14.1. Run automated test in JavaScript
- Deploying and hosting web applications
- 15.1. Package a web application with Docker
- Websecurity
- 16.1. Configure CORS for express
- 16.2. Configure CSP in HTML
- 16.3. Configure CSP for express
- Organize and manage web projects
- Manage web projects
- HTML stands for Hypertext Markup Language and is a markup language that allows defining the structure and semantics of web pages using elements.
- HTML elements have an opening and a closing tag
- Attributes can be used to pass additional information to an opening tag.
- Attributes consist of a name and an associated value.
- There are HTML elements that can contain other elements (child elements) and text, as well as empty elements that must not contain text or other elements.
- Web pages or HTML documents are simply text documents.
- There are many different HTML elements. Among the most important are headings, text paragraphs, lists, links, images, tables, and forms.
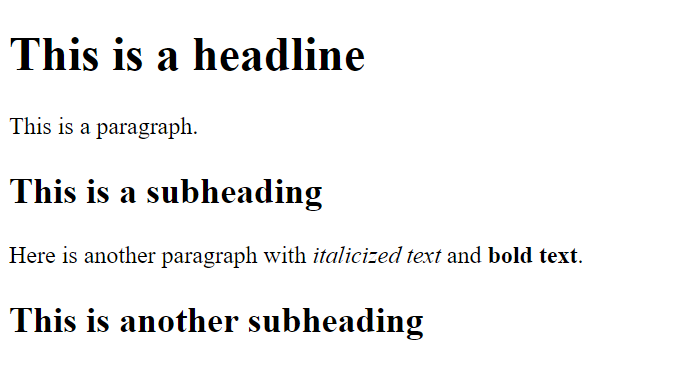
Complete Code --> 1_HTML/Part_1/index.html
   <!DOCTYPE html>
   <html>
     <head>
       <title>My first website</title>
     </head>
     <body>
       <h1>This is a headline</h1>
       <p>This is a paragraph.</p>
       <h2>This is a subheading</h2>
       <p>Here is another paragraph with <i>italicized text</i> and
     <b>bold text</b>.</p>
       <h2>This is another subheading</h2>
     </body>
   </html>
- use attributes
Complete Code --> 1_HTML/Part_2/index.html
```
  <body>
    <a href="https://github.com/BellaMrx">Here you can find my Github account.</a>
  </body>
```
Complete Code --> 1_HTML/Part_3/index.html
```
  <body>
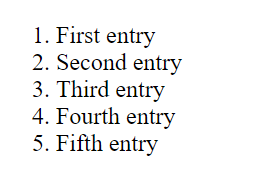
    <ol>
      <li>First entry</li>
      <li>Second entry</li>
      <li>Third entry</li>
      <li>Fourth entry</li>
      <li>Fifth entry</li>
    </ol>
  </body>
```
Complete Code --> 1_HTML/Part_4/index.html
```
  <body>
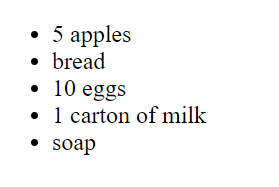
    <ul>
      <li>5 apples</li>
      <li>bread</li>
      <li>10 eggs</li>
      <li>1 carton of milk</li>
      <li>soap</li>
    </ul>
  </body>
```
Complete Code --> 1_HTML/Part_5/index.html
```
  <body>
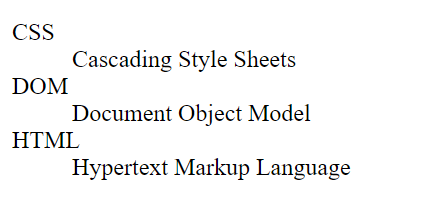
    <dl>
      <dt>CSS</dt>
      <dd>Cascading Style Sheets</dd>
      <dt>DOM</dt>
      <dd>Document Object Model</dd>
      <dt>HTML</dt>
      <dd>Hypertext Markup Language</dd>
    </dl>
  </body>
```
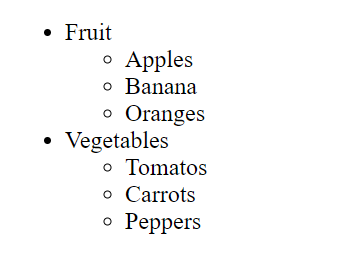
Complete Code --> 1_HTML/Part_6/index.html
```
  <body>
    <ul>
      <li>
          Fruit
          <ul>
            <li>Apples</li>
            <li>Banana</li>
            <li>Oranges</li>
          </ul>
      </li>
      <li>
          Vegetables
          <ul>
            <li>Tomatos</li>
            <li>Carrots</li>
            <li>Peppers</li>
          </ul>
      </li>
    </ul>
  </body>
```
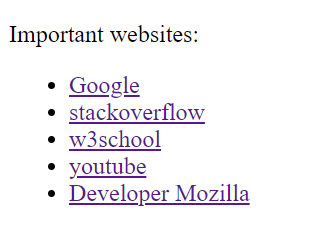
Complete Code --> 1_HTML/Part_7/index.html
```
  <body>
    <p>
      Important websites:
    <ul>
      <li>
        <a href="https://www.google.com/">
            Google
        </a>
      </li>
      <li>
        <a href="https://stackoverflow.com/">
            stackoverflow
        </a>
      </li>
      <li>
        <a href="https://www.w3schools.com/">
            w3school
        </a>
      </li>
      <li>
        <a href="https://www.youtube.com/">
            youtube
        </a>
      </li>
      <li>
        <a href="https://developer.mozilla.org/">
            Developer Mozilla
        </a>
      </li>
    </ul>
    </p>
  </body>
```
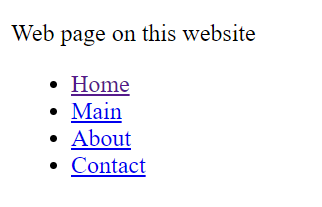
Complete Code --> 1_HTML/Part_8/index.html
```
  <body>
    <p>
      Web page on this website
    <ul>
      <li>
        <a href="index.html">Home</a>
      </li>
      <li>
        <a href="main.html">Main</a>
      </li>
      <li>
        <a href="about.html">About</a>
      </li>
      <li>
        <a href="contact.html">Contact</a>
      </li>
    </ul>
    </p>
  </body>
```
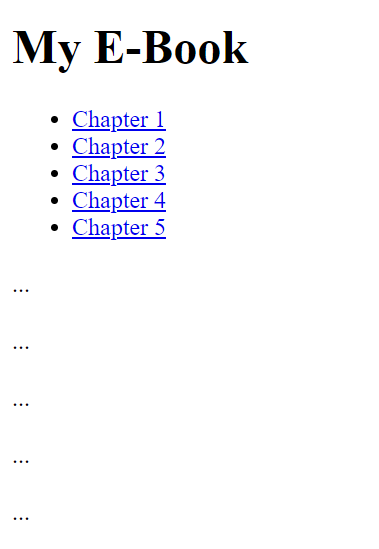
Complete Code --> 1_HTML/Part_9/index.html
```
  <body>
    <h1>My E-Book</h1>
    <ul>
      <li>
        <a href="#chapter01">Chapter 1</a>
      </li>
      <li>
        <a href="#chapter02">Chapter 2</a>
      </li>
      <li>
        <a href="#chapter03">Chapter 3</a>
      </li>
      <li>
        <a href="#chapter04">Chapter 4</a>
      </li>
      <li>
        <a href="#chapter05">Chapter 5</a>
      </li>
    </ul>
    <h2 id="chapter01"></h2>
    <p>...</p>
    <h2 id="chapter02"></h2>
    <p>...</p>
    <h2 id="chapter03"></h2>
    <p>...</p>
    <h2 id="chapter04"></h2>
    <p>...</p>
    <h2 id="chapter05"></h2>
    <p>...</p>
  </body>
```
Complete Code --> 1_HTML/Part_10/index.html
```
  <body>
    <p>
      <img src="images/profile.png" alt="my profile picture" title="Bella Mrx" />
    </p>
  </body>
```
Complete Code --> 1_HTML/Part_11/index.html
```
  <body>
    <figure>
      <img src="images/profile.png" alt="My profile picture" title="Bella Mrx" />
      <br />
      <figcaption>
        Bella Mrx profile picture
      </figcaption>
    </figure>
  </body>
```
Complete Code --> 1_HTML/Part_12/index.html
```
  <body>
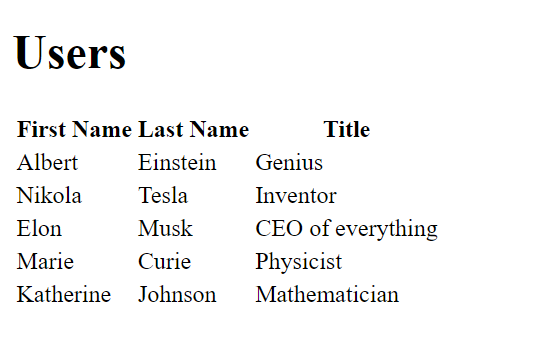
    <h1>Users</h1>
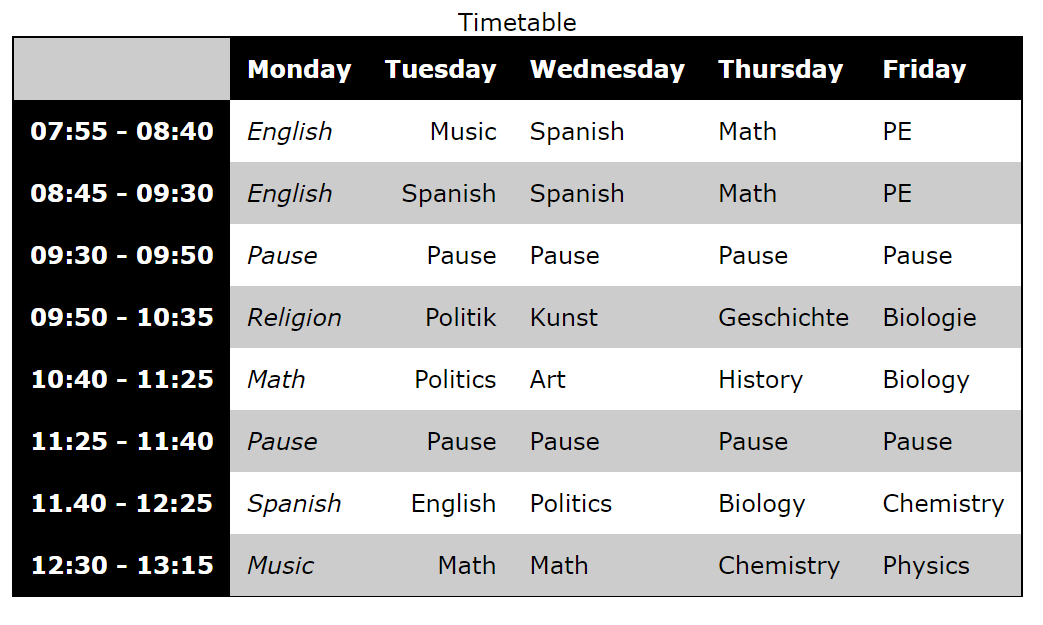
    <table>
      <tr>
        <th>First Name</th>
        <th>Last Name</th>
        <th>Title</th>
      </tr>
      <tr>
        <td>Albert</td>
        <td>Einstein</td>
        <td>Genius</td>
      </tr>
      <tr>
        <td>Nikola</td>
        <td>Tesla</td>
        <td>Inventor</td>
      </tr>
      <tr>
        <td>Elon</td>
        <td>Musk</td>
        <td>CEO of everything</td>
      </tr>
      <tr>
        <td>Marie</td>
        <td>Curie</td>
        <td>Physicist</td>
      </tr>
      <tr>
        <td>Katherine</td>
        <td>Johnson</td>
        <td>Mathematician</td>
      </tr>
    </table>
  </body>
```
Complete Code --> 1_HTML/Part_13/index.html
```
  <body>
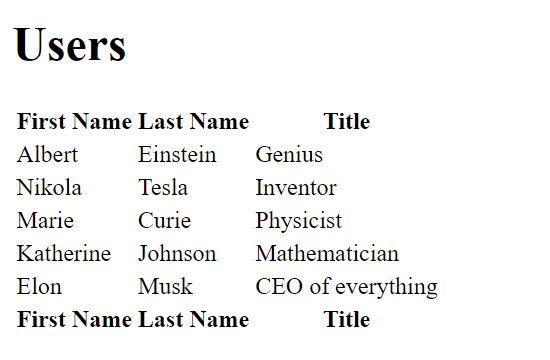
    <h1>Users</h1>
    <table>
      <thead>
        <tr>
            <th>First Name</th>
            <th>Last Name</th>
            <th>Title</th>
        </tr>
      </thead>
      <tbody>
        <tr>
            <td>Albert</td>
            <td>Einstein</td>
            <td>Genius</td>
        </tr>
        <tr>
            <td>Nikola</td>
            <td>Tesla</td>
            <td>Inventor</td>
        </tr>
        <tr>
            <td>Marie</td>
            <td>Curie</td>
            <td>Physicist</td>
        </tr>
        <tr>
            <td>Katherine</td>
            <td>Johnson</td>
            <td>Mathematician</td>
        </tr>
        <tr>
            <td>Elon</td>
            <td>Musk</td>
            <td>CEO of everything</td>
        </tr>
      </tbody>
      <tfoot>
        <tr>
            <th>First Name</th>
            <th>Last Name</th>
            <th>Title</th>
        </tr>
      </tfoot>
    </table>
  </body>
```
Complete Code --> 1_HTML/Part_14/index.html
```
  <body>
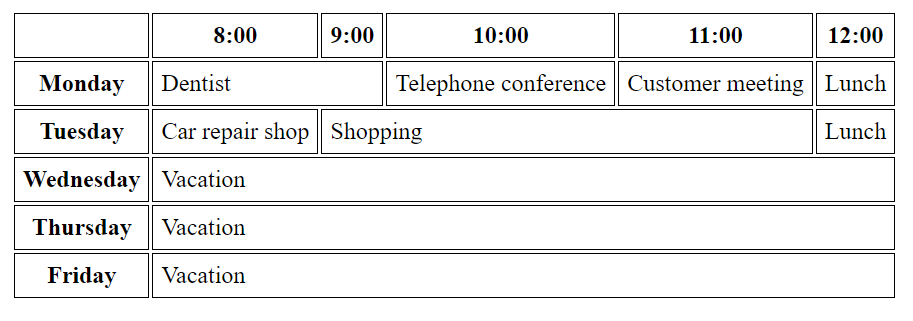
    <table>
      <tr>
        <th></th>
        <th>8:00</th>
        <th>9:00</th>
        <th>10:00</th>
        <th>11:00</th>
        <th>12:00</th>
      </tr>
      <tr>
        <th>Monday</th>
        <td colspan="2">Dentist</td>
        <td>Telephone conference</td>
        <td>Customer meeting</td>
        <td>Lunch</td>
      </tr>
      <tr>
        <th>Tuesday</th>
        <td>Car repair shop</td>
        <td colspan="3">Shopping</td>
        <td>Lunch</td>
      </tr>
      <tr>
        <th>Wednesday</th>
        <td colspan="5">Vacation</td>
      </tr>
      <tr>
        <th>Thursday</th>
        <td colspan="5">Vacation</td>
      </tr>
      <tr>
        <th>Friday</th>
        <td colspan="5">Vacation</td>
      </tr>
    </table>
  </body>
```
Complete Code --> 1_HTML/Part_15/index.html
```
  <body>
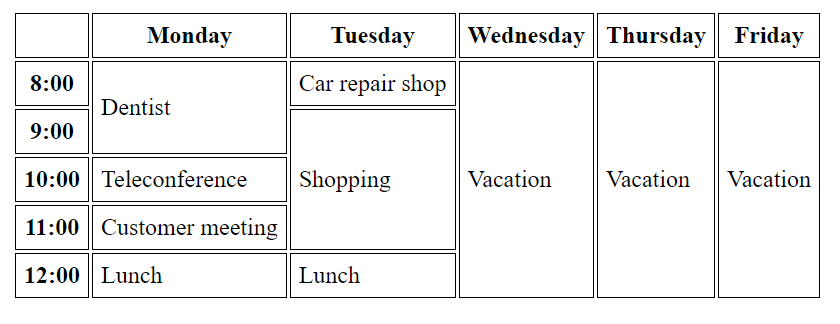
    <table>
      <tr>
        <th></th>
        <th>Monday</th>
        <th>Tuesday</th>
        <th>Wednesday</th>
        <th>Thursday</th>
        <th>Friday</th>
      </tr>
      <tr>
        <th>8:00</th>
        <td rowspan="2">Dentist</td>
        <td>Car repair shop</td>
        <td rowspan="5">Vacation</td>
        <td rowspan="5">Vacation</td>
        <td rowspan="5">Vacation</td>
      </tr>
      <tr>
        <th>9:00</th>
        <td rowspan="3">Shopping</td>
      </tr>
      <tr>
        <th>10:00</th>
        <td>Teleconference</td>
      </tr>
      <tr>
        <th>11:00</th>
        <td>Customer meeting</td>
      </tr>
      <tr>
        <th>12:00</th>
        <td>Lunch</td>
        <td>Lunch</td>
      </tr>
    </table>
  </body>
```
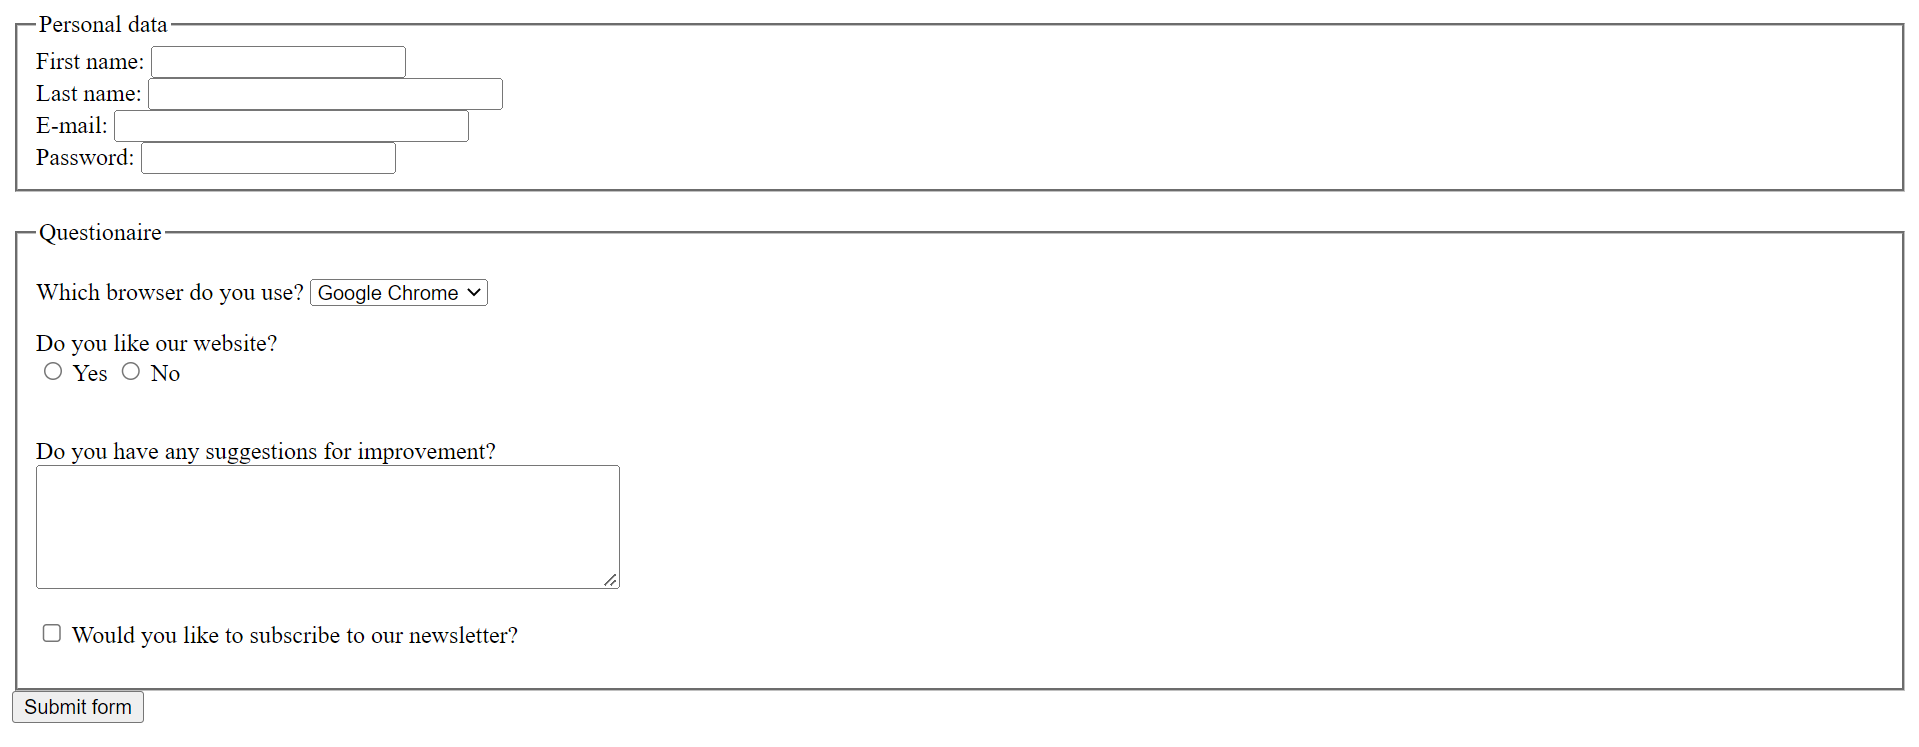
Complete Code --> 1_HTML/Part_16/index.html
```
  <body>
    <form action="/services/handle-form" method="POST">
      <fieldset>
        <legend>Personal data</legend>
        <label>
            First name:
            <input type="text" name="firstname" size="20" maxlength="50" />
        </label>
        <br />
        <label>
            Last name:
            <input type="text" name="lastname" size="30" maxlength="70" />
        </label>
        <br />
        <label>
            E-mail:
            <input type="email" name="email" size="30" maxlength="70" />
        </label>
        <br />
        <label>
            Password:
            <input type="password" name="password" size="20" maxlength="30" />
        </label>
        <br />
      </fieldset>
      <br />
      <fieldset>
        <legend>Questionaire</legend>
        <p>
            <label for="browser">
                Which browser do you use?
            </label>
            <select id="browser" name="browser">
                <option value="chrome">Google Chrome</option>
                <option value="edge">Microsoft Edge</option>
                <option value="firefox">Mozilla Firefox</option>
                <option value="opera">Opera</option>
                <option value="safari">Safari</option>
            </select>
        </p>
        <p>
            Do you like our website?
            <br />
            <label>
                <input type="radio" name="feedback" value="yes" />
                Yes
            </label>
            <label>
                <input type="radio" name="feedback" value="no" />
                No
            </label>
        </p>
        <p>
            <br />
            <label for="improvements">
                Do you have any suggestions for improvement?
            </label>
            <br />
            <textarea id="improvements" rows="5" cols="50"> </textarea>
        </p>
        <p>
            <label>
                <input type="checkbox" name="newsletter" />
                Would you like to subscribe to our newsletter?
            </label>
        </p>
      </fieldset>
      <input type="submit" value="Submit form" />
    </form>
  </body>
```
Here you can find all HTML elements and their attributes: GitHub - HTML Cheat Sheet
If you want to know more about HTML then check this out: GitHub - HTML Guide
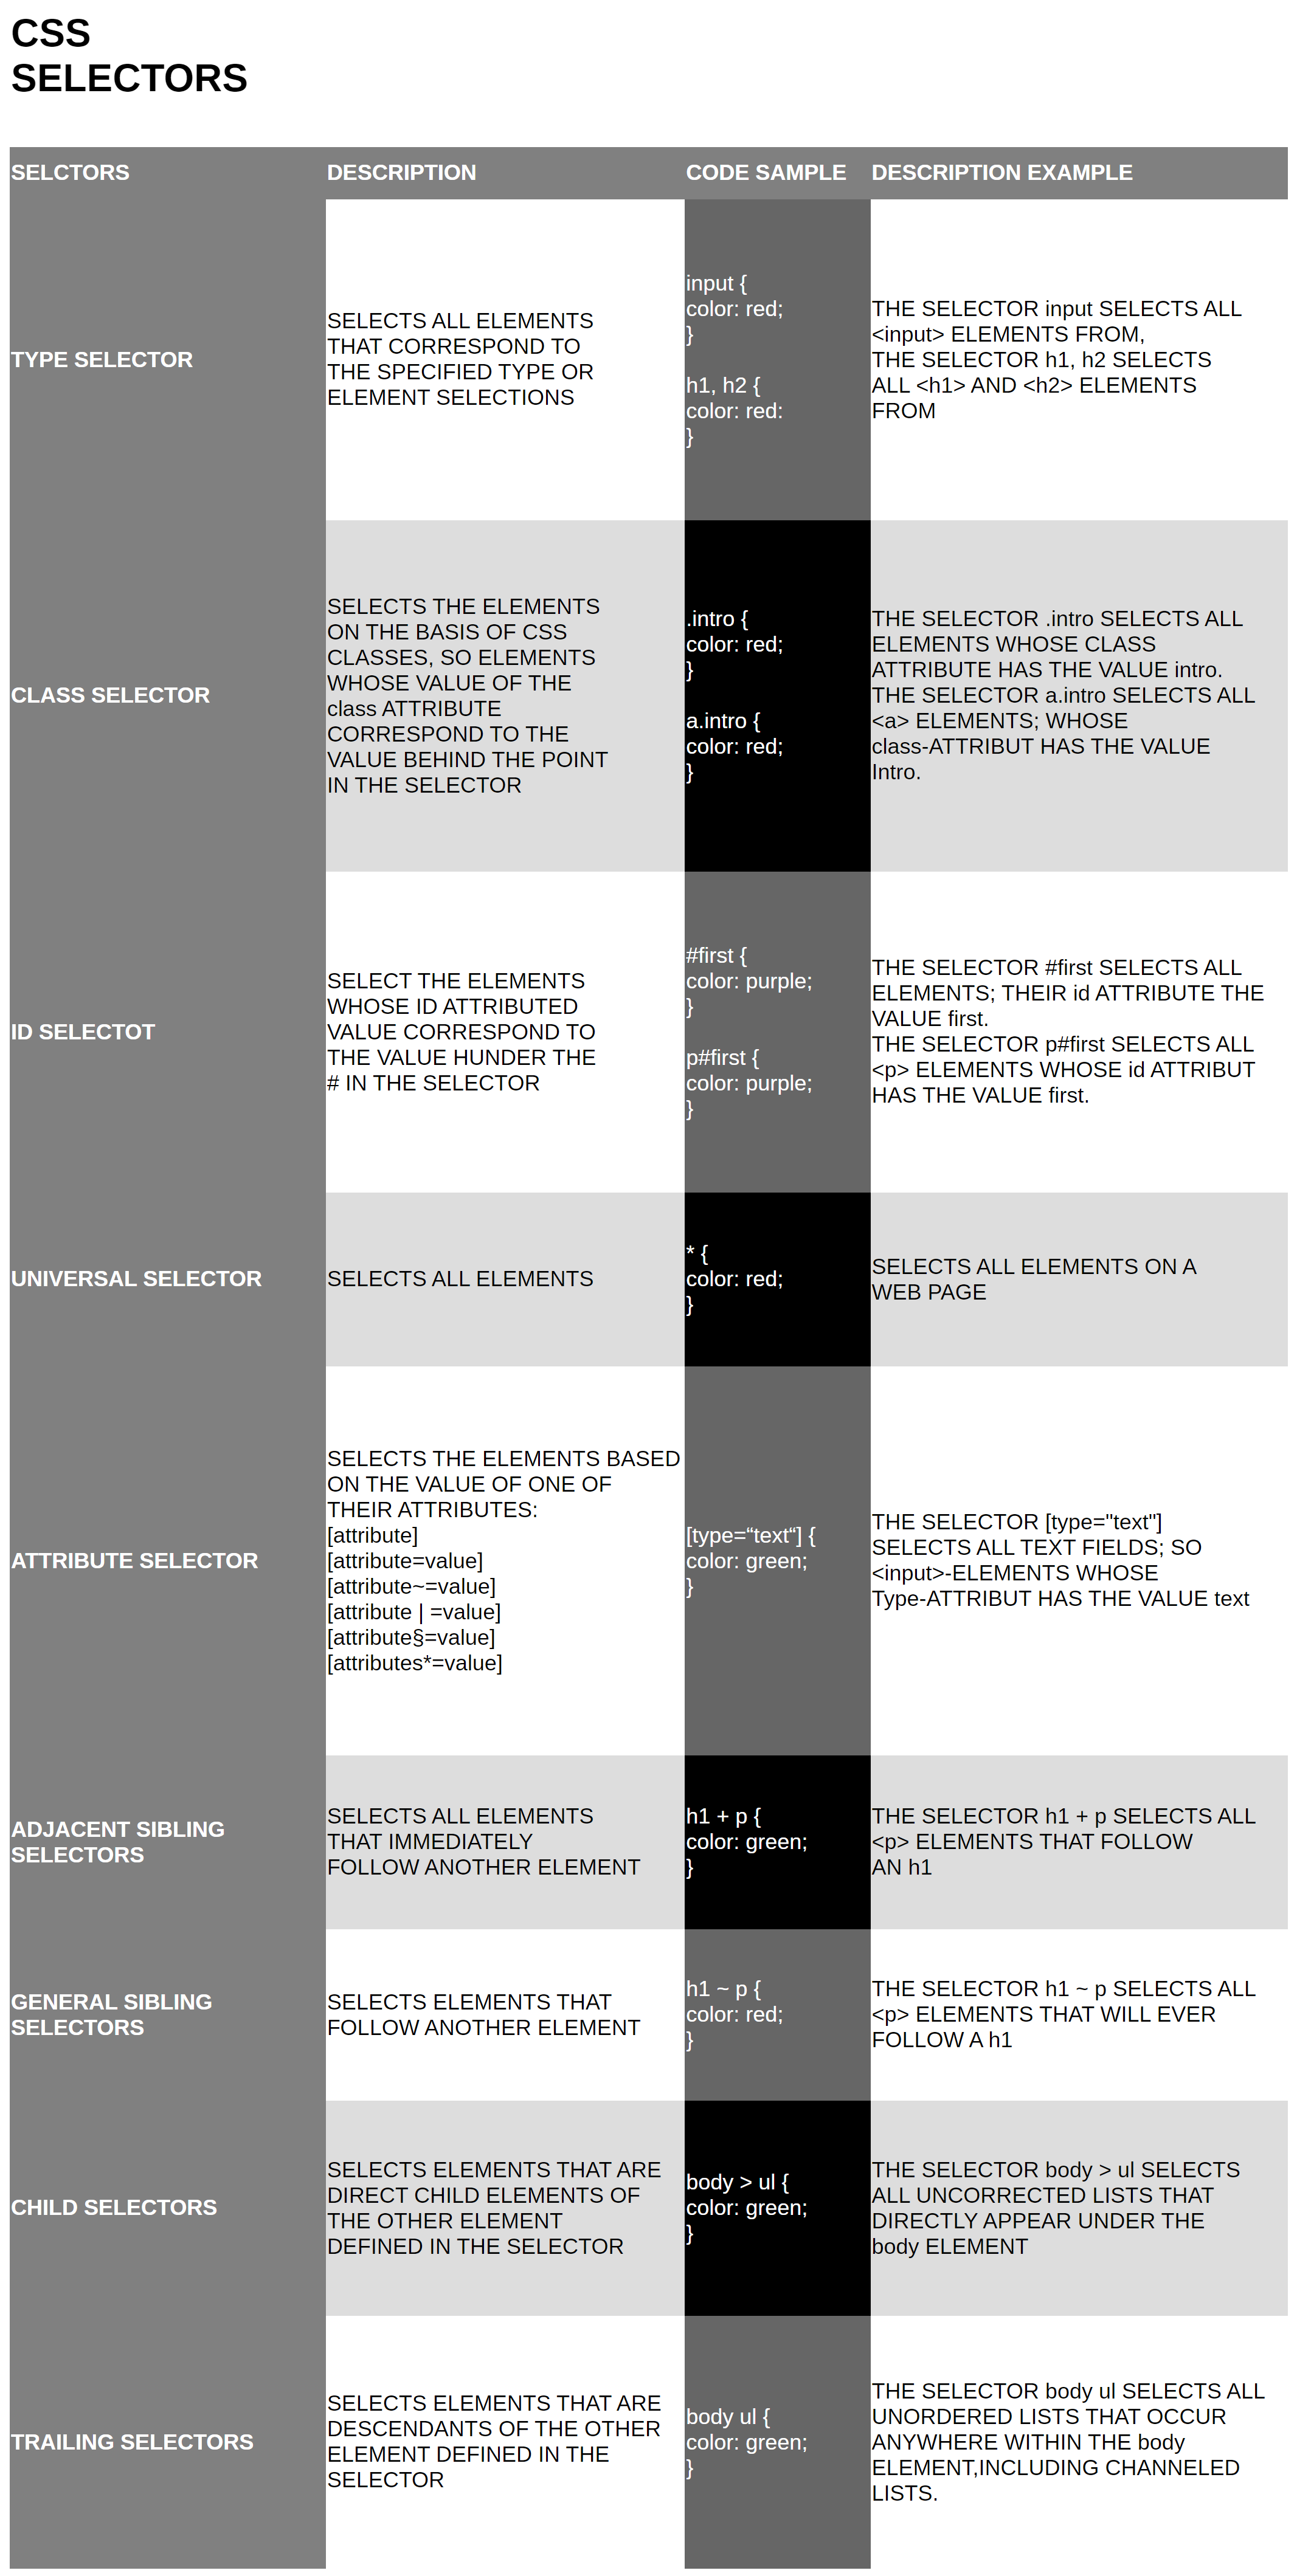
- CSS rules let you define how the content of certain HTML elements should be displayed.
- CSS rules consist of two parts: The selector defines which HTML elements the CSS rule should be applied to. The declaration defines how exactly these HTML elements are to be displayed.
- Individual declarations in turn consist of a property and a value.
- There are several ways to include CSS in an HTML document: External Stylesheet, Internal Stylesheet, Inline Styles.
- CSS can be used to design all components of a web page. For texts, for example, the font, font style, text color and alignment can be adjusted. It can also be used to design tables, lists, forms and much more.
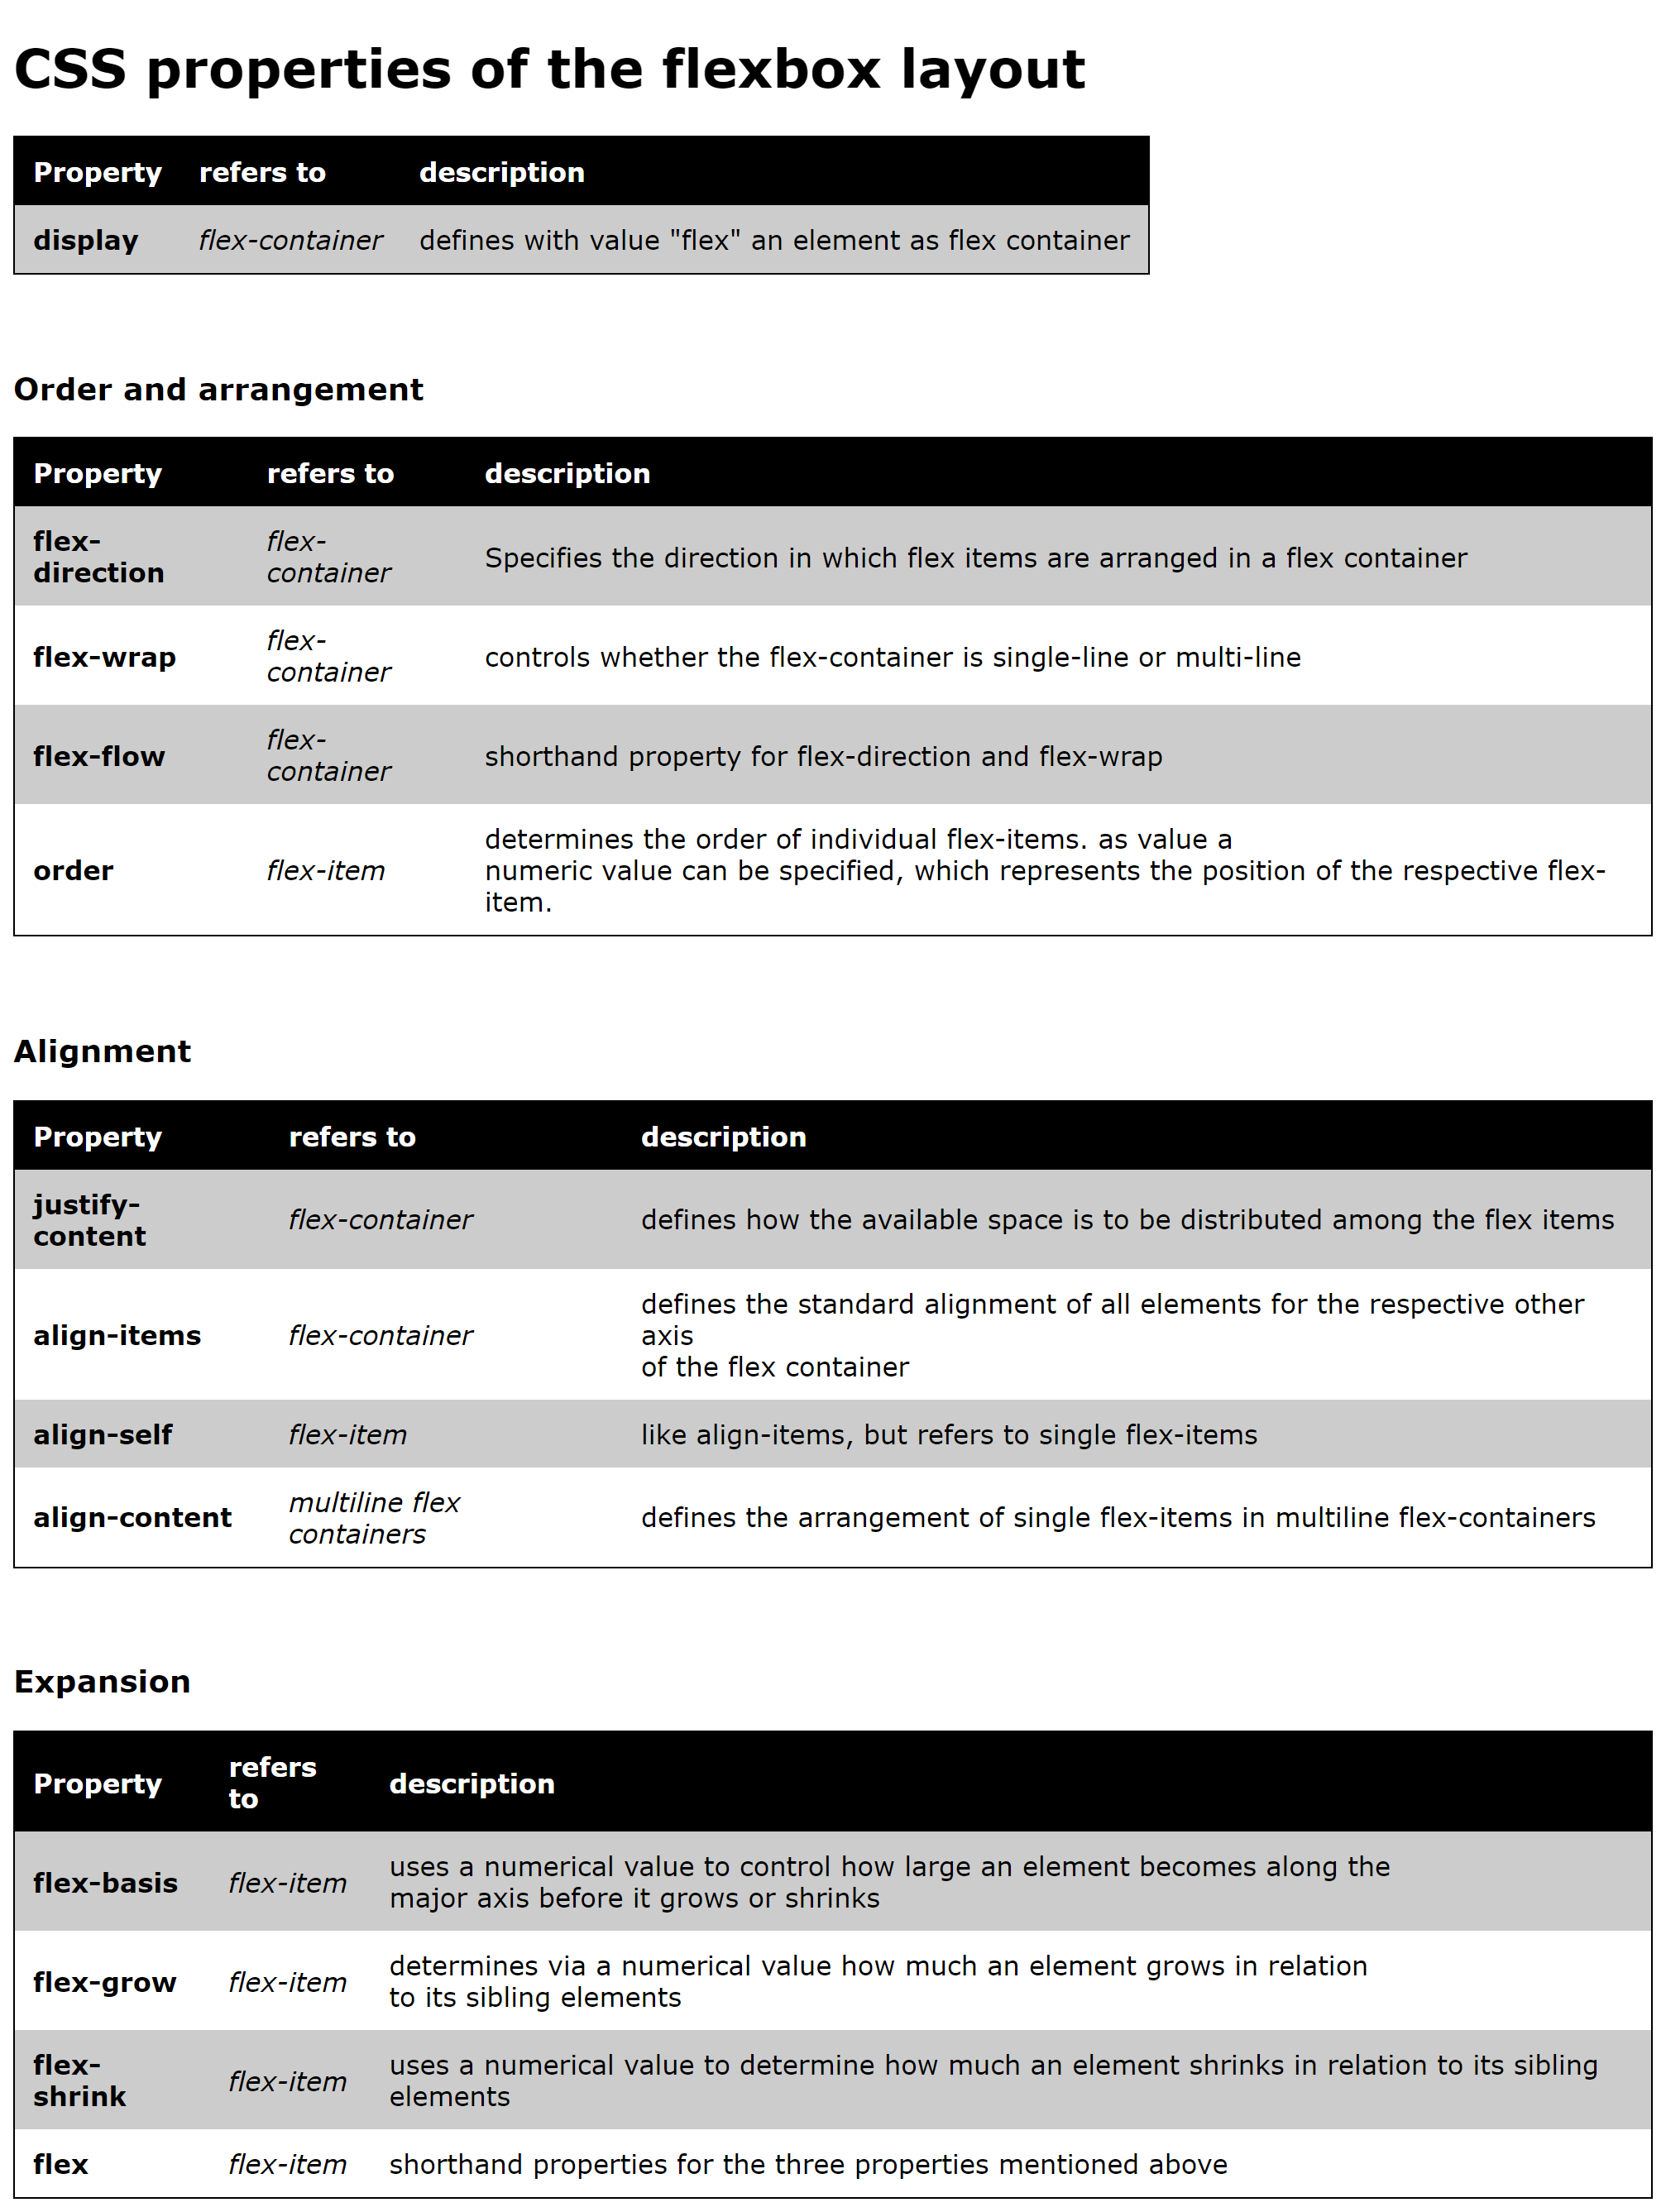
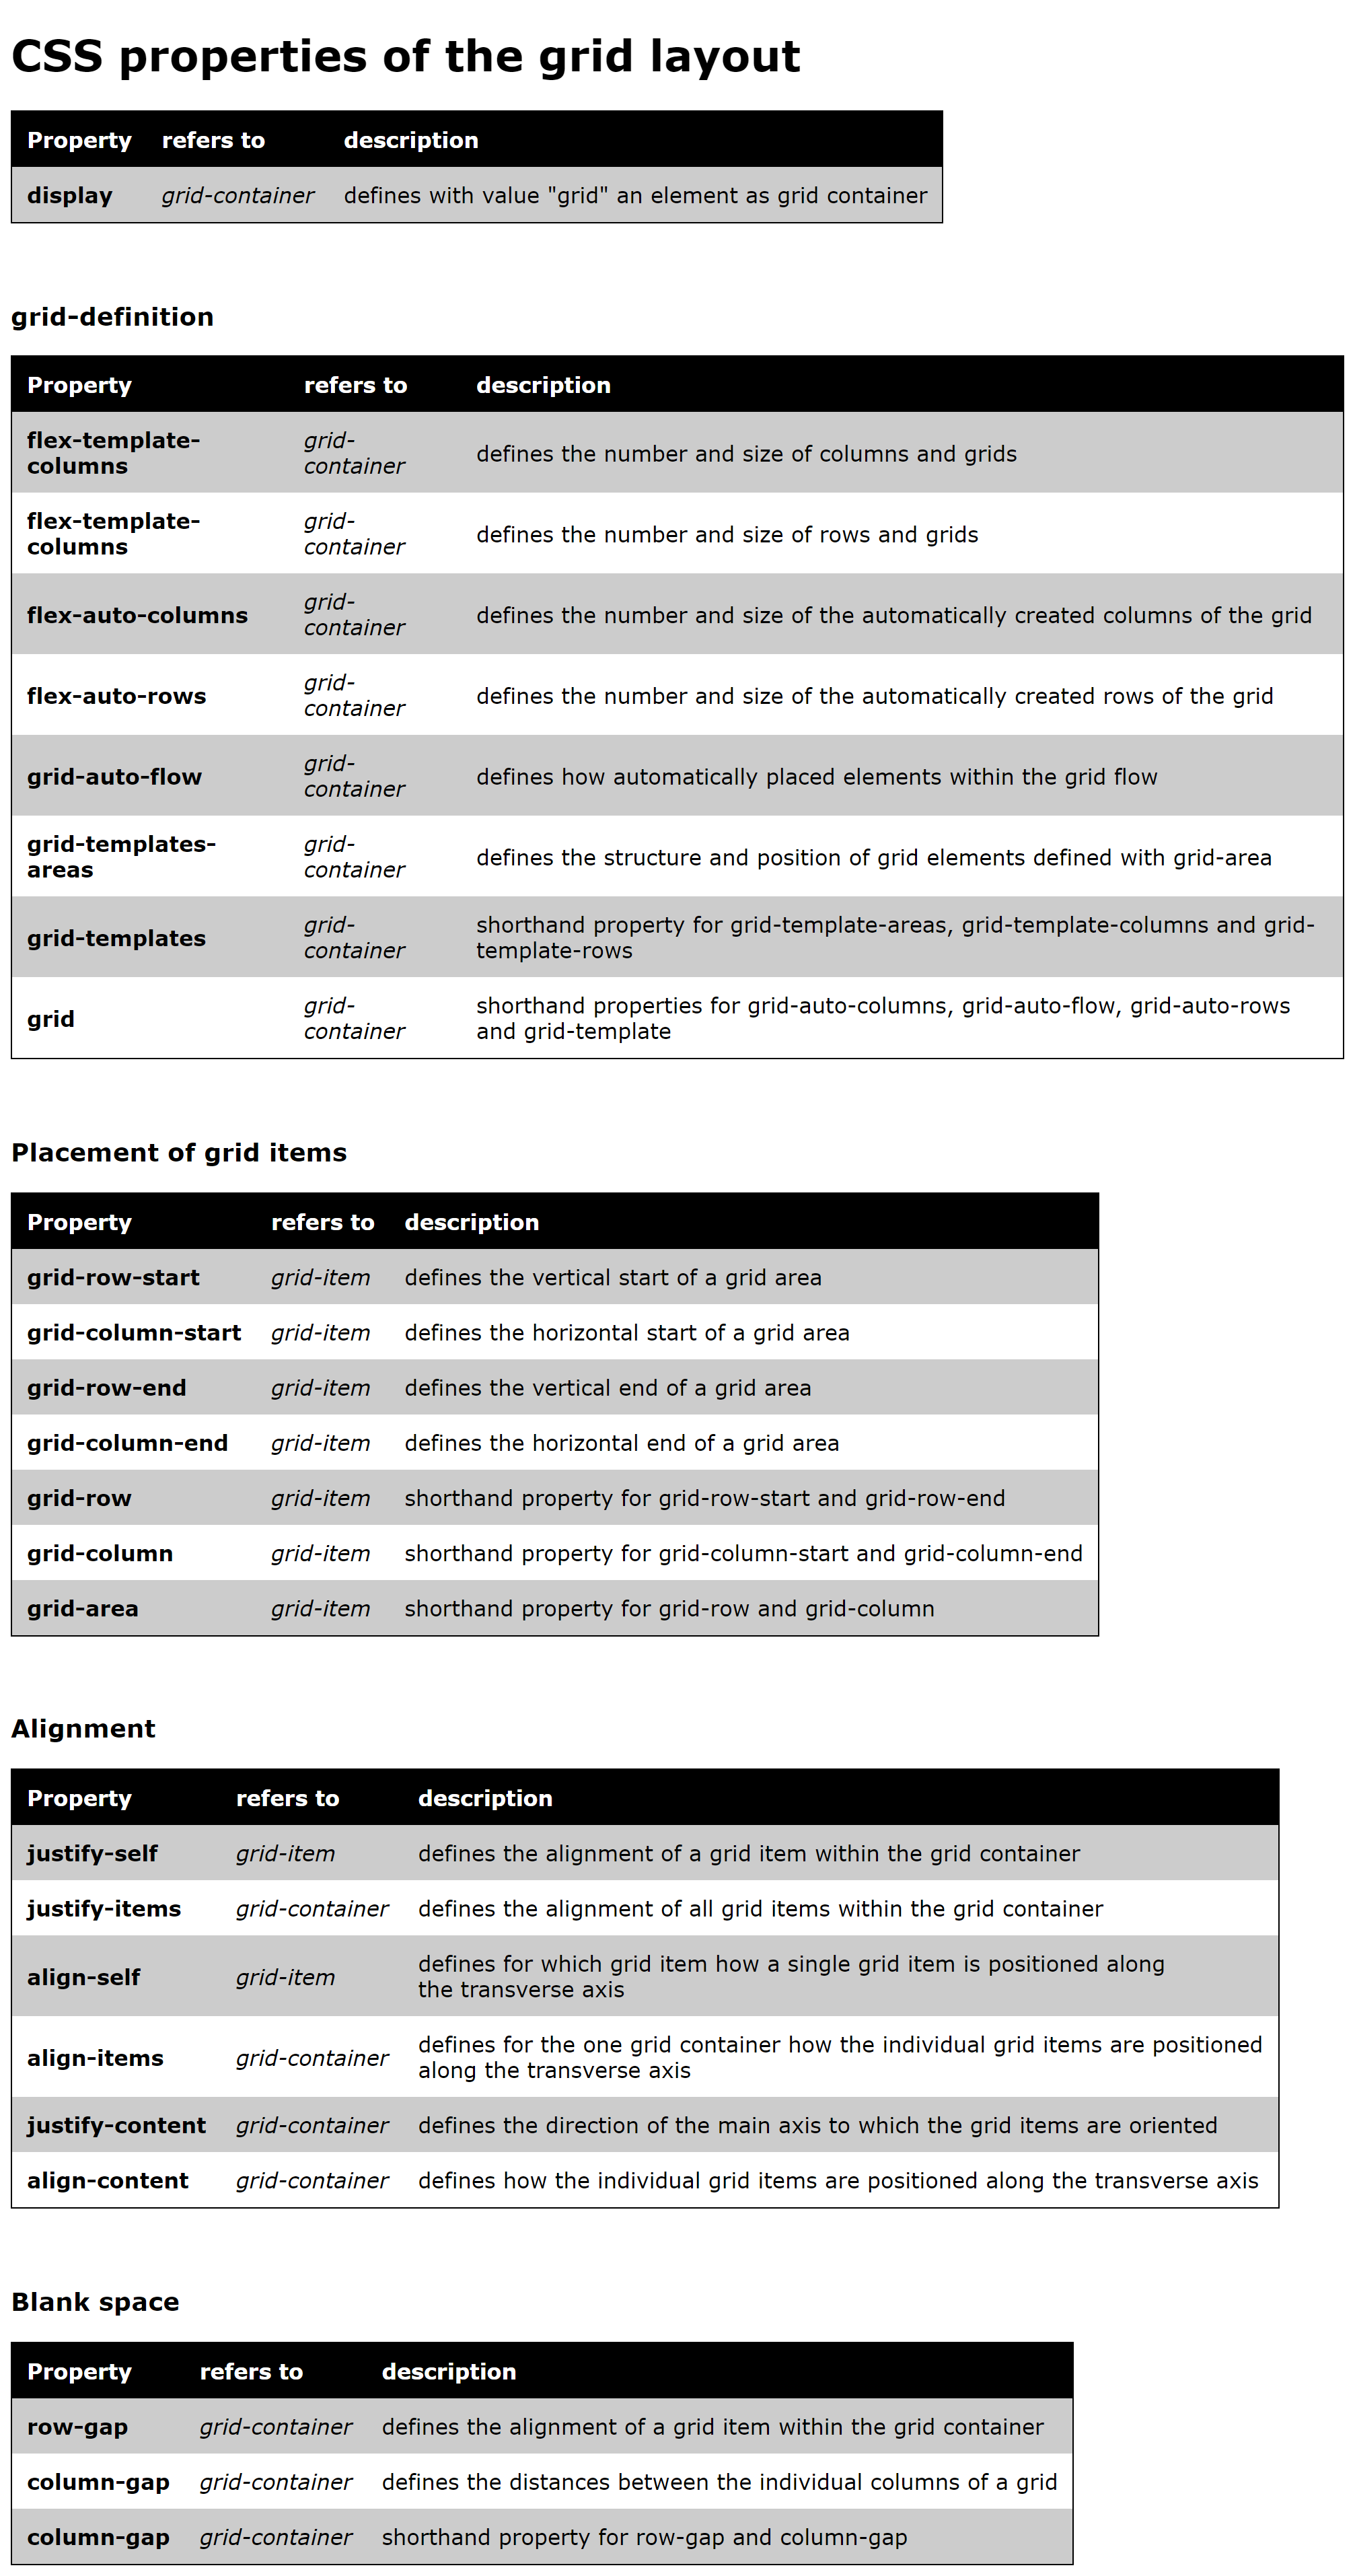
- In CSS there are several layout systems for arranging elements: Float layout, Flexbox layout, Grid layout.
Complete Code --> 2_CSS/Part_1/style.css
```
  body {
    font-family: Arial;
    background-color: darkblue;
  }

  h1 {
    color: lightgreen;
  }

  h2 {
    text-transform: uppercase;
  }
```
Example --> 2_CSS/Part_2/external.html Example --> 2_CSS/Part_2/inline.html
Complete Code --> 2_CSS/Part_2/internal.html
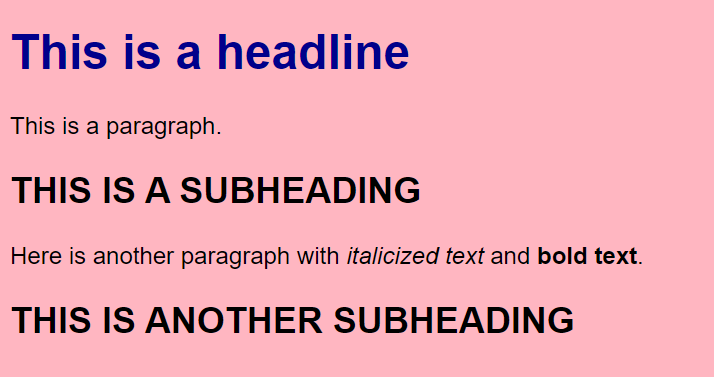
- internal:
    <head>
      <title>My first website with CSS</title>
      <style type="text/css">
        body {
          font-family: Arial;
          background-color: lightpink;
        }

        h1 {
          color: darkblue;
        }

        h2 {
          text-transform: uppercase;
        }
      </style>
    </head>
    <body>
      <h1>This is a headline</h1>
      <p>This is a paragraph.</p>
      <h2>This is a subheading</h2>
      <p>Here is another paragraph with <i>italicized text</i> and
      <b>bold text</b>.</p>
      <h2>This is another subheading</h2>
    </body>
Complete Code --> 2_CSS/Part_3/index.html
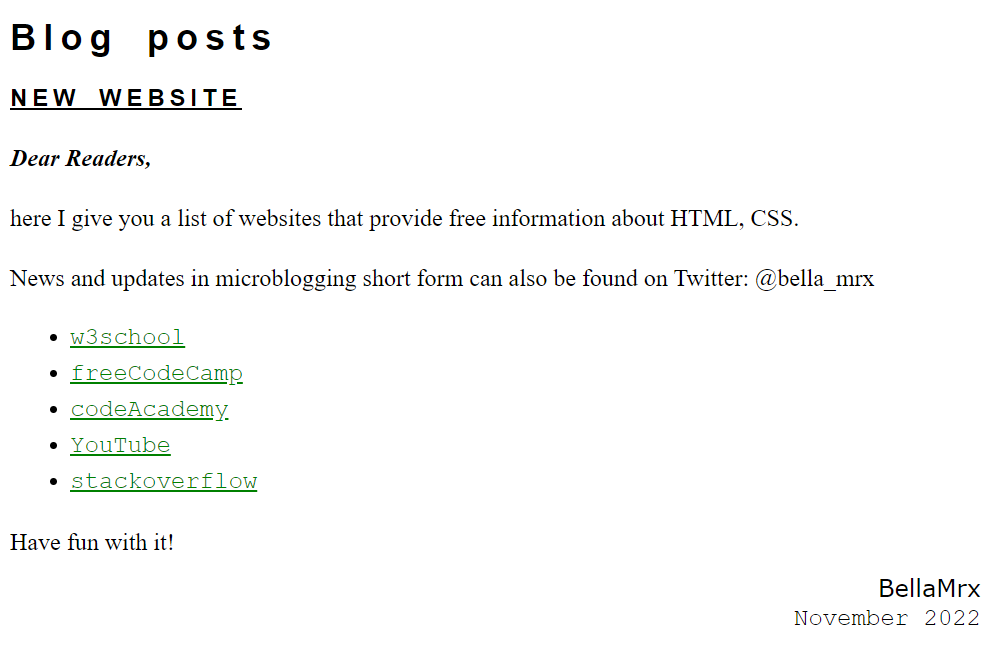
```
  body {
    font-family: 'Times New Roman', Times, serif;

    /* line height 1.5 times the normal font size  */
    line-height: 1.5em;
  }

  h1, h2 {
    font-family: Arial;

    /* character spacing 0.2 times the normal font size  */
    letter-spacing: 0.2em;

    /* character spacing 0.3 times the normal font size  */
    word-spacing: 0.3em;
  }

  h1 {
    /* 150% of the normal font size */
    font-size: 150%;
  }
```
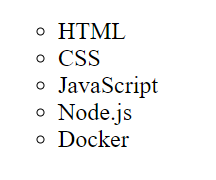
Complete Code --> 2_CSS/Part_4/index.html
```
  <style type="text/css">
    ul.web-technologies li {
      list-style-type: circle;
    }
  </style>
```
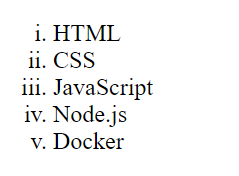
Complete Code --> 2_CSS/Part_5/index.html
```
  <head>
    <title>formatting ordered lists</title>
    <style type="text/css">
      ol.web-technologies li {
        list-style-type: lower-roman;
      }
    </style>
  </head>
  <body>
  <article>
    <p>
      <ol class="web-technologies">
        <li>
          HTML
        </li>
        <li>
          CSS
        </li>
        <li>
          JavaScript
        </li>
        <li>
          Node.js
        </li>
        <li>
          Docker
        </li>
      </ol>
    </p>
  </article>
  </body>
```
Complete Code --> 2_CSS/Part_6/index.html
```
  <head>
    <title>Use images as bullets</title>
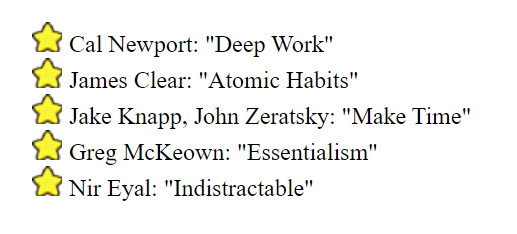
    <style type="text/css">
      ul.books {
        list-style-image: url("images/star.png");
      }
    </style>
  </head>
  <body>
  <article>
    <p>
      <ul class="books">
        <li>
          Cal Newport: "Deep Work"
        </li>
        <li>
          James Clear: "Atomic Habits"
        </li>
        <li>
          Jake Knapp, John Zeratsky: "Make Time"
        </li>
        <li>
          Greg McKeown: "Essentialism"
        </li>
        <li>
          Nir Eyal: "Indistractable"
        </li>
      </ul>
    </p>
  </article>
  </body>
```
Complete Code --> 2_CSS/Part_7/index.html
```
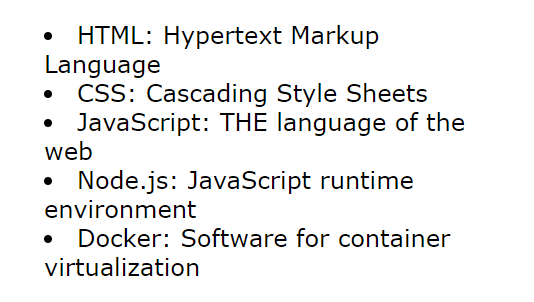
    <style type="text/css">
      ul.web-technologies {
        list-style-position: inside;
        font-family: Verdana, Geneva, Tahoma, sans-serif;
        width: 300px;
      }
    </style>
  </head>
  <body>
  <article>
    <p>
      <ul class="web-technologies">
        <li>
          HTML: Hypertext Markup Language
        </li>
        <li>
          CSS: Cascading Style Sheets
        </li>
        <li>
          JavaScript: THE language of the web
        </li>
        <li>
          Node.js: JavaScript runtime environment
        </li>
        <li>
          Docker: Software for container virtualization
        </li>
      </ul>
    </p>
  </article>
```
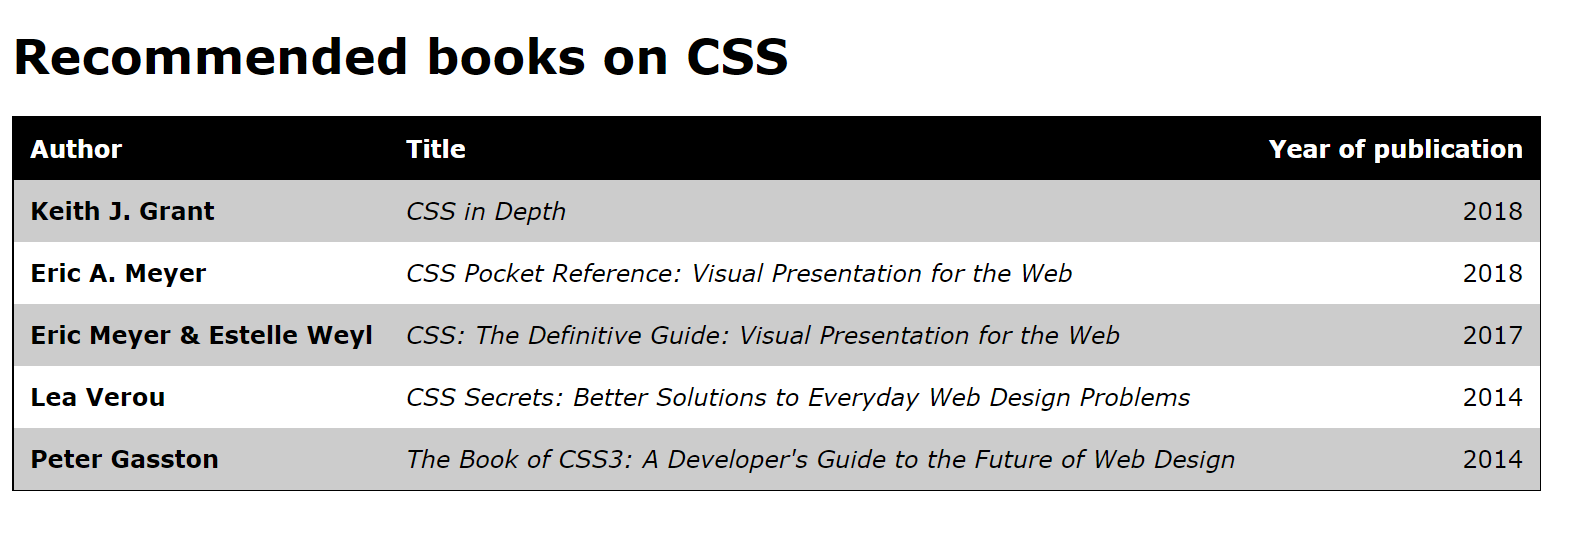
Complete Code --> 2_CSS/Part_8/index.html
```
    body {
      font-family: Verdana, sans-serif;
    }

    table {
    /* thin continuous black border */
      border: thin solid #000000;

    /* no double borders for adjacent cells */
      border-collapse: collapse;
    }

    /* table headings */
    th {
      background-color: #000000;
      color: #FFFFFF;
      text-align: left;
    }

    /* Table headings and cells */
    th, td {
      padding: 11px;
    }
```
Complete Code --> 2_CSS/Part_9/index.html
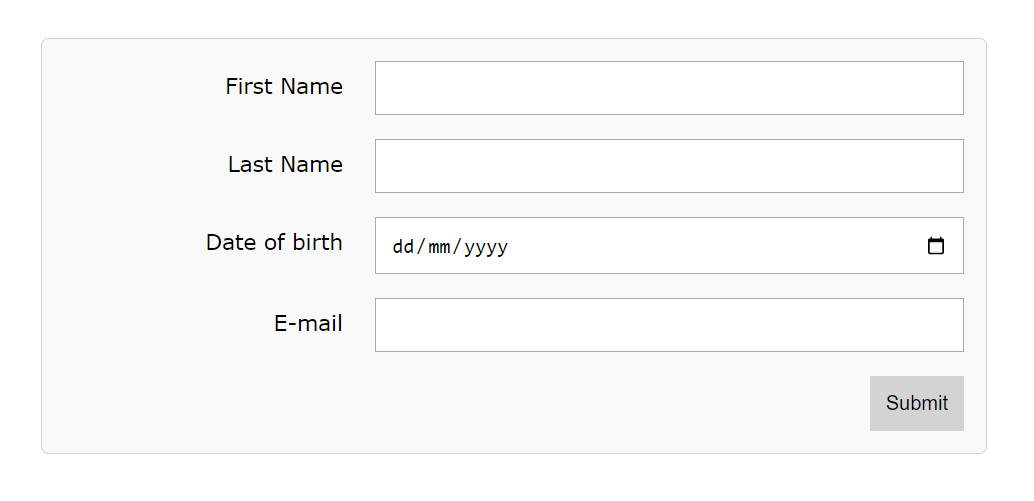
```
  label {
    float: left;
    width: 200px;
  }

  input {
    float: left;
    width: calc(100% - 200px);
  }

  button {
    float: right;
    width: calc(100% - 200px);
  }
```
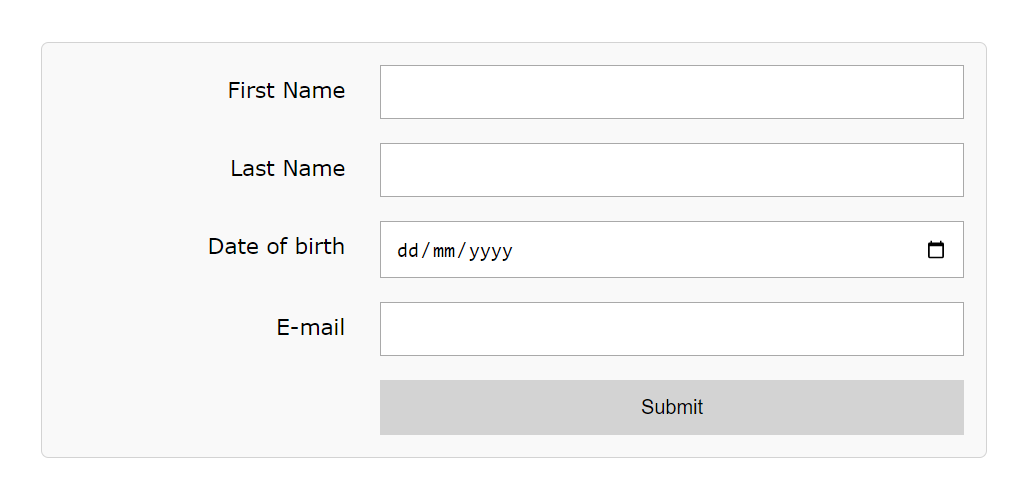
Complete Code --> 2_CSS/Part_10/index.html
```
  form {
    padding: 1em;
    background: #f9f9f9;
    border: 1px solid lightgrey;
    margin: 2rem auto auto auto;
    max-width: 600px;
    border-radius: 5px;
  }

  form input {
    margin-bottom: 1rem;
    background: white;
    border: 1px solid darkgray;
  }

  form button {
    background: lightgrey;
    padding: 0.8em;
    border: 0;
  }

  form button:hover {
    background: deepskyblue;
  }
```
Complete Code --> 2_CSS/Part_11/index.html
```
  label {
    padding: 0.5em 0.5em 0.5em 0;
    text-align: right;
    grid-column: 1 / 2;
  }

  input {
    padding: 0.7em;
  }

  input:focus {
    outline: 3px solid deepskyblue;
  }

  input,
  button {
    grid-column: 2 / 3;
  }
```
More stuff:
- JavaScript can be included in a web page in several ways. However, you should get into the habit of managing JavaScript code in separate files.
- Variables can be defined in JavaScript using the let keyword, while constants can be defined using the const keyword.
- There are different data types in JavaScript: on the one hand, the standard primitive data types for numbers, strings, and Boolean values, as well as the special data types undefined and null, and on the other hand, objects.
- In JavaScript there are different types of operations available: arithmetic operators, operators for working with strings, logical operations for working with boolean values, bitwise operators for working with bits, operators for comparing values, special operators for type checking, among others.
- You can control the control flow of a JavaScript_program using conditional statements, branching, multiple branching, counting loops, and header-controlled and footer-controlled loops.
- You can define reusable program parts via functions. Functions can be called with arguments and return a return value.
- In JavaScript there are different types of errors: syntx errors, runtime errors, logical errors.
- When an error occurs during the execution of a program, you can react to such errors: Using the keyword try you mark the statements that could potentially throw errors, using the keyword catch you define the statements that should be executed in case of an error.
- With JavaScript you have the possibility to generate HTML code dynamically.
Complete Code --> 3_JS/Part_1/script.js
```
  alert('Hello World');
```
Complete Code --> 3_JS/Part_2/index.html
```
  <body>
    <script src="scripts/script.js"></script>
  </body>
```
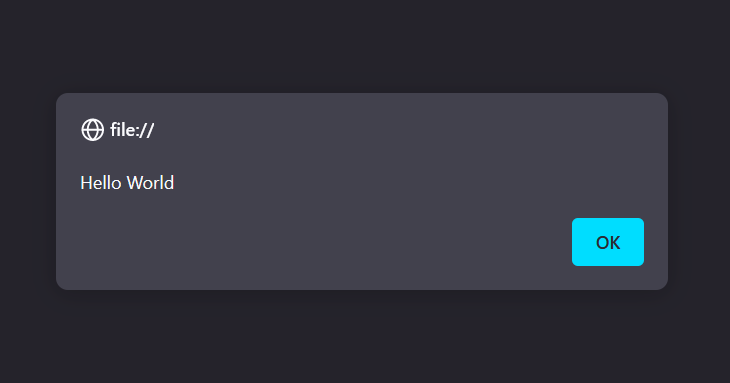
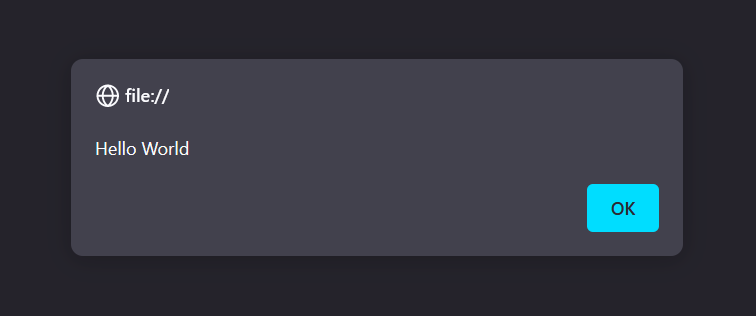
a simple hint dialog generated via JavaScript (a simple information dialog generated via JavaScript only makes sense in exceptional cases: definitions of JavaScript directly in an HTML file)
Complete Code --> 3_JS/Part_3/index.html
```
  <body>
  <script>
     alert('Hello World');
  </script>
  </body>
```
Complete Code --> 3_JS/Part_4/script.js
```
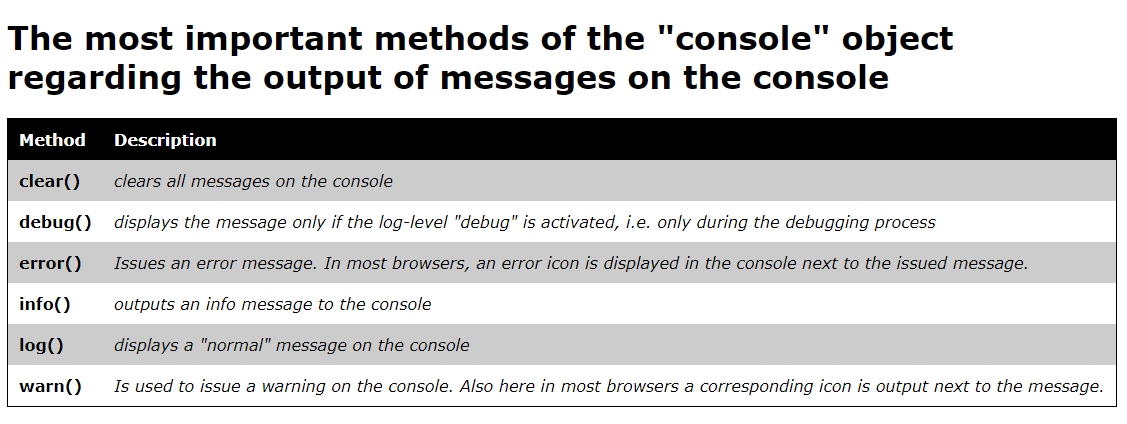
  console.log('Hello World');
```
Complete Code --> 3_JS/Part_5/script.js
```
  console.log('Hello world'); // output a normal message
  console.debug('Hello world'); // output a debug message
  console.error('Hello world'); // output an error message
  console.info('Hello world'); // output an info message
  console.warn('Hello world'); // output a warning message
```
Complete Code --> 3_JS/Part_6/script.js
```
  let firstName;                  // variable declaration
  firstName = 'John';             // Variable initialization
  let lastName = 'Doe';           // combined variable declaration
                                  // and variable initialization
  console.log(firstName);         // "John"; // "John".
  console.log(lastName);          // "Doe".
```
Complete Code --> 3_JS/Part_7/script.js
```
  const MAXIMUM = 5000;
```
Complete Code --> 3_JS/Part_8/script.js
```
  const number1 = 5; // Definition of an integer number
  const number2 = 0.5; // Definition of a decimal number
  const number3 = -22; // Definition of a negative integer
  const number4 = -0.9; // Definition of a negative decimal number
```
Complete Code --> 3_JS/Part_9/script.js
```
  const firstName = 'John';        // single quotes
  const lastName = "Doe";         // double quotes
  const age = "22";               // not a number, but a character string
  // const street = 'Milky Way";  // syntax error: mixed form
```
Complete Code --> 3_JS/Part_10/script.js
```
  const isLoggedIn = true;
  const isAdmin = false;
```
Complete Code --> 3_JS/Part_11/script.js
```
  let passwordTooShort = password.length < 10;
  let message = '';
  if (passwordTooShort) {
    message = 'The password must contain at least 10 characters.';
  } else {
    message = 'The password meets all conditions.';
  }
  document.getElementById('info').textContent = message;
```
Complete Code --> 3_JS/Part_12/script.js
```
  let passwordTooShort = password.length < 10;
  let passwordTooLong = password.length > 50;
  let message = '';
  if (passwordTooShort) {
    message = 'The password must contain at least 10 characters.';
  } else if (passwordTooLong) {
    message = 'The password may contain a maximum of 50 characters.';
  } else {
    message = 'The password meets all conditions.';
  }
  document.getElementById('info').textContent = message;
```
Complete Code --> 3_JS/Part_13/script.js
```
  const testResultElement = document.getElementById('testResult');

  const testResult = 0;
  let icon = null;

  switch (testResult) {
    case 0:
      icon = 'pass.png';
      break;
    case 1:
      icon = 'info.png';
      break;
    case 2:
      icon = 'warning.png';
      break;
    case 3:
      icon = 'error.png';
      break;
    default:
      icon = 'unknown.png';
  }
  testResultElement.src = 'img/' + icon;
```
Complete Code --> 3_JS/Part_14/script.js
```
  for (let i = 1; i <= 10; i++) {
    console.log(i);
  }
```
Complete Code --> 3_JS/Part_15/script.js
```
  let i = 1;            // Initialization
  while (i <= 10) {     // condition
    console.log(i);     // statement
    i++;                // increment
  }
```
Complete Code --> 3_JS/Part_16/script.js
```
  let i = 1; do {       // Initialization
    console.log(i);     // statement
    i++;                // increment
  } while (i <= 10)     // condition
```
Complete Code --> 3_JS/Part_17/script.js
```
  function printNumbersFrom1To10() {
    for (let i = 1; i <= 10; i++) {
      console.log(i);
    }
  }
```
Complete Code --> 3_JS/Part_18/script.js
```
  const printNumbersFrom1To10 = function() {
    for (let i = 1; i <= 10; i++) {
      console.log(i);
    }
  }
```
Complete Code --> 3_JS/Part_19/script.js
```
  const printNumbersFrom1To10 = () => {
    for (let i = 1; i <= 10; i++) {
      console.log(i);
    }
  }
```
Complete Code --> 3_JS/Part_20/script.js
```
  const printNumbersFrom1To10 = () => {
      for (let i = 1; i <= 10; i++) {
        console.log(i);
      }
  }
  printNumbersFrom1To10();        // calls the function
```
Complete Code --> 3_JS/Part_21/script.js
```
  function printNumbersFromXToY(x, y) {
      for (let i = x; i <= y; i++) {
          console.log(i);
      }
  }
  printNumbersFromXToY(1, 10);
  printNumbersFromXToY(1, 100);
  printNumbersFromXToY(100, 1000);
```
Complete Code --> 3_JS/Part_22/script.js
```
  function sum(x, y) {
      let result = x + y;
      return result;
  }
  const z = sum(5, 6);
  console.log(z);
```
Complete Code --> 3_JS/Part_23/script.js
```
  function checkPassword(password) {
      if (password.length < 10) {
          throw new Error('The password must contain at least 10 characters.');
      } else if (password.length > 50) {
          throw new Error('The password must contain at least 10 characters.');
      }
      return 'The password meets all conditions';
  }
  try {
      const password = 'simple';
      checkPassword(password);
      const message = 'The password meets all conditions.'; // ... further processing here ...
  } catch (error) {
      console.error(error)
  }
```
Complete Code --> 3_JS/Part_24/script.js
```
  const book = {
      title: 'Christmas is bad',
      Preis: 109.90,
      author: 'Grinch',
      isbn: '111-1-1111-1111-1',
      printDescription() {
          console.log(`${this.author}: ${this.title}`);
      }
  }
  console.log(book.title); // "Christmas is bad"
  console.log(buch.preis); // 109,90
  console.log(buch.autor); // "Grinch"
  console.log(buch.isbn); // "111-1-1111-1111-1"
  book.printDescription(); // "Grinch:Christmas is bad."
```
Complete Code --> 3_JS/Part_25/script.js
```
  // create an array with specified values
  const names = ['Max', 'John', 'Peter'];
  // access to the elements of an array
  console.log(names[0]); // "Max"
  console.log(names[1]); // "John"
  console.log(names[2]); // "Peter"
  // create an empty array
  const colors = [];
  // adding values
  colors.push('red');
  colors.push('green');
  colors.push('blue');
  // adding values via index notation
  colors[3] = 'orange';
  colors[4] = 'yellow';
  console.log(colors); // ["red", "green", "blue", "orange", "yellow"]
```
Complete Code --> 3_JS/Part_26/script.js
```
  const colors = [];
  colors.push('red');
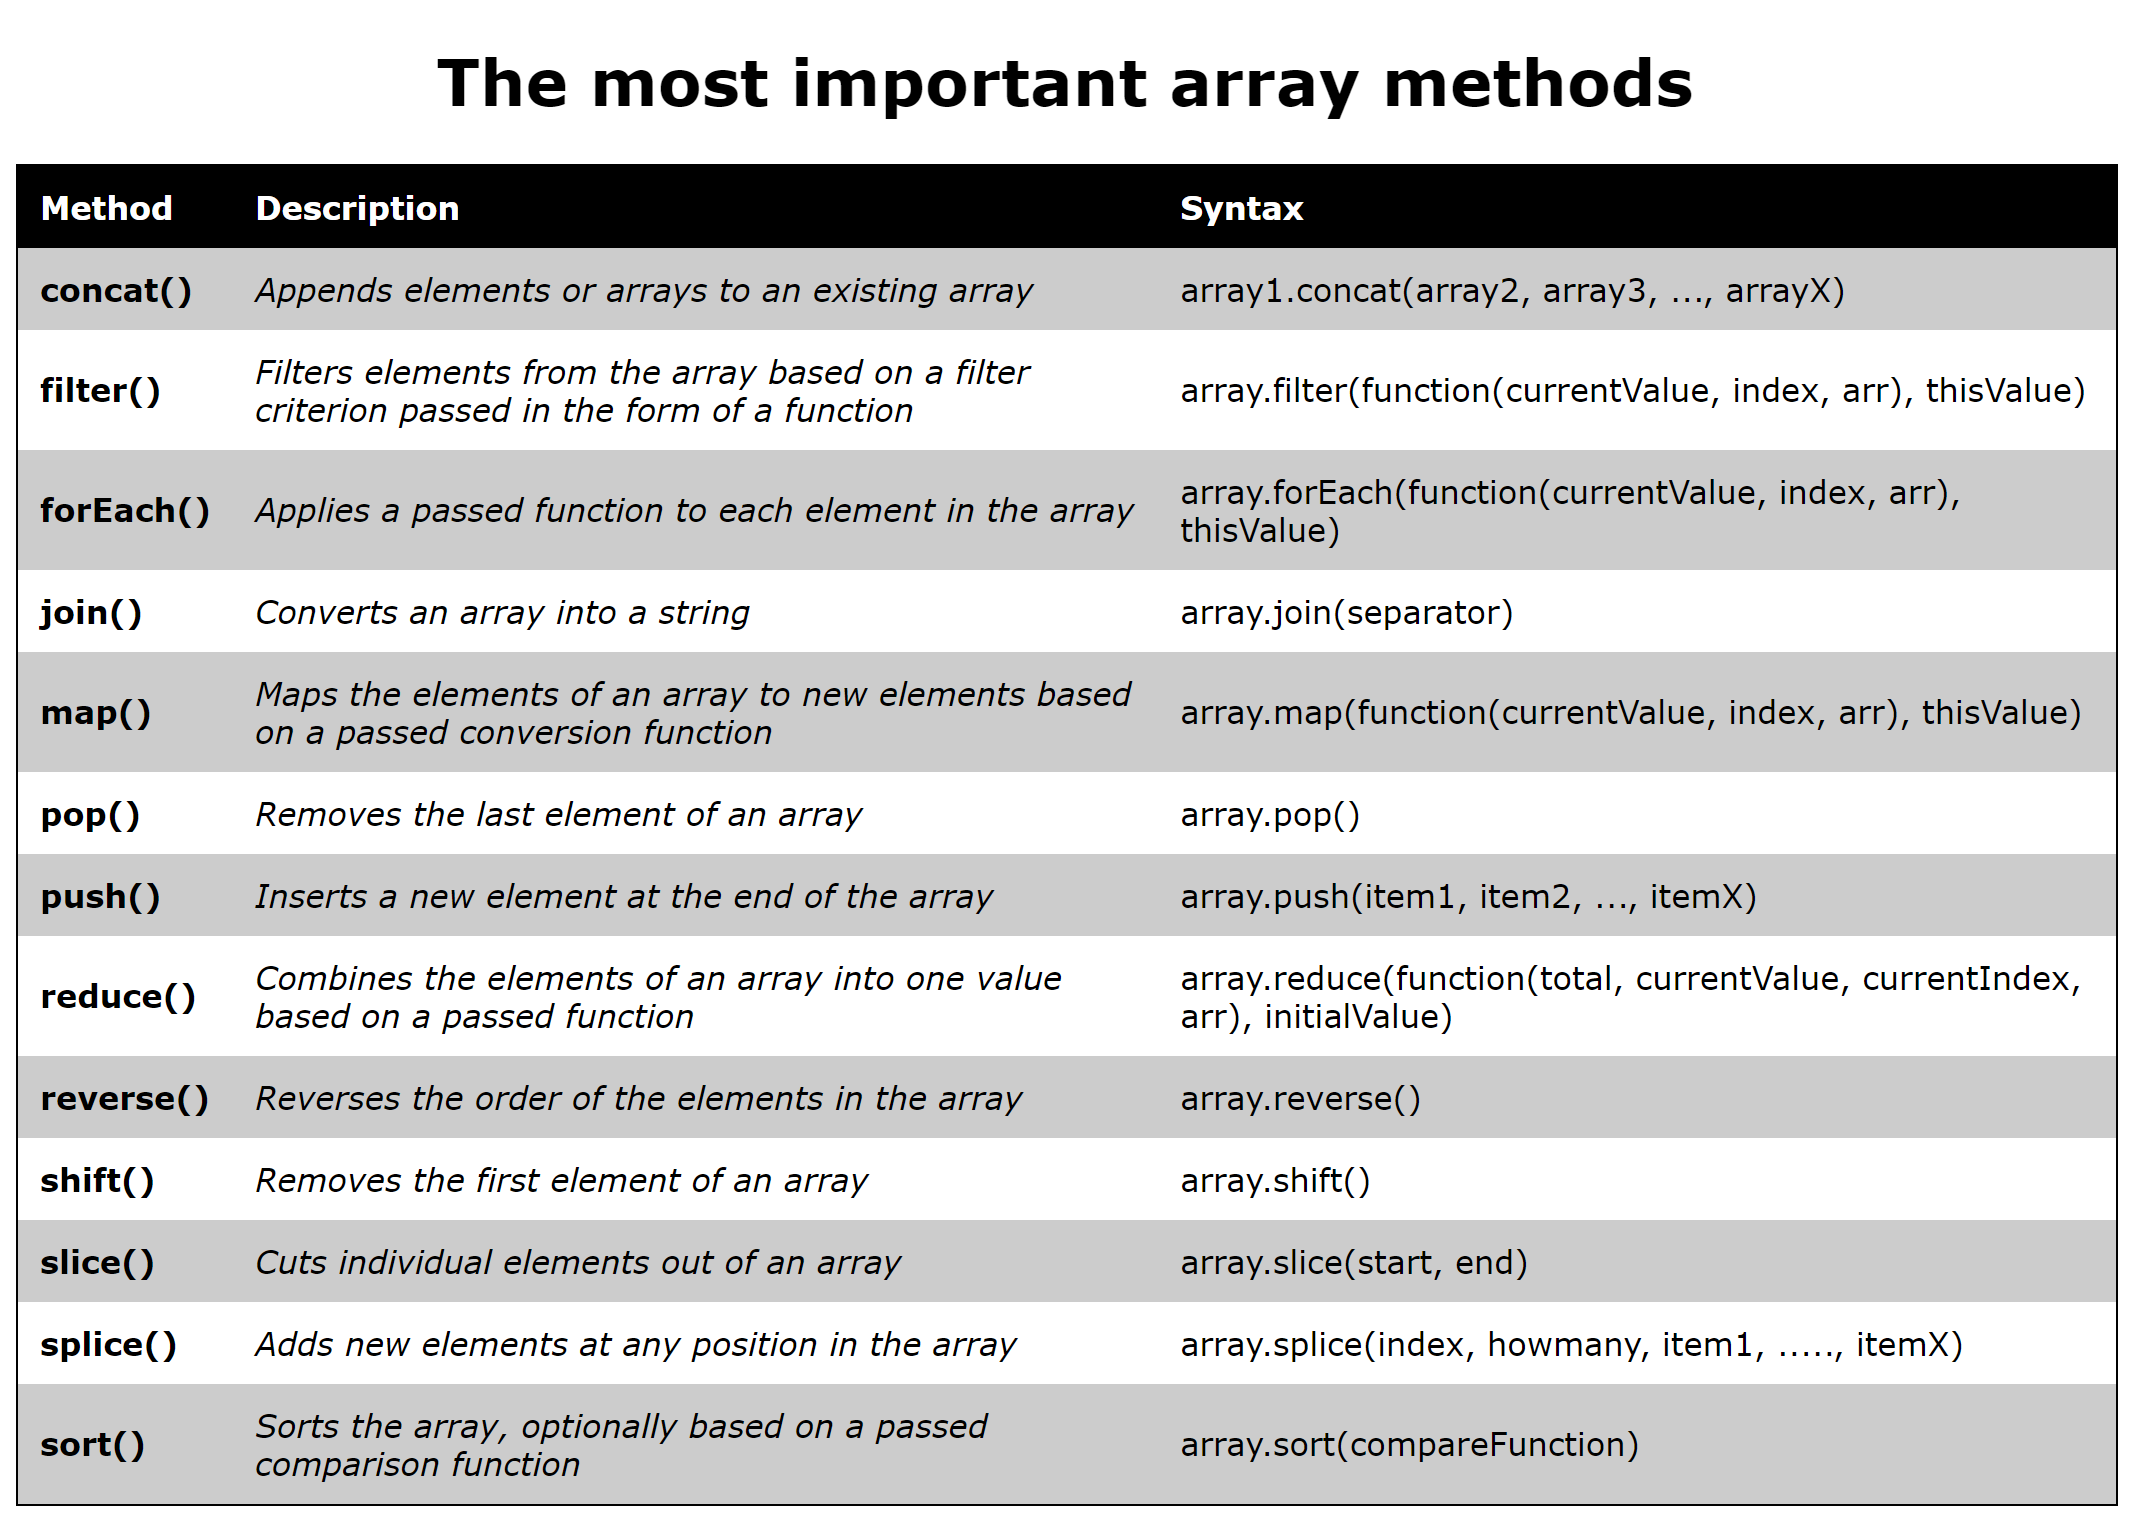
  colors.push('green');
  colors.push('blue');

  // iteration over an array
  for (let i = 0; i < colors.length; i++) {
      console.log(colors[i]);
  }
```
More stuff:
- HTTP, the Hypertext Transfer Protocol is a unidirectional client/server protocol where the HTTP client makes HTTP requests to the HTTP server and the server responds with an HTTP response.
- Using headers, it can pass additional meta-information to HTTP requests and HTTP responses.
- HTTP methods define what actions should be performed on the HTTP server.
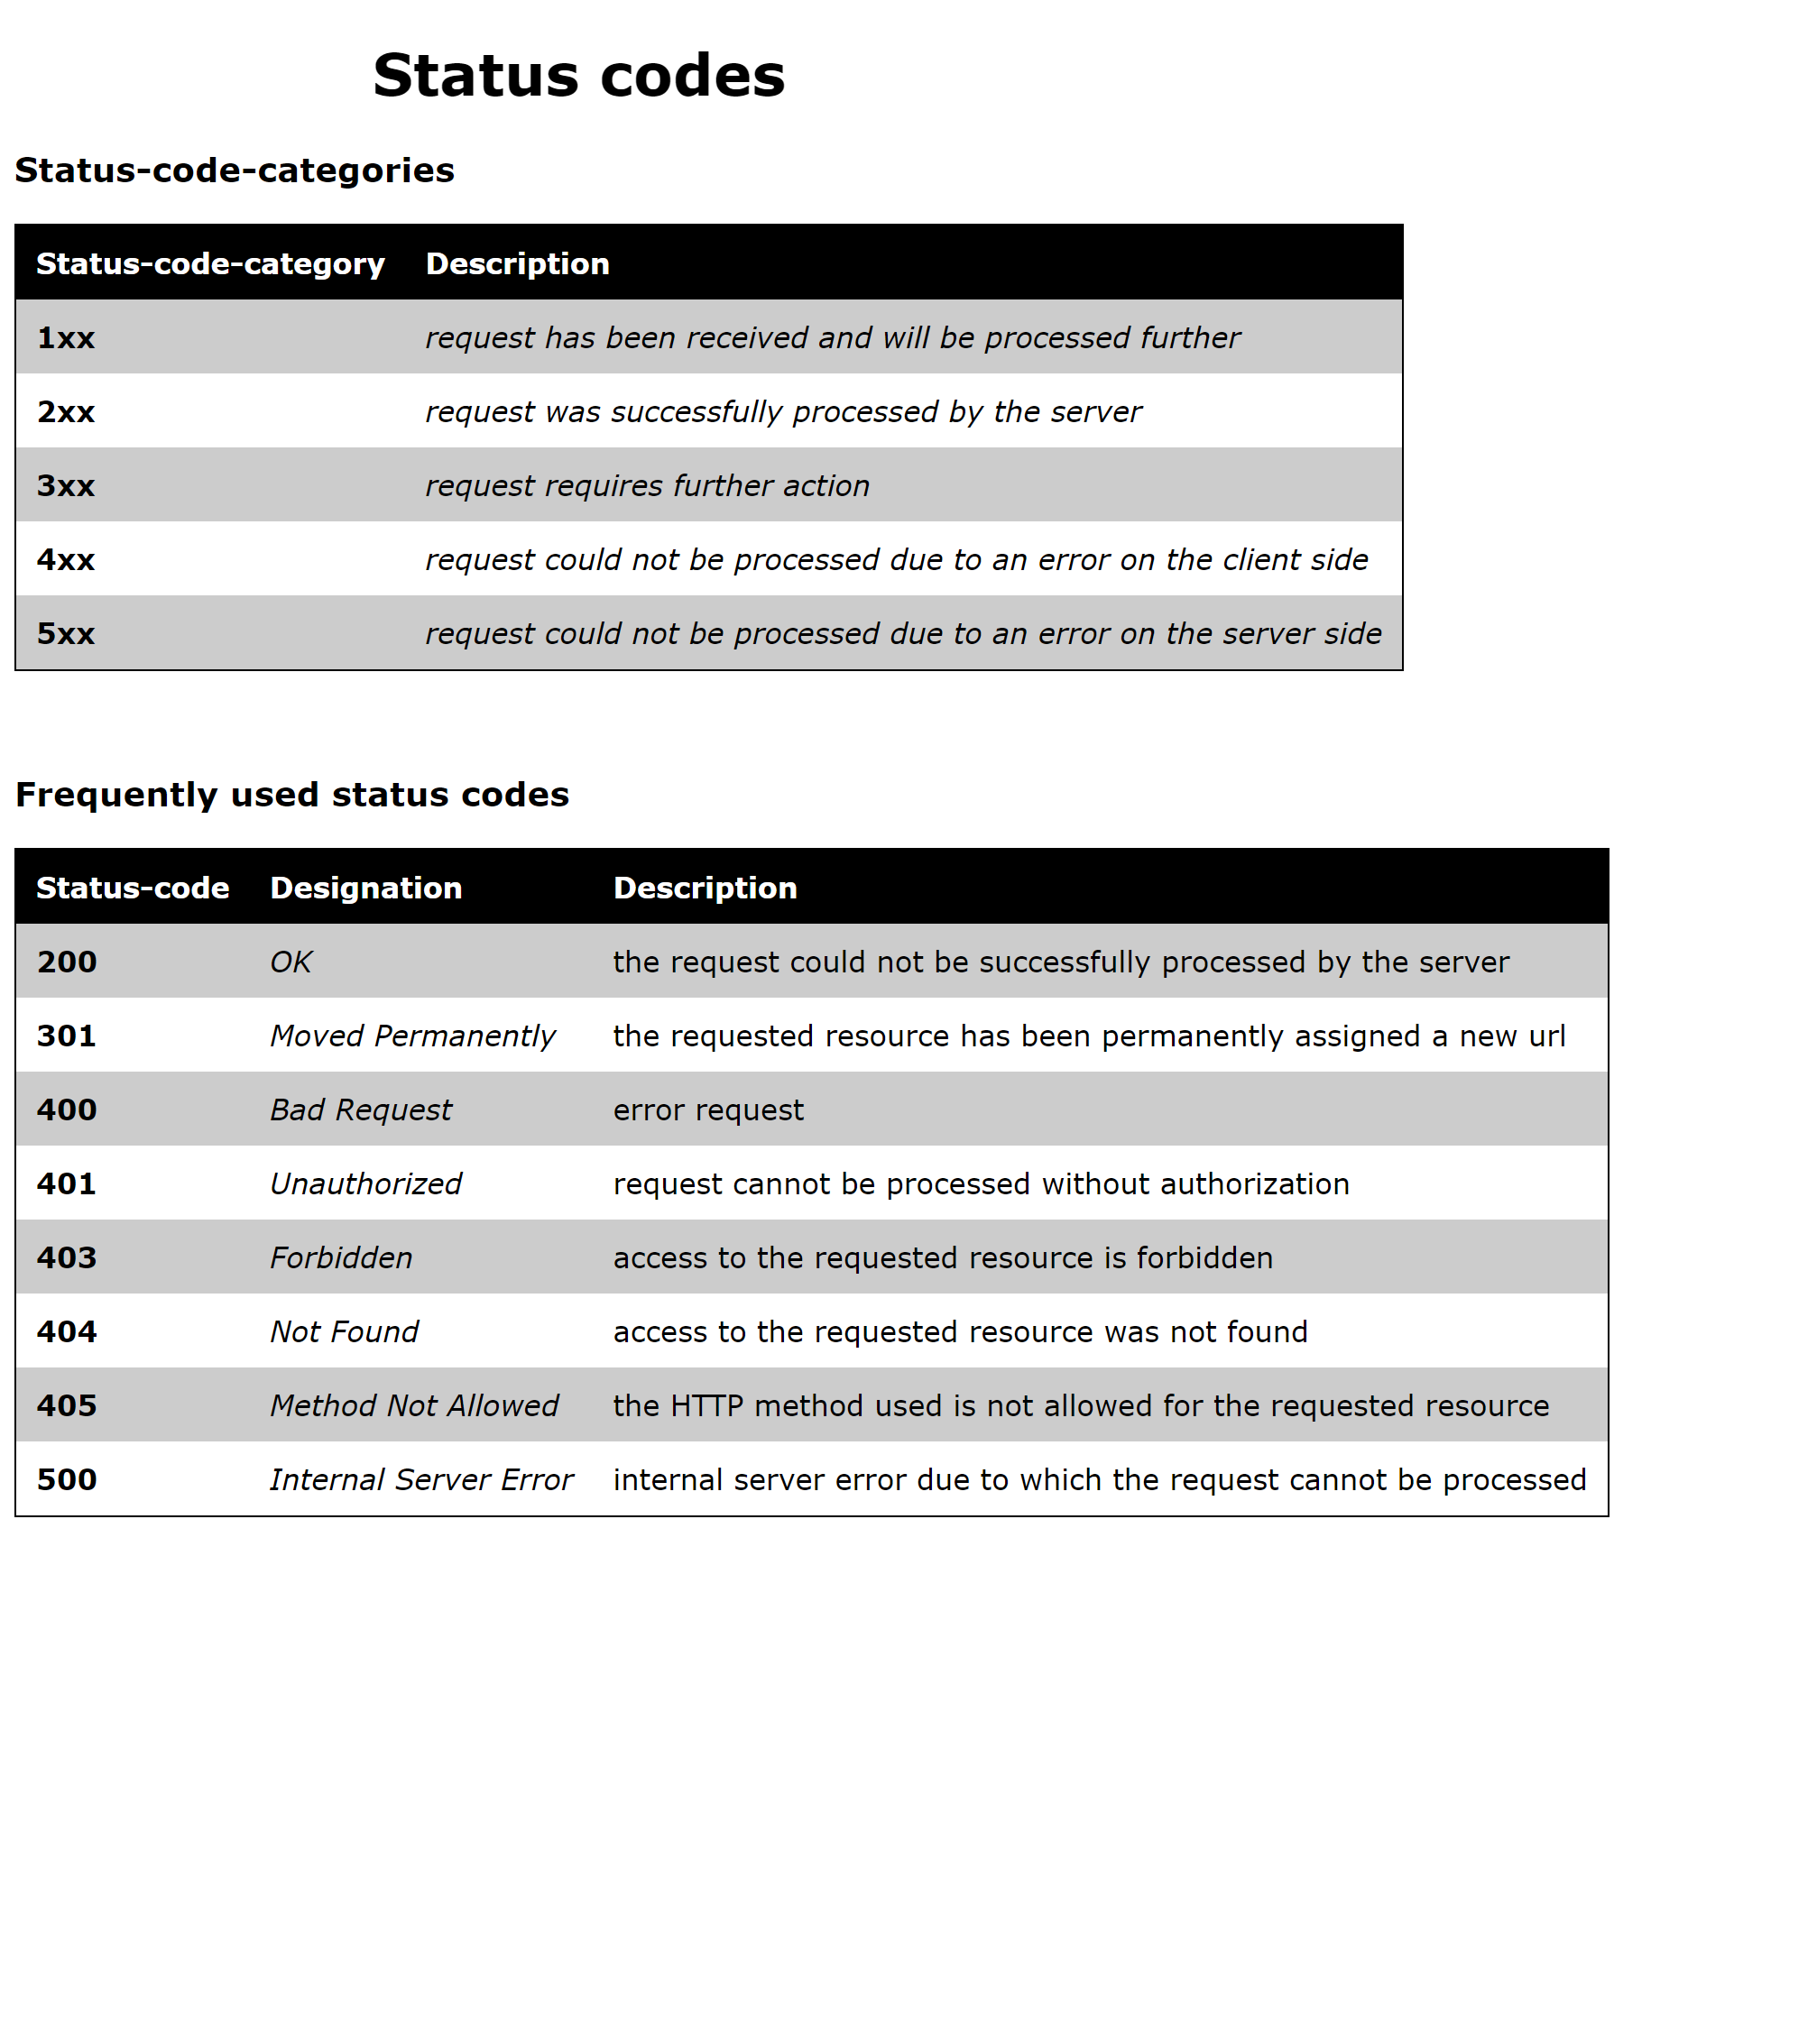
- The status code of an HTTP response defines whether an HTTP request was successfully processed or not.
- MIME types define the format of the data that is transferred via an HTTP request or an HTTP response.
- Polling and long polling are techniques by which a cleint polls data from the server at regular intervals. The communication is unidirectional from the client to the server.
- Server-sent events allow data to be actively sent from the server to the client. The communication is unidirectional from the server to the client.
- The WebSocket client can send data to the WebSocket server, but also the server can actively send data to the client - provided that the client has previously established a Web socket connection to the server.
- CSV format is a very simple data format, suitable for defining records line by line and separated by commas.
- For the structuring of complex data, for example nested data, the XML and JSON data formats are suitable.
- XML and JSON are the two most important data exchange formats on the web.
- JSON has become somewhat more popular over XML in recent years because it is much leaner and much easier to process in JavaScript.
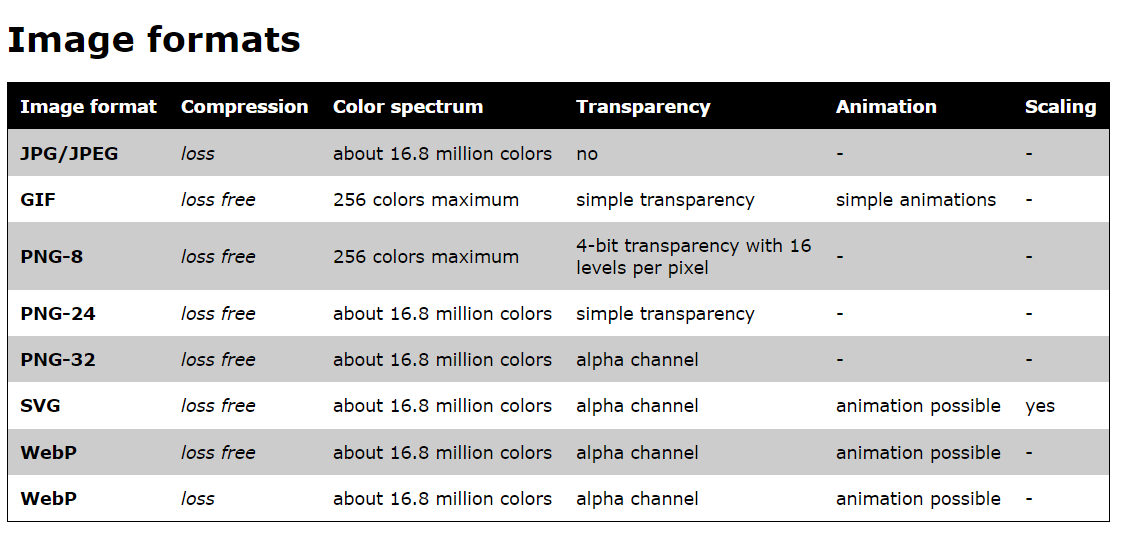
- For saving images and graphics you can use different formats: JPG, GIF, PNG, SVG, WebP.
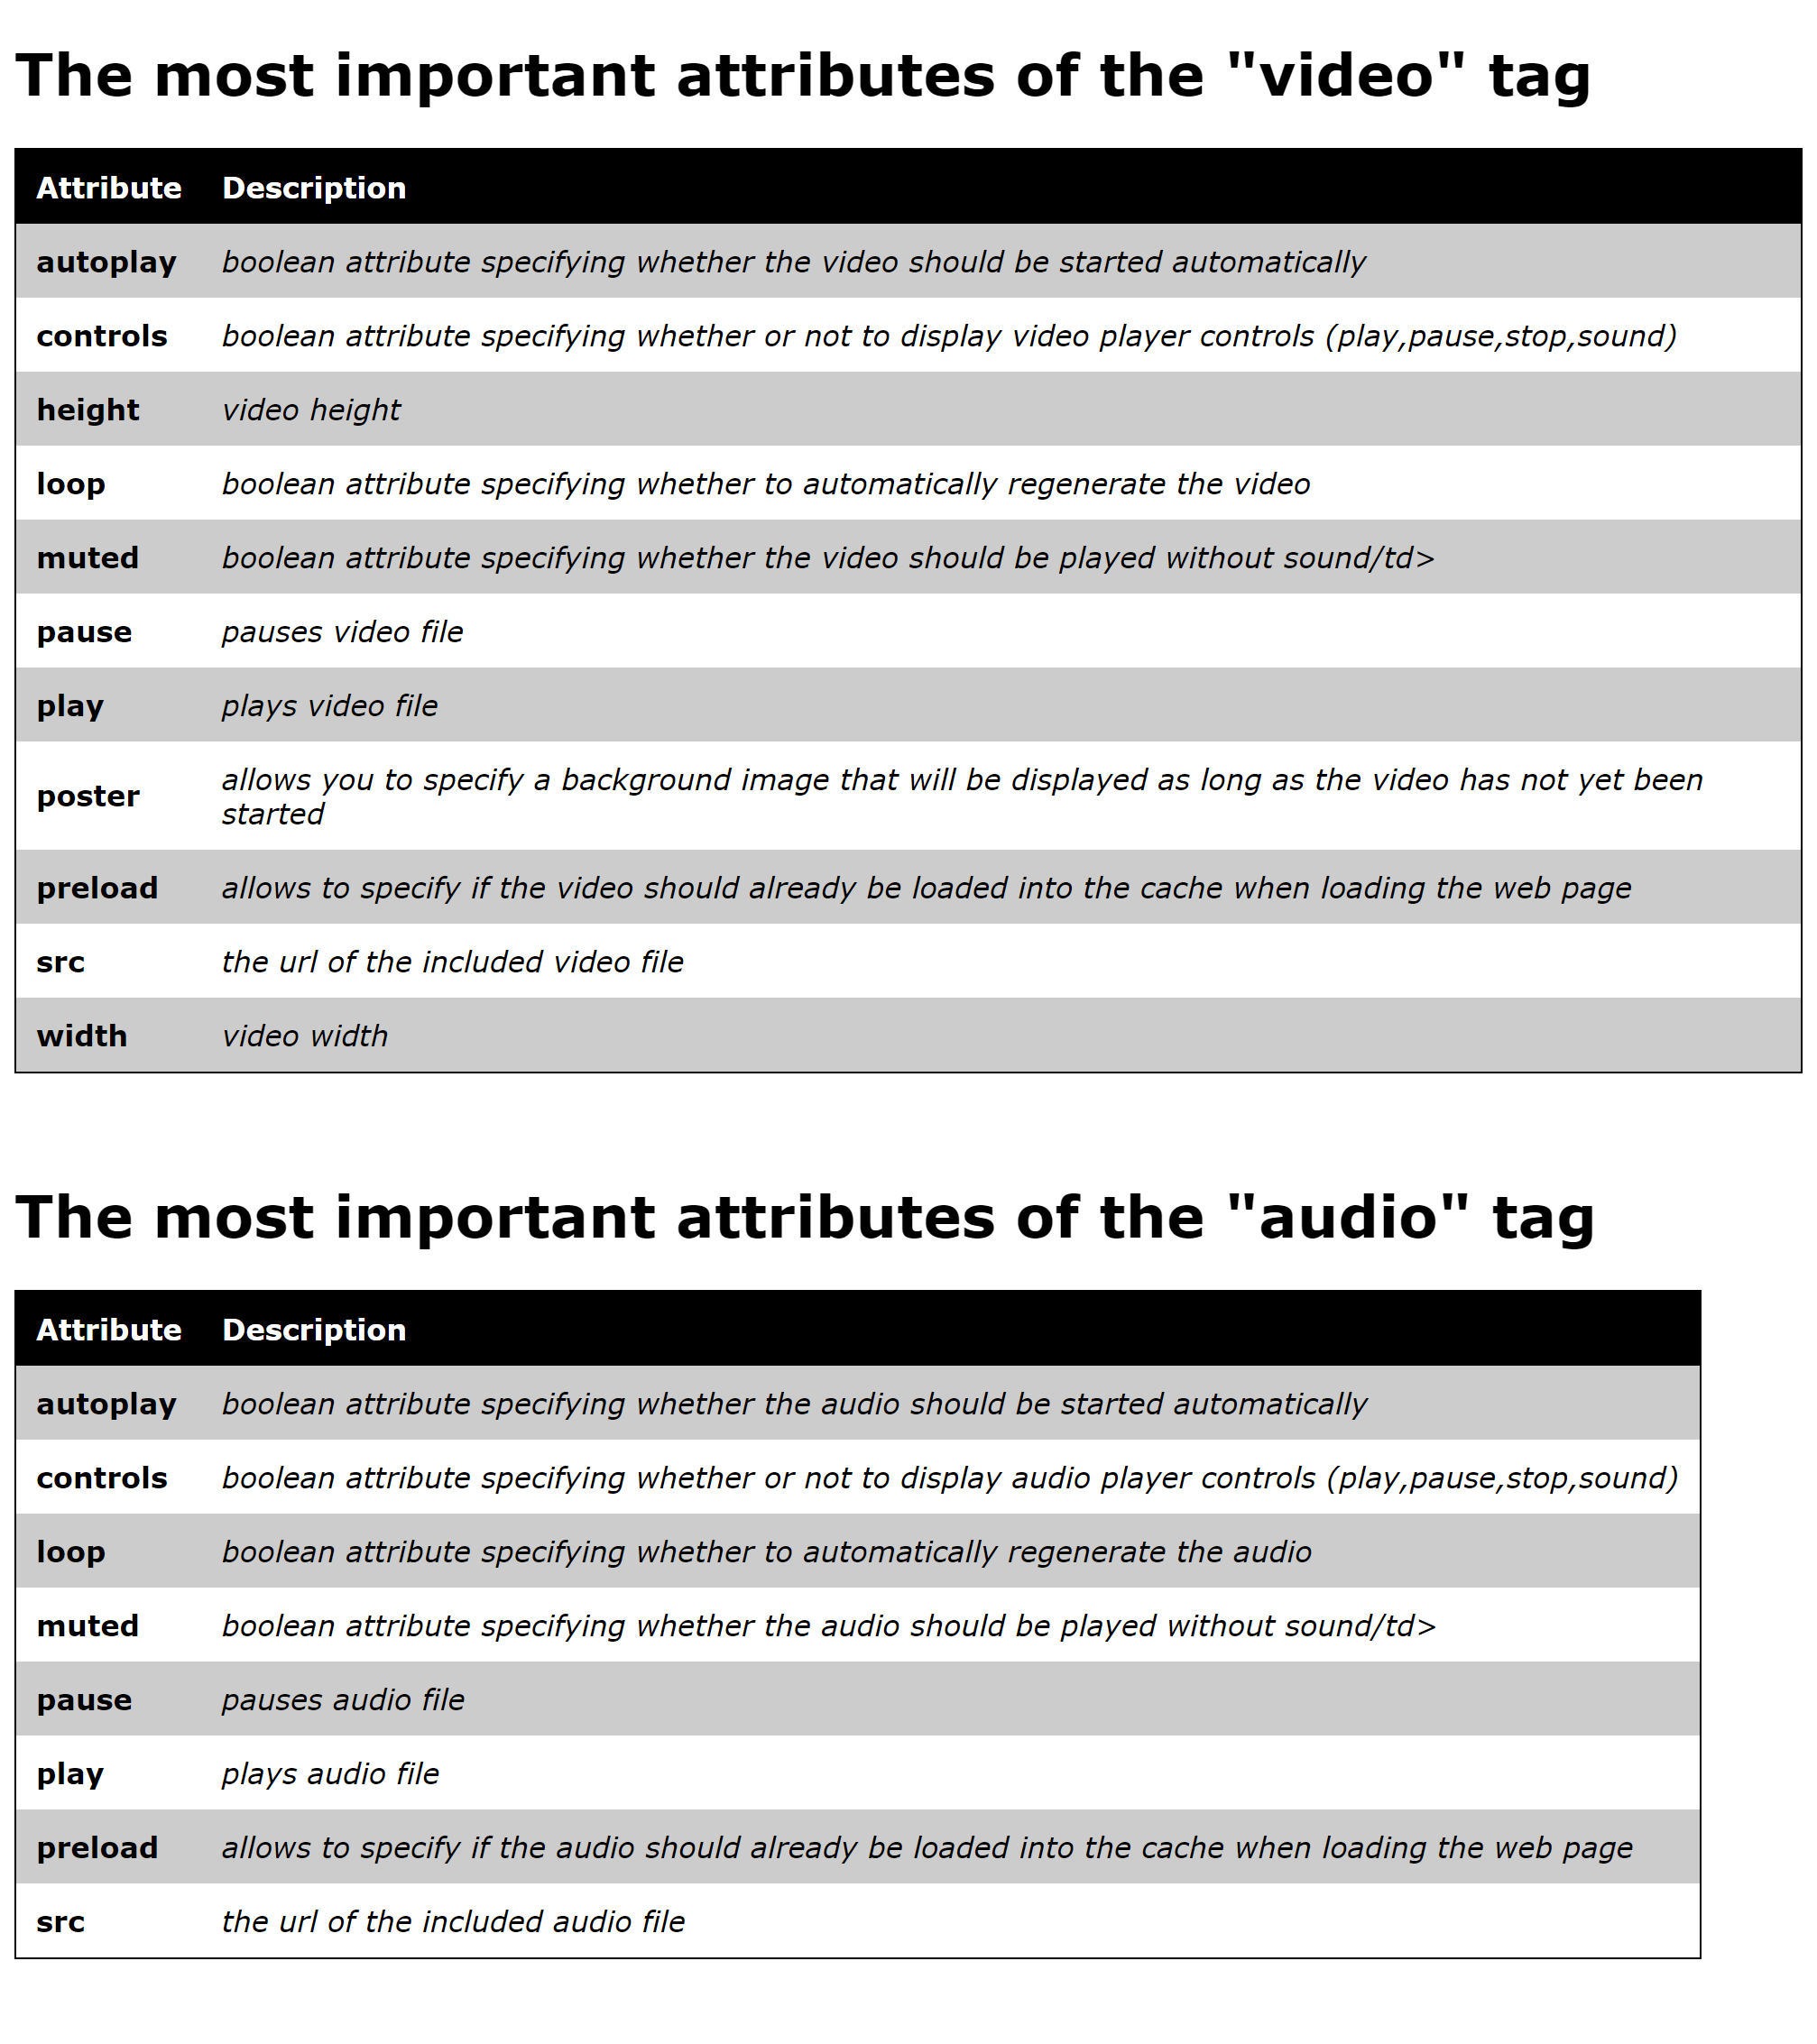
- For embedding video and audio files, since HTML5 you can use the video and audio elements.
- There are many different video and audio formats, but thanks to the HTML elements you can include several formats for one video or for one audio file.
Complete Code --> 5_Webformats/Part_1/data.csv
```
  firstname,lastname,phone,email
  Max,Miller,01234567,max.miller@example.com
  Paula,Taylor,01234567,paula.taylor@example.com
  Peter,Smith,3456789,peter.smith@example.com
```
Complete Code --> 5_Webformats/Part_2/contacts.xml
```
  <?xml version="1.0" encoding="UTF-8"?>
  <contacts xmlns="https://xml.web_manual.com"
    xmlns:xsi="http://www.w3.org/2001/XMLSchema-instance"
    xsi:schemaLocation="https://xml.web_manual.com.
    https://www.web_manual.com/schema.xsd">
    <contact>
      <firstname>Max</firstname>
      <lastname>Miller</lastname>
      <phone type="mobile">01234567</phone>
      <email>max.miller@example.com</email>
      <address>
        <street>Sample Street</street>
        <number>99</number>
        <code>12345</code>
        <city>Sampleville</city>
      </address>
    </contact>
```
Example --> 5_Webformats/Part_3/contacts.xsd
Complete Code --> 5_Webformats/Part_4/contacts.json
```
  {
    "contacts": [
      {
        "firstname": "Max",
        "lastname": "Miller",
        "phone": {
          "type": "mobile",
          "number": "01234567"
        },
        "email": "max.miller@example.com",
        "address": {
          "street": "Sample Street",
          "number": 99,
          "code": 12345,
          "city": "Sampleville"
        }
      }
    ]
  }
```
Complete Code --> 5_Webformats/Part_5/contacts.js
```
  const jsonString = `{
      "firstname": "Max",
      "lastname": "Miller",
      "phone": {
        "type": "mobile",
        "number": "01234567"
      },
      "email": "max.miller@example.com",
      "address": {
        "street": "Sample Street",
        "number": 99,
        "code": 12345,
        "city": "Sampleville"
      }
    }`;

  const person = JSON.parse(jsonString);
  console.log(person.firstname);      // "Max"
  console.log(person.lastname);       // "Miller"
  console.log(person.phone.type);     // "mobile"
  console.log(person.phone.number);   // "01234567"
  console.log(person.email);          // "max.miller@example.com"
  console.log(person.address.street); // "Sample Street"
  console.log(person.address.number); // 99
  console.log(person.address.code);   // 12345
  console.log(person.address.city);   // "Sampleville"
```
Complete Code --> 5_Webformats/Part_6/contacts.js
```
  const person = {
      "firstname": "Max",
      "lastname": "Miller",
      "phone": {
        "type": "mobile",
        "number": "01234567"
      },
      "email": "max.miller@example.com",
        "address": {
        "street": "Sample Street",
        "number": 99,
        "code": 12345,
        "city": "Sampleville"
      }
  };

  console.log(person.firstname);      // "Max"
  console.log(person.lastname);       // "Miller"
  console.log(person.phone.type);     // "mobile"
  console.log(person.phone.number);   // "01234567"
  console.log(person.email);          // "max.miller@example.com"
  console.log(person.address.street); // "Sample Street"
  console.log(person.address.number); // 99
  console.log(person.address.code);   // 12345
  console.log(person.address.city);   // "Sampleville"
```
Complete Code --> 5_Webformats/Part_7/contacts.schema.json
Complete Code --> 5_Webformats/Part_8/graphic.svg
```
  <?xml version="1.0"?>
  <!DOCTYPE svg PUBLIC "-//W3C//DTD SVG 1.0//EN"
    "http://www.w3.org/TR/2001/REC-SVG-20010904/DTD/svg10.dtd">
  <svg xmlns="http://www.w3.org/2000/svg">
    <g style="fill-opacity:0.8;">
      <circle
        cx="8cm"
        cy="2cm"
        r="100"
        style="fill:red; stroke:black; stroke-width:0.2cm"
        transform="translate(0,50)"
      />
      <circle
        cx="8cm"
        cy="2cm"
        r="100"
        style="fill:blue; stroke:black; stroke-width:0.2cm"
        transform="translate(70,150)"
      />
      <circle
        cx="8cm"
        cy="2cm"
        r="100"
        style="fill:green; stroke:black; stroke-width:0.2cm"
        transform="translate(-70,150)"
      />
    </g>
  </svg>
```
Complete Code --> 5_Webformats/Part_9/index.html
```
  <body>
      <video controls height="360" width="640">
          <source src="my-video.mp4" type="video/mp4">
          <source src="my-video.webm" type="video/webm">
          <source src="my-video.ogg" type="video/ogg">
          <p>The browser you are using does not support HTML5 video</p>
      </video>
  </body>
```
Complete Code --> 5_Webformats/Part_10/index.html
```
  <body>
      <video controls src="my-video.mp4"></video>
  </body>
```
Complete Code --> 5_Webformats/Part_11/index.html
```
  <body>
      <audio controls>
          <source src="my-audio.m4a" type="audio/x-aac" />
          <source src="my-audio.mp3" type="audio/mpeg" />
      </audio>
  </body>
```
More stuff:
- The DOM API allows programmatic access to the Document Object Model(DOM), a hierarchical tree structure that represents the object model for a web page.
- The individual components in this tree structure are called nodes, and there are several types of nodes. The most important are document nodes, element nodes, text nodes, and attribute nodes.
- The DOM API defines properties and methods that you can use to access or modify the DOM tree of a web page.
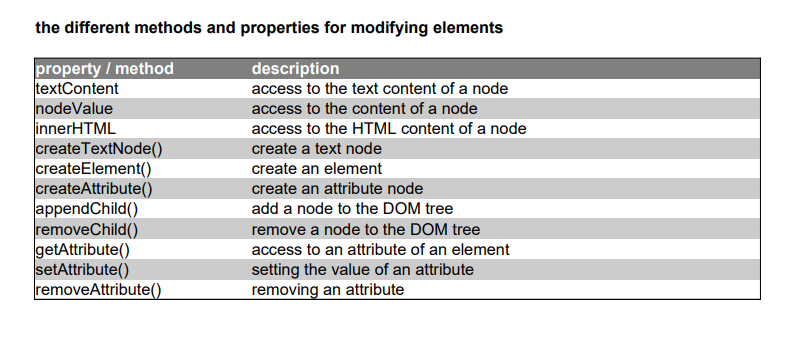
- For example, you can use the DOM API to add elements, delete elements, modify text, and add or delete attributes .
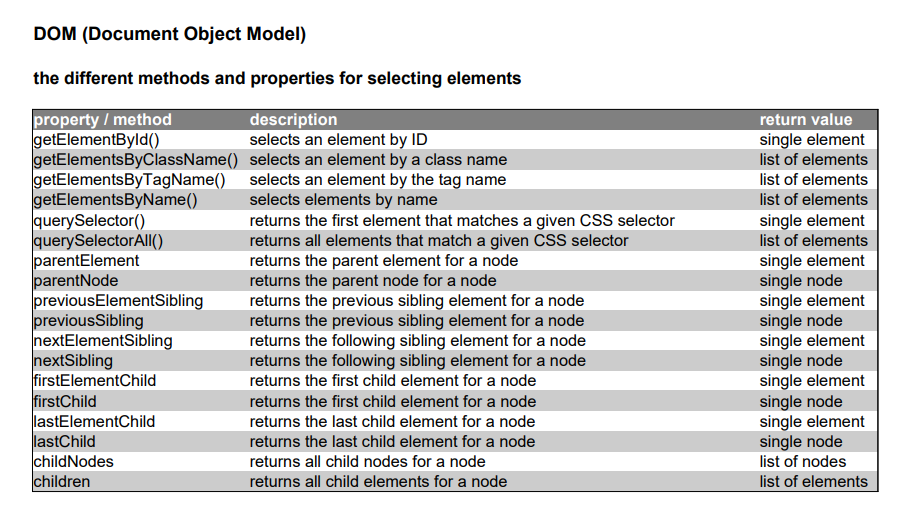
- Elements on a web page can be selected in various ways by: ID, CSS class, element name, name attribute, CSS selector.
- Starting from an element/node, the parent element/node, child elements/child nodes and sibling elements/sibling nodes can be selected via various properties.
- Via the property textContent they can access the text content of a node, via the property innerHTML they can access the HTML content of an element.
- You can create text nodes using the createTextNode() method, element nodes using createElement(), and attribute nodes using createAttribute().
- After creating an element, you must first add it to the DOM tree, using different methods: insertBefore(), appendChild(), replaceChild().
- Using the Fetch API, they can load data asynchronously from servers.
- Beyond that, there is a veritable wealth of web APIs to explore.
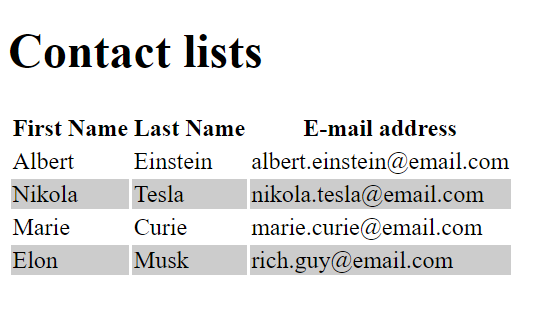
Complete Code --> 6_Web APIs/Part_1/index.html
```
  <script>
    document.addEventListener('DOMContentLoaded', () => {
        const tableRowsEven = document.getElementsByClassName('even');
        if (tableRowsEven.length > 0) {
            for (let i = 0; i < tableRowsEven.length; i++) {
                const tableRow = tableRowsEven.item(i);
                tableRow.style.backgroundColor = '#CCCCCC';
            }
        }
    });
  </script>
```
Complete Code --> 6_Web APIs/Part_2
```
  document.addEventListener('DOMContentLoaded', () => {
      const element = document.getElementById('container');
      const textNode = document.createTextNode('Hello World');
      element.appendChild(textNode);
      const childElement = document.createElement('div');
      childElement.textContent = 'Goodbye World';
      element.appendChild(childElement);
  });
```
Complete Code --> 6_Web APIs/Part_3
```
  const persons = [
      {
          firstName: 'Albert',
          lastName: 'Einstein',
          profession: 'Genius'
      },
      {
          firstName: 'Nikola',
          lastName: 'Tesla',
          profession: 'Inventor'
      },
      {
          firstName: 'Elon',
          lastName: 'Musk',
          profession: 'Rich guy'
      }
  ];

  function createTable(persons) {
      // select container element
      const container = document.getElementById('container');
      // create table
      const table = document.createElement('table');
      // create table header
      const thead = document.createElement('thead');
      thead.innerHTML = '<tr><th>First Name</th><th>Last Name</th><th>Profession</th>';

      // create table body
      const tbody = document.createElement('tbody');
      for (let i = 0; i < persons.length; i++) {
        const person = persons[i];
        const tr = document.createElement('tr');
        tr.innerHTML = `
          <td>
            ${person.firstName}
          </td>
          <td>
            ${person.lastName}
          </td>
          <td>
            ${person.profession}
          </td>
        `;
        tbody.appendChild(tr);
      }

      // add header to table
      table.appendChild(thead);
      // add table body to table
      table.appendChild(tbody);
      // add table body to container
      container.appendChild(table);

  }// registration of the eventlisterner
  document.addEventListener('DOMContentLoaded', (event) => {
      createTable(persons);
    });

```
Example --> 6_Web APIs/Part_4
- Web accessibility means that the content of websites is accessible and understandable for all users, especially for people with disabilities.
- The Web Content Accessibility Guidelines (WCAG) define guidelines that a web page must meet to be accessible.
- Where possible, you should use semantic HTML elements, for example for the definition of header, footer and navigation, etc.
- Where it is not possible or there is no standard HTML element for a particular UI component, you should define the semantics using ARIA (Accessible Rich Internet Applications).
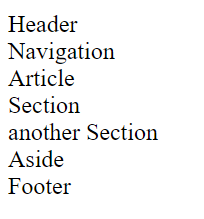
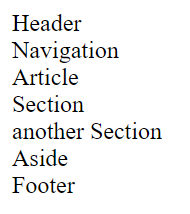
Complete Code --> 7_Ally/Part_1/index.html
```
  <body>
    <div id="header">
      Header
    </div>
    <div id="nav">
      Navigation
    </div>
    <div class="article">
      Article
      <div class="section">
        Section
      </div>
      <div class="section">
        another Section
      </div>
    </div>
    <div class="aside">
      Aside
    </div>
    <div id="footer">
      Footer
    </div>
  </body>
```
Complete Code --> 7_Ally/Part_2/index.html
```
  <body>
    <header>
      Header
    </header>
    <nav>
      Navigation
    </nav>
    <article>
      Article
      <section>
        Section
      </section>
      <section>
        another Section
      </section>
    </article>
    <aside>
      Aside
    </aside>
    <footer>
      Footer
    </footer>
  </body>
```
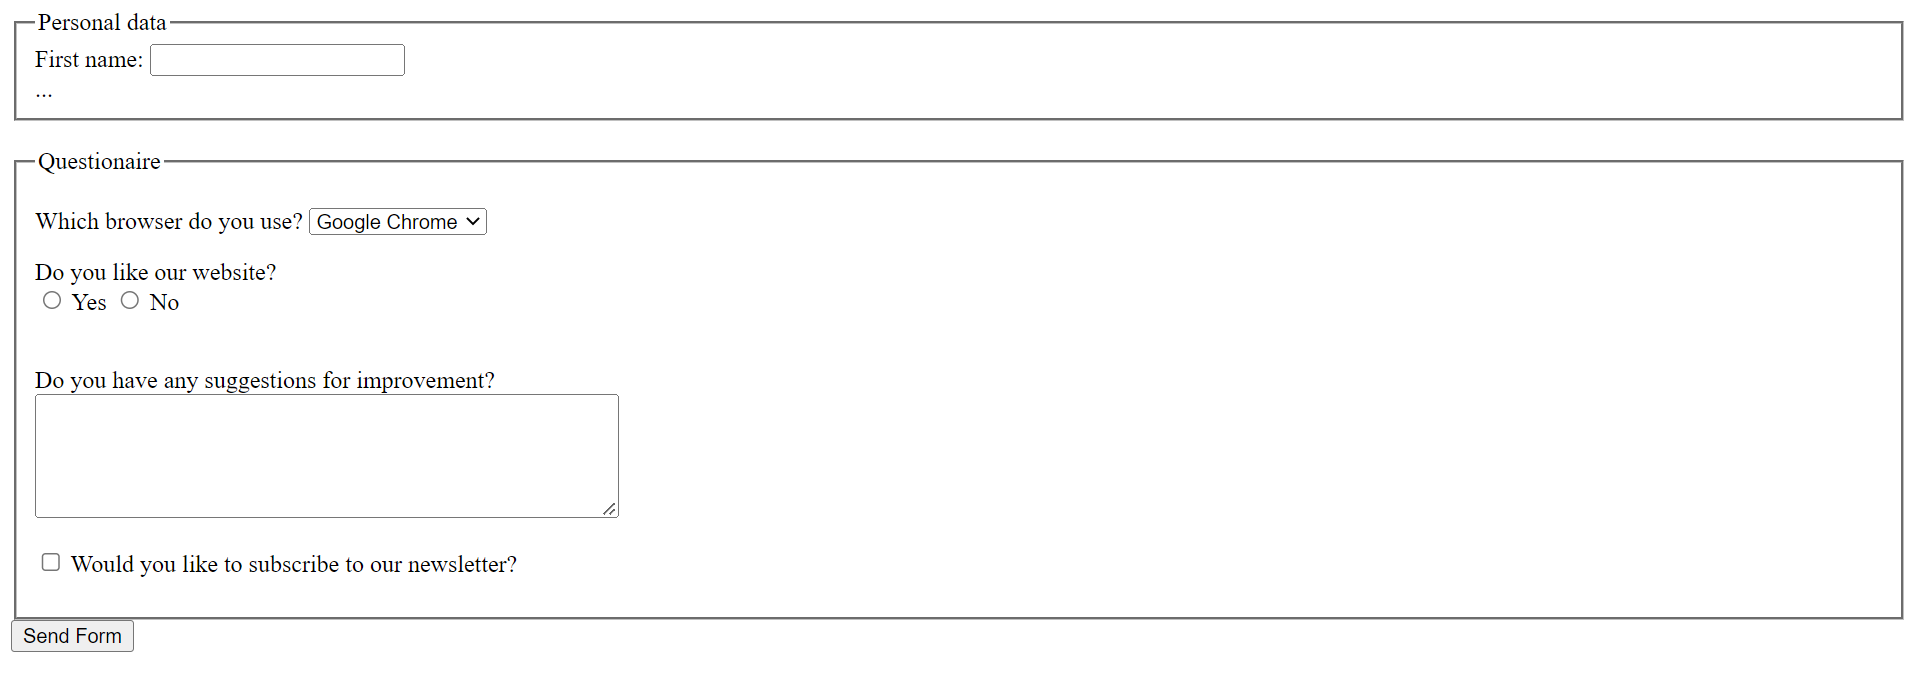
Complete Code --> 7_Ally/Part_3/form.html
```
  <form action="/services/handle-form" method="POST">
    <fieldset>
      <legend>Personal data</legend>
      <label>
        First name:
        <input type="text" name="firstname" size="20" maxlength="50" /> </label>
      <br />
      ...
    </fieldset>
    <br />
    <fieldset>
      <legend>Questionaire</legend>
      <p>
        <label for="browser">
          Which browser do you use?
        </label>
        <select id="browser" name="browser">
          <option value="chrome">Google Chrome</option>
          <option value="edge">Microsoft Edge</option>
          <option value="firefox">Mozilla Firefox</option>
          <option value="opera">Opera</option>
          <option value="safari">Safari</option>
        </select>
      </p>
      <p>
        Do you like our website?
        <br />
        <label>
          <input type="radio" name="feedback" value="yes" />
          Yes
        </label>
        <label>
          <input type="radio" name="feedback" value="no" />
          No
        </label>
      </p>
      <p>
        <br />
        <label for="improvements">
          Do you have any suggestions for improvement?
        </label>
        <br />
        <textarea id="improvements" rows="5" cols="50"> </textarea>
      </p>
      <p>
        <label>
          <input type="checkbox" name="newsletter" />
          Would you like to subscribe to our newsletter?
        </label>
      </p>
    </fieldset>
    <input type="submit" value="Formular abschicken" />
  </form>

```
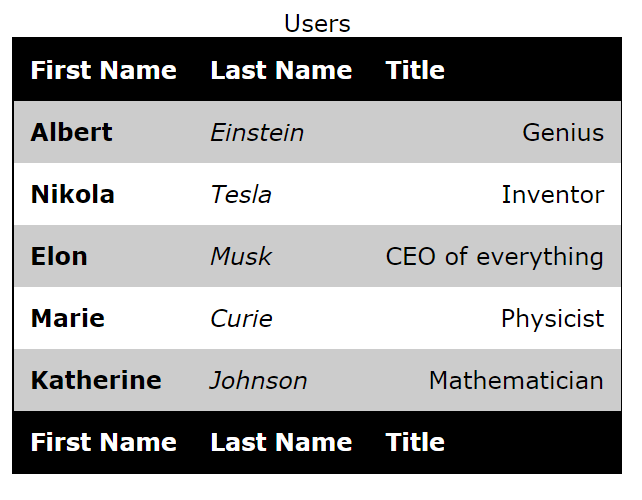
Complete Code --> 7_Ally/Part_4/table.html
```
<table>
  <caption>Users</caption>
  <thead>
    <tr>
      <th>First Name</th>
      <th>Last Name</th>
      <th>Title</th>
    </tr>
  </thead>
  <tbody>
    <tr>
      <td>Albert</td>
      <td>Einstein</td>
      <td>Genius</td>
  </tr>
  <tr>
      <td>Nikola</td>
      <td>Tesla</td>
      <td>Inventor</td>
  </tr>
  <tr>
      <td>Elon</td>
      <td>Musk</td>
      <td>CEO of everything</td>
  </tr>
  <tr>
      <td>Marie</td>
      <td>Curie</td>
      <td>Physicist</td>
  </tr>
  <tr>
      <td>Katherine</td>
      <td>Johnson</td>
      <td>Mathematician</td>
  </tr>
  </tbody>
  <tfoot>
    <tr>
      <th>First Name</th>
      <th>Last Name</th>
      <th>Title</th>
    </tr>
  </tfoot>
</table>
```
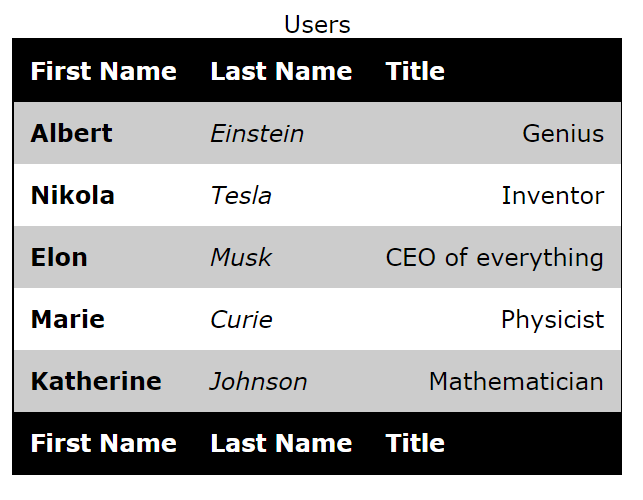
Example --> 7_Ally/Part_5/table.html
Example --> 7_Ally/Part_6/table.html
Complete Code--> 7_Ally/Part_7/list.html
```
  <body>
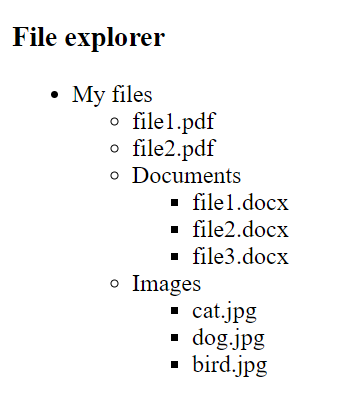
    <h3 id="tree_label">
      File explorer
    </h3>
    <ul role="tree" aria-labelledby="tree_label">
      <li role="treeitem" aria-expanded="false"> <span>
          My files
        </span>
        <ul role="group">
          <li role="treeitem"> file1.pdf
          </li>
          <li role="treeitem">
            file2.pdf
          </li>
          <li role="treeitem" aria-expanded="false">
            <span>
              Documents
            </span>
            <ul role="group">
              <li role="treeitem"> file1.docx
              </li>
              <li role="treeitem">
                file2.docx
              </li>
              <li role="treeitem">
                file3.docx
              </li>
            </ul>
          </li>
          <li role="treeitem" aria-expanded="false">
            <span>
              Images
            </span>
            <ul role="group">
              <li role="treeitem"> cat.jpg
              </li>
              <li role="treeitem">
                dog.jpg
              </li>
              <li role="treeitem"> bird.jpg
              </li>
            </ul>
          </li>
        </ul>
      </li>
    </ul>
  </body>
```
Complete Code --> 7_Ally/Part_8/index.html
```
  <body>
    This is an english website.
    <p lang="de">Aber dieser Absatz hier ist auf Englisch geschrieben.</p>
  </body>
```
Complete Code --> 7_Ally/Part_9/index.html
```
  <body>
    <a href="https://www.facebook.com/"
      accesskey="r"
      tabindex="1">
      Go to Facebook here:
    </a>

    <form action="/api/process-form" method="post">
      <label
        for="name"
        tabindex="2">
        Name:
      </label>
      <input
        type="text"
        id="name"
        accesskey="n"
        tabindex="3">
      <input
        type="submit"
        id="submitform"
        accesskey="s"
        tabindex="4"
        value="Send">
    </form>
  </body>
```
Complete Code --> 7_Ally/Part_10/index.html
```
  <body>
    <video controls>
      <source src="/videos/example.webm" type="video/webm" />
      <source src="/videos/example.mp4" type="video/mp4" />
      <track
        src="/videos/subtitles-en.vtt"
        label="English captions"
        kind="captions" srclang="en"
        default
      >
      <track
        src="subtitles-de.vtt"
        label="Deutsche Untertitel"
        kind="captions"
        srclang="de"
      >
      <p>This browser does not support videos.</p>
    </video>
  </body>
```
- React is a library with a focus on user interface implementations and is complemented by a very rich ecosystem of third-party packages.
- You can either initilize a React app yourself, or use the Create React app project to do so.
- A React application consists of a tree of components.
- React uses JSX, a syntax extension for JavaScript, to build components. It distinguishes between elements, which are translated directly into HTML elements, and components, which you use to model the structure of your application.
- There are two types of components: the older class components, which have lost much of their importance in the meantime, and the function components, which have established themselves as a quasi-standard.
- A component can administer its own state. A change to this state causes the component to be redrawn. The state is managed with the help of the useState function.
- The lifecycle with the mount, update and unmount phases is mapped using the useEffect function.
- Child components receive information through attributes called props. A prop can be a string as well as an object or a function.
- Using functions as props, child components can communicate with their parent components.
- React provides predefined props, such as onclick, for event handling, where they can register their callback functions.
- The context API allows you to break out of the classic data flow from parent to child components and make values available to all child nodes.
- React Router gives you a way to navigate within a React application without completely reloading the page.
- Create React App
- React
- Example --> 8_Single Page Applications/Part_1
Complete Code --> 8_Single Page Applications/Part_2/src/List.js
```
  import { useState } from 'react';

  const initialContacts = [
    {
      id: 1,
      firstName: 'Max',
      lastName: 'Miller',
      email: 'maxmiller@example.com',
    },
    {
      id: 2,
      firstName: 'Erika',
      lastName: 'Miller',
      email: 'erikamiller@example.com',
    },
  ];

  function List() {
    const [contacts, setContacts] = useState(initialContacts);
    return (
      <table>...</table>
    );
  }

  export default List;
```
Complete Code --> 8_Single Page Applications/Part_3/src/List.js
```
  import { useState, useEffect } from 'react';

  function List() {
    const [contacts, setContacts] = useState([]);

    useEffect(() => {
      fetch('http://localhost:8001/api/contacts')
        .then((response) => response.json())
        .then((data) => setContacts(data));
    }, []);

    return (
      <table>...</table>
    );
  }

  export default List;
```
Complete Code --> 8_Single Page Applications/Part_4/src/List.js
```
  function List() {
    ...

    return (
      <>
        <h1 style={{ textDecoration: 'underline' }}>Contact list</h1>
        <table>...</table>
      </>
    );
  }

  export default List;
```
Complete Code --> 8_Single Page Applications/Part_5/src/List.js
```
  import { useState, useEffect } from 'react';
  import './List.css';

  function List() {
    ...

    return (
      <>
        <h1 style={{ textDecoration: 'underline' }}>Contact list</h1>
        <table className="contactTable">
          ...
        </table>
      </>
    );
  }

  export default List;
```
Complete Code --> 8_Single Page Applications/Part_6/src/List.js
```
  import ListItem from './ListItem';

  function List() {
    ...

    return (
      <>
        <h1 style={{ textDecoration: 'underline' }}>Contact list</h1>
        <table className="contactTable">
          <thead>
            <tr>
              <th>ID</th>
              <th>First name</th>
              <th>Last name</th>
              <th>Email</th>
            </tr>
          </thead>
          <tbody>
            {contacts.map((contact) => (
              <ListItem key={contact.id} contact={contact} />
            ))}
          </tbody>
        </table>
      </>
    );
  }

  export default List;
```
Complete Code --> 8_Single Page Applications/Part_7/src/ListItem.js
```
  function ListItem({ contact, onDelete }) {
    return (
      <tr>
        <td>{contact.id}</td>
        <td>{contact.firstName}</td>
        <td>{contact.lastName}</td>
        <td>{contact.email}</td>
        <td>
          <button onClick={() => onDelete(contact)}>delete</button>
        </td>
      </tr>
    );
  }

  export default ListItem;
```
Example --> 8_Single Page Applications/Part_8/src/Form.js
Complete Code --> 8_Single Page Applications/Part_9/src/List.js
```
  import { useEffect, useContext } from 'react';
  import { ContactContext } from './ContactContext';
  import Form from './Form';
  import './List.css';
  import ListItem from './ListItem';

  function List() {
    const [contacts, setContacts] = useContext(ContactContext);

    useEffect(() => { ... }, []);

    function handleDelete(contact) {...}

    return (
      <>
        <h1 style={{ textDecoration: 'underline' }}>Contact list</h1>
        <table className="contactTable">
          ...
        </table>
      </>
    );
  }

  export default List;
```
Complete Code --> 8_Single Page Applications/Part_9/src/App.js
```
  import {
    BrowserRouter as Router,
    Switch,
    Route,
    Redirect,
  } from 'react-router-dom';
  import { ContactProvider } from './ContactContext';
  import List from './List';
  import Form from './Form';

  function App() {
    return (
      <ContactProvider>
        <Router>
          <Switch>
            <Route path="/list">
              <List />
            </Route>
            <Route path="/form">
              <Form />
            </Route>
            <Route path="/" exact>
              <Redirect to="/list" />
            </Route>
          </Switch>
        </Router>
      </ContactProvider>
    );
  }
```
- The architecture of software is about how to break down or divide the software into smaller components and how to organize the interaction of these components.
- A client-server architecture divides an application into two parts: the client and the server are connected via a network. Because this architecture consists of two layers, it is also called a two-tier architecture.
- In an N-tier architecture, the server layer is divided into further layers: a data tier and the logic tier, which contains the application logic or business logic.
- In monolithic architecture, an application consists of a single unit that contains all the code.
- In service-oriented architecture (SOA), the application is divided into smaller reusable services.
- In microservice architecture, the application is divided into even smaller services.
- In component-based architecture, the front end of an application is divided into individual reusable UI components.
- Mircofrontends architecture divides the frontend of an application into individual features.
- The messaging architecture ensures that individual components of an application do not communicate with each other directly, but via a message broker or message bus.
- In the web service architecture, services are made available via the web. Web protocols are used for communication and web formats for data exchange.
- MV* architectures are used in the front end of an application and divide the responsibility into model, view and a component responsible for communication: Controller(MVC), Presenter(MVP), and View Model(MVVM).
- Programming languages can be classified into several categories.
- Subdivision according to degree of abstraction:
- Higher level programming languages abstract very far from the machine code the computer understands.
- Assembly languages abstract less strongly, are however for developers usually not so simple to understand as higher programming languages.
- Division into compiled and interpreted languages:
- In compiled programming languages, a computer translates the source code into machine code.
- In interpreted programming languages, an interpreter interprets the source code and executes it.
- Subdivision by programming paradigm:
- In imperative programming languages, a developer defines exactly how a program works.
- With declarative programming languages, one defines what a program should do.
- Subgroups of the imperative programming paradigm include structured programming, procedural programming, modular programming, and object-oriented programming.
- Subgroups of the declarative programming paradigm include logical programming and functional programming.
- Some languages support multiple programming paradigms. For example, in JavaScript it is possible to program object-oriented and functional.
- Object-oriented programming focuses on objects. Object-oriented languages can also be divided into class-based and classless, depending on whether the object orientation is based on classes or objects.
- Functional programming focuses on functions. Here, functions are treated like objects and can be assigned to variables like these, used as parameters for other functions or as their return value.
- Developers are faced with a real variety of languages when choosing the right programming language.
- Node.js is a runtime environment for JavaScript, thanks to which JavaScript can be executed outside of browsers.
- In addition to the runtime environment, Node.js provides various modules, with the help of which they can, for example, access the file system, implement web servers and much more.
- About the Node.js Package Manager (npm) can also install many other packages.
- npm also helps with the initialization of own packages.
- The meta information of a package like name, version number and dependencies are managed in the configuration file named package.json.
- Node.js provides many methods in a synchronous variant and an ansynchronous variant. As a rule, it is recommended to use the ansynchronous variant.
- The web framework express is one of the most popular web frameworks and facilitates the implementation of web servers.
before you start please install Node.js, you can do that at Node.js
- for macOS download the pkd file
- for windows download the msi file
- for linux a binary package is available start there in the directory bin/node file
- macOS - with $ "node -v" the installed version is displayed, with $ "node -v" the installed version is displayed, and check if npm and npx are also installed with $ "npm -v"** and $ "npx -v"
- window - with $ "node -v" the installed version is displayed, with $ "node -v" the installed version is displayed, and check if npm and npx are also installed with $ "npm -v" and $ "npx -v"
- linux - $ "bin/node -v", $ "bin/npm -v", $ "bin/npx -v"
- Example --> 11_Node/Part_1/main.js
- open the terminal and start the main.js with $ "node main.js" (pay attention to where the file is stored)
- "Server is running on http://localhost:8000" open this in your browser
- read files, write files, delete files (synchronous, asynchronous)
- Example --> 11_Node/Part_2
- Example --> 11_Node/Part_3/start.js
- customized webserver now deploys the HTML file and CSS file
- open the terminal and start the start.js with $ "node start.js" (pay attention to where the file is stored)
- "Server is running on http://localhost:8000" open this in your browser
11.4. Use web framework Express
first please install express, open the project and open the terminal and enter "npm install express" then express will be installed locally for this project
- Example --> 11_Node/Part_4/start.js
- a webserver with the web framework express
- customized webserver now deploys the HTML file and CSS file
- open the terminal and start the start.js with $ "node start.js" (pay attention to where the file is stored)
- "Server is running on http://localhost:8000" open this in your browser
11.5. Express - customized web server processes the data
- Example --> 11_Node/Part_5/start.js
- customized webserver processes the data
- customized webserver now deploys the HTML file and CSS file
- open the terminal and start the start.js with $ "node start.js" (pay attention to where the file is stored)
- "Server is running on http://localhost:8000" open this in your browser
- Web services make functionality of a server-side component available via the Web using an API.
- Web services use web standards such as HTTP, XML and JSON.
- In principle, web services can be implemented in different ways or using different technologies and concepts. Three of the best known are the SOAP protocol, the REST architectural style, and the GraphQL query language.
- SOAP-based webservics use XML as their data exchange format and tend to be classified as heavyweight compared to the other two technologies.
- The API of SOAP-based web services can be formally described by the Web Services Description Language (WSDL).
- REST-based web services are strongly oriented towards the possibilities already provided by HTTP.
- The actions that can be triggered in REST-based web services are predefined by the HTTP methods. The following HTTP methods have a special semantic meaning, which is comparable to CRUD operations from databases: POST requests (Create), GET requests (Read), PUT requests (Update), DELETE requests (Delete).
- REST-based web services use various formats as data exchange formats, most notably JSON and XML.
- REST based web services are expected to make up, the majority of web service implementations.
- If it is expected that the structure of the data provided by a web service will have to be adapted frequently to the client-side requirements, GraphQL-based web services are the right choice. With them, the client can define exactly the structure of the data as it needs it via a GraphQL query.
- Example --> 12_Webservices/Part_1
example for the resource https://www.alberteinstein.com/api/books/4
Complete Code --> 12_Webservices/Part_2/book.json
```
  {
    "id": "4",
    "isbn": "321-4-8765-1110-9",
    "title": "The Theory of Relativity",
    "author": {
      "firstName": "Albert",
      "lastName": "Einstein",
      "href": "https://www.alberteinstein.com/api/authors/1"
    }
  }
```
example for the resource https://www.alberteinstein.com/api/authors/1
Complete Code --> 12_Webservices/Part_3/author.json
```
  {
    "firstName": "Alber",
    "lastName": "Einstein",
    "books": [
      {
        "title": "The Theory of Relativity",
        "href": "https://www.alberteinstein.com/api/books/1"
      },
      {
        "title": "The Ultimate Quotable Einstein",
        "href": "https://www.alberteinstein.com/api/books/2"
      },
      {
        "title": "Albert Einstein in His Own Voice",
        "href": "https://alberteinstein.com/api/books/3"
      },
      {
        "title": "Einstein on Cosmic Religion and Other Opinions and Aphorisms",
        "href": "https://alberteinstein.com/api/books/4"
      },
      {
        "title": "The World As I See It",
        "href": "https://www.alberteinstein.com/api/books/5"
      }
    ]
  }
```
- Example --> 12_Webservices/Part_4/start.js
Tip -> Postman - has a graphical interface instead of a command line
- Basically, a distinction is made between relational databases and non-relational databases.
- Relational databases are called SQL (Structured Query Language) because of the query language used, while non-relational databases are called NoSQL databases, even if the latter is not quite correct, strictly speaking, because non-relational databases also use query languages that are very similar to SQL, at least in terms of syntax.
- In relational databases, data is stored in relations.
- They have the possibility to communicate with databases via the SQL query language.
- In non-relational databases, the data is not stored in relations, but in a different way or in other data structures.
- Non-relational classes can be further classified:
- Key-value databases use associative arrays as data structure and store the data in the form of key-value pairs ( https://redis.io and https://memcached.org/ ).
- Document-oriented databases are a special form of key-value databases and use so-called documents as values for storing data ( https://www.mongodb.com/ and https://couchdb.apache.org/ ).
- Graph databases store data in the form of graphs, where the nodes of the graph represent individual records and the edges represent the relationships between those records ( https://neo4j.com/ and https://www.arangodb.com/ )
- Column-oriented databases store the data in columns, where the individual columns are not part of a table, but are managed separately ( https://cassandra.apache.org/ and https://hbase.apache.org )
- for this example I use SQLite under Node.js with sqlite3 (https://www.npmjs.com/package/sqlite3)
- can be installed with the help of Node.js Package Manager using the command "npm install sqlite3".
- for starting the webservice again "node start.js".
- Example --> 13_Databases/Part_1
A good introduction to the commands supported by SQLite can be found, for example, on the SQLite homepage at SQLite.
- Automated tests help you produce more robust code that has a clean interface, is easier to test, and that you can safely optimize.
- There are several types of tests, of which the following are particularly relevant for web development:
- Over component testsas they test individual components on code level for example classes or functions.
- Over integration tests them the interaction of different components an application.
- Over End-To-End-Tests they test an application from an end (Frontend) to the other end (Backend).
- With performance tests, you test how an application behaves under high load (load tests) or extreme load (stress tests).
- In test-driven development, before implementing a new component, you first formulate in a test via assertion which requirements the new component must implement.
- An iteration consists with the test-driven development of the following five steps: Writing the test, executing the test, implementing the functionality, renewed execution of the tests, optimization/refactoring of the implementation.
- A single test consists of four phases:
- In the Setup phase, initialization can be performed.
- In the Exercise phase, the component under test is called or executed.
- In the Verify phase, the actual results are compared with the expected results.
- In the Teardown phase, cleanup tasks can be performed.
- With the help of special tools they can determine the test coverage, i.e. which part of the code is executed by the tests and which is not.
- With the help of test doubles they can replace or simulate external components on which a component under test depends, so-called DOCs (Dependent-On Components), during the test. There are different types of test doubles:
- Test spies can be used to intercept indirect outputs of the component under test.
- Test stubs can be used to simulate the indirect inputs of the component under test.
- Mock objects can be used to check the indirect outputs of the component under test.
- Unit testing in JavaScript
- for this example I use the test framework Jest to write unit tests for JavaScript
- to run jest just enter command "npx"(node.js) then "npx jest:" ( https://jestjs.io/docs/en/expect )
- Example --> 14_Testing/Part_1
- For a web application to be accessible to users over the Internet, it must be hosted on a (hosting) server. You need web space on the one hand and a domain on the other.
- Basically, there are different types of hosting:
- Shared hosting: here your web application shares the corresponding server with other web applications.
- VPS Hosting: Here your web application is operated within a virtual private server.
- Dedicated Hosting: where your web application is the only one running on the respective server.
- Cloud Hosting: Here your web application runs on a cloud infrastructure based on a network of multiple servers.
- The step of copying an application to a server is called deployment.
- Using Docker, web applications, or applications in general, can be pegged so that they can be installed and run within the Docker runtime environment very easily.
- Docker Compose can be used to configure and launch setups of multiple Docker images ( https://docs.docker.com/compose/ and https://github.com/docker/awesome-compose ).
- Types deployment: FPS, SCP, Container Management
- Install Docker ( https://docs.docker.com )
- all available commands can be found at https://docs.docker.com/engine/reference/builder
- Docker images for all major Node.js versions: https://github.com/nodejs/docker-node , https://hub.docker.com/_/node
- Example --> 15_Deploy_Host/Part_1
Security vulnerabilities:
- OWASP stands for Open Web Application Security Project and refers to an organization of security experts concerned with the security of Web applications and Web services (https://owasp.org/).
- The OWASP Top Ten is a list of the ten most frequently encountered security vulnerabilities at present:
- Injection of malicious code "Injection".
- Incorrect authentication "Broken Authentication
- Sensitive Data Exposure
- Attacks via XML External Entities
- Broken Access Control
- Security Misconfiguration
- Injection of malicious JavaScript code Cross-Site Scripting
- Insecure Deserialization
- Using Components with Known Vulnerabilities
- Insufficient logging and monitoring Insufficient Logging & Monitoring
Cryptography, SSL, TLS, HTTPS :
- In symmetric cryptography, data is encrypted and decrypted using the same key.
- In contrast, asymmetric cryptography encrypts data with one key and decrypts it with another key.
- Asymmetric cryptography is used, for example, in SSL(Secure Sockets Layer), TLS(Transport Layer Security) and HTTPS(Hypertext Transfer Protocol Secure).
SOP, CORS, CSP:
- Via Same Origin Policy (SOP), it is specified that code from one source (domain) must not access content from another source (domain).
- Cross-Origin Resource Sharing (CORS) allows you to relax the SOP by allowing access to resources from one domain to certain other domains.
- Via Content Security Policy (CSP), you can further restrict the SOP and, for example, determine very finely which Java Script code is allowed to run on a web page and which is not.
Authentication:
- Authentication refers to verifying that a user is who they say they are.
- Authorization refers to checking whether a user is allowed to perform a particular action.
- Various authentication mechanisms are available for authentication:
- Basic Authentication, in which credentials are sent to the server with each request after successful authentication.
- Session Based Authentication, in which a session ID is generated by the server after successful authentication, which the client sends with every request from then on and which the server can uniquely assign to a session.
- Token-based authentication, in which a token is generated by the server after successful authentication, which is then sent by the client to the server with every request and which contains the user's complete session information.
16.1. Configure CORS for express (https://github.com/expressjs/cors)
- can be easily installed via node.js with "npm install cors"
- Example --> 16_Websecurity/Part_1
- Example --> 16_Websecurity/Part_2
- possible with for example Helmet
- to install Helmet just use node.js "npm install helmet" -> "node start.js"
- Example --> 16_Websecurity/Part_3
Under Node.js, you can create digital signatures using the crypto module included in the Node.js installation (https://nodejs.org/api/crypto.html).
- Basically, a distinction is made between classic project management and agile project management. For both categories, there are different process models that describe exactly how project management is to be implemented in each case.
- Scrum is an iterative and incremental process model to be implemented in each case.
- Srcum defines different roles, events and artifacts.
- The following roles are defined:
- The Pruduct Owner is responsible for the product release and communication with the Business Owner and stakeholders.
- The development team consists not only of developers, but of all persons responsible for the implementation of the requirements, for example also designers or UX professionals.
- The Scrum Master supports the correct use of Scrum and, if necessary, conveys the required knowledge to the other Scrum team members.
- The following events are defined:
- Sprint Planning is used to plan the tasks (user stories, tasks, etc.) for the upcoming sprint.
- In the sprint, the tasks are then implemented the development team.
- In daily Scrum, the development team meets to exchange information about the current status and any obstacles or problems.
- The following artifacts are defined:
- The Product Backlog contains a prioritized list of planned requirements for the software.
- The Sprint Backlog contains the entries from the Product Backlog that are to be implemented in a Sprint.
- The Product Increment designates a new state of the software that contains the requirements or new features implemented in a Sprint.
The guide is an overview that a WebDeveloper should know. But there is more to know and also always something new. You never stop learning in this business.
On my Twitter account @bella_mrx you can find more useful stuff about web development.
Or check out my GitHub profile.
Thanks for reading. I hope you enjoyed it or at least learned something.
