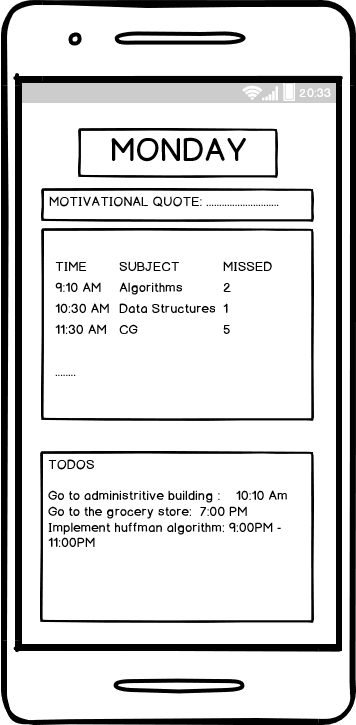
The app will help students to get all the work done in time and track his activities The students will be notified about their timetable, classes to attend, other todos to be done. It will help the student keep track of the number of class he/she has missed. It will also show motiviational quotes with todos to be done so that the student stays motivated.
Fork the repository by clicking on the Fork button.
Clone your copy of the repository onto your local machine.
git clone https://github.com/<YOUR_USERNAME>/in-timeThis makes a local copy of the repository onto your machine
List the current configured remote repository for your fork.
git remote -v
origin  https://github.com/Your_Username/in-time.git (fetch)
origin  https://github.com/Your_Username/in-time.git (push)
Specify a new remote upstream repository that will be synced with the fork.
git remote add upstream https://github.com/nityanandagohain/in-timeVerify the new upstream repository you've specified for your fork.
origin  https://github.com/Your_Username/in-time (fetch)
origin  https://github.com/Your_Username/in-time (push)
upstream        https://github.com/nityanandagohain/in-time (fetch)
upstream https://github.com/nityanandagohain/in-time (push)- Go to Firebase Console
- Click on Add Project
- Add name, accept the terms and click on Create Project
- Go to 'Add Firebase to your Android App'
- Enter Package name as
com.example.in_time - Add your SHA-1 key (click on the question mark near it and follow the steps to find your SHA-1 key)
- Download Config file
google.services.json - Follow the rest of the steps
- Enter Package name as
- Run the app by typing
flutter runonto your terminal
Whenever contributing, create a separate branch using commands below. Keep your master branch synced with remote branch.
- This will create a new branch
git branch Branch_Name- Switch to the new branch
git checkout Branch_Name- Add your changes to the branch
git add .- Add an explanation to the contribution while committing
git commit -m "relevant explanation"- Push it onto your remote repository
git push -u origin Branch_Name- Go to your repository in browser and click on 'Compare and Pull Requests'.
- Add title and description to your contribution!


