Basic-MIDI-controller
Step 1
Install Arduino and teensy duino using this guide
Step 2
Breadboard setup
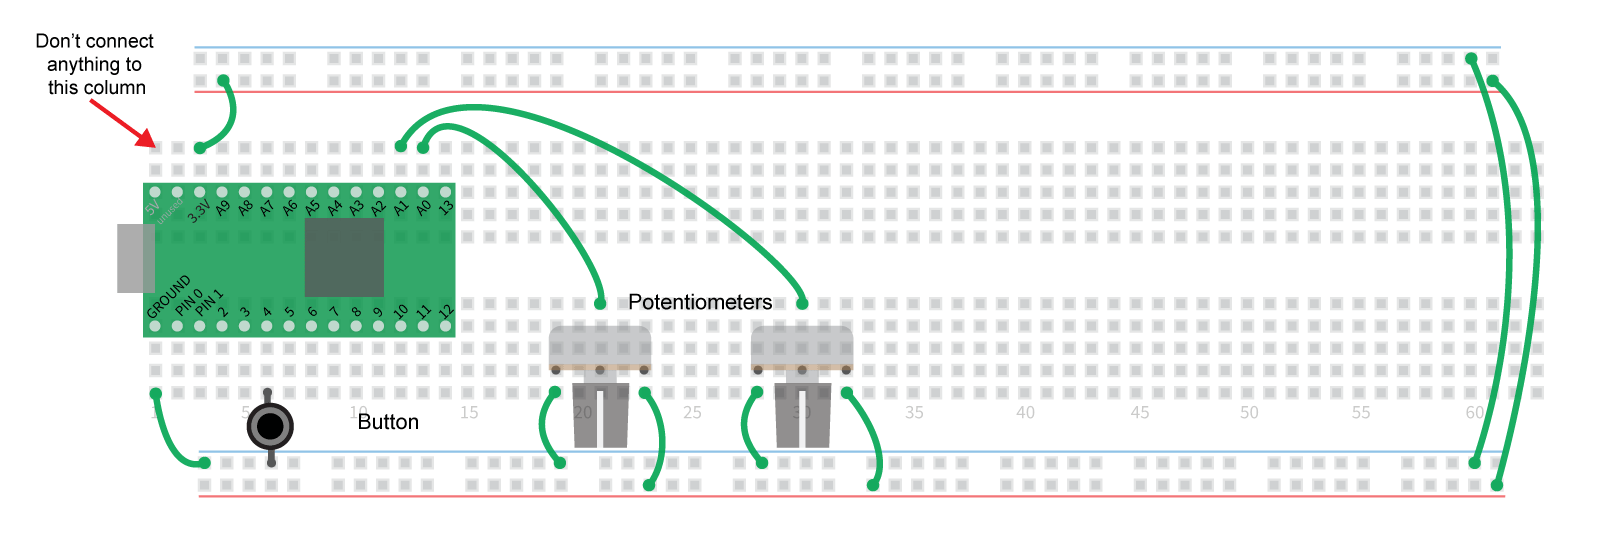
Put the Teensy, wires, button, and pots in the breadbaord as shown.

The pins on the top side of the Teensy taht star with A are analog input meaning the can read voltages between 0 to 3.3V and return a value. Other pins can just read if something is high (3.3V) or low (0V aka ground).
Here the pots have one side connected to ground and the other to 3.3V with the middle going to Teensy. Just like the volume controls we've discussed before, the pot is mixing bewteen nothing and something. If you were to read the voltage of the middle pin with the pot was at 12 o'clock you'd see 3.3V/2 = 1.65V. The analog pin can read this voltage and turn it into a number we can use.
The button is attached to a digital pin witch can read whe it's being pressed or not.
Step 3
Code
Download this file and open it with Arduino. It will ask you about moving it to a folder, just say ok.
In Arduino go to the tools menu and select Board>Teensy LC Also in the tools menu select USB Type>Serial + MIDI
Connect the Teensy to your comuter and upload the code by click the arrow icon in the top left corner of the Arduino window.
Once upladed the LED on the Teensy should blink whenever you adjust one of the controls.
If you want to see the MIDI data coming into your computer use MIDI Monitor on OSX or MIDI OX on PC.
Step 4
Editing the code
At the top of the code you'll see
#define button1_note 60
#define pot1_cc 20
#define pot2_cc 21
Change these to change the note and CCs the dvice is sending
Once you get all this going we can add more!