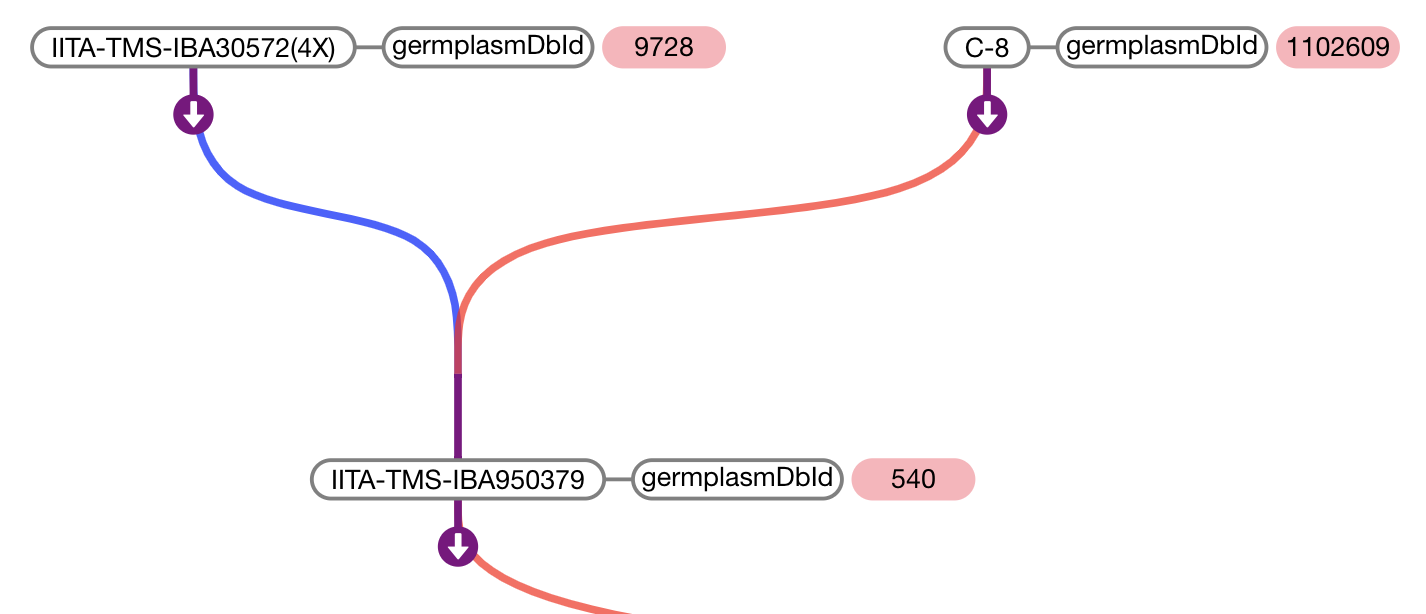
BrAPI Pedigree Viewer 

- Try it out here
- Include-ready version can be found under releases.
- Also available via npm:
npm install @solgenomics/brapi-pedigree-viewer
The pedigree viewer exposes a minimal API for initializing and populating the tree. It relies on BrAPI to fetch the pedigree data it uses.
Use the following snippets (in order) to fully set up a tree.
- Create a new PedigreeTree object (create one for each pedigree tree viewer)
var pdg = PedigreeViewer(
  //REQUIRED Server: BrAPI.js handle for target endpoint
  BrAPI("https://brapi.myserver.org/brapi/v1"),
  //OPTIONAL a function which returns a link to a germplasm information page, returning null will create a node without a link.
  function(germplasmDbId){
      return "https://brapi.myserver.org/germ/"+germplasmDbId+".html";
  },
  //OPTIONAL additional configuration options
  {
    credentials: 'same-site', //see https://developer.mozilla.org/en-US/docs/Web/API/Request/credentials for options
    urlTarget: '_blank', //see https://developer.mozilla.org/en-US/docs/Web/HTML/Element/a#attr-target for options
    nodeNameFn: function(d) { // allows for customization of the name displayed on a pedigree node
        return d.value.name;
    },
    textSize: "14",
    textFont: "sans-serif",
    arrowRight: function() { //resolve the right arrow display
        return "";
    },
    arrowUp: function() { //resolve the up arrow display
        return "";
    },
    arrowDown: function() { //resolve the down arrow display
        return "";
    },
  }
);
- Then, specify the root node and load the initial data.
pdg.newTree(
  //REQUIRED root germplasmDbId of germplasm which should be displayed on start (highlighted in pink)
  "1234"
)
- Last, tell the viewer where to draw.
pdg.drawViewer(
  //REQUIRED selector for the parent node of the new viewer SVG element.
  "div#pdgv-wrap",
  //OPTIONAL width of viewer
  800,
  //OPTIONAL height of viewer
  400
);
- (Optional) Provided function to retrieve phenotype/marker data to display. (See the next section.)
Use the pdg.data(accessor) method to display marker or phenotype data. Data is displayed as a table to the right of each node in the tree. accessor should be a function which takes a germplasmDbId returns an array or Promise which will resolve to an array in the following format:
// Example of data accessor return value
[
  {
    "name":"DS", // Unique name for data row
    "values":[ // Array of data values to display in row
      {
        "value":"0", // Text to display as data value
        "color":"#EEE" // background color of data value
      },...
    ]
  },...
]// Source example
pdg.data(function(germplasmDbId){
return [
{name:"germplasmDbId",values:[
{value:germplasmDbId,color:"#ffb3ba"}
]}
]
}) // Source example
pdg.data(function(germplasmDbId){
return fetch(`https://mysite.com/api/marker_data/${germplasmDbId}`)
.then(resp=>resp.json())
.then(data=>data.markers);
/*
data.markers: [{
"name": "Marker:4:12202:REF",
"values": [{
"value": "REF",
"color": "#eeeeee"
}]
}, {
"name": "Marker:3:04993:GT",
"values": [{
"value": "T",
"color": "#baffc9"
}, {
"value": "A",
"color": "#ffb3ba"
}]
}, {
"name": "Marker:3:05002:GT",
"values": [{
"value": "A",
"color": "#ffb3ba"
}]
}]
*/
}) - @solgenomics/brapijs (Peer Requirement)
- D3.js (v4) (Peer Requirement, expected to be in scope)
- d3-pedigree-tree
- @solgenomics/brapp-wrapper (For building the example.)
- jQuery (v3) (For the forms in the example.)


