Please use the provided folder structure for your docs (project plan, design documentation, communications log, weekly logs, and final documentation), source code, testing, etc. You are free to organize any additional internal folder structure as required by the project. Please use a branching workflow and once an item is ready, do remember to issue a PR, code review, and merge it into the develop branch and then the master branch.
.
├── docs                    # Documentation files (alternatively `doc`)
│   ├── project plan        # Project plan document
│   ├── design              # Getting started guide
│   ├── final               # Getting started guide
│   ├── logs                # Team Logs
│   └── ...
├── app                     # Source files
├── tests                   # Automated tests
├── utils                   # Tools and utilities
└── README.md
Also, update your README.md file with the team and client/project information. You can find details on writing GitHub Markdown here as well as a handy cheatsheet.
In order to run the website hosted on AWS Elastic Beanstalk server, you need to enable the "Insecure origins treated as secure" flag on your browser. Follow the steps below to enable the flag on your browser:
- In the address bar, type
[browser name]://flagsand press Enter. Replace[browser name]with the name of your browser (e.g.,chrome,firefox,edge). - Search for "Insecure origins treated as secure" in the search bar.
- Paste our website link http://vnonymous-env.eba-ai3bsdyf.us-west-2.elasticbeanstalk.com/ into the box area.
- Click the dropdown menu and select "Enabled".
- Click the "Relaunch" button at the bottom of the page to restart your browser.
This guide will walk you through the process of setting up your Python environment, installing necessary packages, configuring the database, and running the Django server. It also includes instructions for running Selenium and Pytest tests.
Note: The following guide uses python as the command to run Python. Depending on your system, you may need to use python3 or py instead.
If Python is not installed on your system, download it from the official Python website and follow the installation instructions. During the installation process, ensure to check the box that says "Add Python to PATH".
First, navigate to the app folder in your command line. Then, run the following command to install the required packages
Then, activate the virtual environment:
-
MacOS/Linux:
source myenv/Scripts/activate -
Cmd.exe:
myenv\Scripts\activate.bat -
Powershell:
myenv\Scripts\Activate.ps1 -
Git bash:
. myenv/Scripts/activate
With the virtual environment activated, install the necessary packages.
pip install -r requirements.txtFFmpeg is required to convert webm files to mp4 format. Follow the instructions below to install FFmpeg on your system:
-
Windows 10/11:
- Go to the official FFmpeg download website.
- Download "ffmpeg-XXXX-XX-XX-git-5d71f97e0e-full_build.zip" package (Date version might differ).
- Extract the ffmpeg zip file into your C drive ("C:").
- Rename your extracted ffmpeg folder to "ffmpeg".
- Navigate to the bin folder and copy the bin navigation path ("C:\ffmpeg\bin").
- Type “Edit the system environment variables” on the search tab and open it.
- Click the "Environment Variables" button.
- Click and edit the "Path" inside the "System variables" table.
- Add a new path with your copied bin navigation path ("C:\ffmpeg\bin").
- Click "OK" to save.
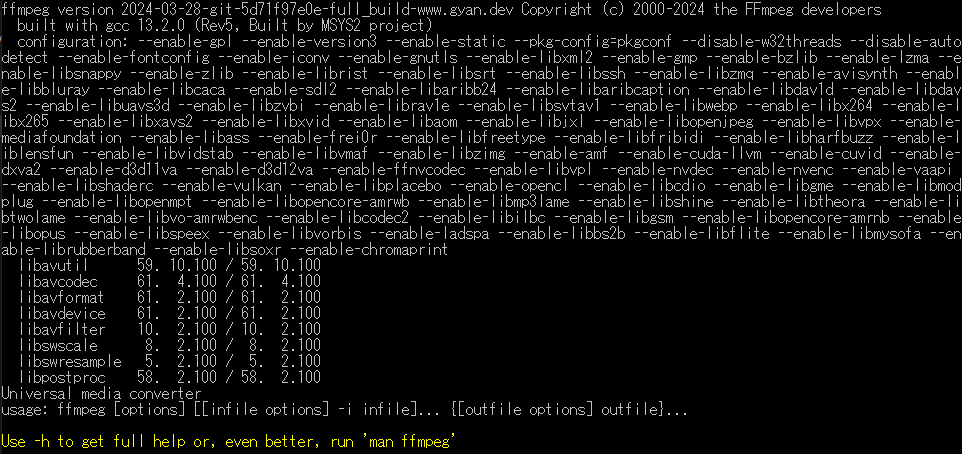
- Type this command in Command Prompt to check if FFmpeg is working:
ffmpegIf successfully installed, FFmpeg displays configuration options.

-
MacOS:
-
Make sure to have Home Brew installed: Go to Home Brew Website to follow the instructions there if it is not installed.
-
Run the following command to install ffmpeg:
brew install ffmpeg -
Check if ffmpeg installed properly by running this command:
ffmpeg
-
-
Using Local hosting:
-
Using AWS Elastic Beanstalk hosting:
-
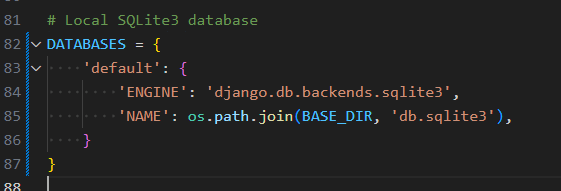
Using Local SQL Database:
-
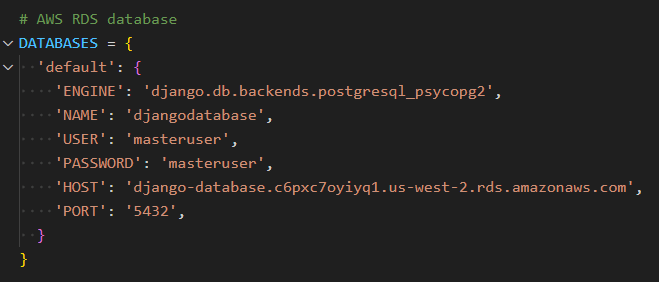
Using AWS RDS database:
Configure the database by applying migrations:
python manage.py makemigrations
python manage.py migrate-
Using Local host AWS access:
-
Using AWS Elastic Beanstalk hosting access:
-
Using Local host:
-
Using AWS Elastic Beanstalk hosting:
Launch the Django development server:
python manage.py runserverOpen your web browser and navigate to http://127.0.0.1:8000/ to access the locally hosted website.
For the following section, make sure to configure the views.py, database and AWS access/session keys as mentioned in the previous sections.
-
Start the Django server.
-
In a different terminal window, activate the virtual environment. Navigate to the
Selenium_Testsfolder in your command line. -
Run all Selenium tests:
python master_test.py -
Run a specific test file (replace
[your_file_name_here]with the specific test file name):python [your_file_name_here].py
Note: Selenium Testing can be finicky depending on how fast your computer can run. If something fails, most of the time, if you run it again, the test will pass. Otherwise, add wait time to allow for the page to load.
-
Save Selenium test report into a txt file (replace
master_test.pywith any other test file name if needed):python master_test.py > report.txt
-
For this section, the server is not required to be running.
-
Navigate into the
appfolder in your command line. -
Run all Pytests:
python manage.py test pytests -
Run a specific pytest (replace
[your_file_name_here]with the specific test file name):python manage.py test pytests.[your_file_name_here]
- Bootstrap studio
- Our project structure was inspired by this template
- Login template was using login template website
- Register template was using register template website
- Profile page template was using profile template website
- AWS video face blurring was referenced by AWS Rekognition Video


