This isn't 1:1 with the video, but this is the script I tried to work off of. Yes I am a two take tony. I sure hope the video doesn't reach 1 hour long...
- "Smush Blender" : Carlos' smash ultimate blender plugin
- Sharp Smash Suite: The suite of python scripts and programs used for model importing. Could also refer to the Blender addon of this suite.
- StudioSB: Program for importing models
- SSBH Editor: Program for editing various smash files
- Arcexplorer: Used to obtain assets from your copy of smash
- ssbh_data_json: Converts files from smash to json, and vise versa
- Switch Tool Box: Used to import textures
- Normal: Hazards on/off, base form of a stage
- Battle: Omega/BF version
- Render: Contains information about lighting and rendering
- Mesh: the numshb file that contains polygons
- Material: the numatb file that contains a list of materials and textures.
- Texture: a nutexb file that contains an image.
- Model: the numdlb file that tells the game "apply this material to this mesh"
- Animation: a nuanmb file that controls animations, as well as lighting
- Shader: the long string of numbers that tells the game how to render a material based on several parameters
- Config.json: Tells arc to add files and directories
- nrm: Normal map, creates texture on the surface by rendering vertices higher or lower.
- prm: PBR, a file whose RGBA channels denote how metallic (R) and rough (G) a texture should be, as well as Ambient Occlusion/Lighting (B) and specular (A)
- AO: Ambient Occlusion
- Inkmap: a mesh used for when inkling uses that pesky side special move
- Vertex Color: Assigns color values to vertices.
- Blank file, "blanking" a folder: To make a model invisible by having arc load an empty file type.
- Shiny Blue DK: Someone did an MS Paint fill bucket recolor of DK and posted it online. Please don't do this.
I wanna highlight what we won't be going over first so that you don't feel too confused at the end. This won't be going over custom collisions or stage gimmicks, typically referred to as "lvd" edits or anything that involves the stdat file. This is strongly on a stage-by-stage basis so if I showed how to edit Smashville's, you might not be able to take those same concepts to New Donk City. I won't be going over animations, it's mostly similar to have character animations work but with some caveats involving stage coding on specific models. Another stage-by-stage thing. Lastly, I'm assuming you have SOME familiarity with smash ultimate modding in general. If I told you to make me a shiny blue DK mod, you'd say "Easy!". I'll also keep a glossary in the transcript so if I say something weird like "smush blender" you can look at what that might mean.
Before we start, we'll have to download SEVERAL things. This is mostly following the README guide in https://github.com/CSharpM7/SharpSmashSuite as well as the FAQ in https://csharpm7.github.io/stages/; We'll want to download all the necessary programs, as well as the repo. Normally with github projects you'll want to check the releases tab to see if there are any recent releases, but often you'll want to "download from source" which is just clicking on the green code button and downloading the zip file. I won't be showing how to download and install everything, but while those programs are installing, we can go over some high-level ideas first before we get into using the tools. Feel free to pause if you want to get everything prepped before we go over concepts first, though.
First, let's go ahead and bookmark this site (https://csharpm7.github.io/stages/). This is my repo of knowledge about specific stages and general concepts. If you need a material, or want to know some basic terms, this site will help you out. It also has a list of recommended programs.
With stages, there's normal folders and battle folders, battle corresponding to the omega and battlefield variant. This is why you can't have separate omega and battlefield forms of a stage, they share the same folders. Looking inside one of these folders, you'll see lut, model, motion, param, and render. Sometimes an effect folder, too. Model and Motion are just like fighters, that correspond to the models and animations for the stage. Param is mostly related to stage mechanics, collisions, and a few extra visual details. Render is related to lighting. Lighting can be controlled through a few different things here, each spherical file (shpanim) controls a sort of ambience lighting...there's a whole talk Sakurai did about this somewhere. Loupe is for the magnifying glass. Reflection_cubemap is what fighters and inkmaps will reflect. Render_param...admittedly I don't touch this file too much but it's got a lot more specifics on how light, light rays and a few other gfx work. The light folder contains an animation file that corresponds to the lighting system. It's best to edit these through converting them to json first, provided they aren't animated. The animated ones...you can try it in smush blender.
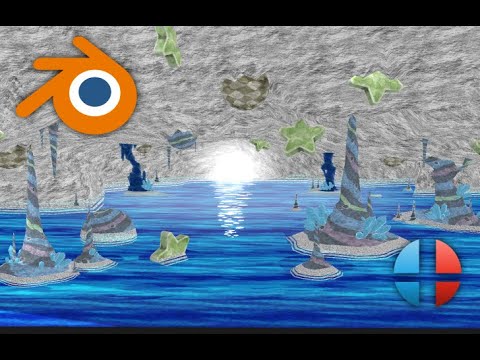
Let's open our moddingTutorial zip file. You can download it here. We'll be making a background from return to dreamland, so let's go to this site and download this folder. This folder has all the textures in it. Also say thank you Peardian. Take the textures from the background we downloaded and put them into the cave folder.
It'll contain a folder called "none" which contains a bunch of "empty" or blank files that you can use to make a mesh turn invisible, or prevent an animation from playing. It also contains BF.dae which is the transition model for Battlefield. Perfect for getting the scale of a stage. We also have a copy of one of the background scenes from Kirby's Return to Dreamland. We are going to be working with Great Cave Offensive's omega form, so go ahead use arcexplorer to get the assets from that stage using your copy of smash.
Let's open the blend file, and I've already made a quick scene for you to work on. (If the cave looks dark, then just turn on the third sphere icon which is material preview) All this needs is to be fixed for smash ultimate exporting. I'm also going to set up a work folder, which will look exactly the same as it would in my ultimate mods folder. So this workspace will have a stage/kirby_cave/battle folder, and I'll copy the contents over from my arcexplorer rip. I'll remove the lut folder, and inside my model folder, I'll only be keeping the stc_cave_bg and hikari folders. For the hikari folder, I am going to delete all the contents, and from that none folder in our zip, I will place the numatb material file, and the numdlb model file. This will turn that model completely invisible.
Make sure you have the SharpSmashSuite blender addon installed already (google how to install blender add ons or blender python scripts). NOTE: If you're working on a different background, you'll need to make sure every mesh only has one material per mesh. I recommend running Separate and Preserve Materials if you think this is the case. Let's go into the first collection, and select ALL the polygons. Open the Sharp Smash Suite tab and navigate down to "Join Like Objects". This joins objects together based on material. I'm also going to remove the waterindrect01 and CA_Light02_01 mesh for this tutorial. Select all the polygons again, and click "Export Material List". We want to export this to the stc_cave_bg folder in our mod, because that will be the background we are replacing. Lastly, export this as a .dae. using these settings. I've already saved these as a preset, I recommend you do as well.
We are now quickly popping into StudioSB to import the mesh. Open that cave folder again, delete the current meshes, and then go to file>import>model. Select our exported dae. I am going to set Flip UVs to True, I find I usually have to set this to true. Now this gives us a textureless version of our model. Before we save, let's select all the meshes here, and set "ExportColorSet1" to true. This means that these models will have a vertex color, which most stage materials expect. Now go to File>Export>Scene and save it to the cave folder
NOTE: you might have to run SharpSuite.py via Idle. You can search for the idle program via windows key. Notice how everything was blank? Well we don't have any textures. Let's open the SharpSmashSuite folder. In the img2nutexbGUI folder, we have to run the program once. It'll ask for your img2nutexbGUI.exe file, so make sure that was downloaded before hand. I also recommend making a build of nutexb_cli.exe, though it is not necessary for this specific mod as we are using png files. After running the program and setting where your exe files are, let's run SharpSuite.py. It'll begin by reminding you to import your model via StudioSB and export a material list via Sharp Smash Suite, which we did! I will select our model folder, the cave one. Then I will select from the downloads our folder with the images. If you have StudioSB still open, reload the scene by double clicking on the model file.
(If you don't have the material presets from earlier, you'll want to extract those material files from their model in arcexplorer, then open that model in another ssbheditor window. Alternatively, you can replace your SSBHEditor presets with mine that I included in the repo. navigate to %Appdata%, then under local go to ssbh_editor and replace that file. Don't do this if you have custom presets already)
Before popping into SSBH Editor, I want to bring over the crystal04_d_col and prm textures from the main ring here. We have crystals in our scene but they don't look too great. Let's add a little extra flair with these textures.
Open SSBH Editor, open the cave folder and WOW. All the textures are there! Hold on we are NOT finished yet! For this section, I recommend having my stage site on hand as I'll be using shaders from the material list there. I have them set as presets on my end. Let's make these changes:
-
BlueLight needs the PS2 light shader (SFX_PBS_0000000000094100_far). I will also bring down the emission colors so it isn't glaring white. (CustomVector3 is now set to (.1,.1,.1))
-
Light01 needs the PS2 light shader. (CustomVector3 is now set to (.75,.75,.75))
-
PillarWater02 needs the PS2 light shader.
-
CA_Crystal needs the Town and City ring_metal material (SFX_PBS_0000008009080248_opaque), this texture has a prm on it. The one down side is that this texture receives shadows, while almost every other shader in the background doesn't. I'll be going over why this isn't as great later.
-
LightReflection needs the scrolling diffuse shader from Gaur Plains (SFX_PBS_000000080109c240_sort). We also need to change the Z and W values, which represents how fast it will scroll in a direction. I also want to make sure the render pass is sort.
-
Water 01 needs the scrolling shader from Gaur Plains. It'll use similar values to reflection, but will use the far render pass. Working with transparency is REALLY difficult, if you can find textures that have alpha testing and are opaque it'll make it easier but for this one we have to set the render pass to far so that the reflection will be rendered after the water is, which will result in the reflection being ontop of the water.
Once that's done, hit File>Save.
Because this is a cave, I want to change the lighting a bit. I'll copy over the files from Dracula's Castle, the battlefield version. Next I'll go into the light folder. I also want to open ssbh_data_json in another window. I'll drag light00 into that exe, and open up the json file that comes out. If I wanted to make the character or stage lighting dark, I'll scroll back up to the LightChr and LightStg areas. CustomFloat0 is the intensity for light, so if I bring this number down, there will be less light. Make sure the lighting for characters and stages are somewhat similar. Some stages have multiple entries, which means different models could have different lighting effects.
Let's go into the sharp smash suite and run LazyConfig. Go ahead and select your mod workspace, it should have a "stage" folder in it. In one click, it creates the perfect config.json for you! Now move it to your switch, and boot up smash.
There's a reason why we worked on a background element rather than the main stage and that's because our prototyping solution uses a very barebones shader. Most notably, that shader has no normal maps, prms, and does not support shadows. Also the way we converted images, because they were pngs, put them in a very expensive dds format called R8G8B8...whatever the rest is. You can tell because of the ludicrous file size, which you will have to go into SwitchToolBox. Preferably you'd want this to be BC7_SRGB or BC1_SRGB just depending on the quality needed. If I see a mod up on gamebanana, or heaven forbid on patreon or done as a commission, that only used the SharpSuite.py technique across all the models and did nothing the zhuzh it up, I'm flagging it. And for those who want to commission stages, if you recognized this is all they did you gotta let someone know. It's a good thing for our background we learned how to put in just a little more effort into making things nice like making scrolling textures and using a little bit of prms.
Right, on to the actual best practices. Here's a behind the scenes look at Sky Sanctuary (#selfpromo). We could also just look at an in-game example but here's a little inspiration that with dedication you could make something look just as official. So there's the main ring area up in front, and the background floating islands and they look a lot different. There's this extra polished quality to the objects in front, and the back objects have just a little bit. To save on performance, we want to use the fancy shaders only on stuff that's on the foreground, and perhaps a few select background elements. What's important is that almost every element on the main ring uses a complex shader to give it a polished feel. Ground materials have prms and normal maps, the trees use a relatively simple transparent shader...I plan on giving them vegetation sway later on. This also is one of the few mods out there that uses a baked map, in this case some baked AO for the crevices, though you can't see them unless I change the render settings. It looks amazing in game. If you want to make your own custom rings for omega or normal stages, you'll need to learn how to make your own PRM maps if they aren't provided (sorry this tutorial won't cover that). Another VERY VERY VERY important thing is that all shaders on the main ring MUST support shadows. I wanna say if a shader has an 8 as a digit here (...98a...) it should support it but you also might want to test in game. Most basegame shaders that are on the main stage support them. If your main ring doesn't support shadows, that's the mark of a low quality mod.
In the background, the shaders are much more simple. Because the players won't be able to look at them up close, you can get a way with saving performance here. The islands closer to the stage have baked AO, but the ones all the way in the back don't.
So now you know how to import a background into smash ultimate! We also went over how to improve the quality of materials, as well as some best practices if you want to become the next top stage modder. We didn't touch over the entire Sharp Smash Suite, Lazy Mat is really good if you have excel for organizing materials. You might also need to use img2nutexbGUI if you have normal and prms maps with your import. MagicModel is specifically for models exported via the blender plugin. NumatbGUI and LVDSpec we don't need to go over. UIRetrieve is for when you're ready to make UI.
For you UI, Export the stage folder from your ui/replace and replace_patch folders in arc, and this'll automatically detect which UI to copy over. UI is the same for characters except much easier. I recommend using TNN's Unrestricted Camera and my Invisible Puffs mods to get a good screenshot. Use Special Smash's fixed camera mode to get a good screenshot.
But ya thank you for sitting through ALL of this, or skimming through I won't judge. Just make sure with stage mods PLEASE put some quality into it. I really don't want gamebanana to be flooded with the Shiny Blue DK of stages. Take pride in your work, and people will appreciate it. Cut corners and people will notice...for the wrong reasons.
Thank you to chrispo, C2PO, boop and 4days (huge shoutout) for funding this tutorial on my kofi page. I honestly would not have the time to block out this tutorial betwixt Alucard, HDR and other things but I'm glad a tutorial is finally in the hands of the community. Also huge thanks to Peardian for ripping the assets and making them publicly available.
Take care, and mod responsibly.
https://gamebanana.com/wips/73183?post=10510039
Vertex colors do a plethora of things in smash ultimate. The most commonly used one, colorSet1 is great for when you want some variance in specific meshes, or when you just wanna quickly paint some AO or shadows on a mesh without baking a texture. Most modders don't actually use baking, and maybe sometimes they'll add some vertex color. It's just how much you wanna put into a mod, especially for imports that usually come with a set of them. Some vertex colors even have alpha on them which is annoying to paint BUT creates cool effects like the nighttime light on Minecraft World.
There's some other colorSets, like one that controls vegetation sway and one that controls blending two materials but it's a case-by-case thing.
https://gamebanana.com/wips/73183?post=10509855
For stage names you need to edit ui/message/message_name and for the series icon you need to edit ui/param/database/ui_stage_db. There's some other tutorials on gamebanana about patch msbt and prc files