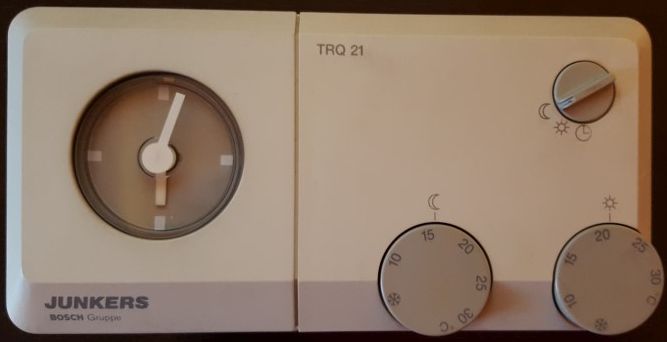
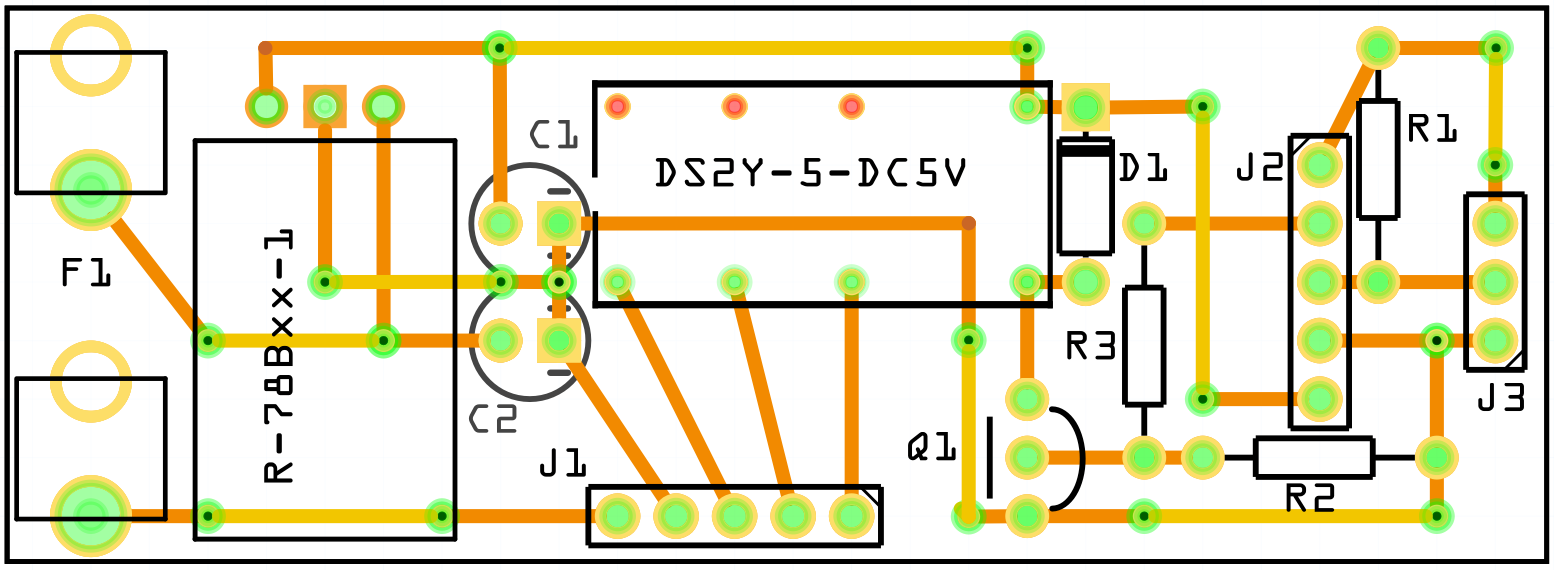
This Project improves the Junkers TRQ 21 T Thermostat with the following features:
- mute the ticking clock
By disconnecting the timer clock from the thermostat the clock will stop ticking eventually
(might take a few weeks before the battery dies) - support weekends
The default timer clock does not differentiate between work days and weekends
By controlling the thermostat with your smart home, you can define every timer rule you want - support presence detection and geo location
If your smart home supports it, your thermostat will do too now - support disabling when windows are open
If your smart home supports it, ...
Best of all: Your thermostat will not be managed and you can still change to day and night mode manually like before.
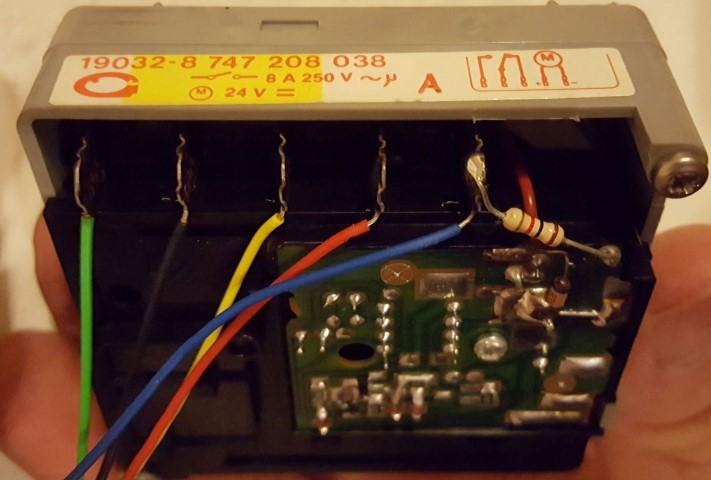
You will replace the internal timer clock with an Arduino (esp8266) to switch between day and night mode.
The Arduino will be connected via WiFi and communicates via mqtt with your smart home (e.g. openHAB).
You can optionally integrate a button to change the current mode without switching to manual mode on the thermostat. But this may require damaging the original case if want it to look good.
Beside some standard components, you need:
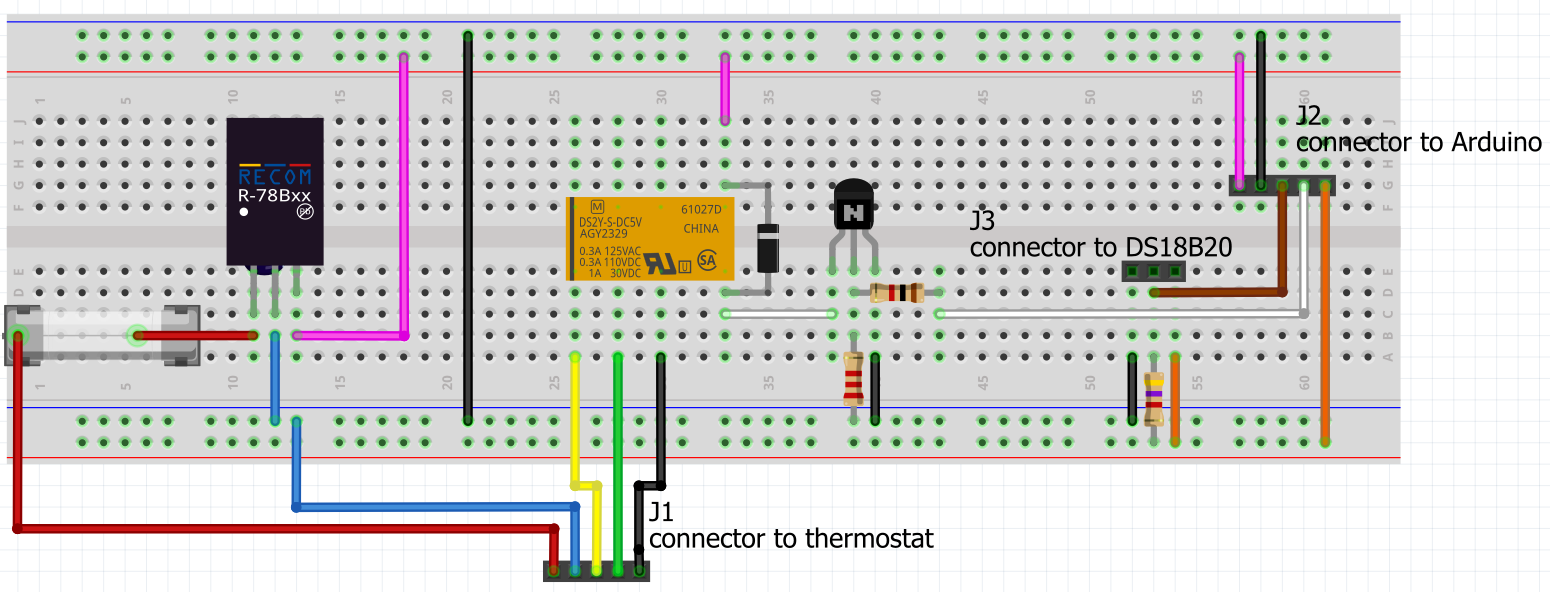
- Arduino: Wemos D1 mini (pro)
Website - Relay: Panasonic DS2Y-5-DC5V
Datasheet - DC-DC Converter: Recom R-78B5.0-1.0L
Website
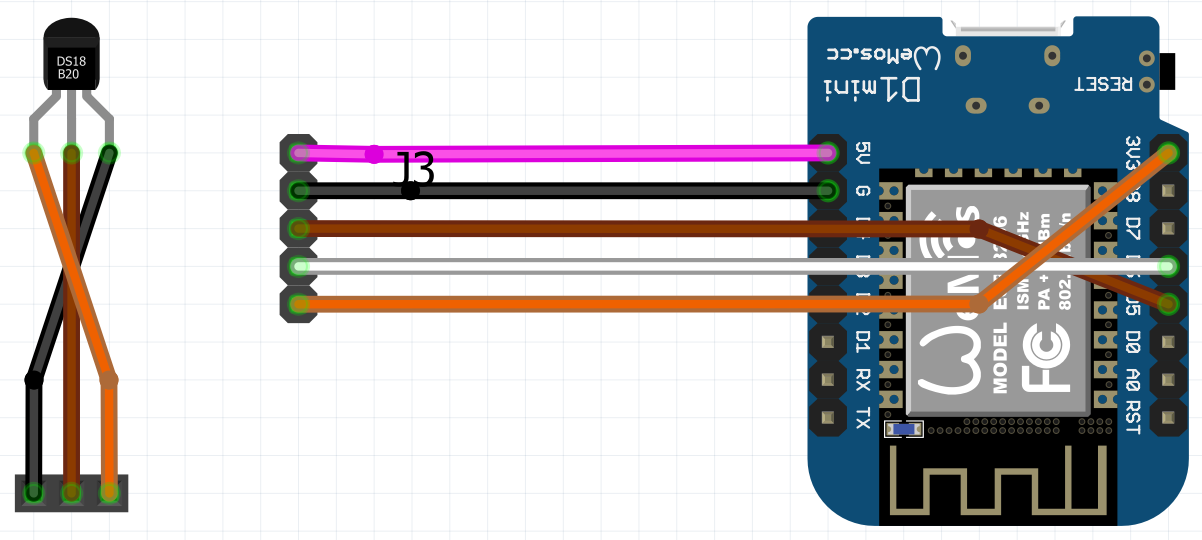
Datasheet - Temp sensor: Dallas DS18B20
Website
Datasheet - Wire-to-Board connector
- molex SPOX™ Wire-to-Board Crimp Housing
2.50mm Pitch SPOX™ Wire-to-Board Crimp Housing, Friction Lock, 5 Circuits
Website
Datasheet - molex SPOX™ BMI Connector System (5x)
2.50mm Pitch SPOX™ Crimp Terminal, 22-28 AWG, Bag
Website
Datasheet
You can find more photos of the finished project in the photos directory.
Open the web interface of your controller.
Click Configuration and then Configure Mode. Select the Module Type.
Here : "18 Wemos D1 mini".
Define the Sensors for the GPIOs.
- GPIO12: "17 Relay1"
- GPIO13: "09 Switch1" (optional, if you add a switch to the project)
- GPIO14: "04 DS18x20"
Click Save
If you added a switch to your project, execute the following commands in the Console in the web interface.
SwitchMode1 2
SwitchTopic1 wemos01-switch
See this page for more details.
You can find some example configuration files in the openhab folder.
You basically need an item for the relay and an item for the temperature sensor. To make use of some smart automation rules and manual override you might want to configure some virtual items. If you have any windows or door contacts connected to your smart home you also might want to turn the thermostat off while you let some fresh air in.
You can also use a transformation file to display more accurate terms than "ON" and "OFF" for day and night mode.
Finally I renamed some openhab2 classic icons to thermostat*.png/svg. (see /openhab/icons)
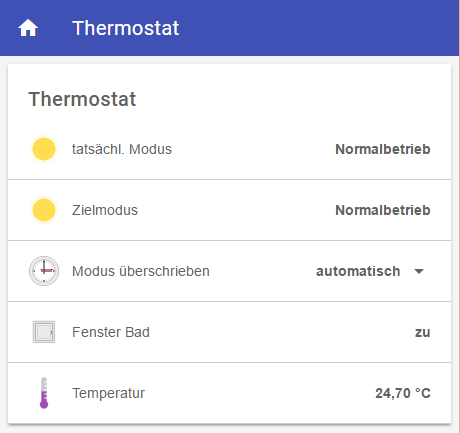
The current mode is "Nachtabsenkung" (night mode)
The target mode is set to "Normalbetrieb" (day mode).
The override mode is set to "automatic" (this means no override).
The window is open.
While the current mode should be "day mode", because of the target mode, it actually is "night mode", because the window is open. Once the window closes the mode changes to "day mode" (target mode).
