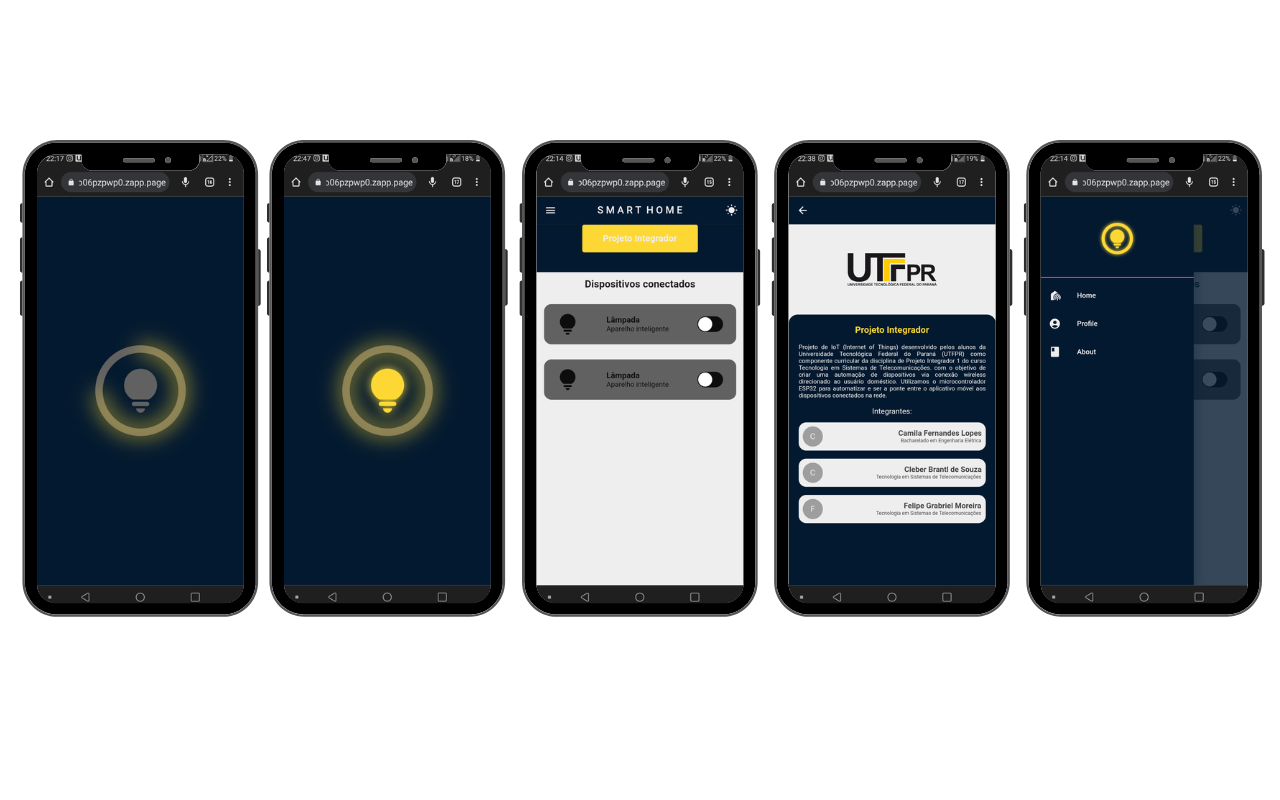
This README provides an overview of the Smart Home project, a mobile application developed using Flutter. The project was completed as part of a university course and aims to control two lamps by connecting to an ESP32 device. This document will guide you through setting up the project, running it on both Android and iOS, and understanding its key features.
The Smart Home Flutter App is designed to provide users with a convenient way to control two lamps in their home. The app connects to an ESP32 device via Wi-Fi and allows users to turn the lamps on and off remotely. This app, initially developed as a project for the 'Projeto Integrador' course at Universidade Tecnológica Federal do Paraná (UTFPR), has been successfully completed and approved. Currently, I am actively working on improving the project and implementing new features.
- Device Connection: Connect the app to an ESP32 device over Wi-Fi.
- Lamp Control: Control two lamps individually, turning them on and off remotely.
- Intuitive Interface: A user-friendly interface for easy navigation and control.
- Cross-Platform: The app is compatible with both Android and iOS devices
- Flutter: sdk: ">=2.19.0 <3.0.0"
- cupertino_icons: ^1.0.2
- google_fonts: ^5.1.0
- http: ^0.13.0
- provider: ^6.0.5
- percent_indicator: ^4.0.1
Before you begin, ensure you have met the following requirements:
- Flutter SDK instalado.
- Android Studio or Xcode for Android and iOS development, respectively.
- An ESP32 device configured and connected to your Wi-Fi network.
- Clone the repository to your local machine:
git clone https://github.com/yourusername/smart-home-flutter.git- Change your working directory to the project folder:
cd smart-home-flutter- Install the Flutter packages:
flutter pub get- Open the project in your preferred Flutter development environment (e.g., Android Studio, VSCode).
- Configure the ESP32 device to run the provided firmware to control the lamps.
- Modify the ESP32 connection settings in the Flutter app code to match your ESP32's IP address and port.
- Build and run the app on an Android or iOS emulator or a physical device.
- Connect to your ESP32 device via the app.
- Use the app to control the two lamps by turning them on or off.
Contributions to this project are welcome. To maintain an organized version history and follow semantic commit standards, we recommend using meaningful commit messages. You can contribute in various ways:
-
Reporting Issues: If you encounter a problem or bug, please open a GitHub issue and provide relevant details such as steps to reproduce the issue and information about your environment.
-
Suggesting Enhancements: If you have ideas to improve the project, feel free to open an issue to discuss your suggestions.
-
Submitting Pull Requests: If you want to contribute code, submit a pull request. Please ensure that you follow these steps for semantic commits:
-
Use one of the following prefixes in your commit messages:
feat:for new features.fix:for bug fixes.docs:for documentation changes.style:for formatting/code changes that do not affect program behavior.refactor:for code improvements/refactoring of existing code.test:for adding or modifying tests.chore:for maintenance tasks like dependency updates.
-
Example of a commit message with a prefix:
feat[your-name]: Add an awesome new feature. -
Ensure your commit messages are clear, concise, and descriptive.
-
-
Code of Conduct and Contribution Guidelines: Please follow this project's code of conduct and contribution guidelines when making any contributions.
