██╗███╗   ██╗███████╗████████╗ █████╗ ██╗     ██╗
██║████╗  ██║██╔════╝╚══██╔══╝██╔══██╗██║     ██║
██║██╔██╗ ██║███████╗   ██║   ███████║██║     ██║
██║██║╚██╗██║╚════██║   ██║   ██╔══██║██║     ██║
██║██║ ╚████║███████║   ██║   ██║  ██║███████╗███████╗
╚═╝╚═╝  ╚═══╝╚══════╝   ╚═╝   ╚═╝  ╚═╝╚══════╝╚══════╝

  ██████╗ ██████╗ ███████╗███╗   ██╗ ██████╗██╗   ██╗
 ██╔═══██╗██╔══██╗██╔════╝████╗  ██║██╔════╝██║   ██║
 ██║   ██║██████╔╝█████╗  ██╔██╗ ██║██║     ██║   ██║
 ██║   ██║██╔═══╝ ██╔══╝  ██║╚██╗██║██║     ╚██╗ ██╔╝
 ╚██████╔╝██║     ███████╗██║ ╚████║╚██████╗ ╚████╔╝
  ╚═════╝ ╚═╝     ╚══════╝╚═╝  ╚═══╝ ╚═════╝  ╚═══╝
The best way to install OpenCV is from source since there are multiple ways to compile it (using GPU optimizations for instance). In order to automate this process I've put together scripts that install the necessary prerequisites and build OpenCV with C++, Java and Python bindings. I also included example source, so you can test the installation.
I no longer build ffmpeg from source. Instead I rely on libav, so the install process is faster now. Both Python and Java work with VideoWriter using X264 as well.
Platforms Supported
- Ubuntu 14.04.3 LTS x86_64
- Ubuntu 14.04.3 LTS x86
- Ubuntu 14.04.3 LTS armv7l (Will not build on Official ODROID images, see Create Ubuntu root filesystem ODROID-C1/C1+)
OpenCV versions
I have included branches aligned with various versions of OpenCV. I'm not keeping the branches up to date, but you can see where they were at the time of branching. If you wish to use a branch then you will need to bring some things up to date yourself. The master branch is aligned to OpenCV master. For some reason OpenCV uses branches sometimes and tags others, but not consistently. For instance, there is a 2.4 branch, but no 3.1 branch. Tags seem to be the preferred method of organizing releases.
If something breaks when executing code with the OpenCV master branch then try again another day. I have had times where something that worked would segfault the JVM which was happening down in the C++ code. All part of being on the cutting edge.
WARNING
This script has the ability to install/remove Ubuntu packages and it also installs some libraries from source. This could potentially screw up your system (if it's not a fresh install), so use with caution! I suggest using a VM for testing before using it on your physical systems. I tried to make the defaults sane in config-*.sh files.
To do
- Install X265 - I tried FFMPEG PPA and libx265-dev, but no luck with X265 FOURCC.
- Build for Python 3
Provides
- OpenCV from source
- opencv_contrib is built by default, but can be disabled in config-opencv.sh.
- ARM optimizations
- Patch libjpeg to mute common warnings that will fill up the logs
- Java 8 and Apache Ant
- Patch memory leaks as I find them. Get more information here
- FourCC class
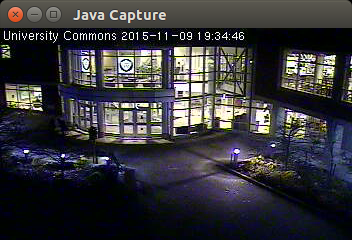
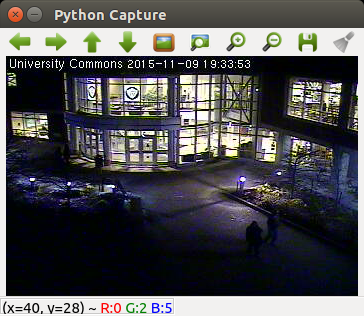
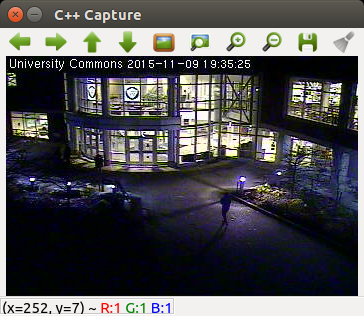
- CaptureUI Applet to view images/video since there's no imshow with the bindings
- Java, Python and C++ examples can be easily run from Eclipse.
- Capture UI
- Motion detection
- People detection
- Camera Calibration
- Drawing
- Scripts update individual components without having to worry about uninstalling them first
- Java
- OpenCV
Build
Make sure the following is in your /etc/apt/sources.list for ARM:
deb http://ports.ubuntu.com/ubuntu-ports/ trusty multiverse
deb-src http://ports.ubuntu.com/ubuntu-ports/ trusty multiverse
deb http://ports.ubuntu.com/ubuntu-ports/ trusty-updates multiverse
deb-src http://ports.ubuntu.com/ubuntu-ports/ trusty-updates multiverse
- On ARM platforms with limited memory create a swap file or the build may fail
with an out of memory exception. To create a 1GB swap file use:
sudo su -dd if=/dev/zero of=tmpswap bs=1024 count=1Mmkswap tmpswapswapon tmpswapfree
git clone --depth 1 https://github.com/sgjava/install-opencv.gitcd install-opencv/scripts/ubuntu- Edit config-*.sh files and change versions or switches as needed
- Run individual scripts to update individual components
sudo ./install-java.shto install/update Javasudo ./install-opencv.shto install/update OpenCV
- Run script in foreground or background to install all components
sudo ./install.shto run script in foregroundsudo sh -c 'nohup ./install.sh &'to run script in background
Build times
- Acer AM3470G-UW10P Desktop
- Test build on 04/14/2016
- AMD A6-3620 quad core
- 2.20GHz, 4MB Cache
- 8GB DIMM DDR3 Synchronous 1333 MHz
- PNY CS1311 480 GB 2.5" SATA III Internal Solid State Drive SSD in AHCI mode
- Ubuntu 14.04.3 x86_64
- ~21 minutes (depends on download latency)
- MacBookPro 11,3
- Test build on 11/02/2015
- Intel(R) Core(TM) i7-4870HQ (8 cores)
- 2.50GHz, 6MB Cache
- 16GB SODIMM DDR3 Synchronous 1600 MHz (0.6 ns)
- APPLE SSD SM1024
- Ubuntu 14.04.3 x86_64
- ~16 minutes (depends on download latency)
- ODROID-C1/C1+ (Mali-450 MP2 GPU has no support for OpenCL)
- Test build on 02/12/2016
- Amlogic S805 quad core
- 1.5GHz Cortex-A5 (set to 1.6 GHz)
- 1GB DDR3
- 32GB SanDisk Extreme PRO 32GB UHS-I/U3 Micro SDHC
- Ubuntu 14.04.3
- ~1.3 hours (depends on download latency)
- ODROID-XU4 (Mali-T628 MP6 GPU has OpenCL support)
- Test build on 02/15/2016
- Samsung Exynos 5422 Cortex-A15 quad core and Cortex-A7 quad core
- 1.4GHz Cortex-A7 and 2.0 GHz Cortex-A15 (both set to maximum frequency)
- 2Gbyte LPDDR3 RAM PoP stacked
- 32GB SanDisk Extreme 32GB UHS-1 Micro SDHC
- Ubuntu 14.04.3
- ~35 minutes (depends on download latency)
- MK808 mini PC
- Rockchip RK3066 dual core
- 1.6GHz Cortex-A9 (set to 1.5 GHz)
- 1GB DDR3
- 32GB SDHC Class 10
- Ubuntu 14.04.3
- ~2.5 hours (depends on download latency)
- MK802IV mini PC
- Test build on 02/02/2015
- Rockchip RK3188 quad core
- 1.6GHz Cortex-A9 (set to 1.2 GHz)
- 2GB DDR3
- 32GB SDHC Class 10
- Ubuntu 14.04.3
- ~1 hours (depends on download latency)
Build output
- Check install logs for any problems with the installation scripts.
- OpenCV home
/home/<username>/opencv-3.1.x - Java and Python bindings
/home/<username>/opencv-3.1.x/build - OpenCV contrib
/home/<username>/opencv-3.1.x
Java
To run Java programs in Eclipse you need add the OpenCV library.
- Window, Preferences, Java, Build Path, User Libraries, New..., OpenCV, OK
- Add External JARs..., /home/<username>/opencv-3.1.x/build/bin/opencv-31x.jar
- Native library location, Edit..., External Folder..., /home/<username>/opencv-3.1.x/build/lib, OK
- Right click project, Properties, Java Build Path, Libraries, Add Library..., User Library, OpenCV, Finish, OK
- Import Eclipse project
To run compiled class (Canny for this example) from shell:
cd /home/<username>/workspace/install-opencv/opencv-javajava -Djava.library.path=/home/<username>/opencv-3.1.x/build/lib -cp /home/<username>/opencv-3.1.x/build/bin/opencv-31x.jar:bin com.codeferm.opencv.Canny
Things to be aware of
- There are no bindings generated for OpenCV's GPU module.
- Missing VideoWriter generated via patch (if needed).
- Missing constants generated via patch.
- There's no imshow equivalent, so check out CaptureUI
- Understand how memory management works
- Make sure you call Mat.free() to free native memory
- The JNI code can modify variables with the final modifier. You need to be aware of the implications of this since it is not normal Java behavior.
The Canny example is slightly faster in Java (3.08 seconds) compared to Python
(3.18 seconds). In general, there's not enough difference in processing over 900
frames to pick one set of bindings over another for performance reasons.
-agentlib:hprof=cpu=samples is used to profile.
Input file: ../resources/traffic.mp4
Output file: ../output/canny-java.avi
Resolution: 480x360
919 frames
Elipse time: 3.03 seconds

CPU SAMPLES BEGIN (total = 310) Fri Jan  3 16:09:24 2014
rank   self  accum   count trace method
   1 40.32% 40.32%     125 300218 org.opencv.imgproc.Imgproc.Canny_0
   2 22.58% 62.90%      70 300220 org.opencv.highgui.VideoWriter.write_0
   3 10.00% 72.90%      31 300215 org.opencv.highgui.VideoCapture.read_0
   4  9.03% 81.94%      28 300219 org.opencv.core.Core.bitwise_and_0
   5  9.03% 90.97%      28 300221 org.opencv.imgproc.Imgproc.cvtColor_1
   6  5.81% 96.77%      18 300222 org.opencv.imgproc.Imgproc.GaussianBlur_2
   7  0.32% 97.10%       1 300016 sun.misc.Perf.createLong
   8  0.32% 97.42%       1 300077 java.util.zip.ZipFile.open
   9  0.32% 97.74%       1 300095 java.util.jar.JarVerifier.<init>
  10  0.32% 98.06%       1 300102 java.lang.ClassLoader$NativeLibrary.load
  11  0.32% 98.39%       1 300105 java.util.Arrays.copyOfRange
  12  0.32% 98.71%       1 300163 sun.nio.fs.UnixNativeDispatcher.init
  13  0.32% 99.03%       1 300212 sun.reflect.ReflectionFactory.newConstructorAccessor
  14  0.32% 99.35%       1 300214 org.opencv.highgui.VideoCapture.VideoCapture_1
  15  0.32% 99.68%       1 300216 java.util.Arrays.copyOfRange
  16  0.32% 100.00%       1 300217 com.codeferm.opencv.Canny.main
CPU SAMPLES END
Python
To run Python programs in Eclipse you need PyDev installed.
- Help, Install New Software..., Add..., Name: PyDev, Location: http://pydev.org/updates, OK, check PyDev, Next>, Next>, I accept the terms of the license agreement, Finish, Trust certificate, OK
- Import Eclipse project
-m cProfile -s time is used to profile.
Input file: ../../resources/traffic.mp4
Output file: ../../output/canny-python.avi
Resolution: 480x360
919 frames
Elapse time: 3.18 seconds

   Ordered by: internal time

   ncalls  tottime  percall  cumtime  percall filename:lineno(function)
      919    1.231    0.001    1.231    0.001 {cv2.Canny}
      919    0.932    0.001    0.932    0.001 {method 'write' of 'cv2.VideoWriter' objects}
      920    0.375    0.000    0.375    0.000 {method 'read' of 'cv2.VideoCapture' objects}
      919    0.230    0.000    0.230    0.000 {cv2.bitwise_and}
      919    0.188    0.000    0.188    0.000 {cv2.cvtColor}
      919    0.175    0.000    0.175    0.000 {cv2.GaussianBlur}
        1    0.075    0.075    3.263    3.263 Canny.py:6(<module>)
        1    0.007    0.007    0.007    0.007 {cv2.VideoCapture}
      262    0.003    0.000    0.004    0.000 function_base.py:3181(add_newdoc)
        2    0.003    0.001    0.012    0.006 __init__.py:2(<module>)
        1    0.002    0.002    0.003    0.003 polynomial.py:48(<module>)
        1    0.002    0.002    0.003    0.003 chebyshev.py:78(<module>)
        1    0.002    0.002    0.003    0.003 hermite_e.py:50(<module>)
        6    0.002    0.000    0.003    0.000 {method 'sub' of '_sre.SRE_Pattern' objects}
        1    0.002    0.002    0.003    0.003 hermite.py:50(<module>)
        1    0.002    0.002    0.003    0.003 legendre.py:74(<module>)
C++
To create a new C++ project in Eclipse you need to install CDT plugin first (or use the Eclipse IDE for C/C++ Developers). I'm using the Eclipse IDE for Java EE Developers, so I installed the CDT plugin.
- Help, Install New Software..., Add..., Name: CDT, Location: http://download.eclipse.org/tools/cdt/releases/8.8.1 (this is for Eclipse Mars), OK, select CDT Main Features and CDT Optional Features, Next, Next, I accept the terms of the license agreement, Finish, Yes
To run C++ example projects
- Import Eclipse projects one at a time
To create new C++ project
- Change to C/C++ perspcetive, File, New, C++ Project, Project name: test, Hello World C++ Project, Cross GCC, Next, Next, Next, Finish
- Open terminal (Crtl+Alt+T) and run
pkg-config --cflags opencvand note output for next step - Right click project, Properties, C/C++ Build, Settings, Cross GCC Compiler, Includes, Include paths(-l), click +, Directory: /usr/local/include/opencv, OK'
- Open terminal (Crtl+Alt+T) and run
pkg-config --libs opencvand note output for next step - Right click project, Properties, C/C++ Build, Settings, Cross G++ Linker, Libraries, Library search path (-L), click +, Directory: /usr/local/lib, OK
- Right click project, Properties, C/C++ Build, Settings, Cross G++ Linker, Libraries, Libraries(-l), click +, Libraries(-l): opencv_core, repeat for other libraries such as opencv_imgproc opencv_highgui, OK
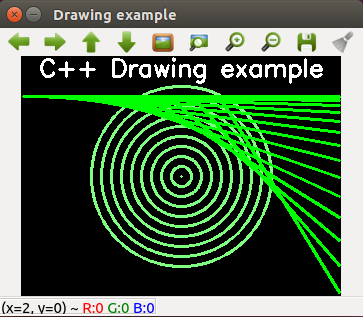
- Open test.cpp and replace all the text with:
#include <opencv2/opencv.hpp>

using namespace cv;

int main() {
	// Create black empty image
	Mat image = Mat::zeros(240, 320, CV_8UC3);
	// Draw circles
	for (int a = 0; a < 10; a = a + 1) {
		circle(image, Point(160, 120), 10.0 * a, Scalar(128, 128, 255), 2, 8);
	}
	// Draw lines
	for (int a = 0; a < 15; a = a + 1) {
		line(image, Point(2 + a * a, 40), Point(318, 40 + a * a), Scalar(0, 255, 0),
				2, 8);
	}
	// Draw text
	putText(image, "C++ Drawing example", Point(18, 20), FONT_HERSHEY_SIMPLEX,
			0.8, Scalar(255, 255, 255), 2);
	// Show image
	imshow("Drawing example", image);
	// Wait for key press
	waitKey();
	return 0;
}
- Save file, right click project, Build Project, right click project, Run As, Local C/C++ Application
FreeBSD License
Copyright (c) Steven P. Goldsmith
All rights reserved.
Redistribution and use in source and binary forms, with or without modification, are permitted provided that the following conditions are met:
- Redistributions of source code must retain the above copyright notice, this list of conditions and the following disclaimer.
- Redistributions in binary form must reproduce the above copyright notice, this list of conditions and the following disclaimer in the documentation and/or other materials provided with the distribution.
THIS SOFTWARE IS PROVIDED BY THE COPYRIGHT HOLDERS AND CONTRIBUTORS "AS IS" AND ANY EXPRESS OR IMPLIED WARRANTIES, INCLUDING, BUT NOT LIMITED TO, THE IMPLIED WARRANTIES OF MERCHANTABILITY AND FITNESS FOR A PARTICULAR PURPOSE ARE DISCLAIMED. IN NO EVENT SHALL THE COPYRIGHT HOLDER OR CONTRIBUTORS BE LIABLE FOR ANY DIRECT, INDIRECT, INCIDENTAL, SPECIAL, EXEMPLARY, OR CONSEQUENTIAL DAMAGES (INCLUDING, BUT NOT LIMITED TO, PROCUREMENT OF SUBSTITUTE GOODS OR SERVICES; LOSS OF USE, DATA, OR PROFITS; OR BUSINESS INTERRUPTION) HOWEVER CAUSED AND ON ANY THEORY OF LIABILITY, WHETHER IN CONTRACT, STRICT LIABILITY, OR TORT (INCLUDING NEGLIGENCE OR OTHERWISE) ARISING IN ANY WAY OUT OF THE USE OF THIS SOFTWARE, EVEN IF ADVISED OF THE POSSIBILITY OF SUCH DAMAGE.


