| Name | |
|---|---|
| Duy (Dave) Nguyen | nguyend2@carleton.edu |
| Kaung Thant (John) Win | winj@carleton.edu |
- Overview
- Detailed Project Explanation
- Set-up Instructions
- Running Instructions
- Acknowledgements
- References
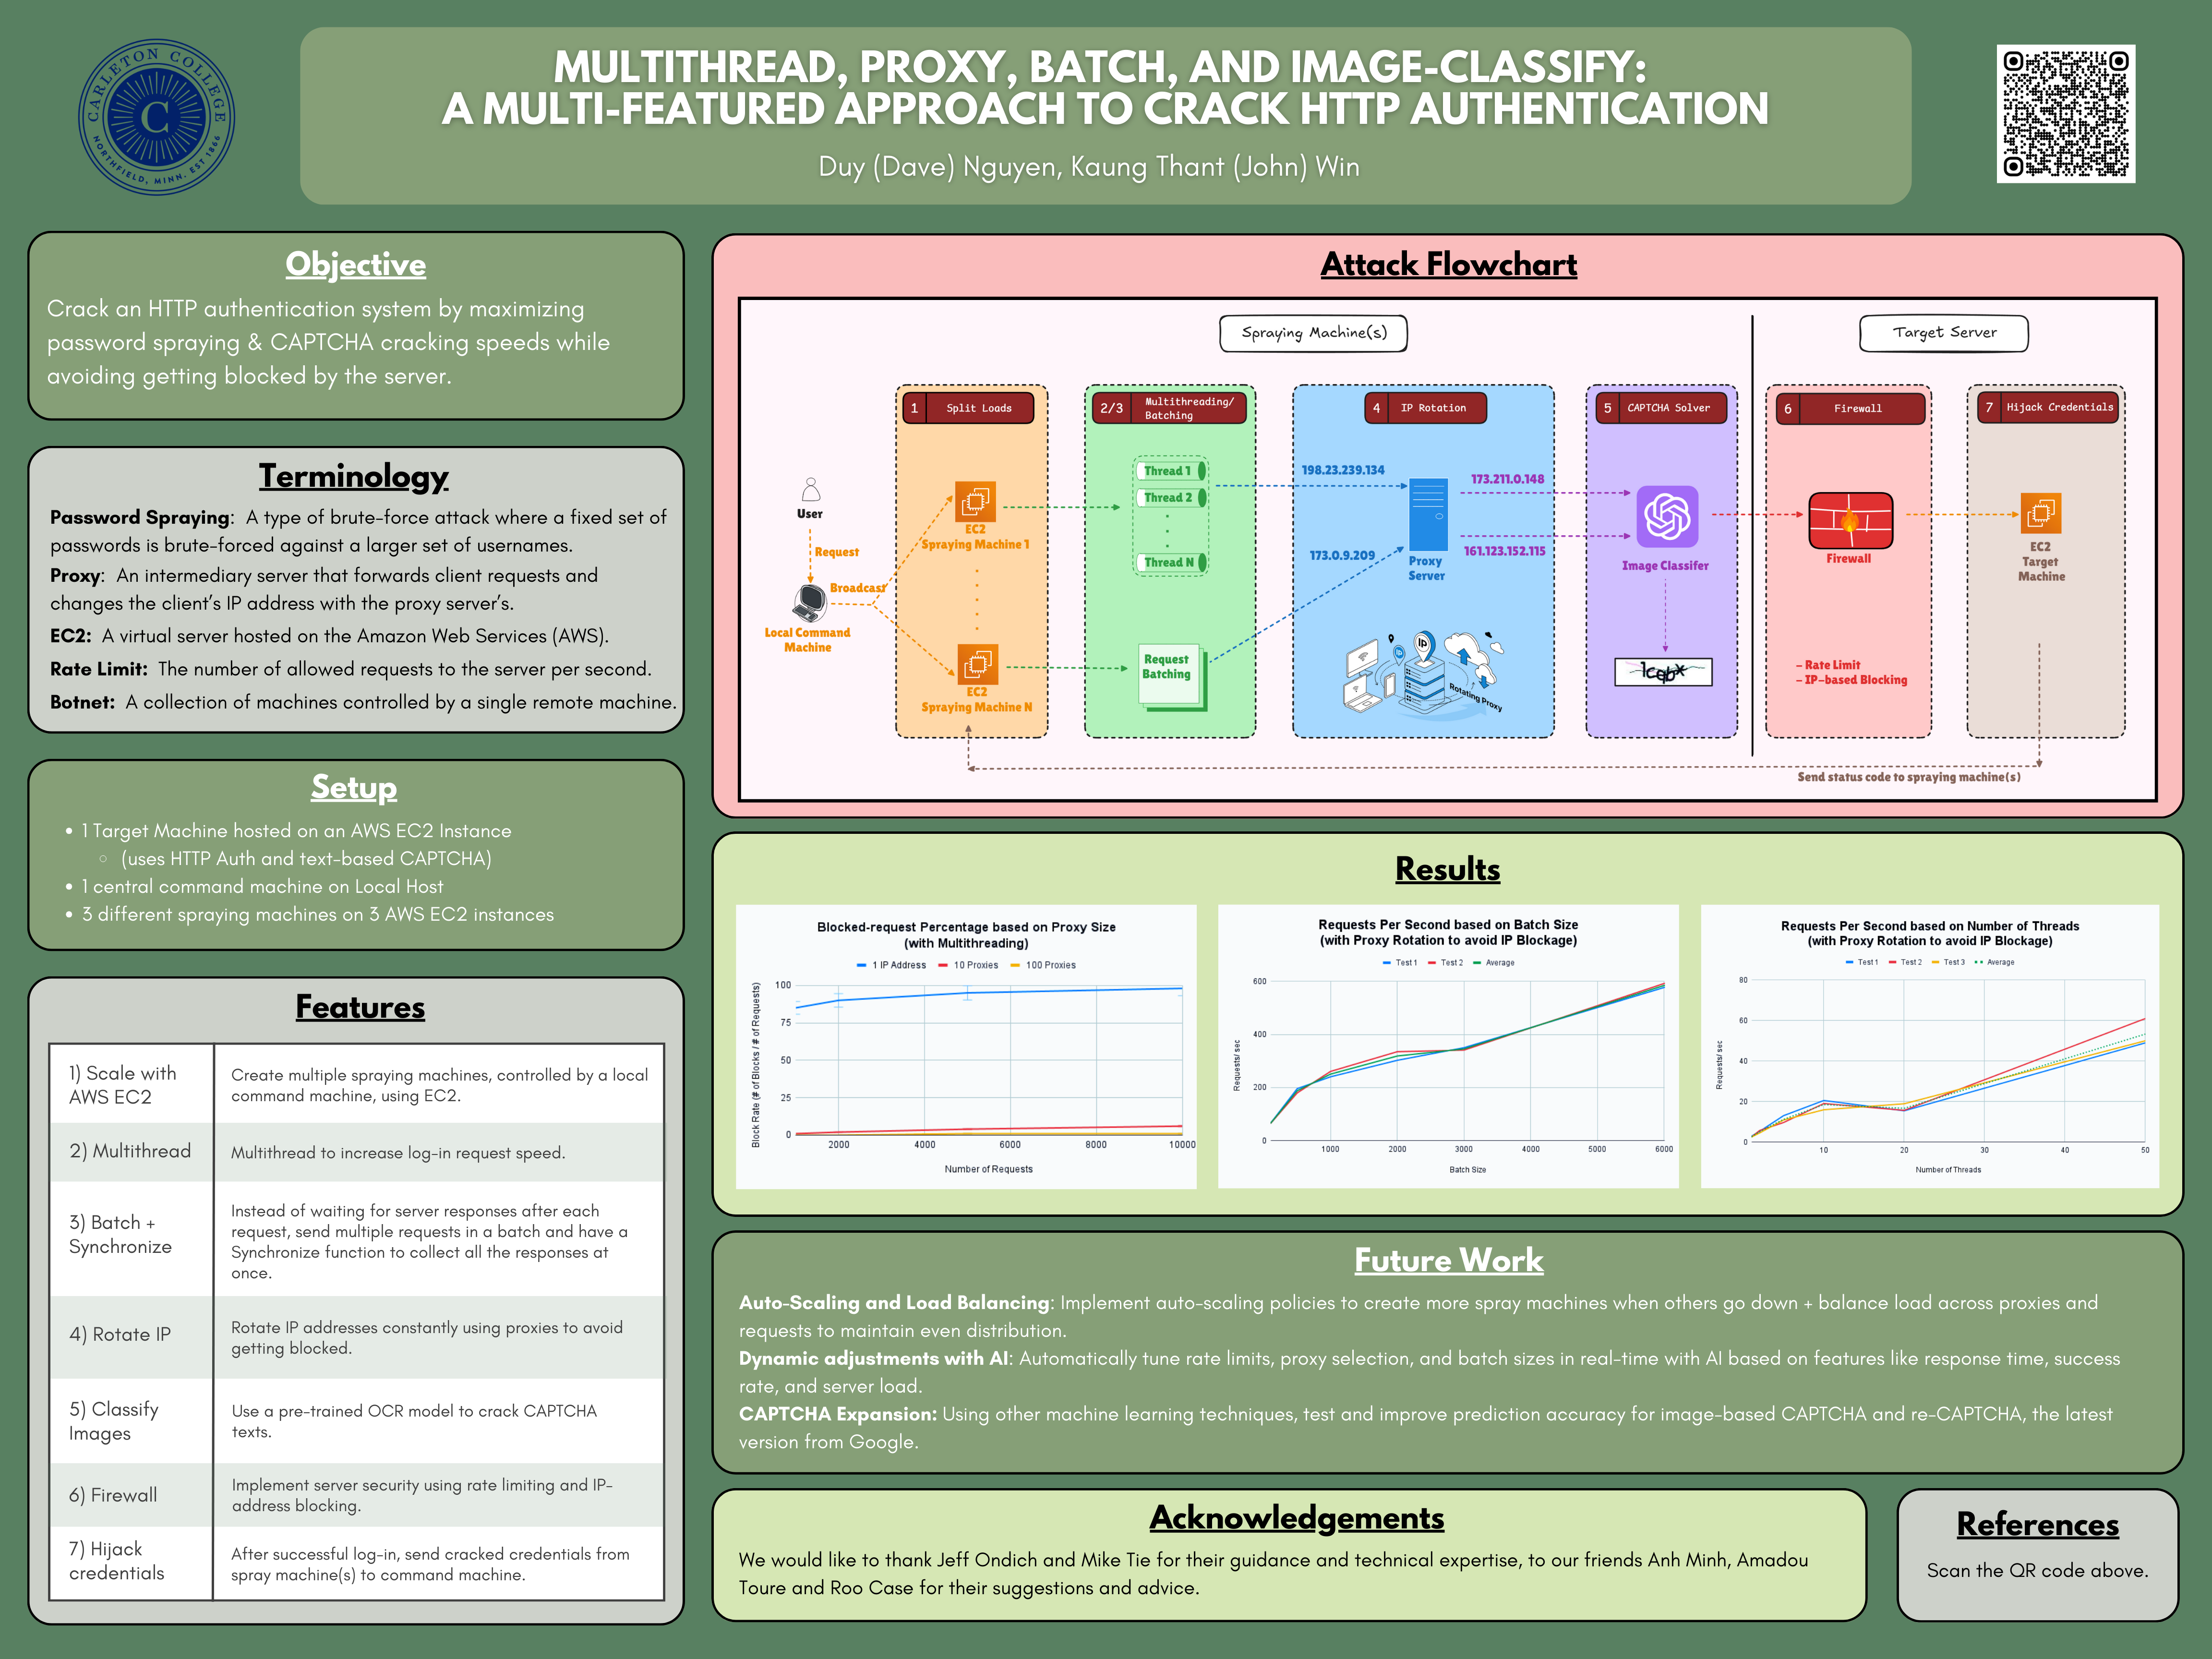
Although two-factor authentication (2FA) and multi-factor authentication (MFA) have become more widespread within the past few years, single-factor authentication (SFA) still continues to be the default authentication method for a number of websites. Among many, password spraying is a commonly used technique to break into such weak authentication systems. Our goal with this project is to demonstrate the effectiveness of such a tool against weak authentication systems and how an attacker can incorporate an Optical Character Recognition (OCR) model with password spraying to bypass text-based CAPTCHA systems in order to create a password-cracking tool. We hope to educate readers the need for “security in depth” as well as for stronger passwords.
There are two ways to run the project: 1) without the OCR model for CAPTCHA translation, 2) with the OCR model. The only difference in set-up are the git clone instruction and the optional OCR model set-up steps.
There are two options for setting up the target machine (locally or on AWS [Amazon Web Services])
- Clone the git repository into a folder:
- Without OCR
git clone https://github.com/CarletonSecurityComps2024/SecurityComps2024.git- With OCR
git clone -b read-respond-captcha https://github.com/CarletonSecurityComps2024/SecurityComps2024.git- Install dependencies on the backend:
cd SecurityComps2024/project/TargetMachine/backend
npm install- (Optional) Install dependencies on the frontend to see what the log-in page looks like:
cd SecurityComps2024/project/TargetMachine/frontend
npm install- Create/ Sign-in to your AWS account.
- Create an EC2 Instance
2.1. Select "EC2" on the AWS dashboard.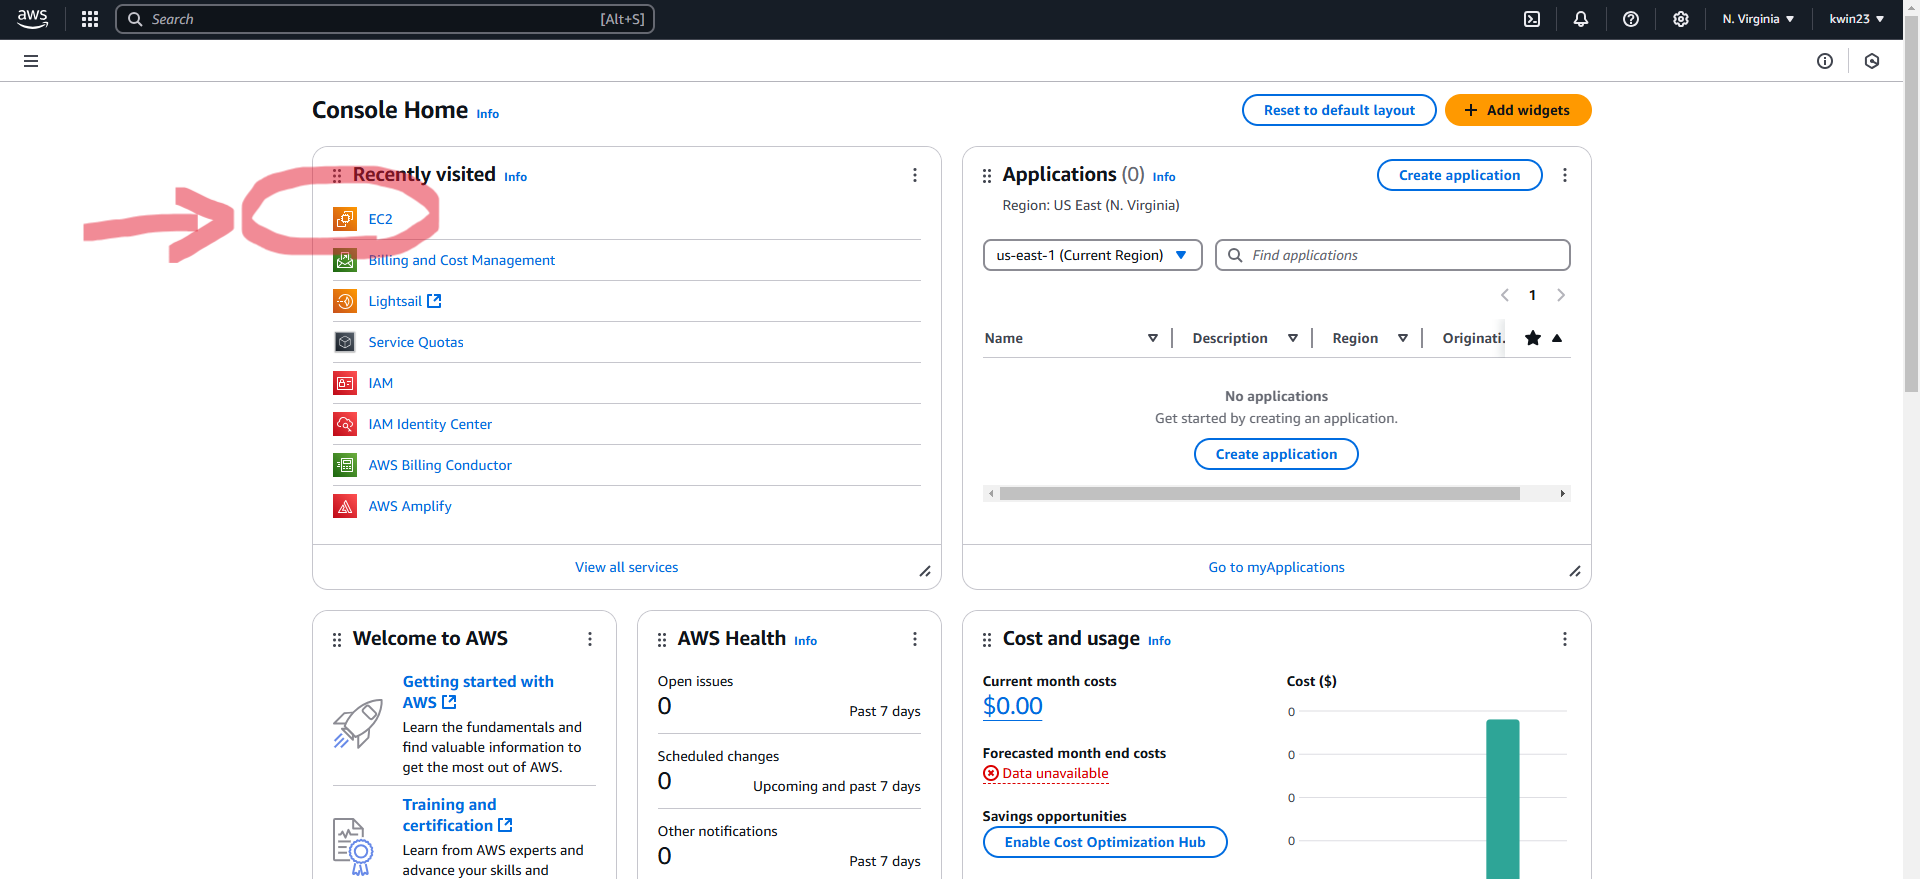 2.2. Selecte "Launch an instance".
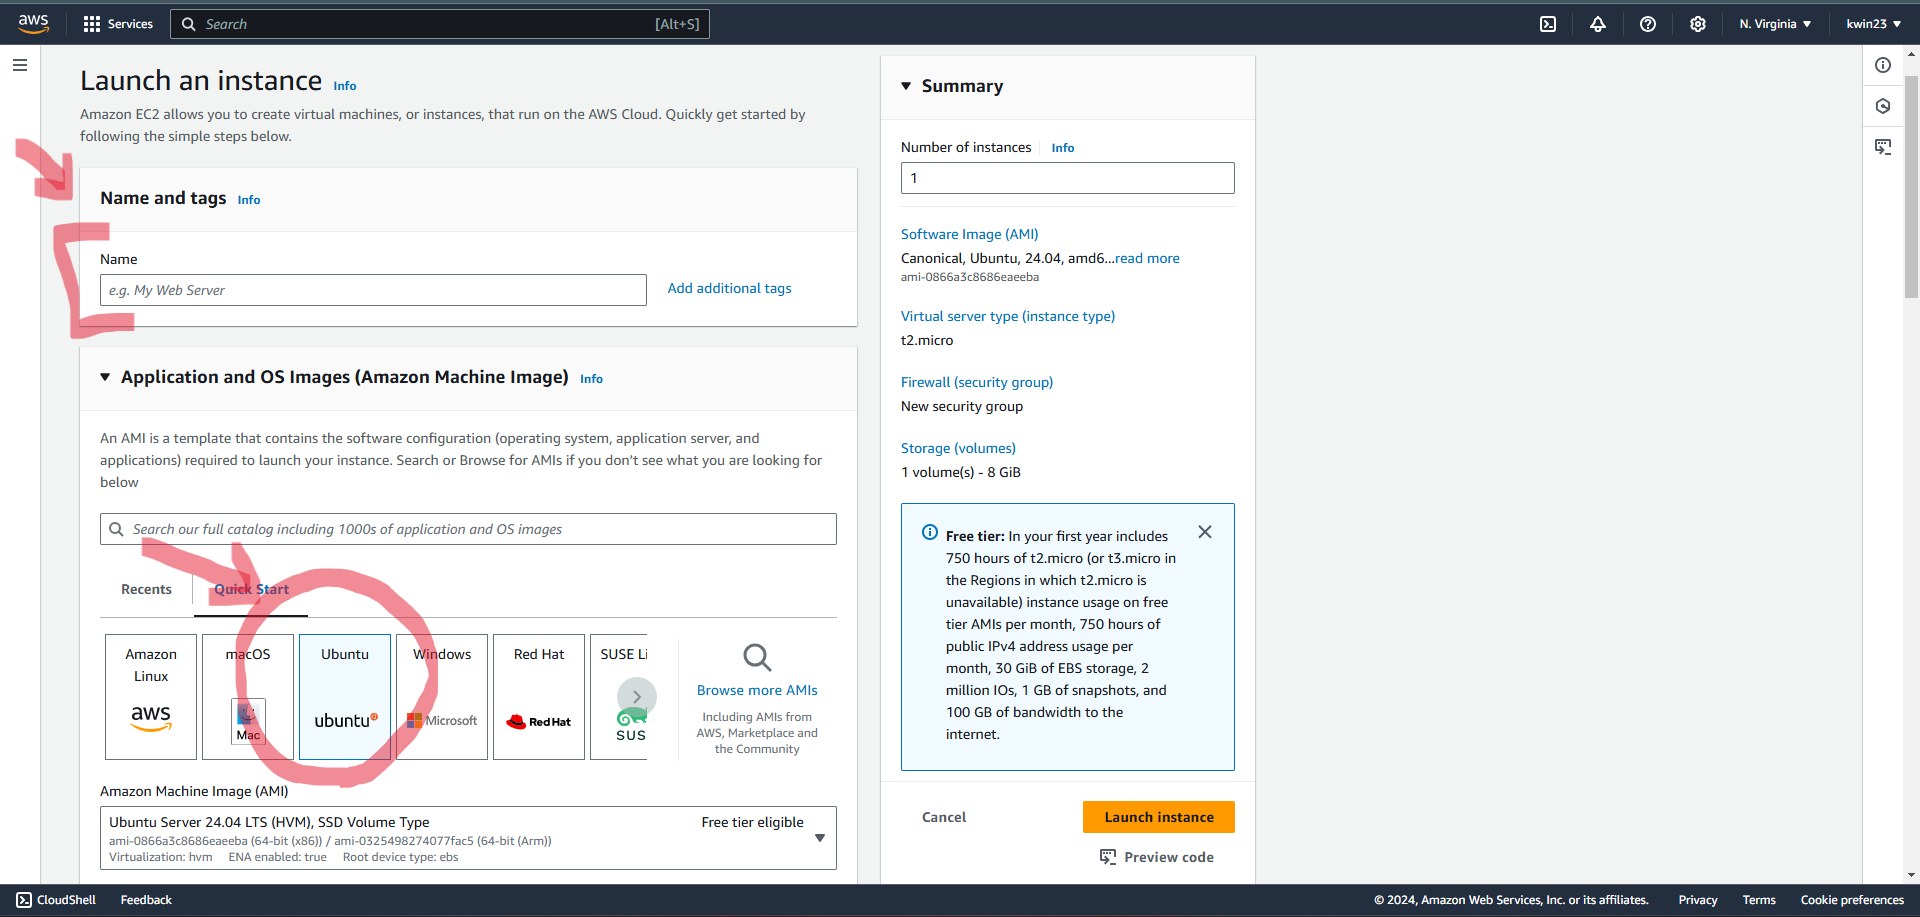
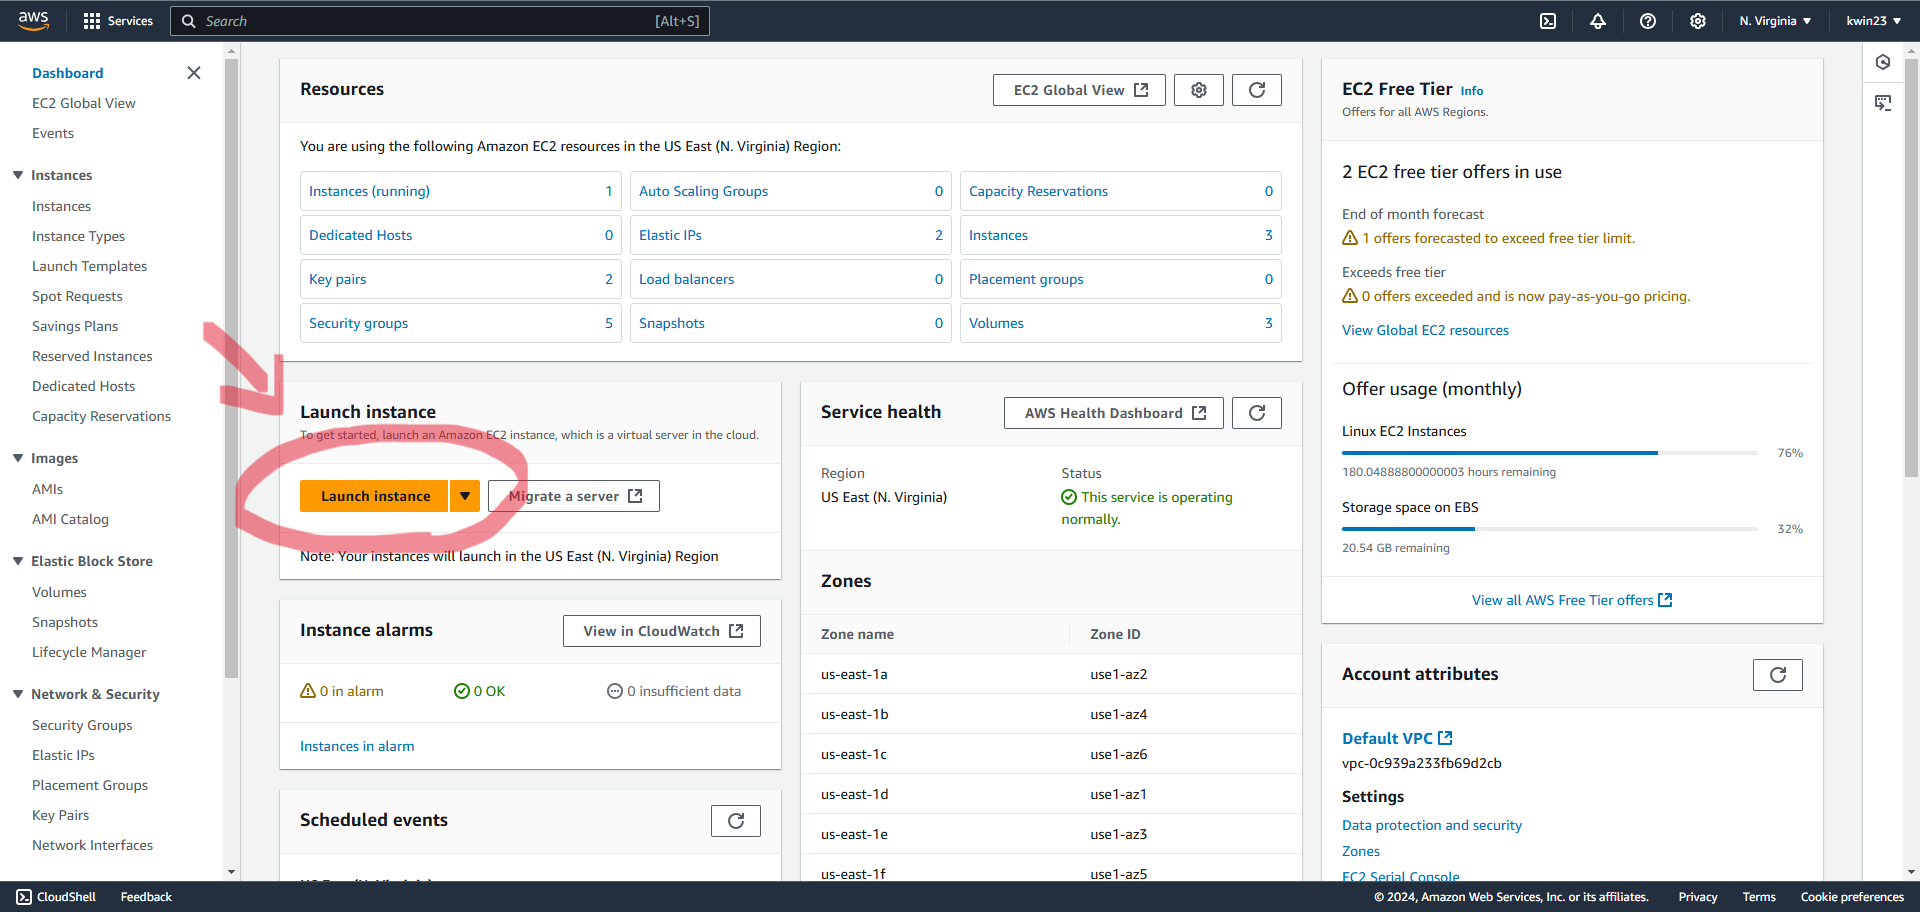 2.3. Name your instance and select "Ubuntu" for the OS Image.
 2.4. For "Key pair", select "Proceed without a key pair". For Network settings, tick the boxes for HTTP and HTTPS traffic.
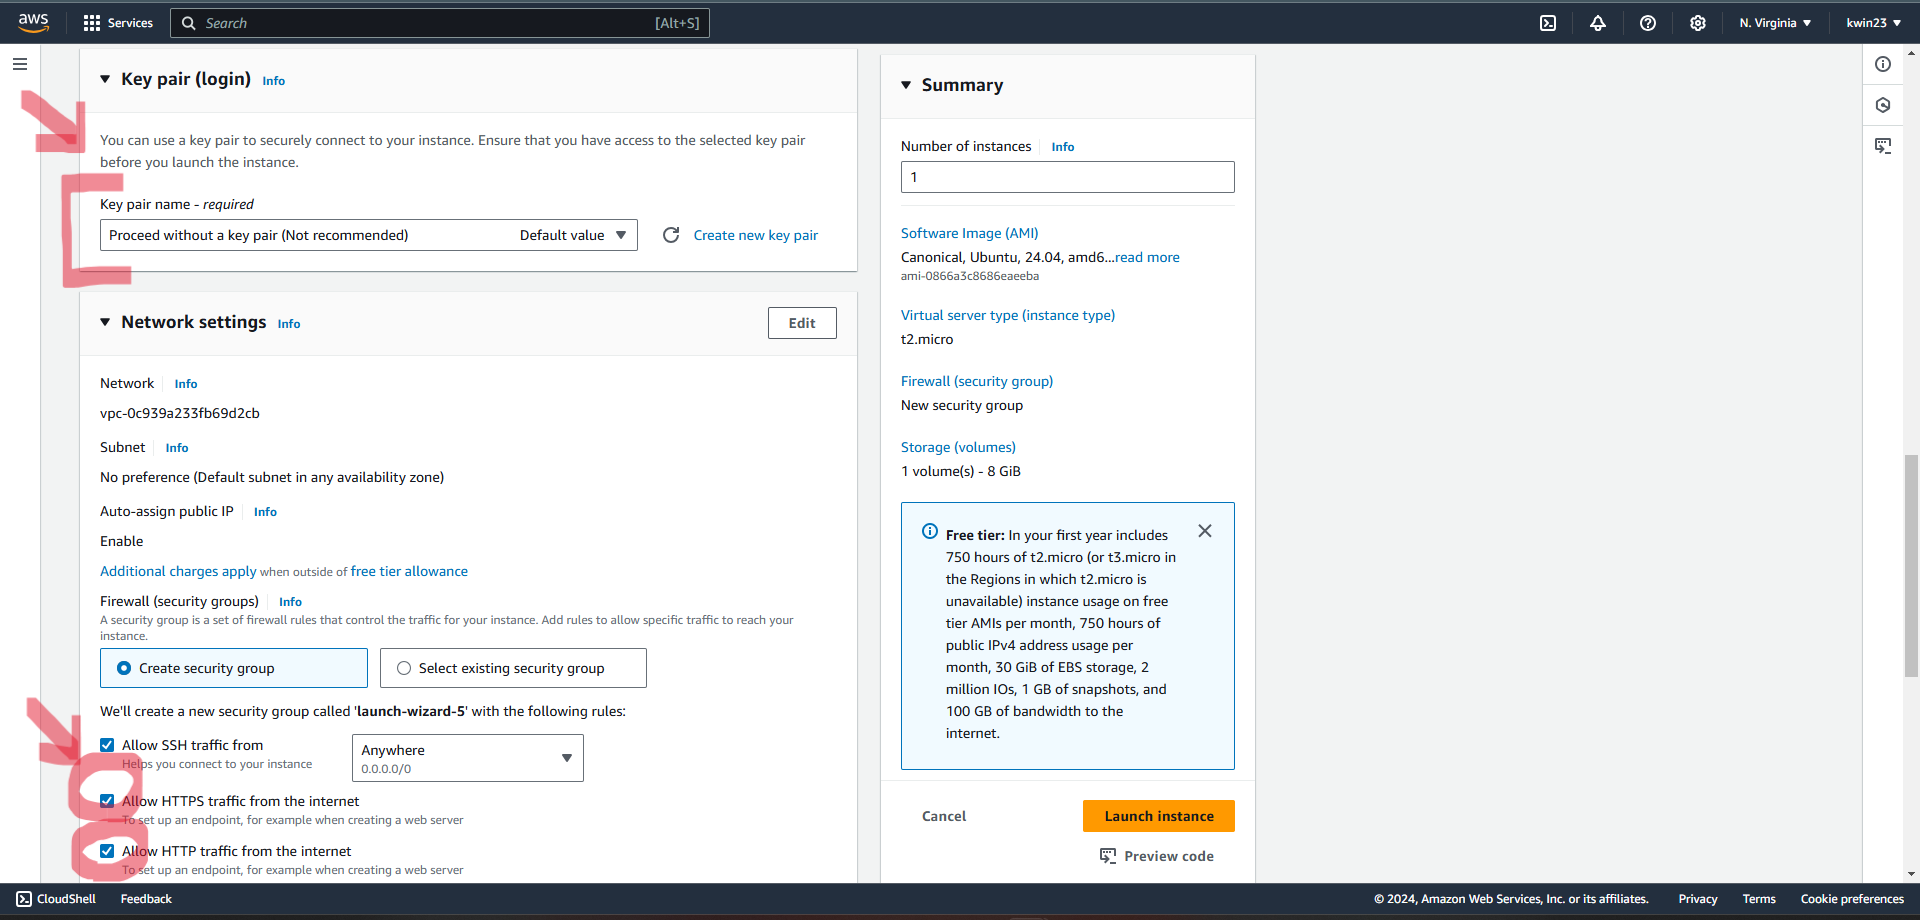 2.5. Launch instance.
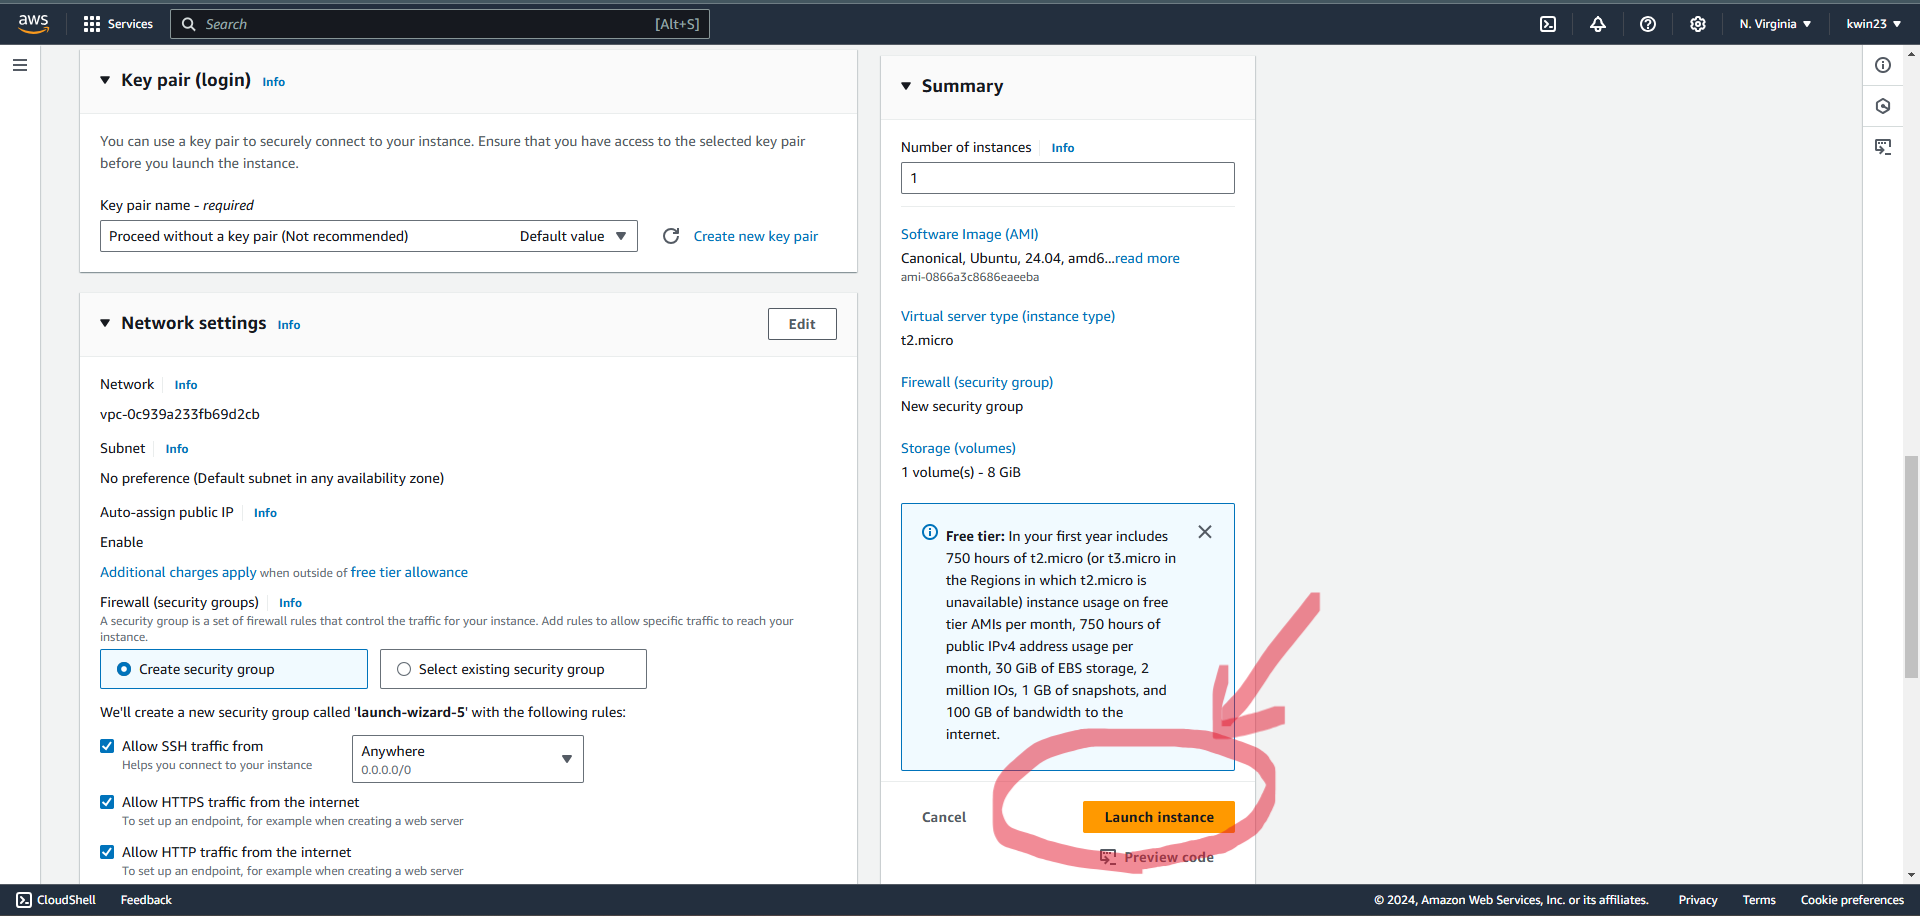
- Edit Security Group
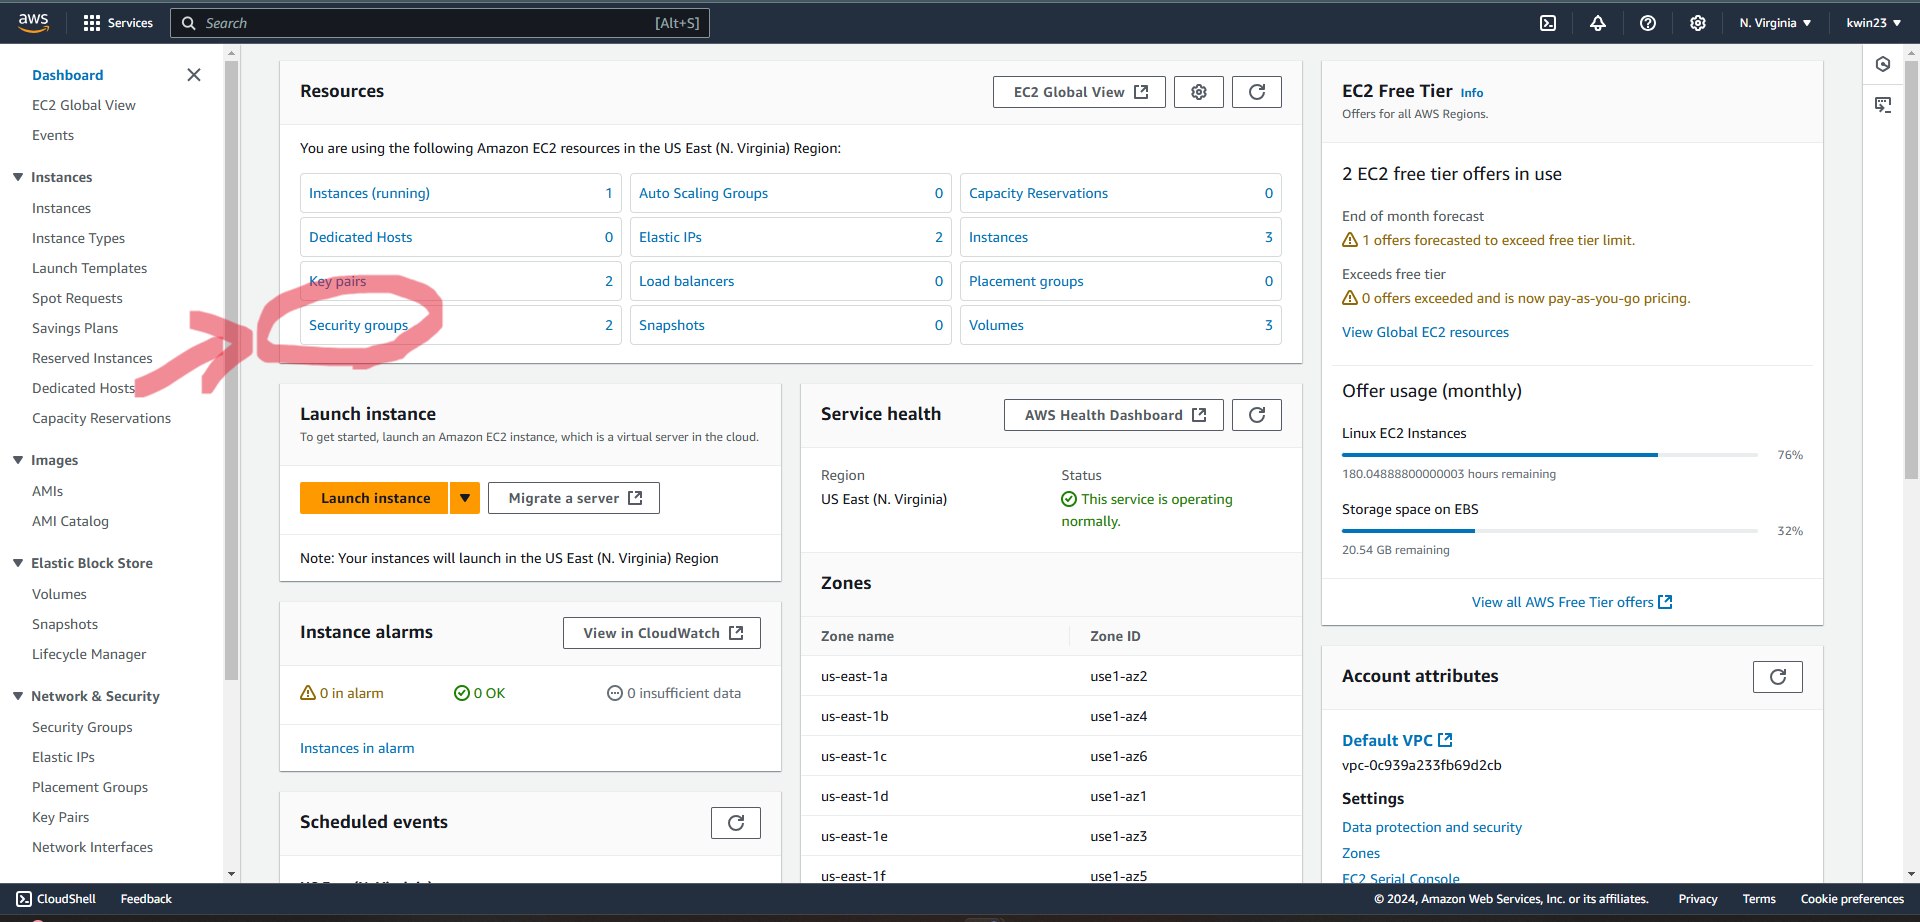
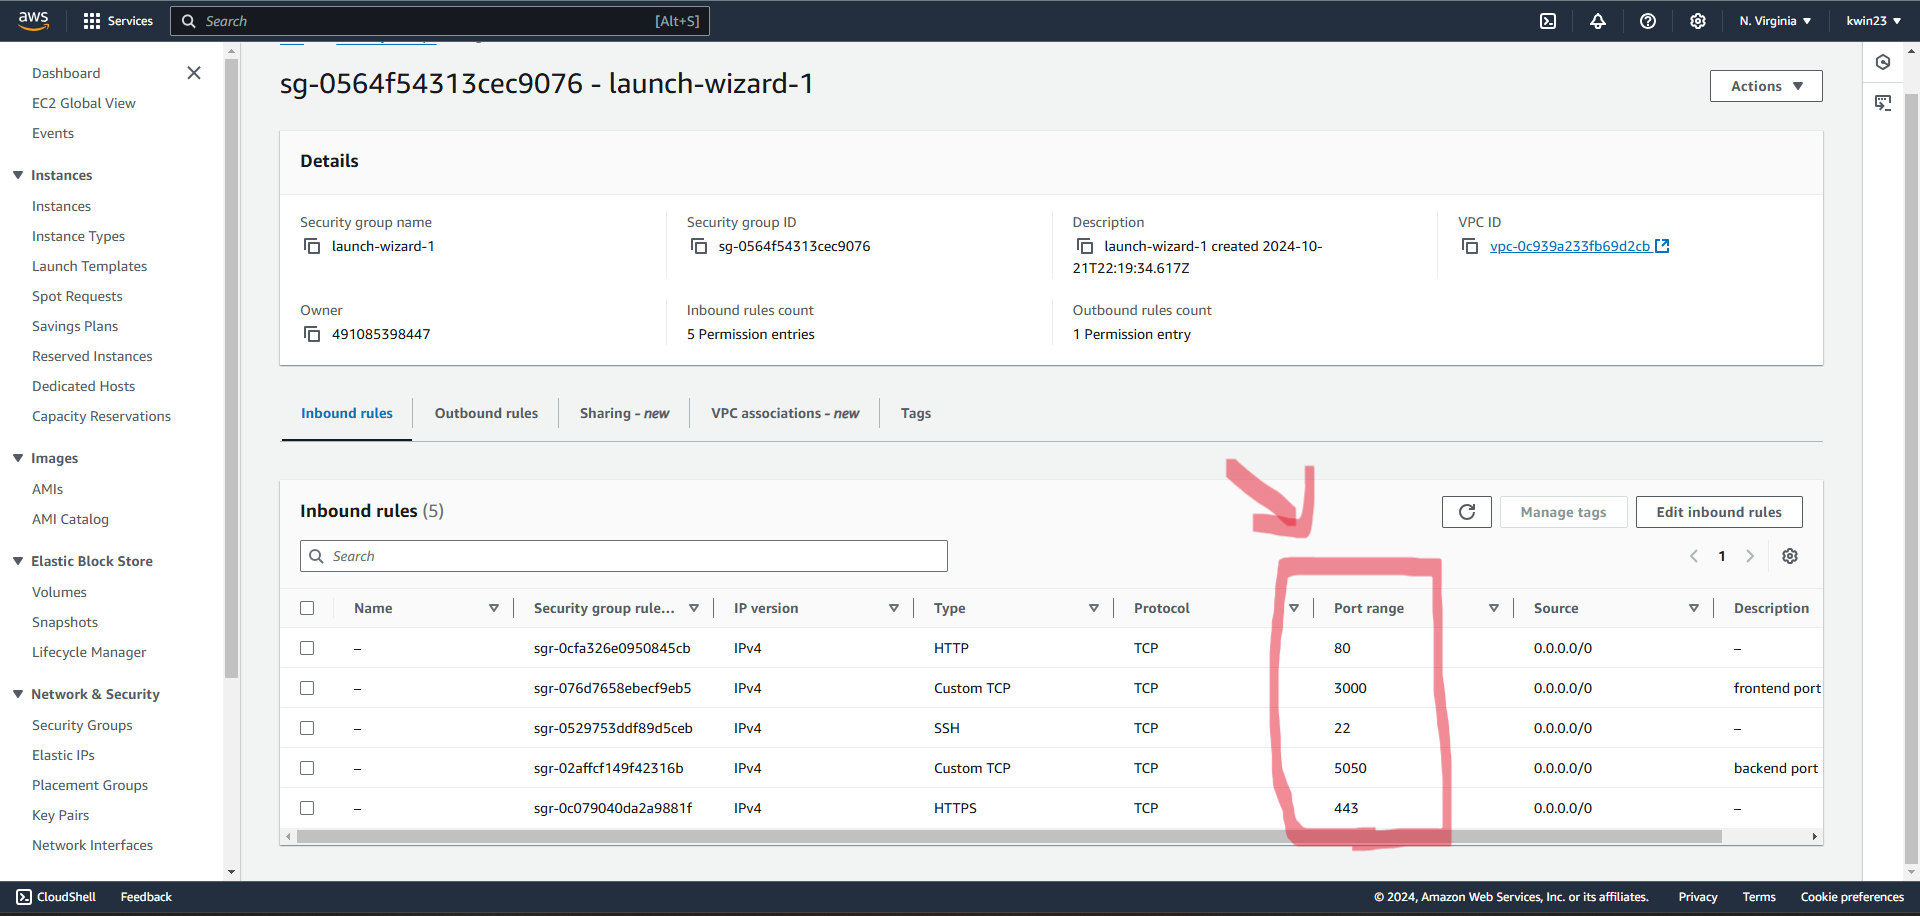
3.1. Select "Security Groups" on the AWS dashboard.
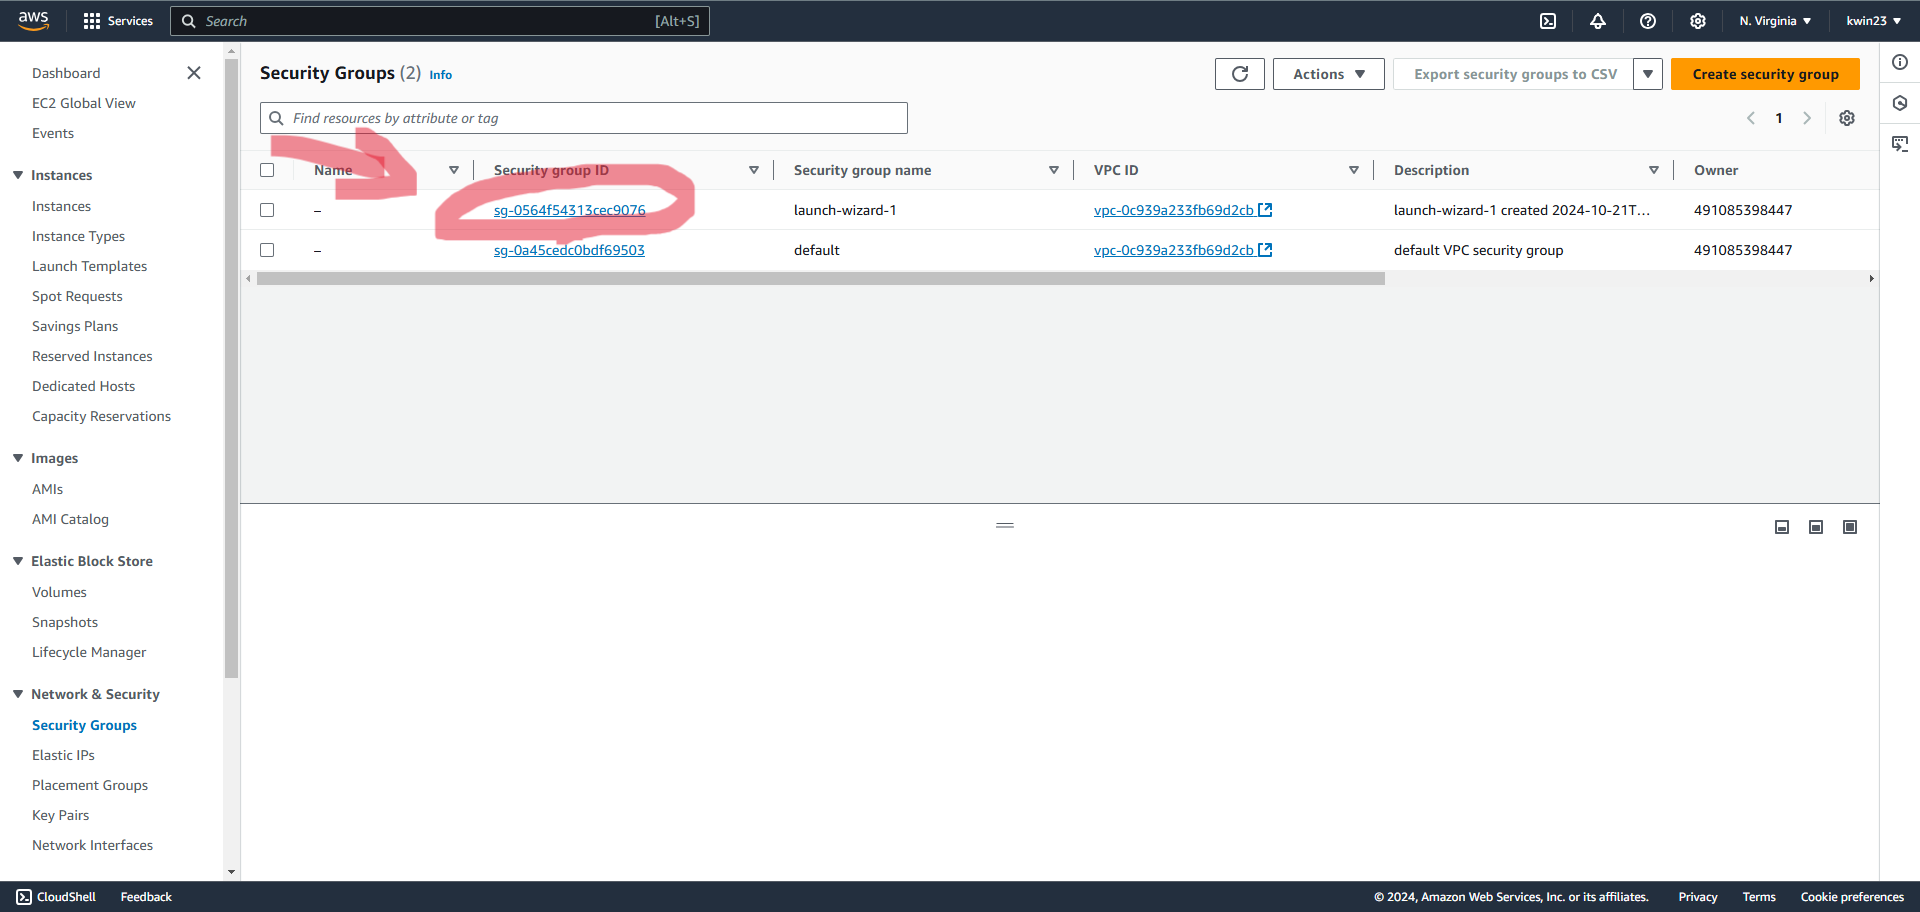
 3.2. Choose the new security group created (the name may be different from picture).
 3.3. Add new inbound rules so that new TCP protocol ports as shown in picture are accepted:.
- Attach an elastic IP (so that the server's IP stays static).
4.1. Select "Elastic IPs" on the AWS dashboard.
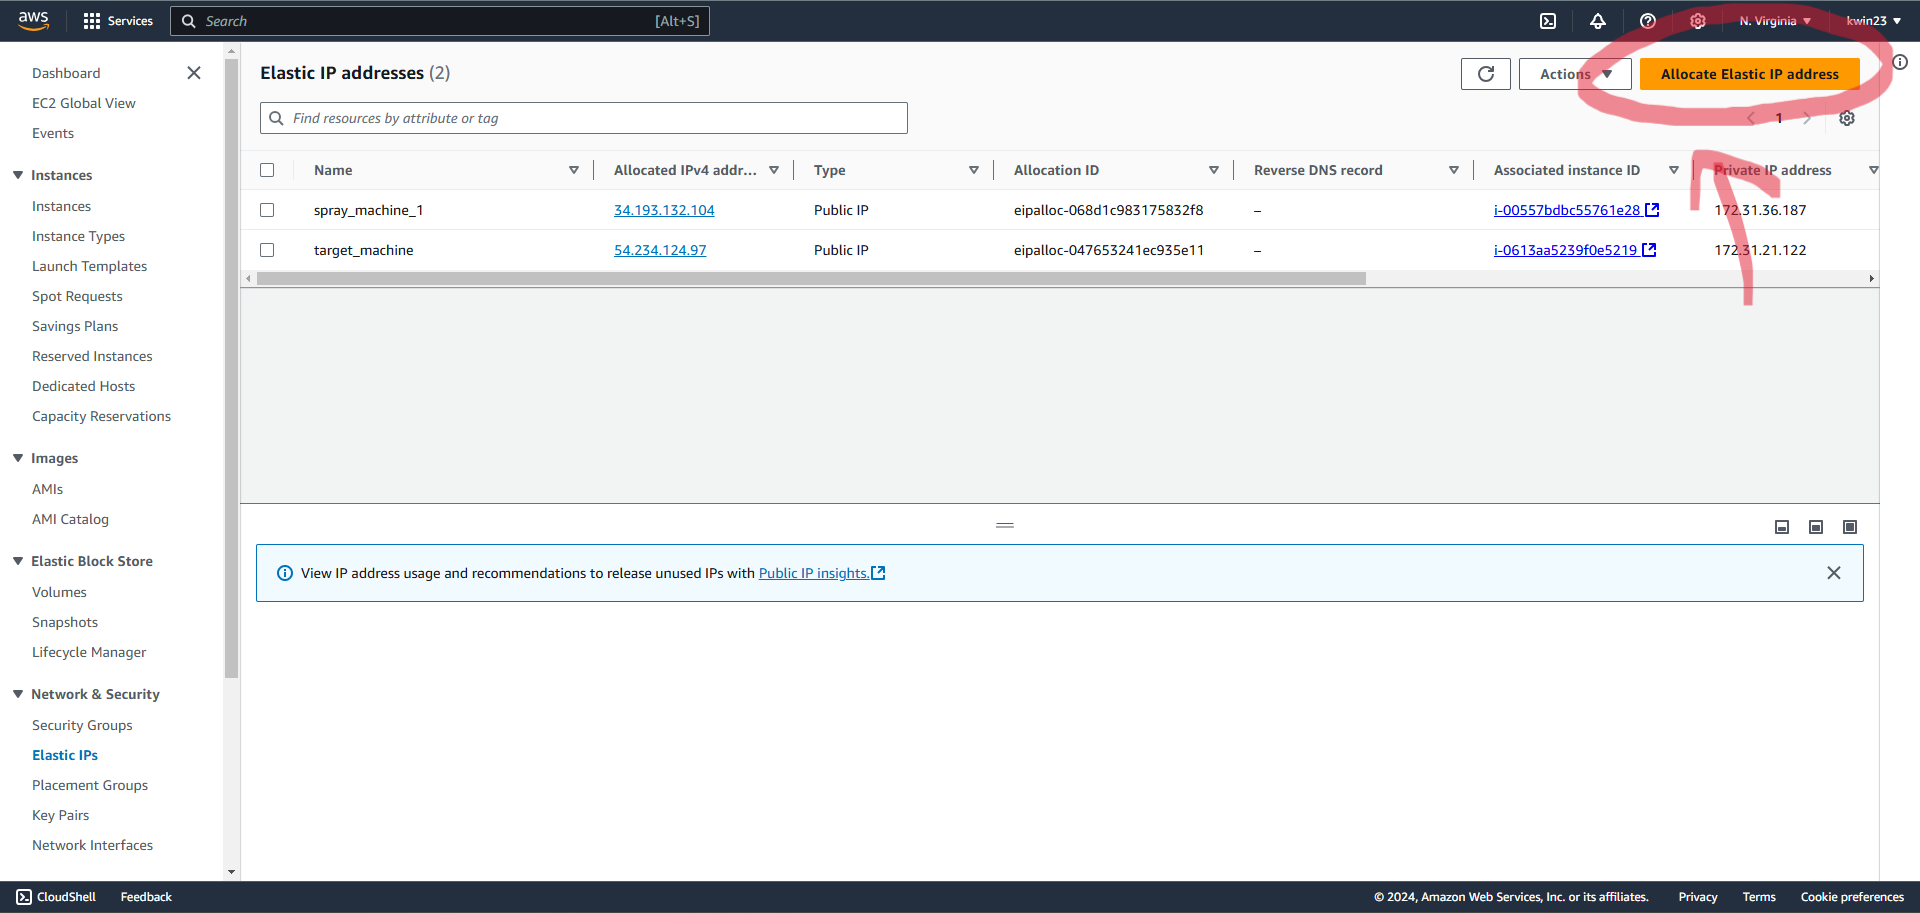
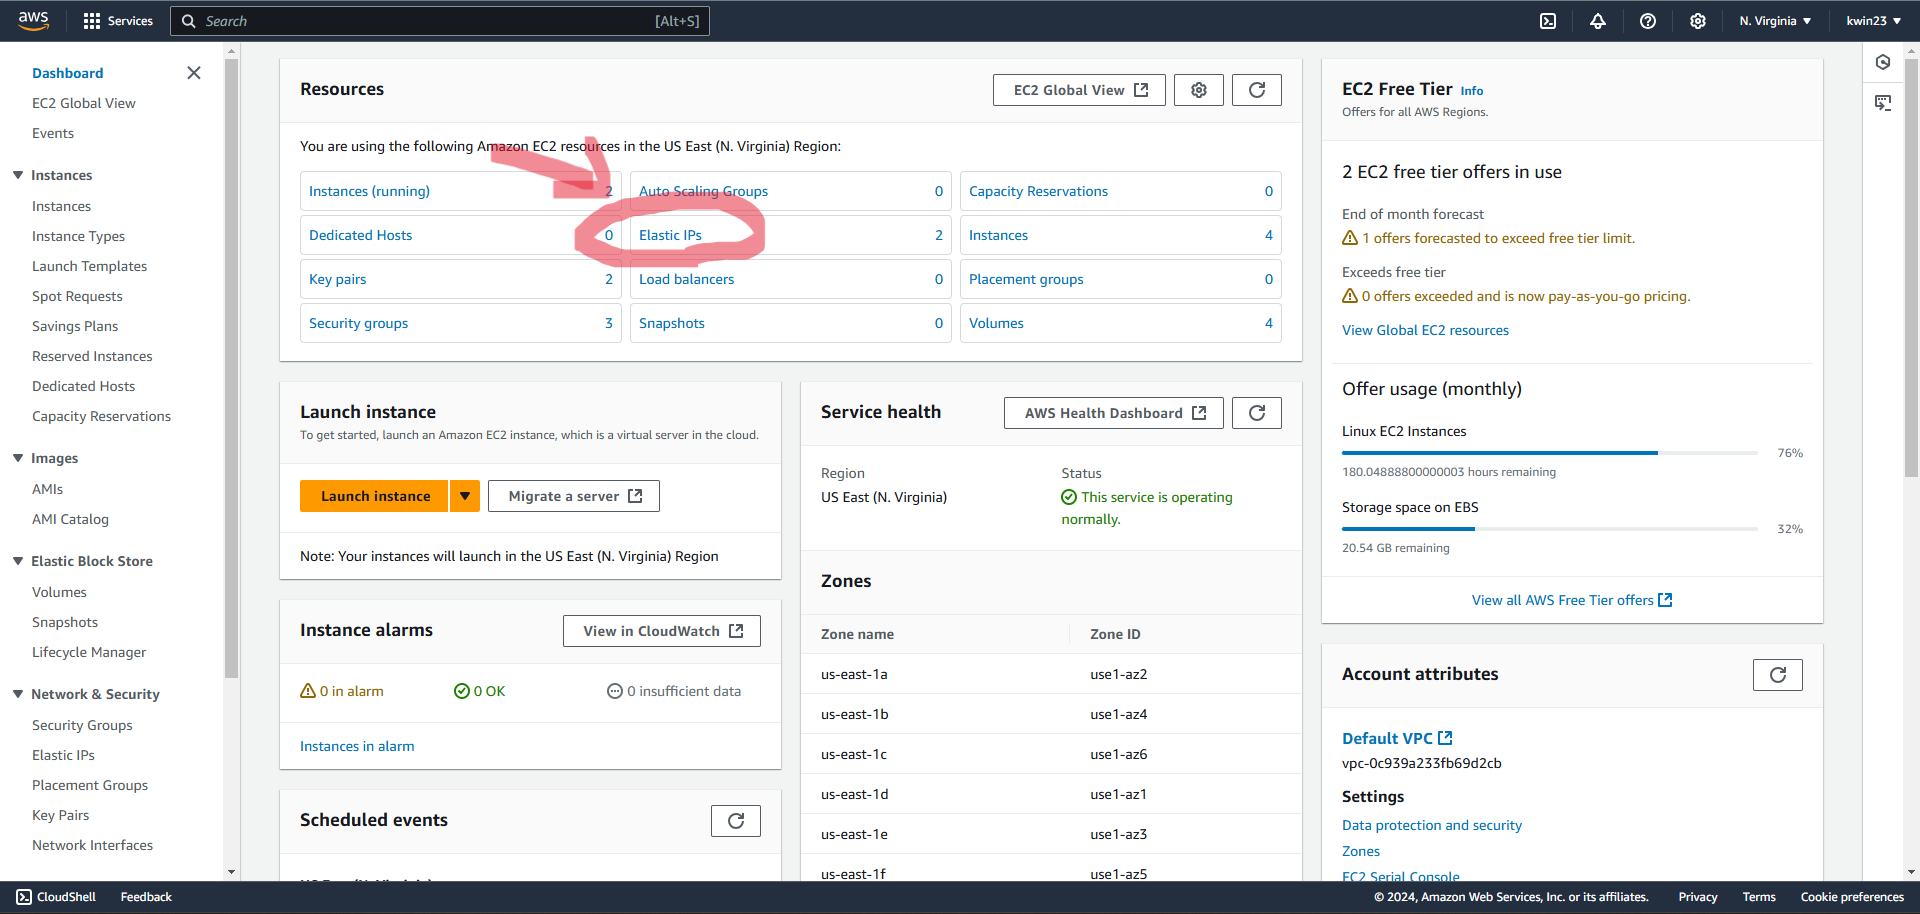 4.2. Select "Allocate Elastic IP Address".
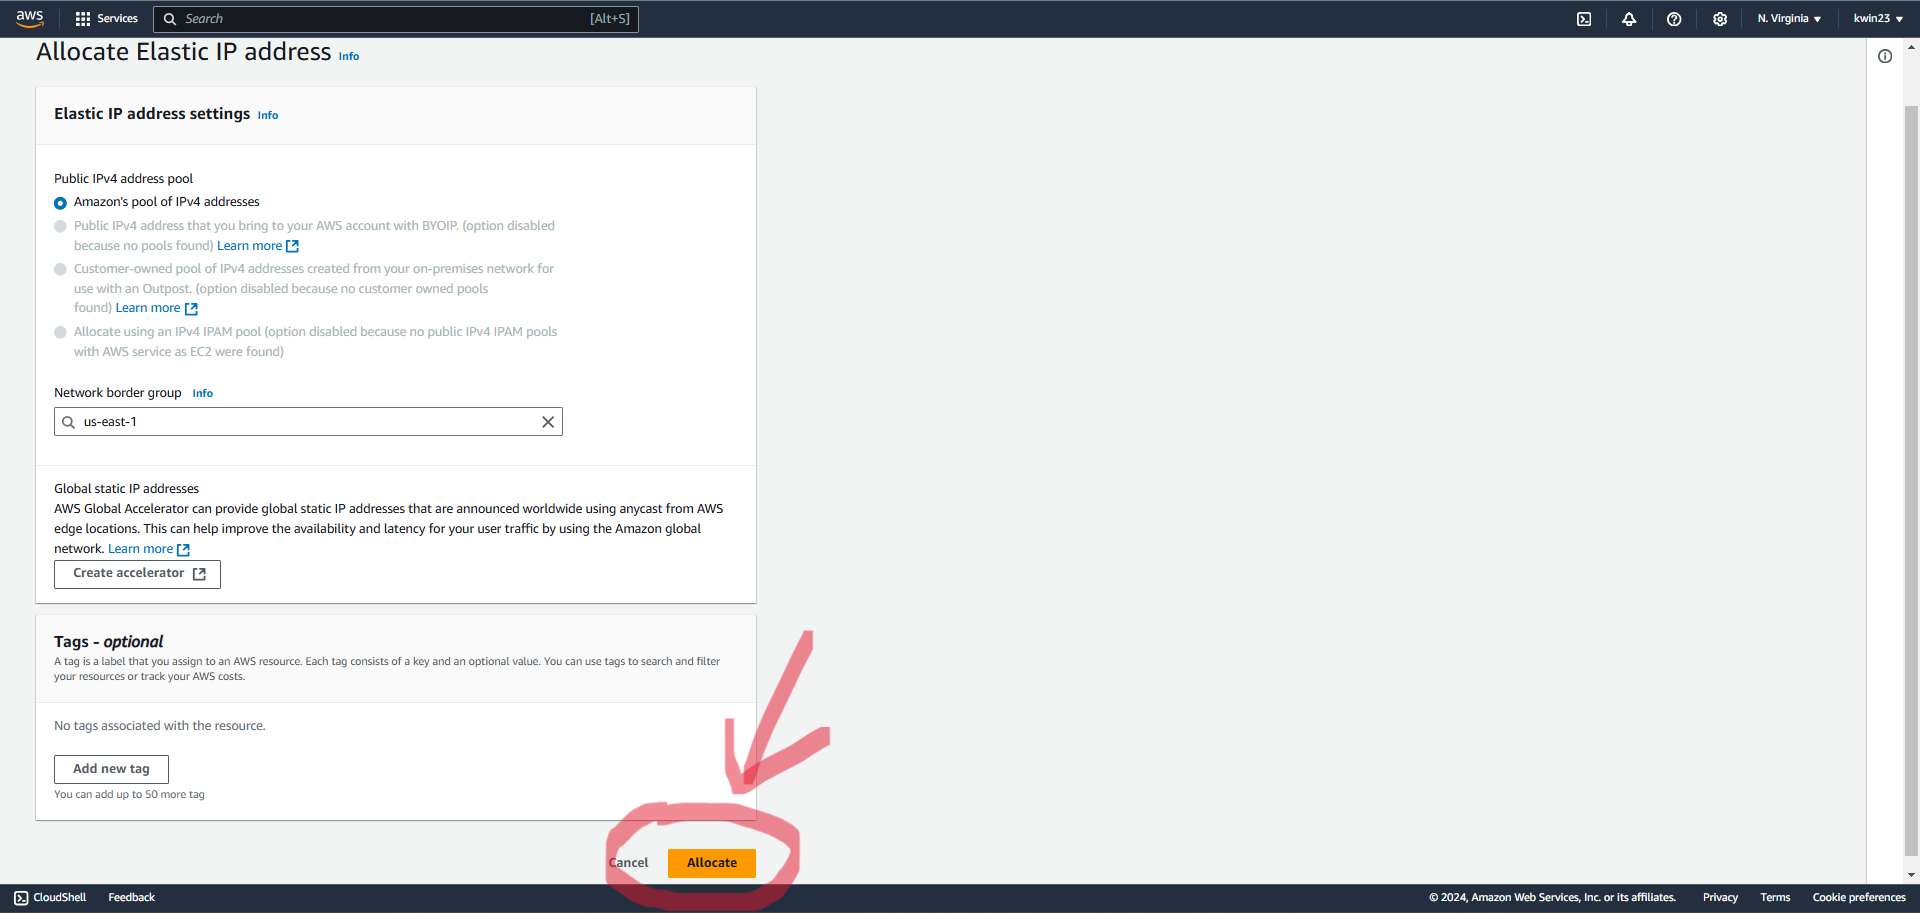
 4.3. Choose "Allocate" to finish allocation.
 4.4. Select the newly allocated IP address. Within "Actions" choose "Associate Elastic IP address".
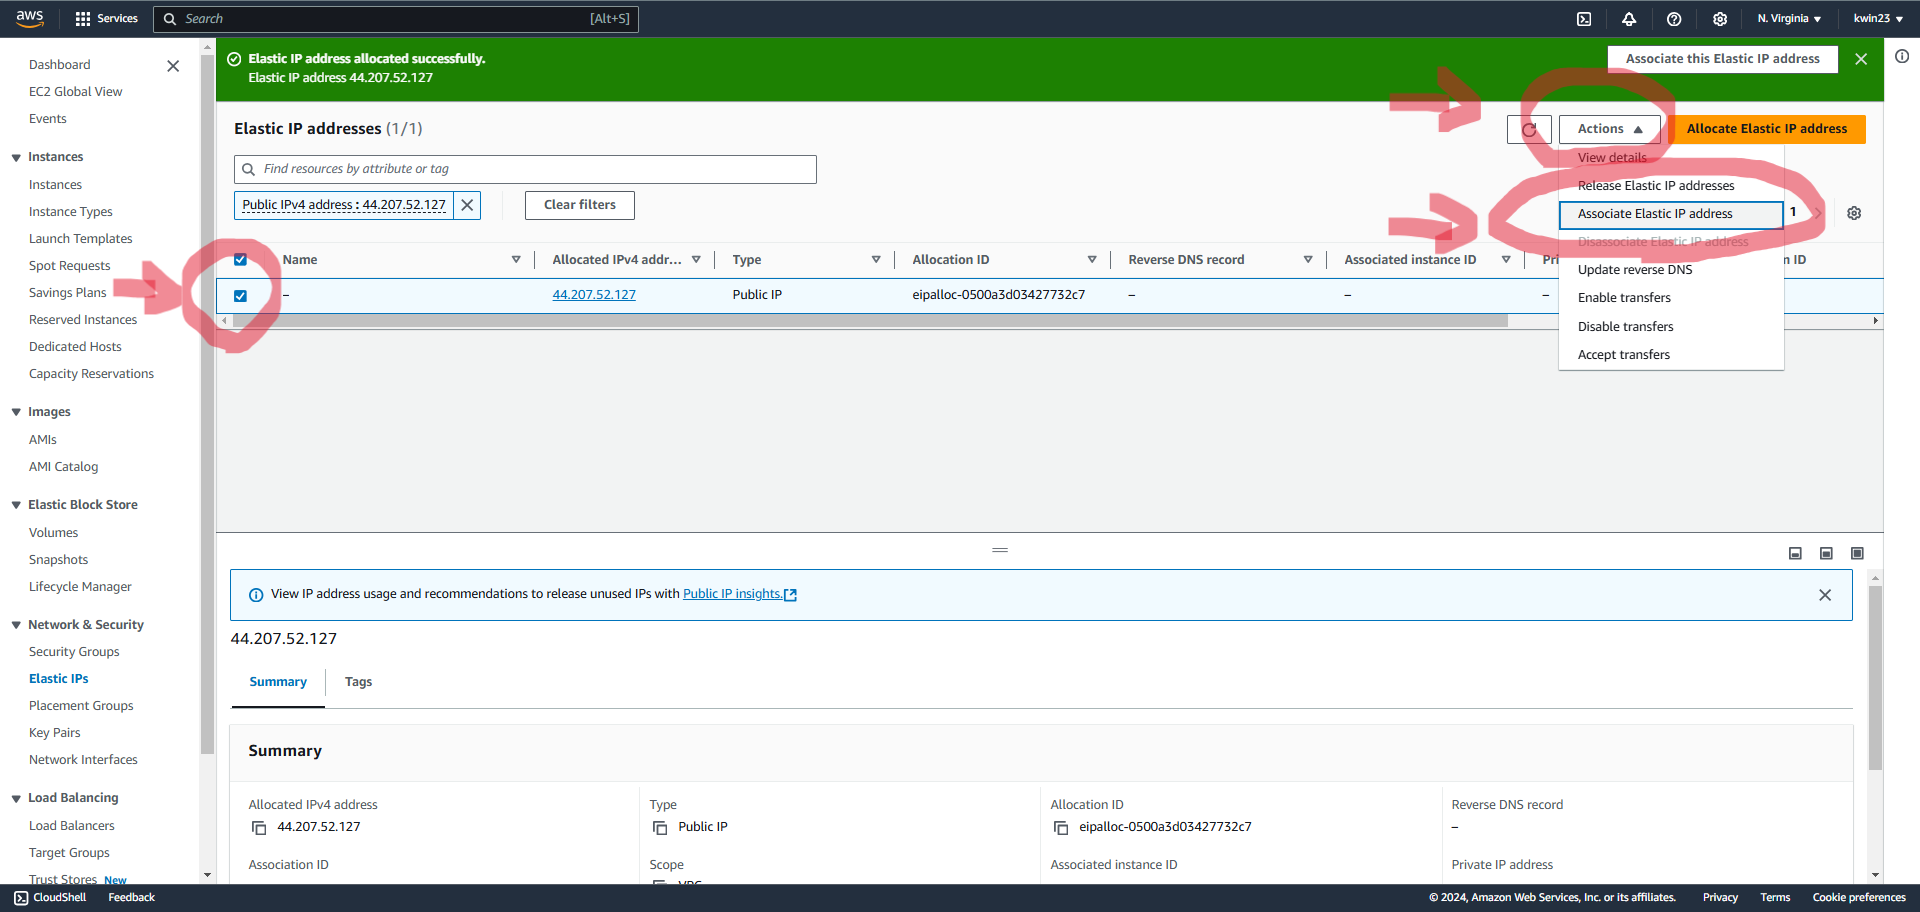 4.5. Choose the recently created EC2 instance.
For private IP address, select whichever IP address is provided.
Click "Associate" and your instance now has a static IP address!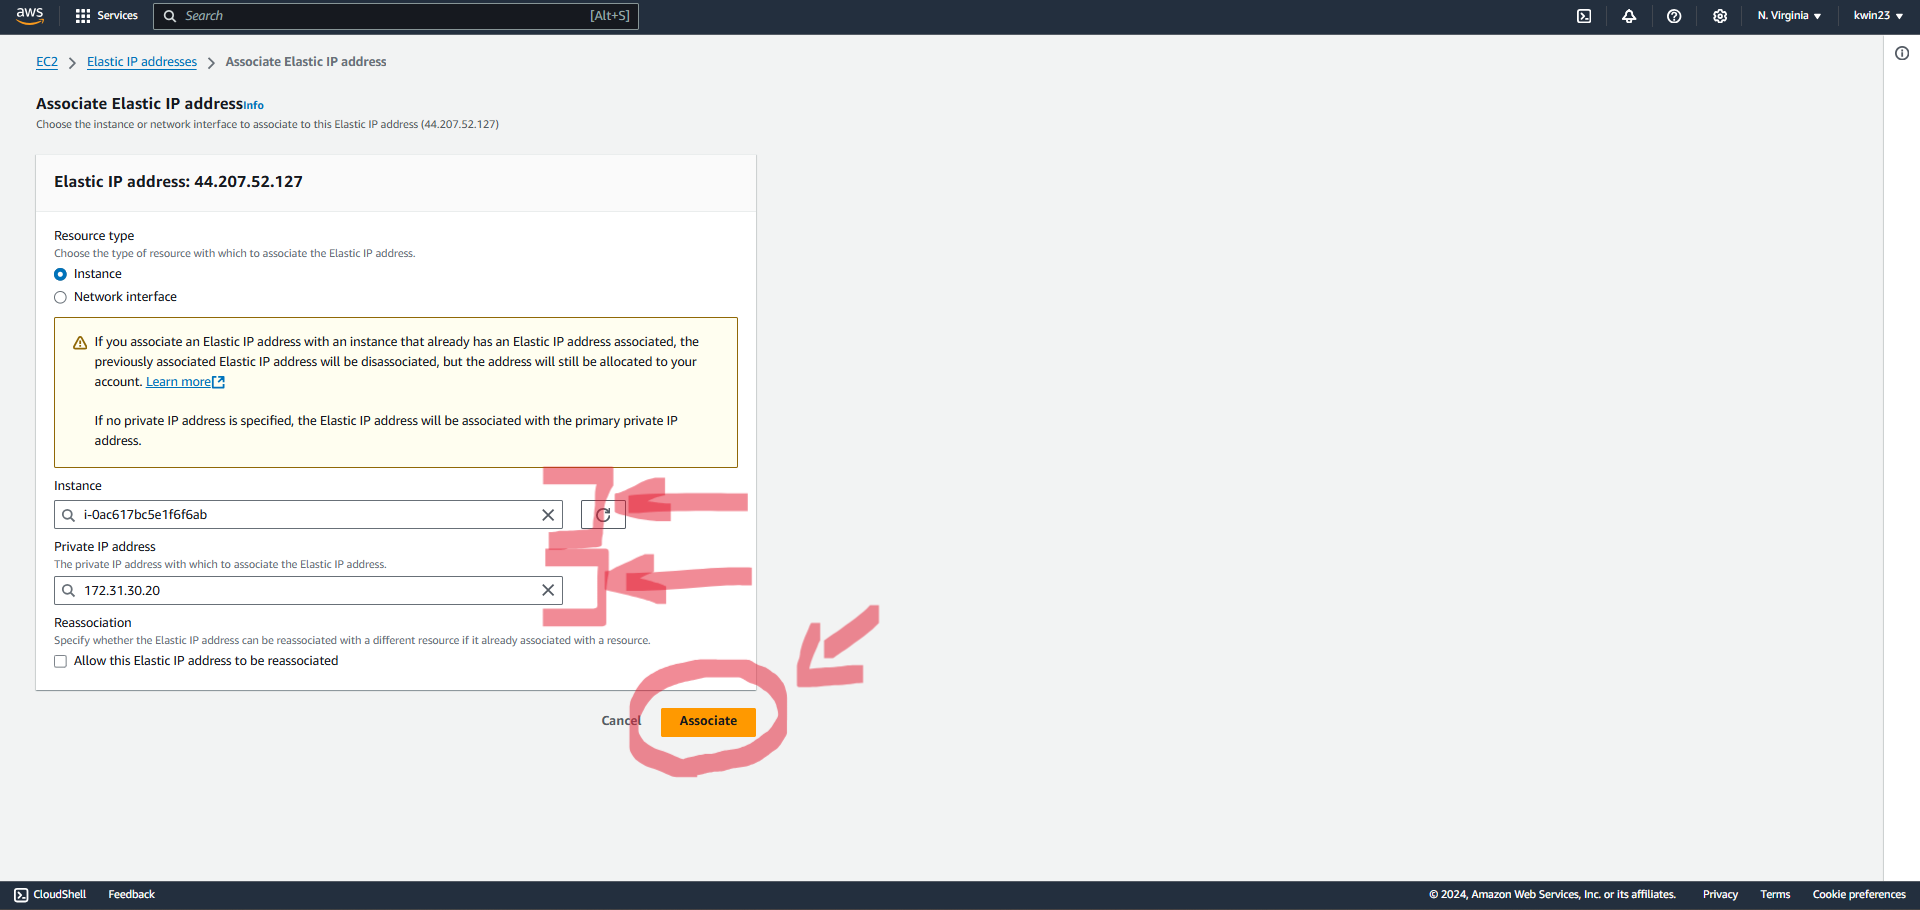
- Setting up dependencies on the EC2 instance.
5.1. Select "EC2" on the AWS dashboard.
5.2. Select the recently created EC2 instance and click on "Connect".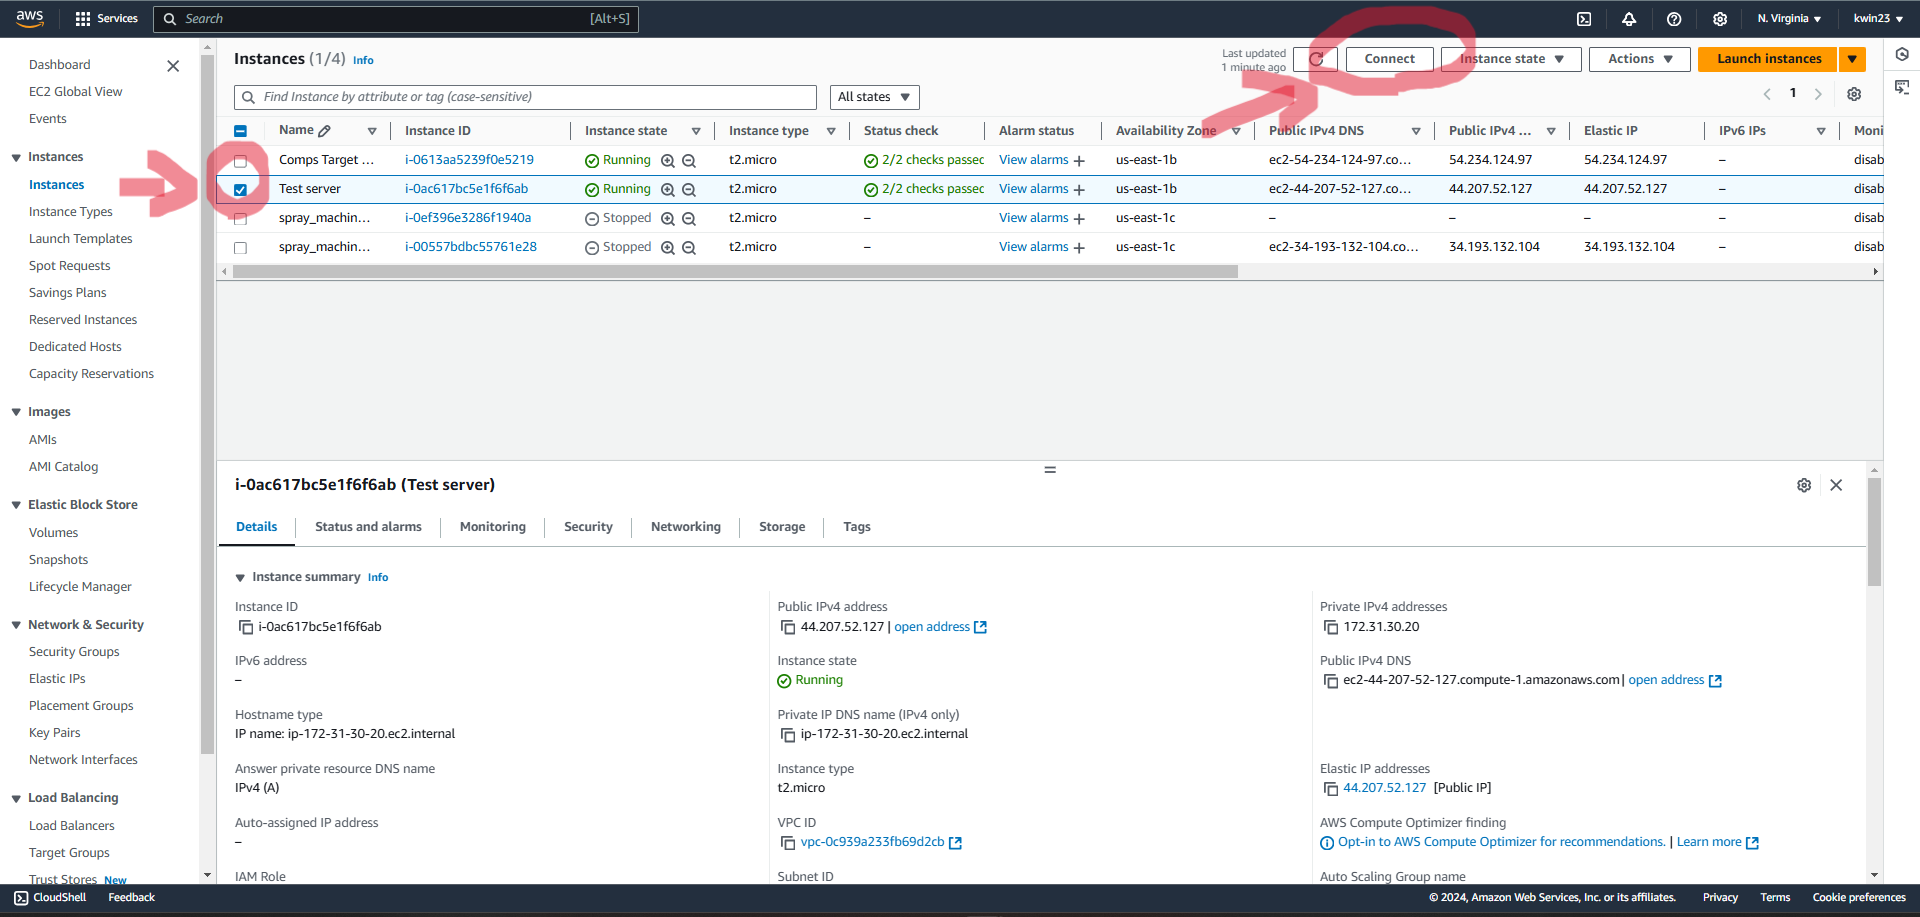 5.3. Choose the "EC2 Instance Connect" option and click on "Connect".
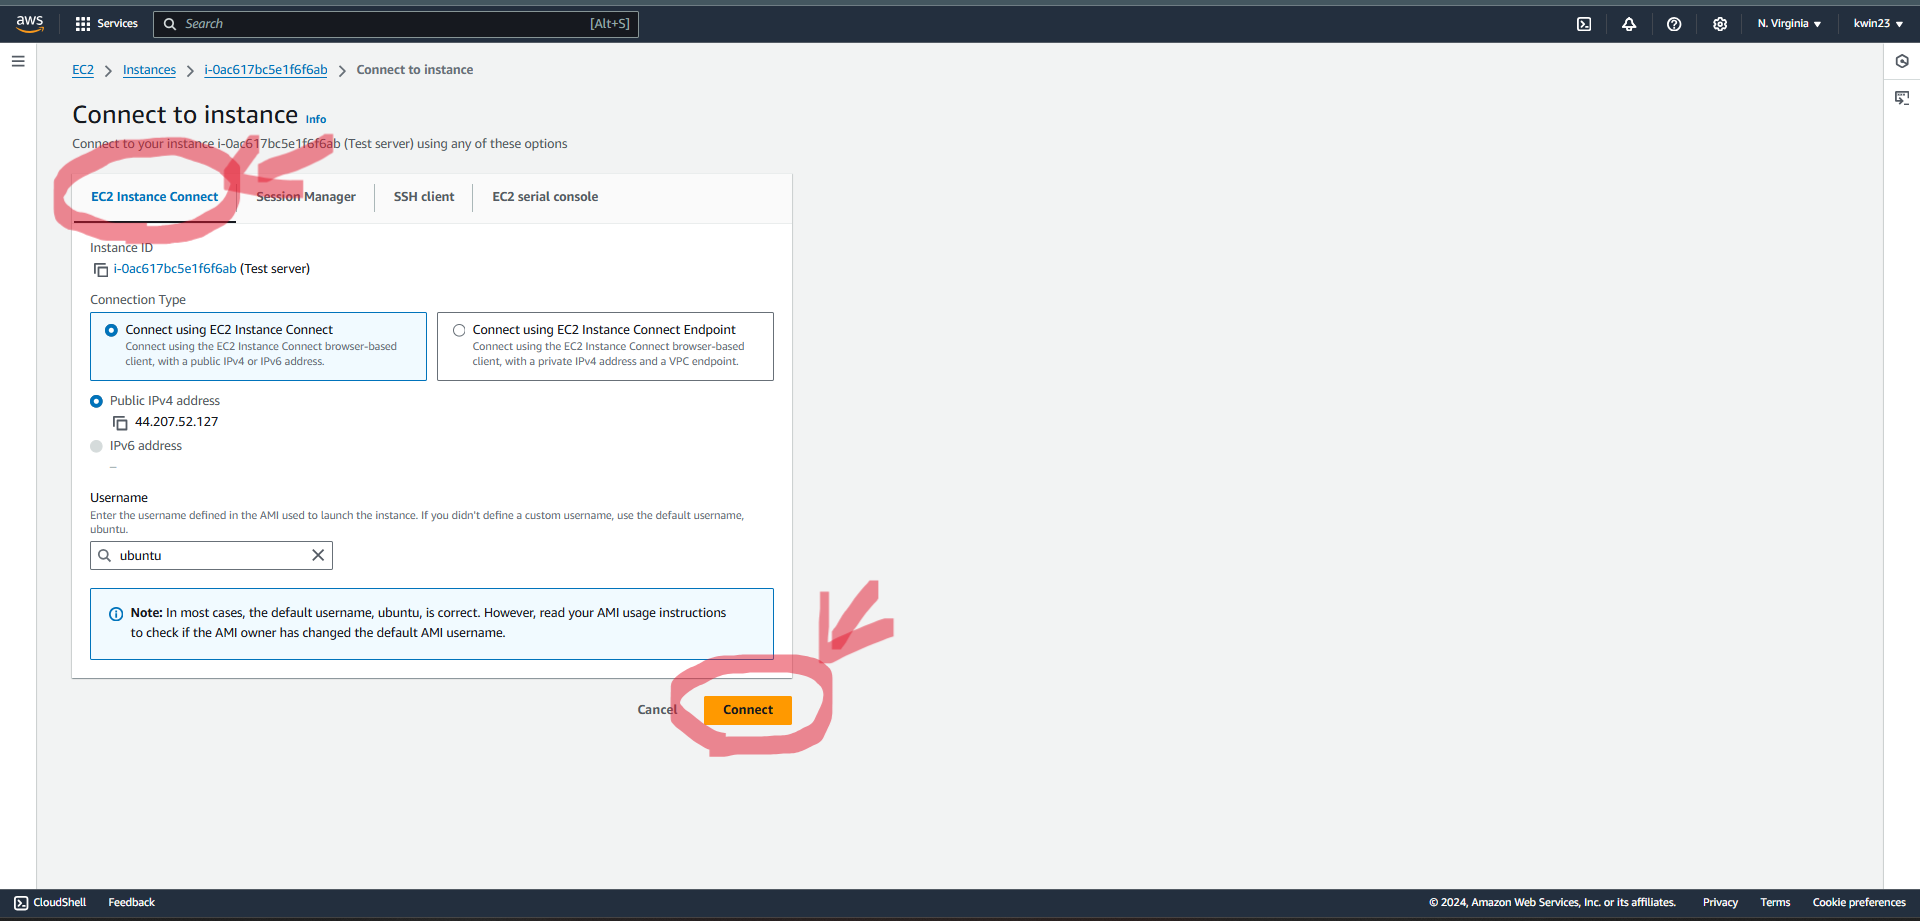 5.4. Install nginx, npm, and psql:
5.5. Setup postgres database.
5.4. Install nginx, npm, and psql:
5.5. Setup postgres database.sudo apt-get update sudo apt install nginx -y sudo apt install npm -y sudo apt install postgresql -y
sudo -u postgres psql
5.6. Once the "comps" database is set up, set up the "blocked_ips" table.CREATE USER comps_user WITH PASSWORD 'comps_password'; CREATE DATABASE comps; GRANT ALL PRIVILEGES ON DATABASE comps TO comps_user;
\c comps5.7. Relocate to the target machine's backend folder.CREATE TABLE blocked_ips ( id SERIAL PRIMARY KEY, ip_address INET NOT NULL, log_date TIMESTAMP WITH TIME ZONE DEFAULT CURRENT_TIMESTAMP ); GRANT SELECT, INSERT, UPDATE, DELETE ON TABLE blocked_ips TO comps_user;
Create a ".env" file with the following:cd SecurityComps2024/project/TargetMachine/backend/DB_USER=comps_user DB_HOST=localhost DB_DATABASE=comps DB_PASSWORD=comps_password DB_PORT=5432
- Install dependencies.
6.1. Install dependencies on the backend:
6.2. (Optional) Install dependencies on the frontend to see what the log-in page looks like:
cd SecurityComps2024/project/TargetMachine/backend npm installcd SecurityComps2024/project/TargetMachine/frontend npm install
- Clone the git repository into a folder:
- Without OCR
git clone https://github.com/CarletonSecurityComps2024/SecurityComps2024.git- With OCR
git clone -b read-respond-captcha https://github.com/CarletonSecurityComps2024/SecurityComps2024.git- Open the folder using VSCode.
- Navigate to the spraying tool folder using the terminal:
cd SecurityComps2024/project/PasswordSprayingtool/- Install dependencies:
pip install -r requirements.txt- Add API credentials for proxy rotation.
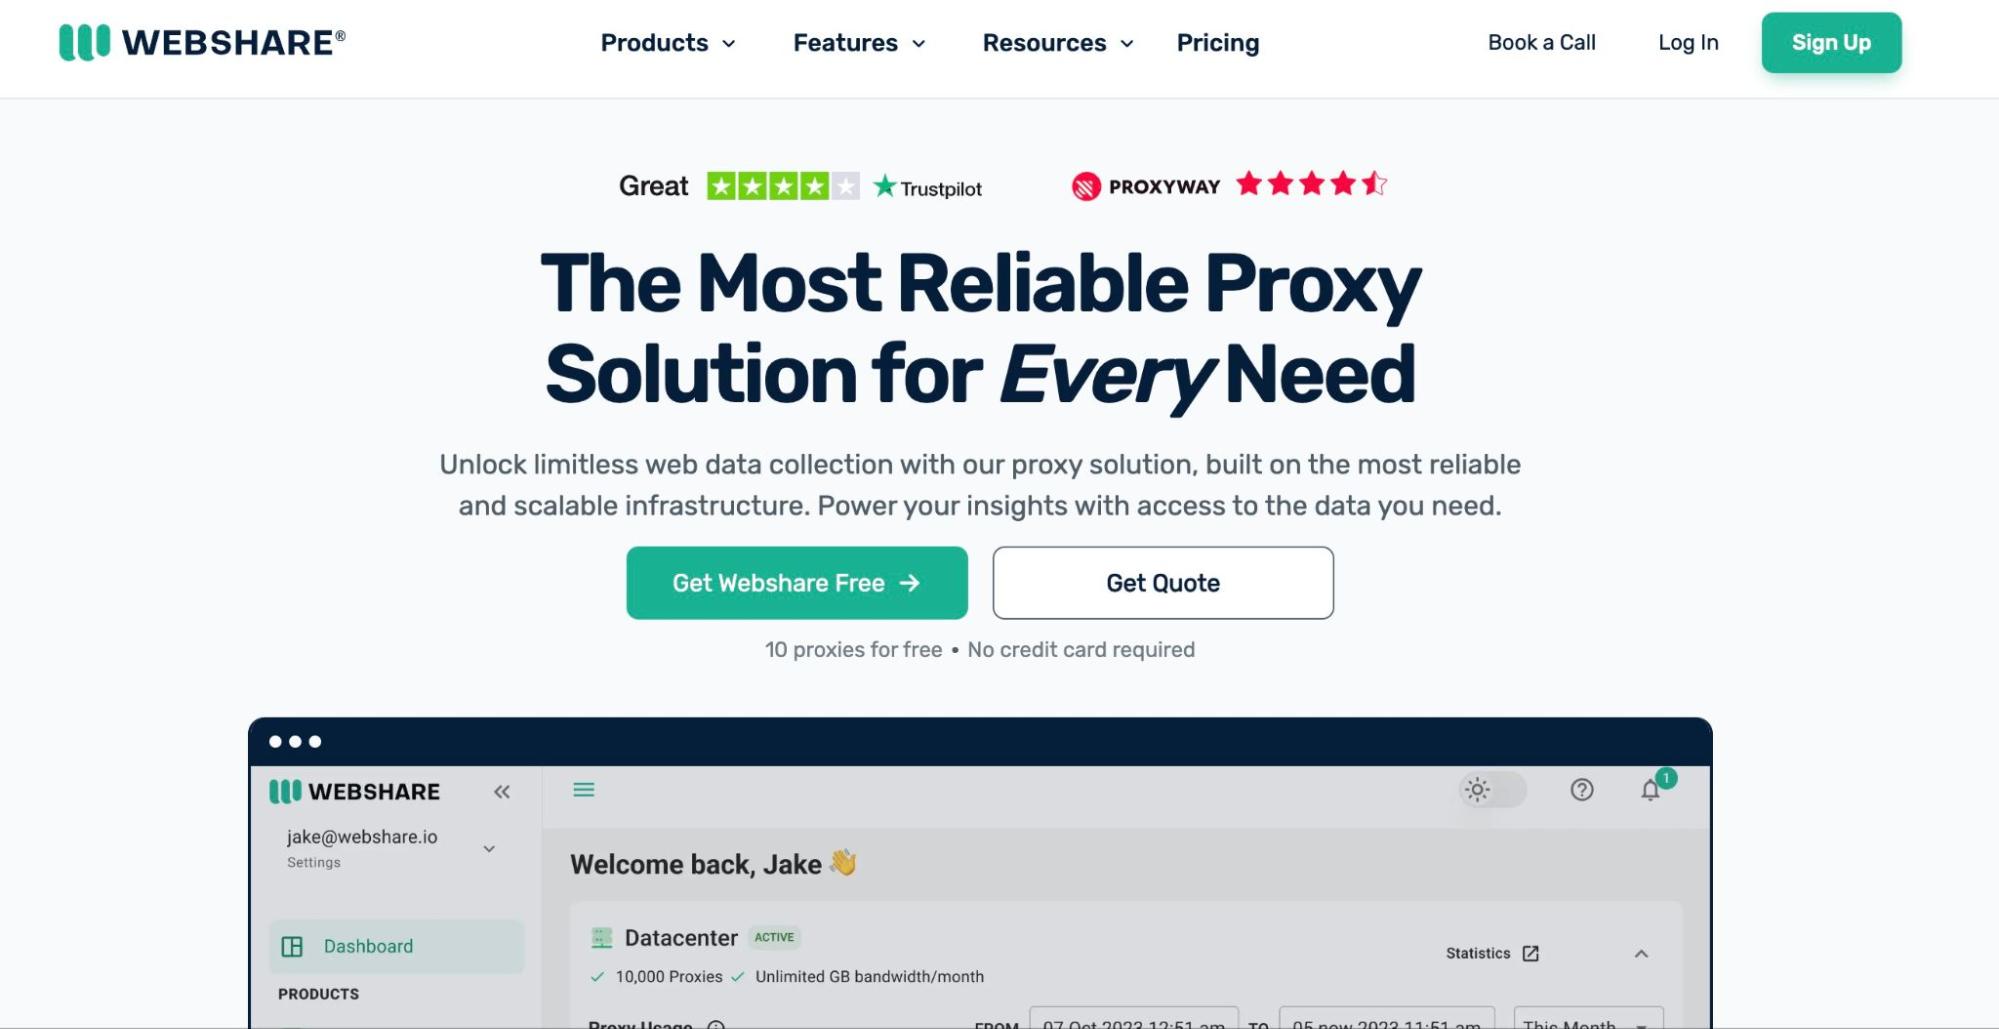
5.1. Sign up for a free account on Webshare.
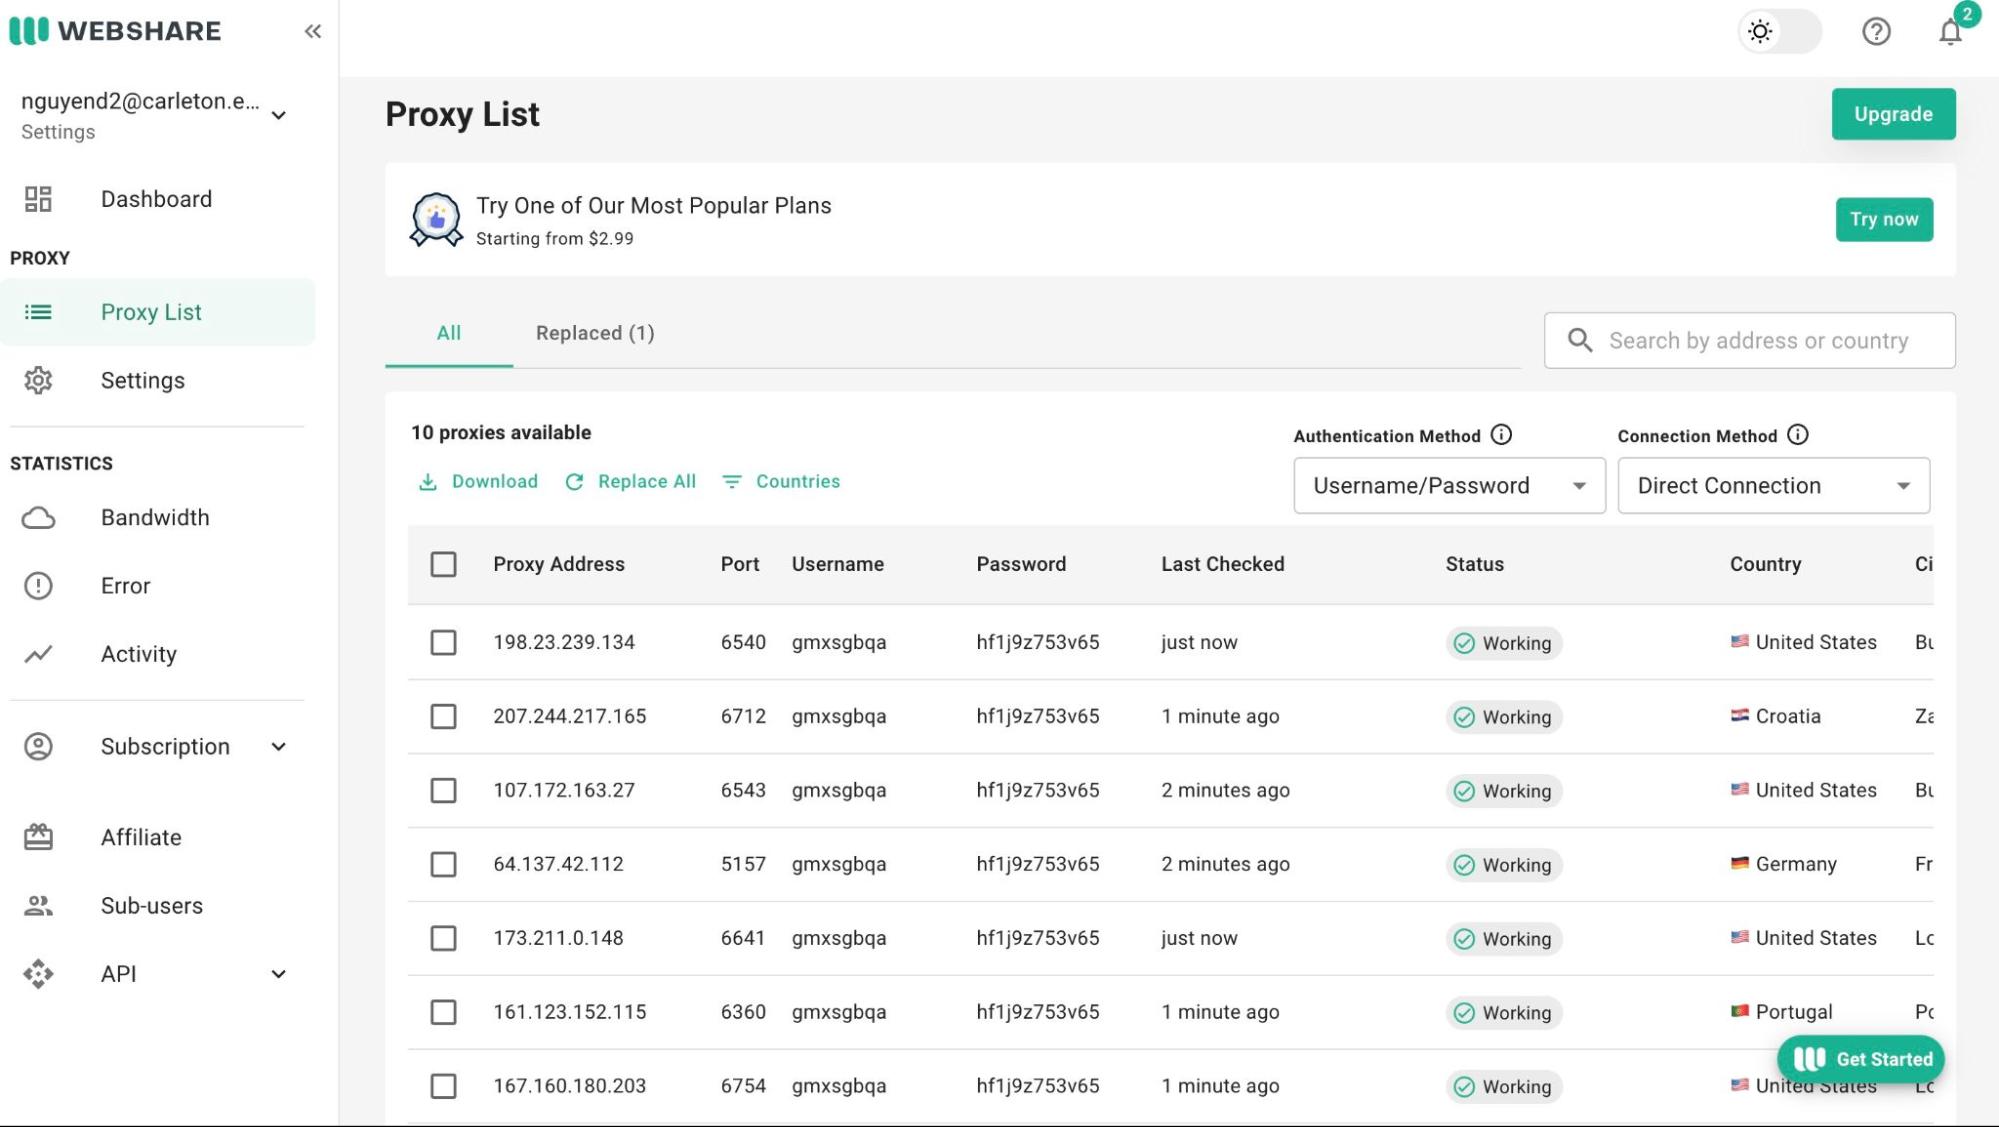
 5.2. After logging in, navigate to the Proxy List section in your dashboard.
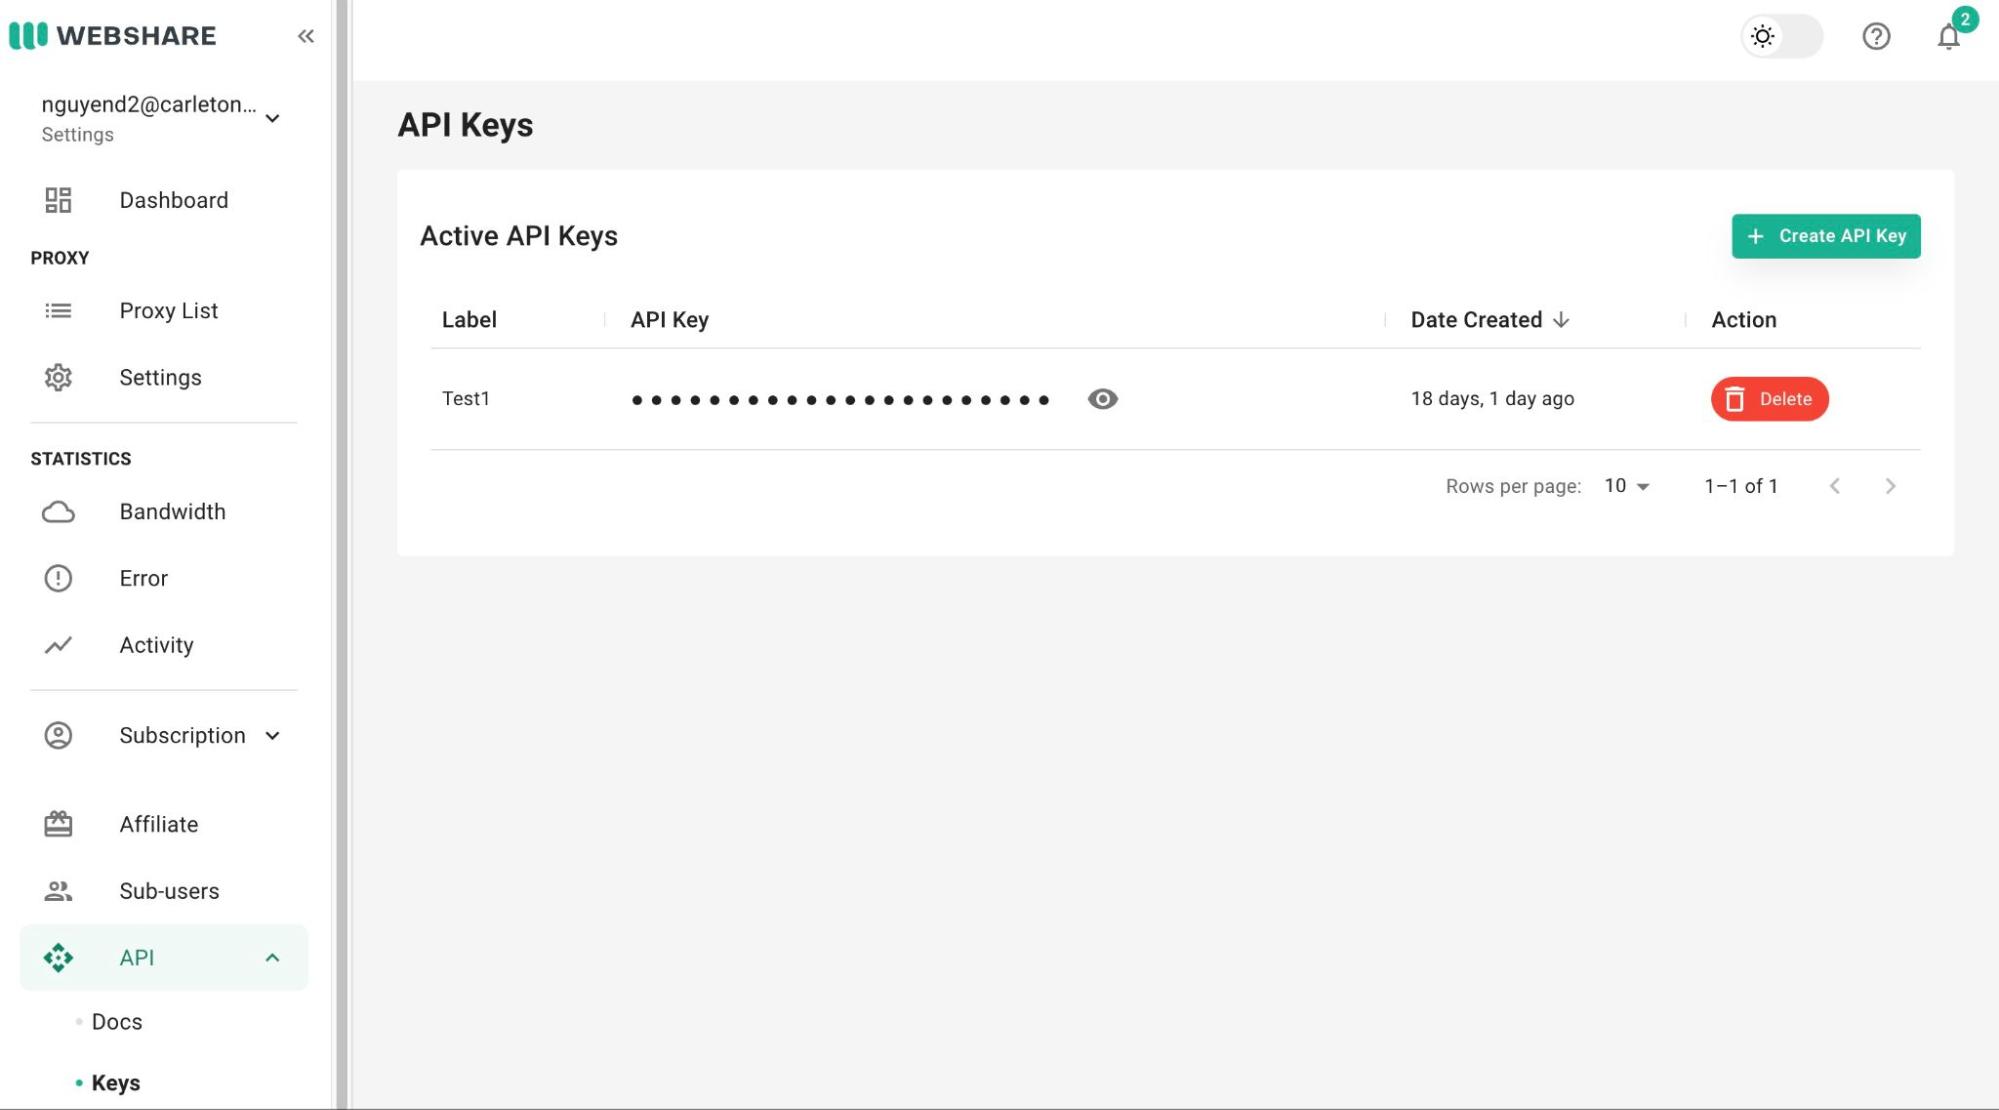
 5.3. Click on the "Create API Key" button to generate a new key. You can assign a label to this key for easy identification.
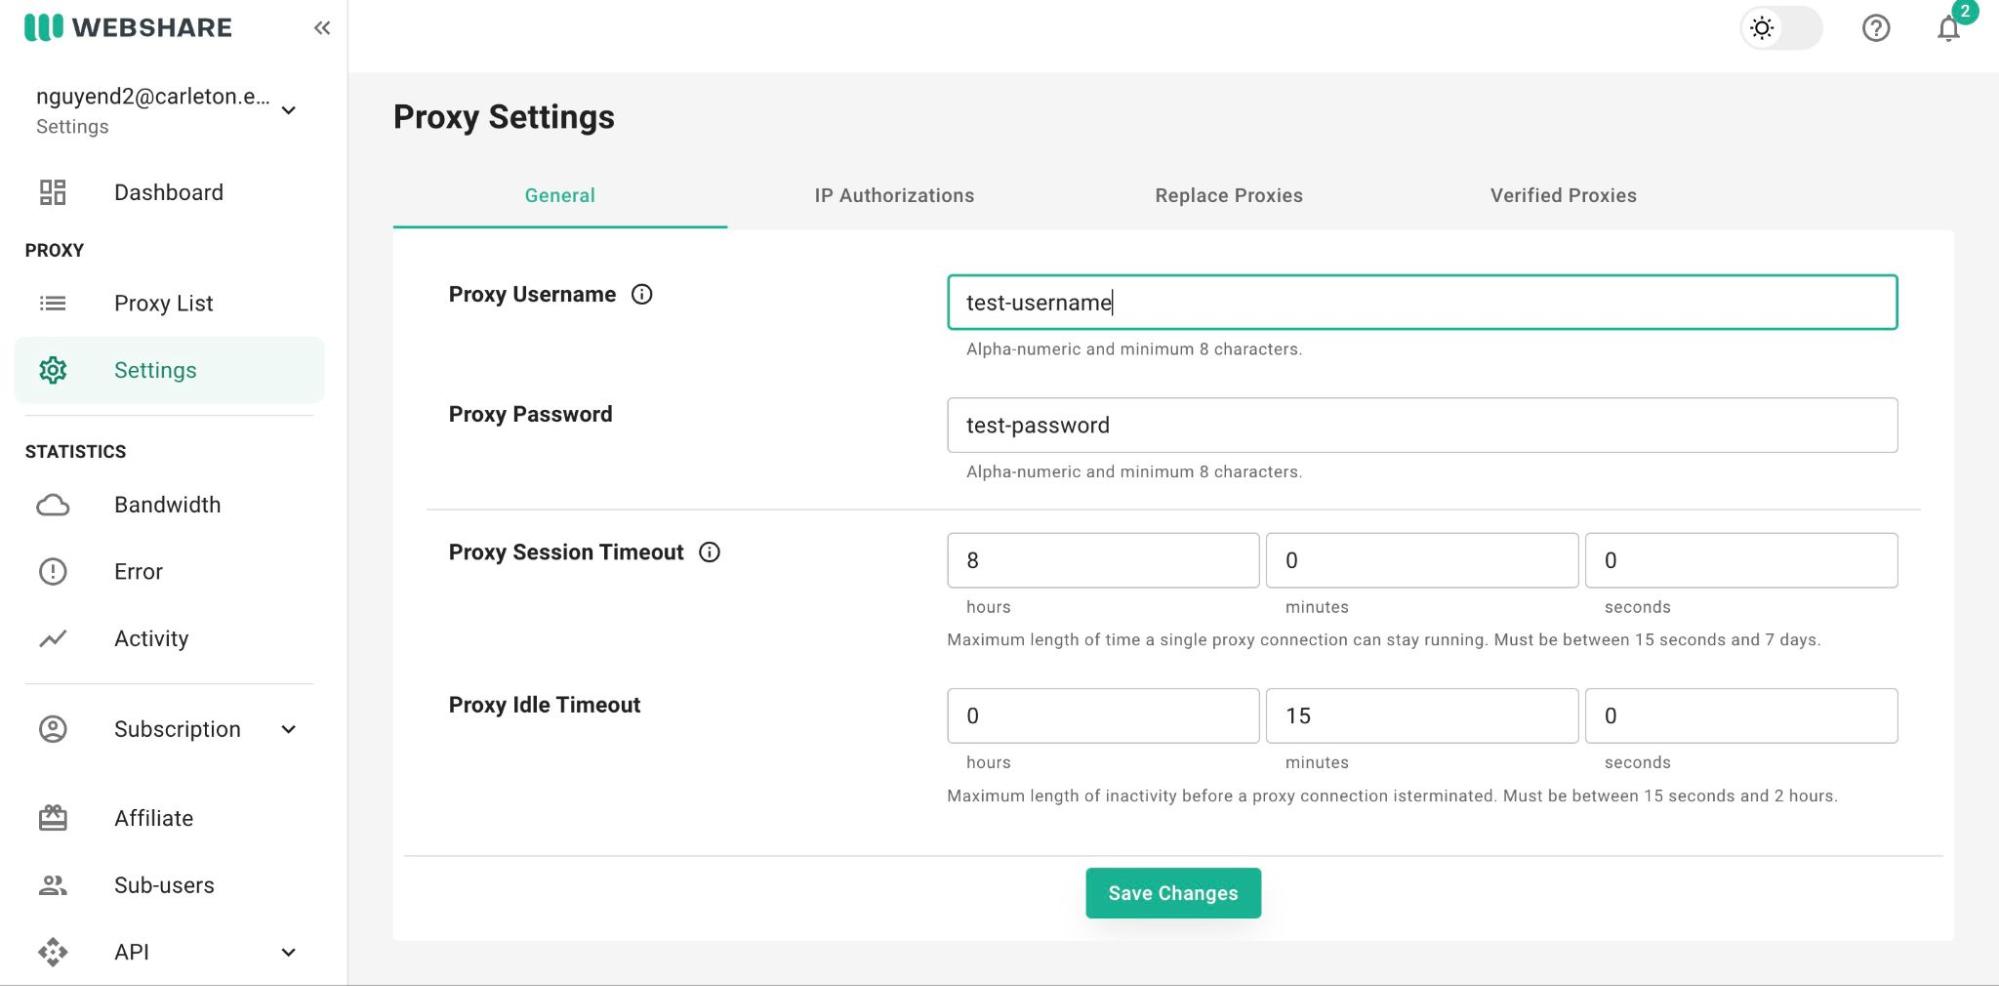
 5.4. Go to Settings and retrieve API username and password.
 5.5. Relocate to the tool's folder.
Add the API credentials in this format:
5.5. Relocate to the tool's folder.
Add the API credentials in this format:cd SecurityComps2024/project/PasswordSprayingtool/APIFY_PROXY_HOSTNAME=proxy.apify.com APIFY_PROXY_PORT=8000 APIFY_PROXY_PASSWORD=***add_apify_account_password_here*** PROXY_API_KEY = ***add_api_key_here*** PROXY_API_USERNAME = ***add_api_username_here*** PROXY_API_PASSWORD = ***add_api_password_here***
- For ease of development, use a Linux-based system like WSL.
- Create a virtual environment and start the environment.
- Install tensorflow.
- Download the CAPTCHA dataset from Kaggle and place the folder containing the images inside this directory:
cd SecurityComps2024/project/OCRModel/- (If necessary) Rename the CAPTCHA image folder.
- Run
train_ocr_model.ipynb. - (If necessary) Install Keras and make sure the Keras and Tensorflow versions are compatible.
- (If necessary) Reopen the VSCode terminal in WSL.
- On the target machine, run the following code to start the server:
cd SecurityComps2024/project/TargetMachine/backend
npm start- On the attacker machine, run the following code to run the tool:
cd SecurityComps2024/project/PasswordSprayingtool/
python3 password_spraying.pyWe'd like to thank Professor Jeff Ondich for his support and guidance throughout the project. This project would not have been possible without him.
- AWS, "Amazon EC2", https://aws.amazon.com/ec2/
- AWS "Amazon EC2 Auto Scaling", https://aws.amazon.com/ec2/autoscaling/
- Badhri Adhikari, “[DL] Some pitfalls to avoid when designing your own convolutional neural network,” YouTube, https://www.youtube.com/watch?v=eTUobNH5fj4
- Baoguang Shi, et. al. “An End-to-End Trainable Neural Network for Image-based Sequence Recognition and Its Application to Scene Text Recognition.” https://ar5iv.labs.arxiv.org/html/1507.05717
- CrowdStrike, Bart Lenaerts-Bergmans, "Password Spraying", 2022, https://www.crowdstrike.com/en-us/cybersecurity-101/cyberattacks/password-spraying/,
- Distill. “Sequence Modeling with CTC.” https://distill.pub/2017/ctc/
- Infura, "Python: How to perform batch requests with Infura", https://support.infura.io/building-with-infura/python/how-to-perform-batch-requests
- Keras - A_K_Nain. “OCR model for reading Captchas.” https://keras.io/examples/vision/captcha_ocr/
- mdn web docs. “HTTP Authentication.” https://developer.mozilla.org/en-US/docs/Web/HTTP/Authentication
- NetApps, "EC2 Autoscaling: The Basics, Getting Started, and 4 Best Practices", https://spot.io/resources/aws-autoscaling/ec2-autoscaling-the-basics-and-4-best-practices/
- Oxylabs, Roberta Aukstikalnyte, "What is proxy rotation and why is it important?", https://oxylabs.io/blog/rotate-proxies-python
- Ping Wang, et al. “An Experimental Investigation of Text-based CAPTCHA Attacks and Their Robustness,” https://dl.acm.org/doi/10.1145/3559754
- Semperis, Daniel Petri, 2024, "How to Defend Against a Password Spraying Attack, "https://www.semperis.com/blog/how-to-defend-against-password-spraying-attacks/
- Splunk, Shanika Wickramasinghe, 2023, "Password Spraying Attacks: What You Need To Know To Prevent Attacks", https://www.splunk.com/en_us/blog/learn/password-spraying.html
- Server Dataset: https://www.kaggle.com/datasets/greysky/captcha-dataset
- Training Dataset: https://www.kaggle.com/datasets/parsasam/captcha-dataset
