This is a DIY project aimed at providing a practical, useful and safe electronic load for people interested in electronics. While it is not be the most powerful electronic load available, it is designed to be easy to use and reliable, making it an excellent option for those looking for a DIY electronic load. We develop a HW and SW for complete integration, but you can use it as you want. Based in microcontroller ESP32-C3.
This project is designed for people who want to build their own electronic load for testing and evaluating power supplies, batteries, and other electronic components. It is a practical and affordable solution for those who do not want to spend a lot of money on a commercial electronic load but still want to have a reliable tool for their electronic projects.
The Electronic Load - 60W has several features that make it a practical and useful tool, including:
- 25Vdc maximum voltage
- 5A maximum current
- 60W power output (12V/5A, depending on cooling system, Fan needed!!)
- Based in microcontroller ESP32-C3
- Reverse polarity voltage protection
- Thermal protection to prevent avalanche breakdown due to temperature
- Overcurrent and overvoltage protection
- Adjustable current, voltage and power settings by fisical selector
- Switch to dis/enable load functions
- Easy-to-read display for current, voltage and power monitoring
- Easy-to-configure wifi ssid and psk
- Live graphic on web for current, tension and power monitoring
- Cooling fan output, 12Vdc/0.5A
- It is powered by a typical 5V USB-C power source
- USB to power up the LV site of board
- Vload input, where to connect the power supply to apply the load
- Power mosfet, is the main component that works in resistence part to to vary its resistance. I need a heatsink !!
- Fan output, to healp heatsink control mosfet temperature. For low power applications and having a good heatsink maybe it is not needed.
- eLoad switch enable and disable the mosfet gate directly, to stop or let run the load.
When you plug in the USB power to eLoad electronics, it will start and in a few seconds will show a IP (if it can connecto to the wifi) or it wil generate an AP wifi (where you can configure wifi, if you want). At any case, you will see this website.
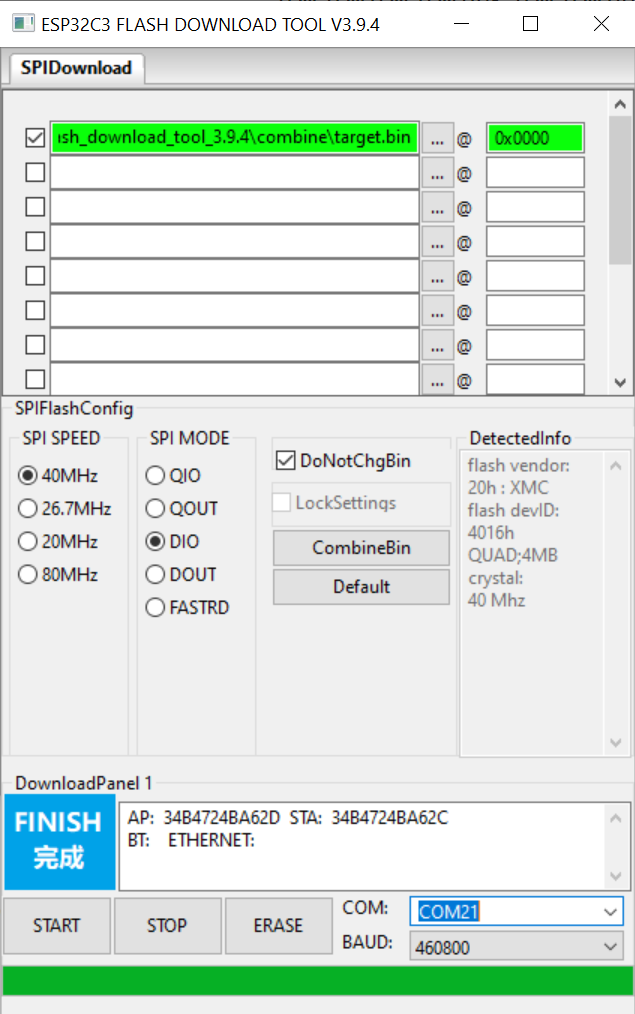
There are two different ways to do that, the easy&fast (using bin file) or the advance (using PlatformUO)
- Download Last eLoad Release
- Download Flash Download Tools from ESPRESSIF
- Open Flash Download Tools -> ESP32-C3 / Develop / USB

| Function | GPIO | Mode |
|---|---|---|
| Cooling fan | 0 | Output |
| ADC-Isense | 1 | Input |
| Digital led | 2 | Output |
| ADC-Vsense | 3 | Input |
| ADC-Tsense1 | 4 | Input |
| Mosfet | 6 | Output |
| Sw sense | 7 | Input |
| Selector move B | 8 | Input |
| Selector button | 9 | Input |
| Selector move A | 10 | Input |
| I2C-SCL | 20 | Communication |
| I2C-SDA | 21 | Communication |
Safety is a top priority in the design of the Electronic Load - 60W. It includes HW and SW protections: HW
Resettable fuse of 6A, for overcurrent of load Thermoswitch, Opam, Main switch Thermistor sensor, Fan SW
Thermistor monitoring for turn on the fan when temperature increase over 50ºC and turn of pwm signal when it is over 100. overcurrent and overvoltage protection, and is designed to be safe and reliable for DIY enthusiasts.
It is the weak point of the ESPRESSIF microcontrollers, the internal ADC it is not accurate. In my tests, the error can be up to 10% of error, and it can change in the time. In the PCB design exist de option the use an external ADC for monitor Voltage and Current (not for temperature).
- Get log file .csv, via web, sd card or usb to pc
- Program option to setting up load profile in the time
- Batteries calculations
- Design of 3D printable box


