This tutorial will go through three demo projects for two use cases: (1) Deploying Web services: Websites and (2) Data Processing: Lightweight Data Transformation using Google Cloud Run, Cloud Storage, Eventarc (pronunciation: event arch), and BigQuery services of the Google Cloud Platform.
Before you dive into the coding, you should study the following materials.
There is no need to operate on the Cloud Run; just understand the concepts and know what you will probably do.
-
How to use Git and Github: Youtube: Git Tutorial, Youtube: GitHub Tutorial.
-
Cloud Run:
-
Overall:
-
What is Cloud Run: You should understand the concept of "Cloud Run Services" and "Clould Run Jobs."
-
Is my app a good fit for Cloud Run?: You should know what kind of work suits Google Cloud Run.
-
-
For Use Case 1:
-
For Use Case 2:
-
-
Cloud Storage:
-
Eventarc:
-
BigQuery:
-
Install the Google Cloud CLI: https://cloud.google.com/sdk/docs/install, run init, and select the project you just created.
Verify if the tools by the command:
gcloud -v
and you should get the following output:
Google Cloud SDK 444.0.0
bq 2.0.97
core 2023.08.22
gcloud-crc32c 1.0.0
gsutil 5.25
-
Create your Project on Google Cloud Console at https://cloud.google.com/?hl=en.

-
<>: Set up a billing account for your project.
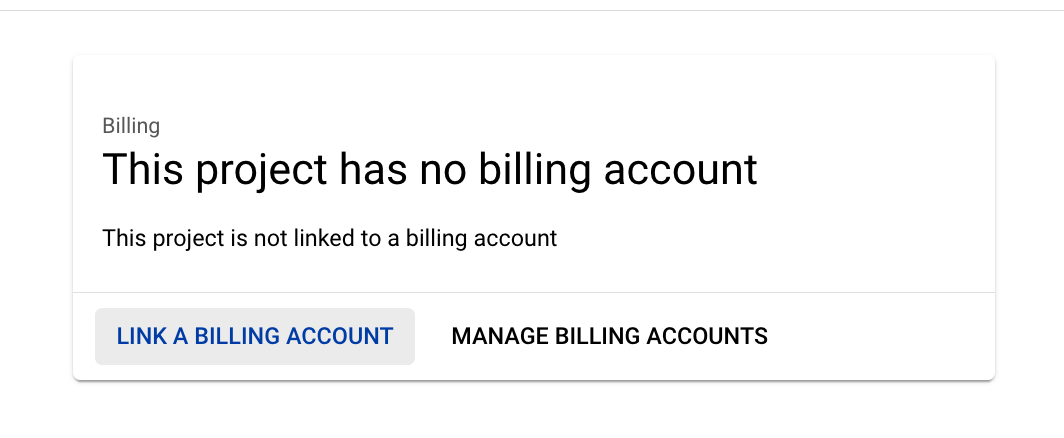
If you are new to the platform, remember that the platform grants you $400+ credits once your billing is linked.
-
Authorization for the gcloud.
You should log in first:
gcloud auth login
then it will pull up your browser:
Once allowed, you will see:
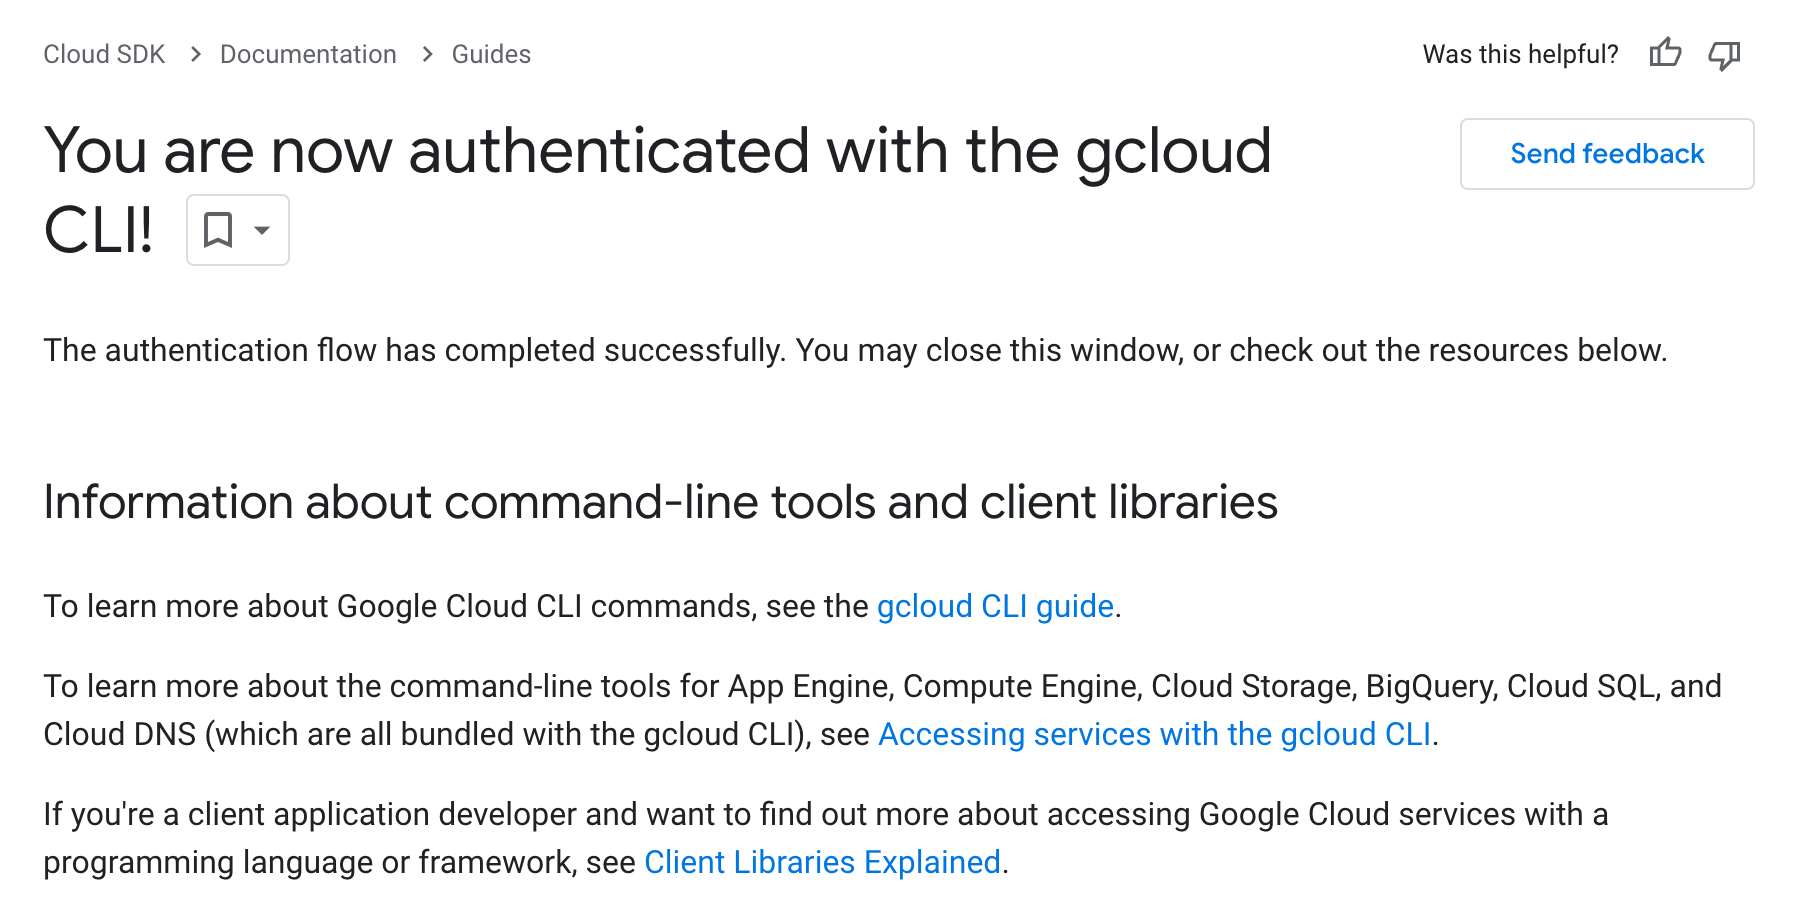
Verify your login status with:
gcloud auth list
-
Config the project to your gcloud:
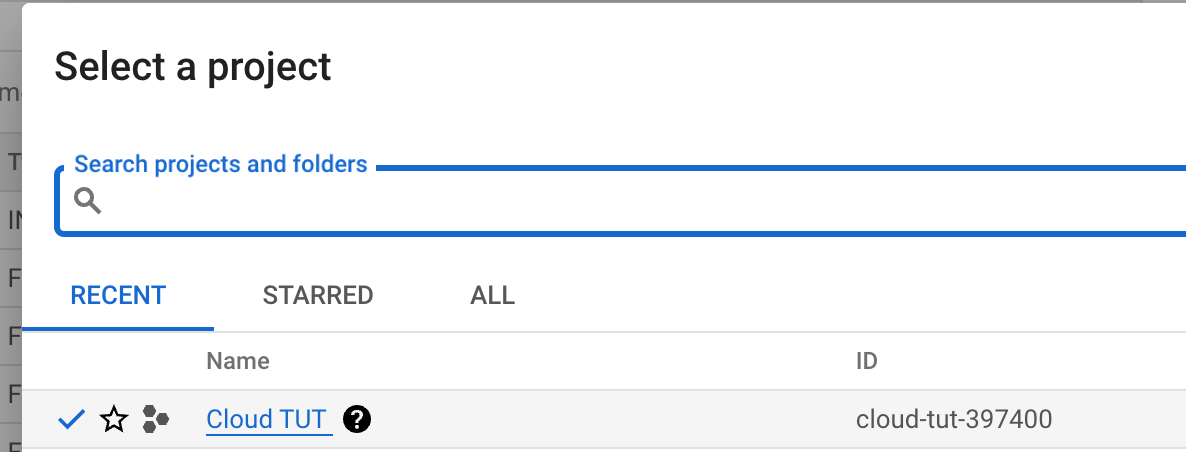
gcloud config set project <your-project-id>
The project ID can be found while selecting Project in the Console.
-
Set up Billing information, add card as payment to your account (this will charge you 1$~2$, and it will be refunded):

-
Enable the following six Google Cloud APIs (Updated):
gcloud services enable run.googleapis.com eventarc.googleapis.com storage.googleapis.com cloudbuild.googleapis.com iam.googleapis.com iamcredentials.googleapis.com -
(Optional) Install docker in your local to debug with your Dockerfile.


There are three approaches to deploying your project as services to Cloud Run:
- from a published docker image;
- from a GitHub repository;
- from your local source code;
The following user scenario is presented:
You now work on deploying Python and Java web applications to the Cloud Run through the last two approaches.
Deploying projects on GitHub to Cloud Run can enable the CI/CD workflow between Google Cloud Platform and GitHub.
In the root path of this repository, a simple Flash application in the main.py and the Dockerfile is for Cloud Run Service to build and deploy the image.
The Dockerfile:
# Use the official lightweight Python image.
# https://hub.docker.com/_/python
FROM python:3.11-slim

# Allow statements and log messages to immediately appear in the logs
ENV PYTHONUNBUFFERED True

# Copy local code to the container image.
ENV APP_HOME /app
WORKDIR $APP_HOME
COPY . ./

# Install production dependencies.
RUN pip install --no-cache-dir -r requirements.txt

# Run the web service on container startup. Here we use the gunicorn
# webserver, with one worker process and 8 threads.
# For environments with multiple CPU cores, increase the number of workers
# to be equal to the cores available.
# Timeout is set to 0 to disable the timeouts of the workers to allow Cloud Run to handle instance scaling.
CMD exec gunicorn --bind :$PORT --workers 1 --threads 8 --timeout 0 main:app
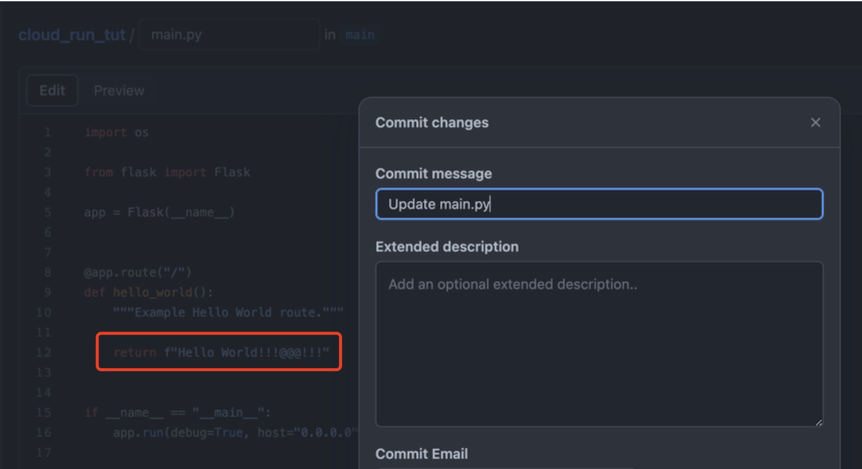
In this section, you will focus on the / endpoint in the main.py:
@app.route("/", methods=['GET', 'POST'])
def hello_world():
    """Example Hello World route."""

return f"Hello World!!!!!!"Please work on the following steps:
-
Clone this repository (Youtube: Git Tutorial, Youtube: GitHub Tutorial).
-
Go to Cloud Run and create a Cloud Run Service:
-
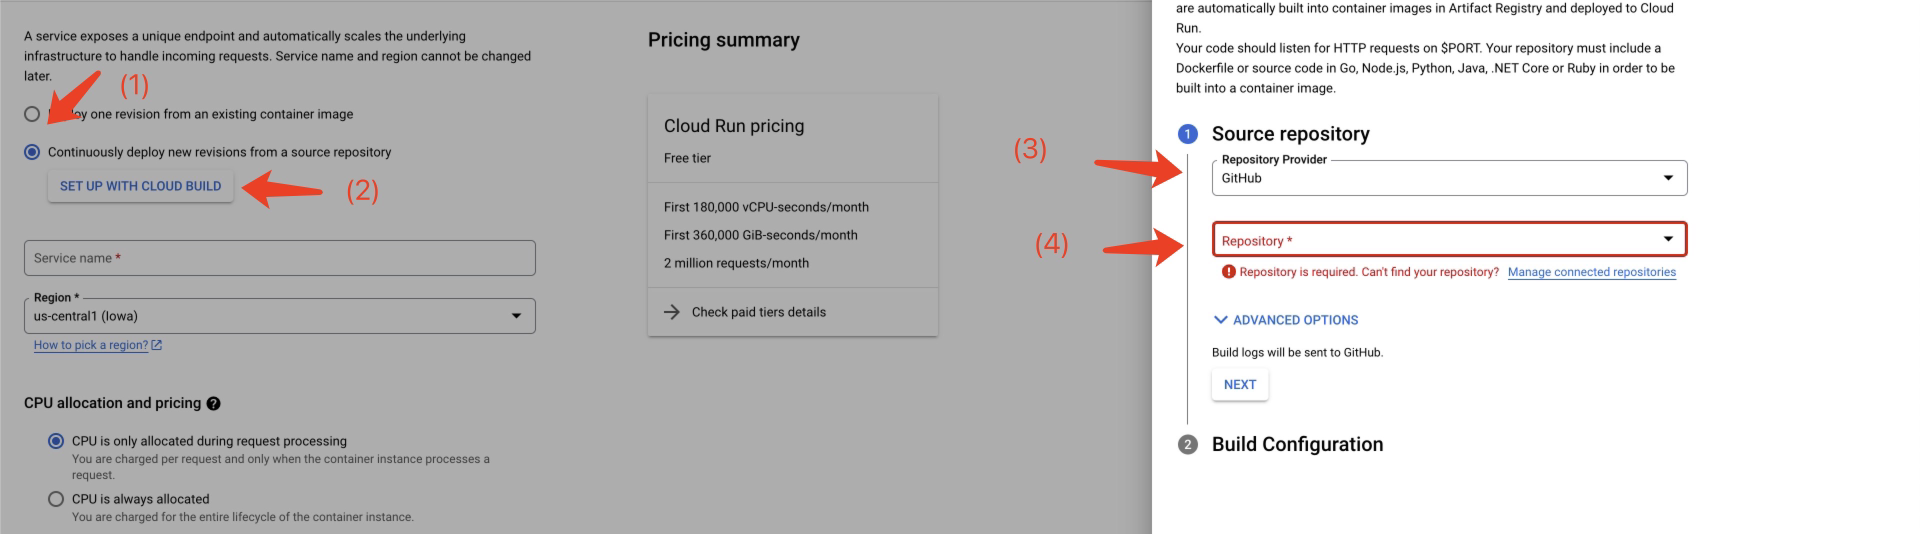
Click the Cloud Run panel "CREATE SERVICE."
-
Select "... from a source repository"; Setup Cloud Build; Authorize to your GitHub account; Select the repository you just cloned.
-
Select the main branch; Select build type "Dockerfile" and locate the file path
/Dockerfile.
-
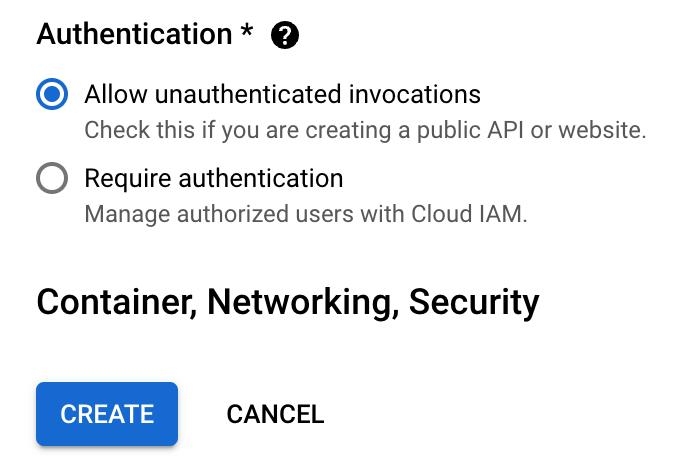
Allow unauthenticated invocations and create the service.
-
-
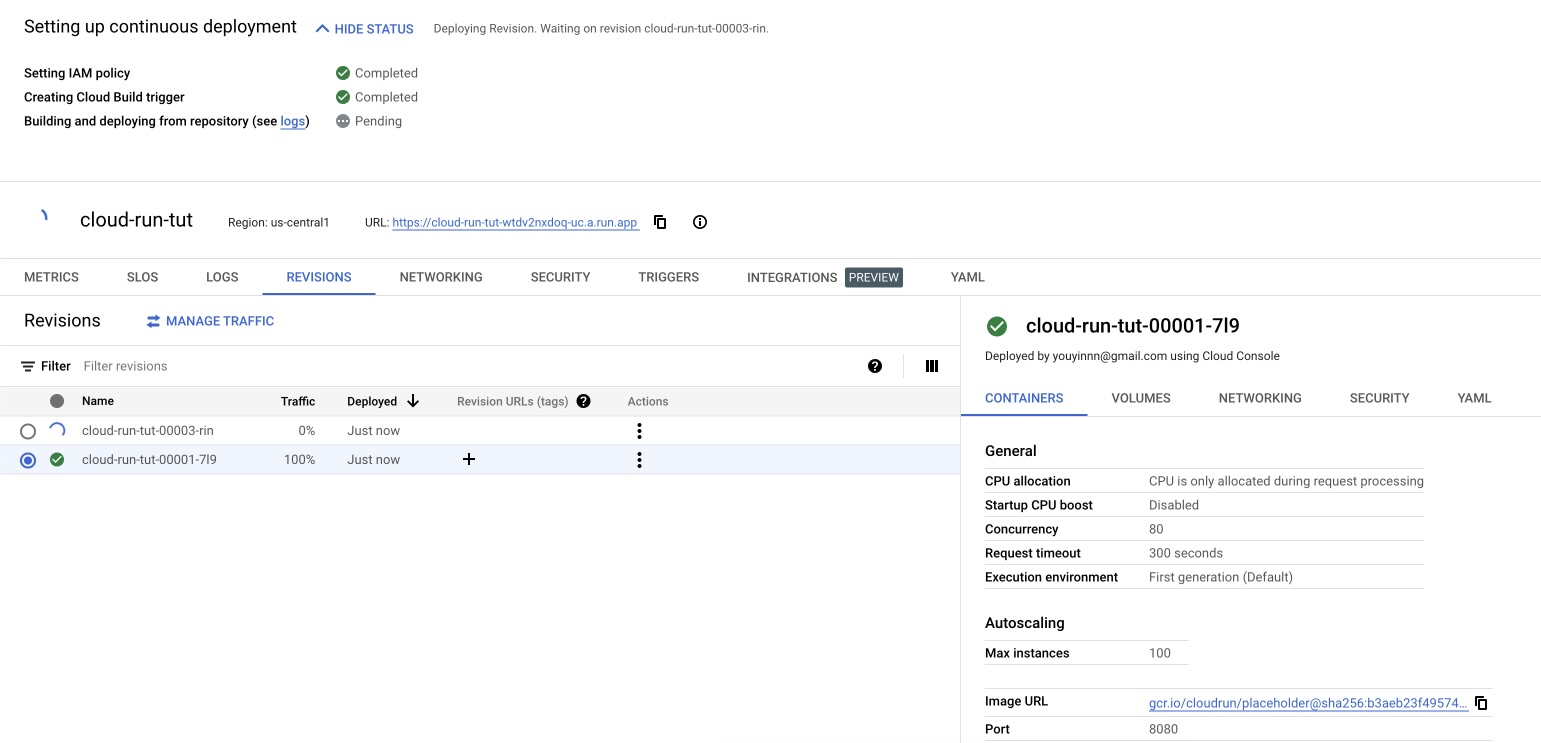
Your code is now created and deployed on Cloud Run.
-
Visit the URL of the
hello_world()endpoint.
-
Make some changes in your code and commit it to the GitHub repository.
-
Visit the Build History. You should see a new build is processing.

-
The change should be updated to the web service.


Sometimes, you may want to deploy your local work to the cloud for debugging. One simple way is to deploy your code using Google Cloud CLI.
In the root path of this repository, a Java application demo in the folder skier_app_java contains all necessary Java servlet code and the skier_app_java/Dockerfile.
The file builds an image that runs a Java application with Maven.
FROM maven:3.9.4-eclipse-temurin-11

COPY . ./project
WORKDIR ./project

ENTRYPOINT ["mvn", "clean", "install", "exec:exec", "-Dmaven.test.skip=true"]Please work on the following steps:
-
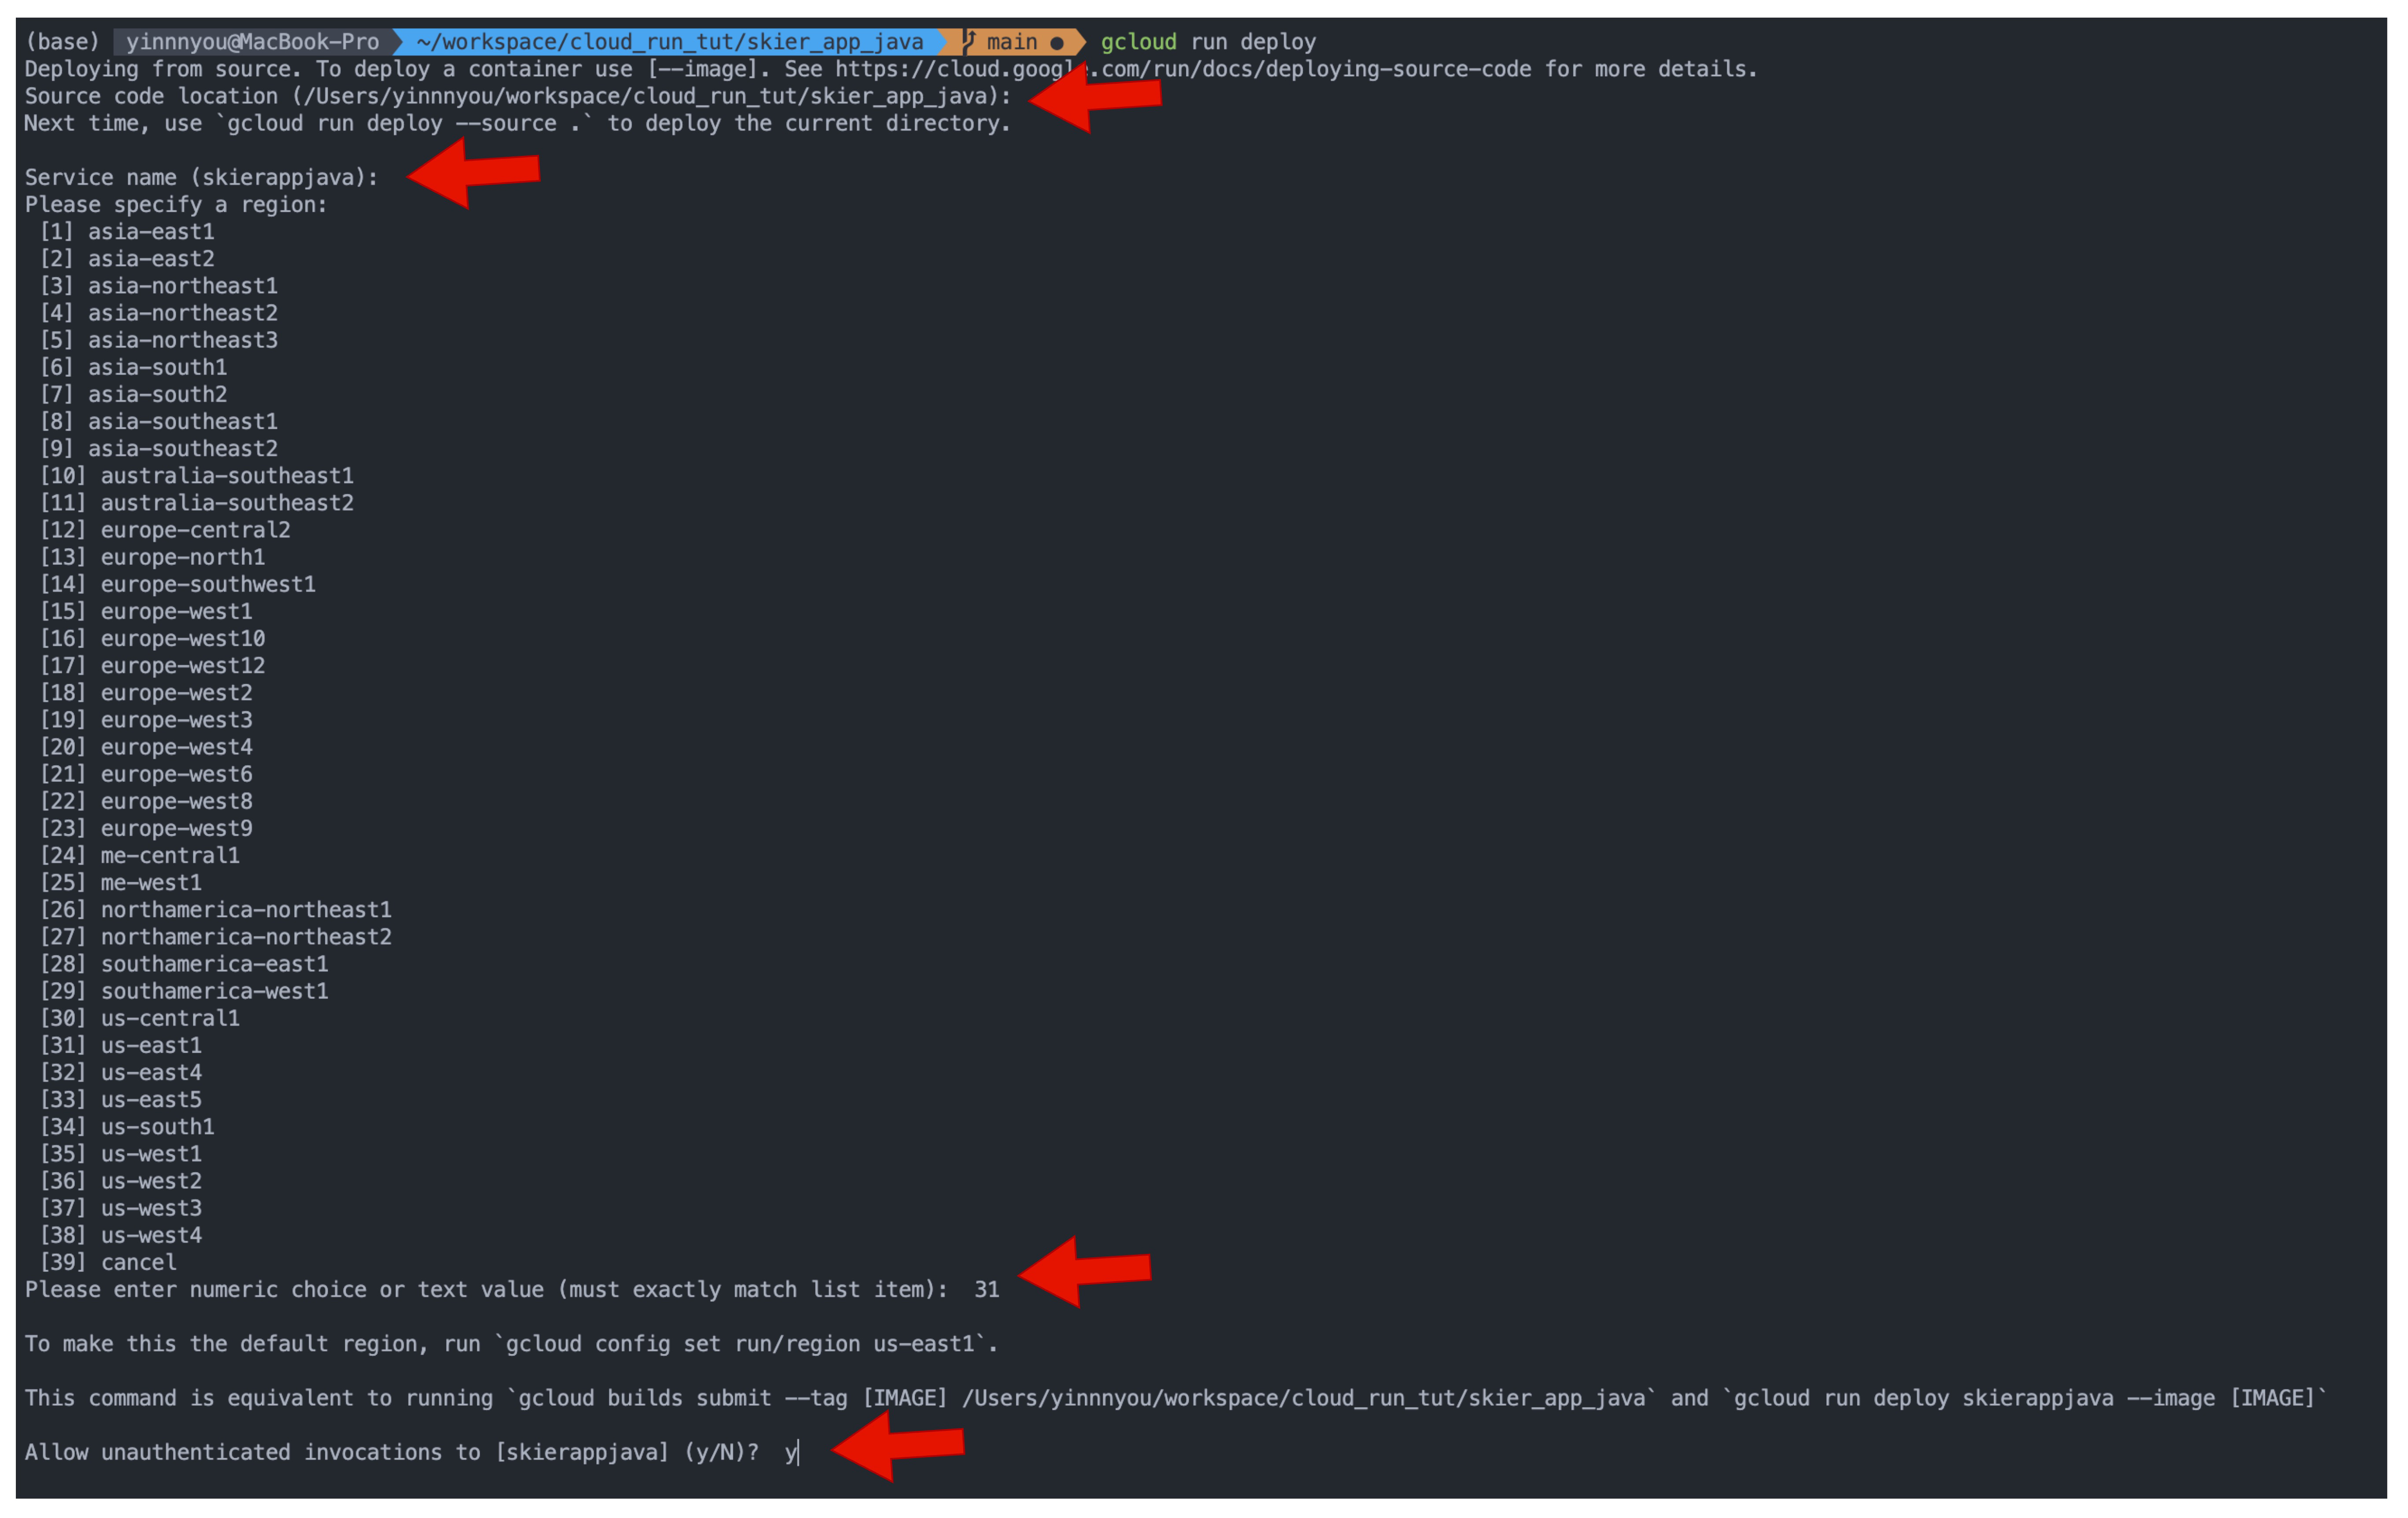
Once you have installed the CLI tools, you can now deploy this project with the following:
cd ./skier_app_javaAnd run:
gcloud run deploy
-
Follow the prompt: (1) stay default for source code location; (2) stay default for service name; (3) select region; (4) allow unauthenticated invocations.
This will trigger the Cloud Build first to build your image. On the Cloud Build, you will see:
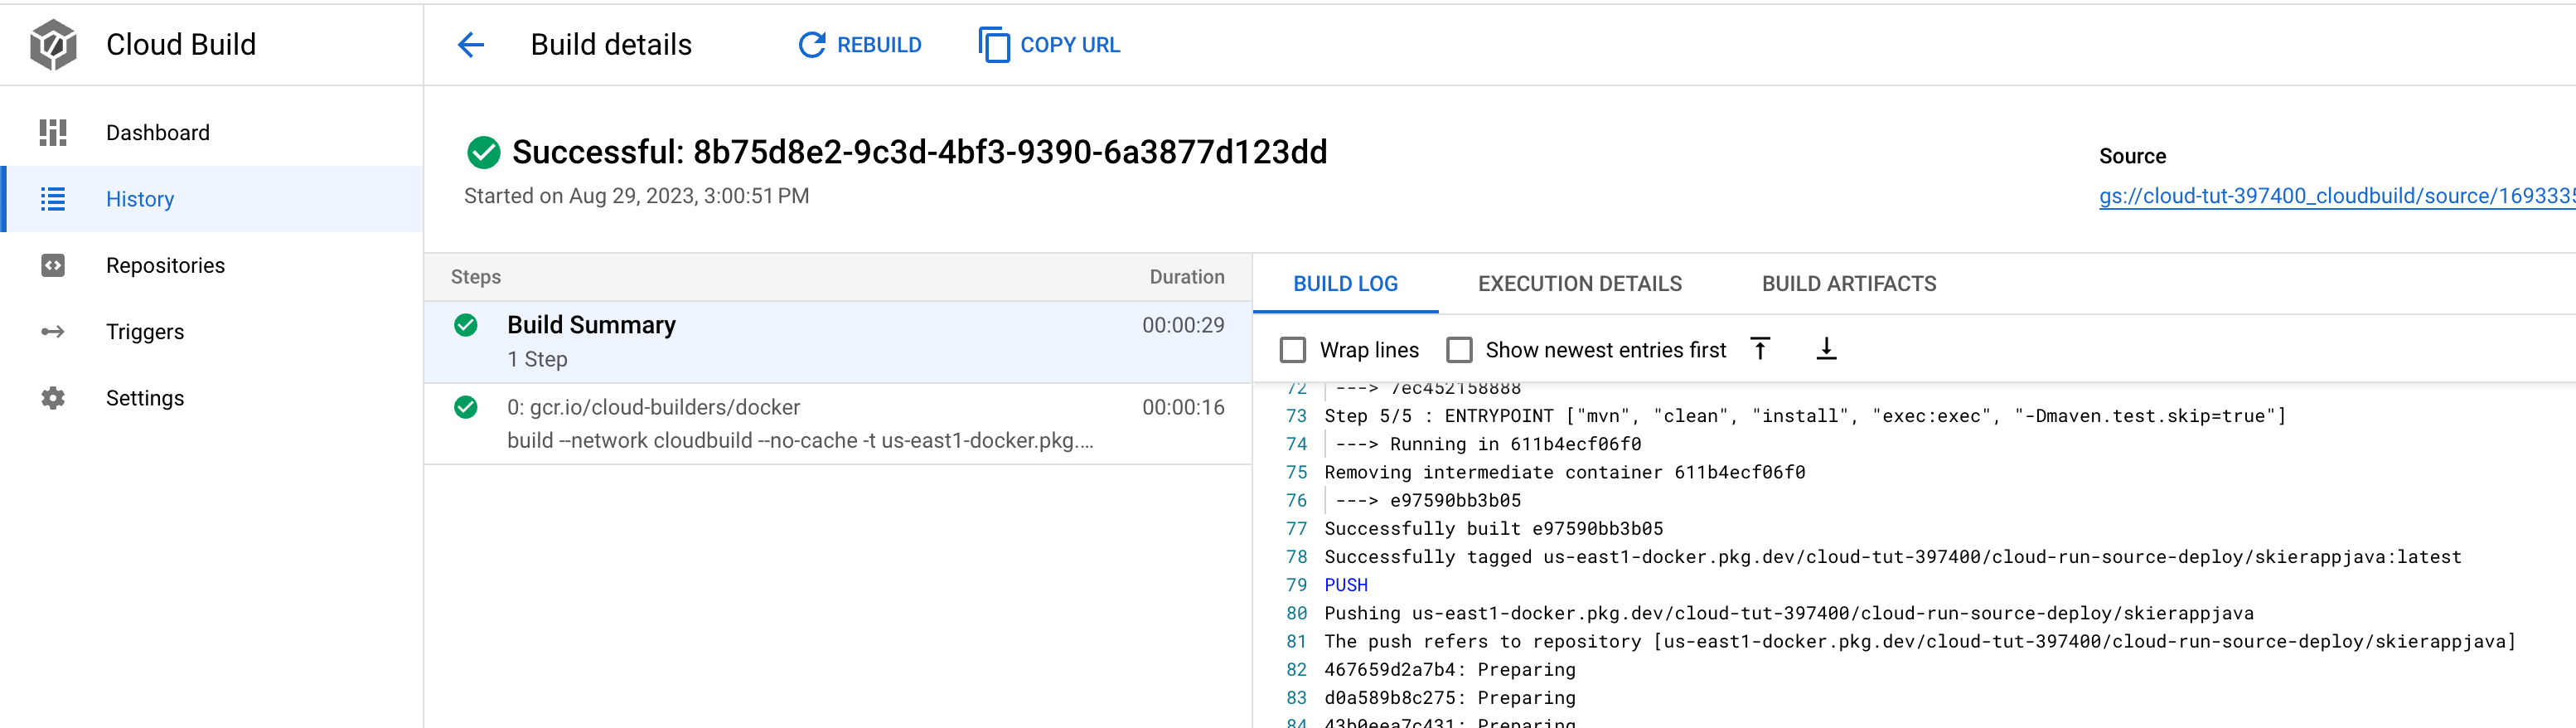
Then, it will create a Cloud Run Service. On the Cloud Run, you will see your endpoint URL:

You can now visit the <your_cloudrun_service_url>/coen6731/public/ to play with the Java Web application.
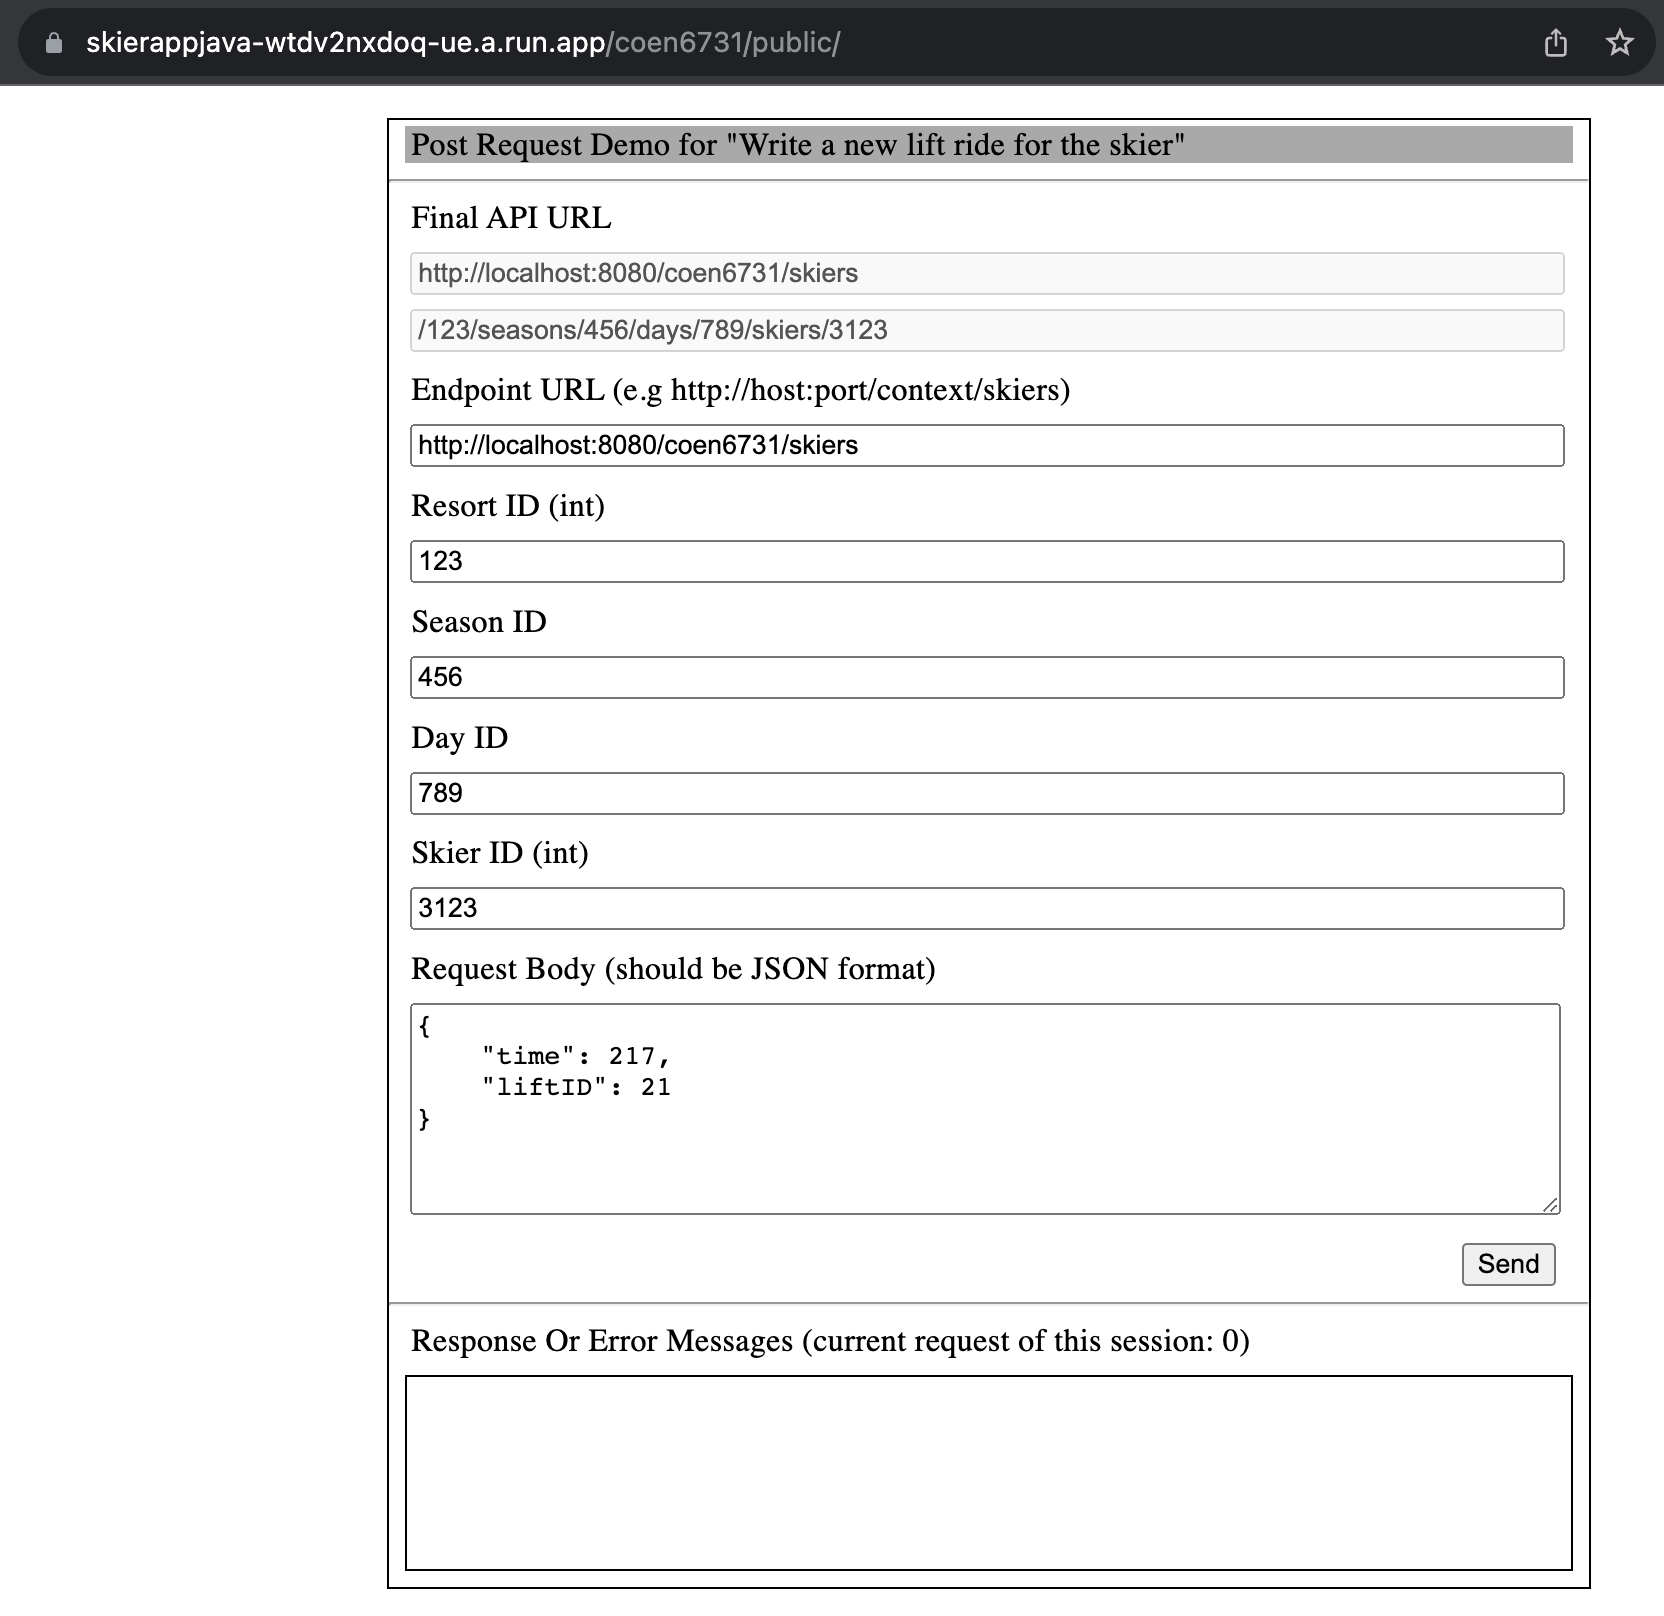
On this webpage, two request forms represent the post request and get request.
Please change the content of the Endpoint URL to your cloud-run server's endpoint. For instance:
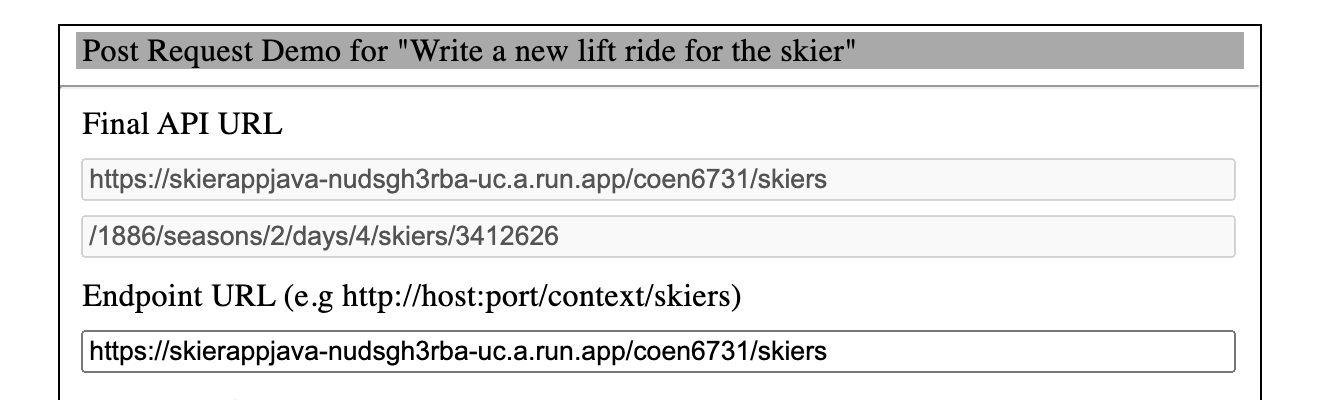
As my cloud-run server's endpoint is
https://skierappjava-nudsgh3rba-uc.a.run.app.Then, click the send button, and you should see:


To continually deploy your local changes, you can re-run the gcloud run deploy and use the same service name.
To implement the use case, the basic process would be like https://cloud.google.com/eventarc/docs/run/create-trigger-storage-console. But you need to have your event receiver that receives the file upload events and hand it to BigQuery. We deploy a web application with Cloud Run as the receiver.
The following user scenario is presented:
We upload the IRIS dataset to the Cloud Storage bucket with the Console, and we should be able to query all its data in BigQuery. The automation is done by our Cloud Run service.
Before that, you need to know how the event has been received and what you will receive.
The following process shows how to figure out the event.
Use the Python app of case 1 to reveal that by adding the following endpoint event_looks to the web app on main.py as the event receiver.
@app.route("/event_looks", methods=['POST'])
def event_looks():
    print(request.method)
    payload = json.loads(request.data)
    print(payload)

return "Event Received"-
Deploy it to the Cloud Run as we did in use case 1.
-
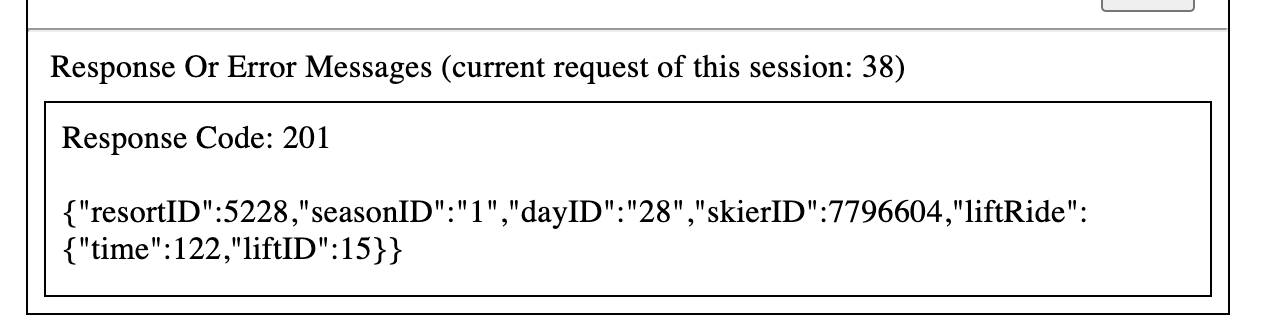
Create a Cloud Storage bucket named
cloud_run_tut_bucket: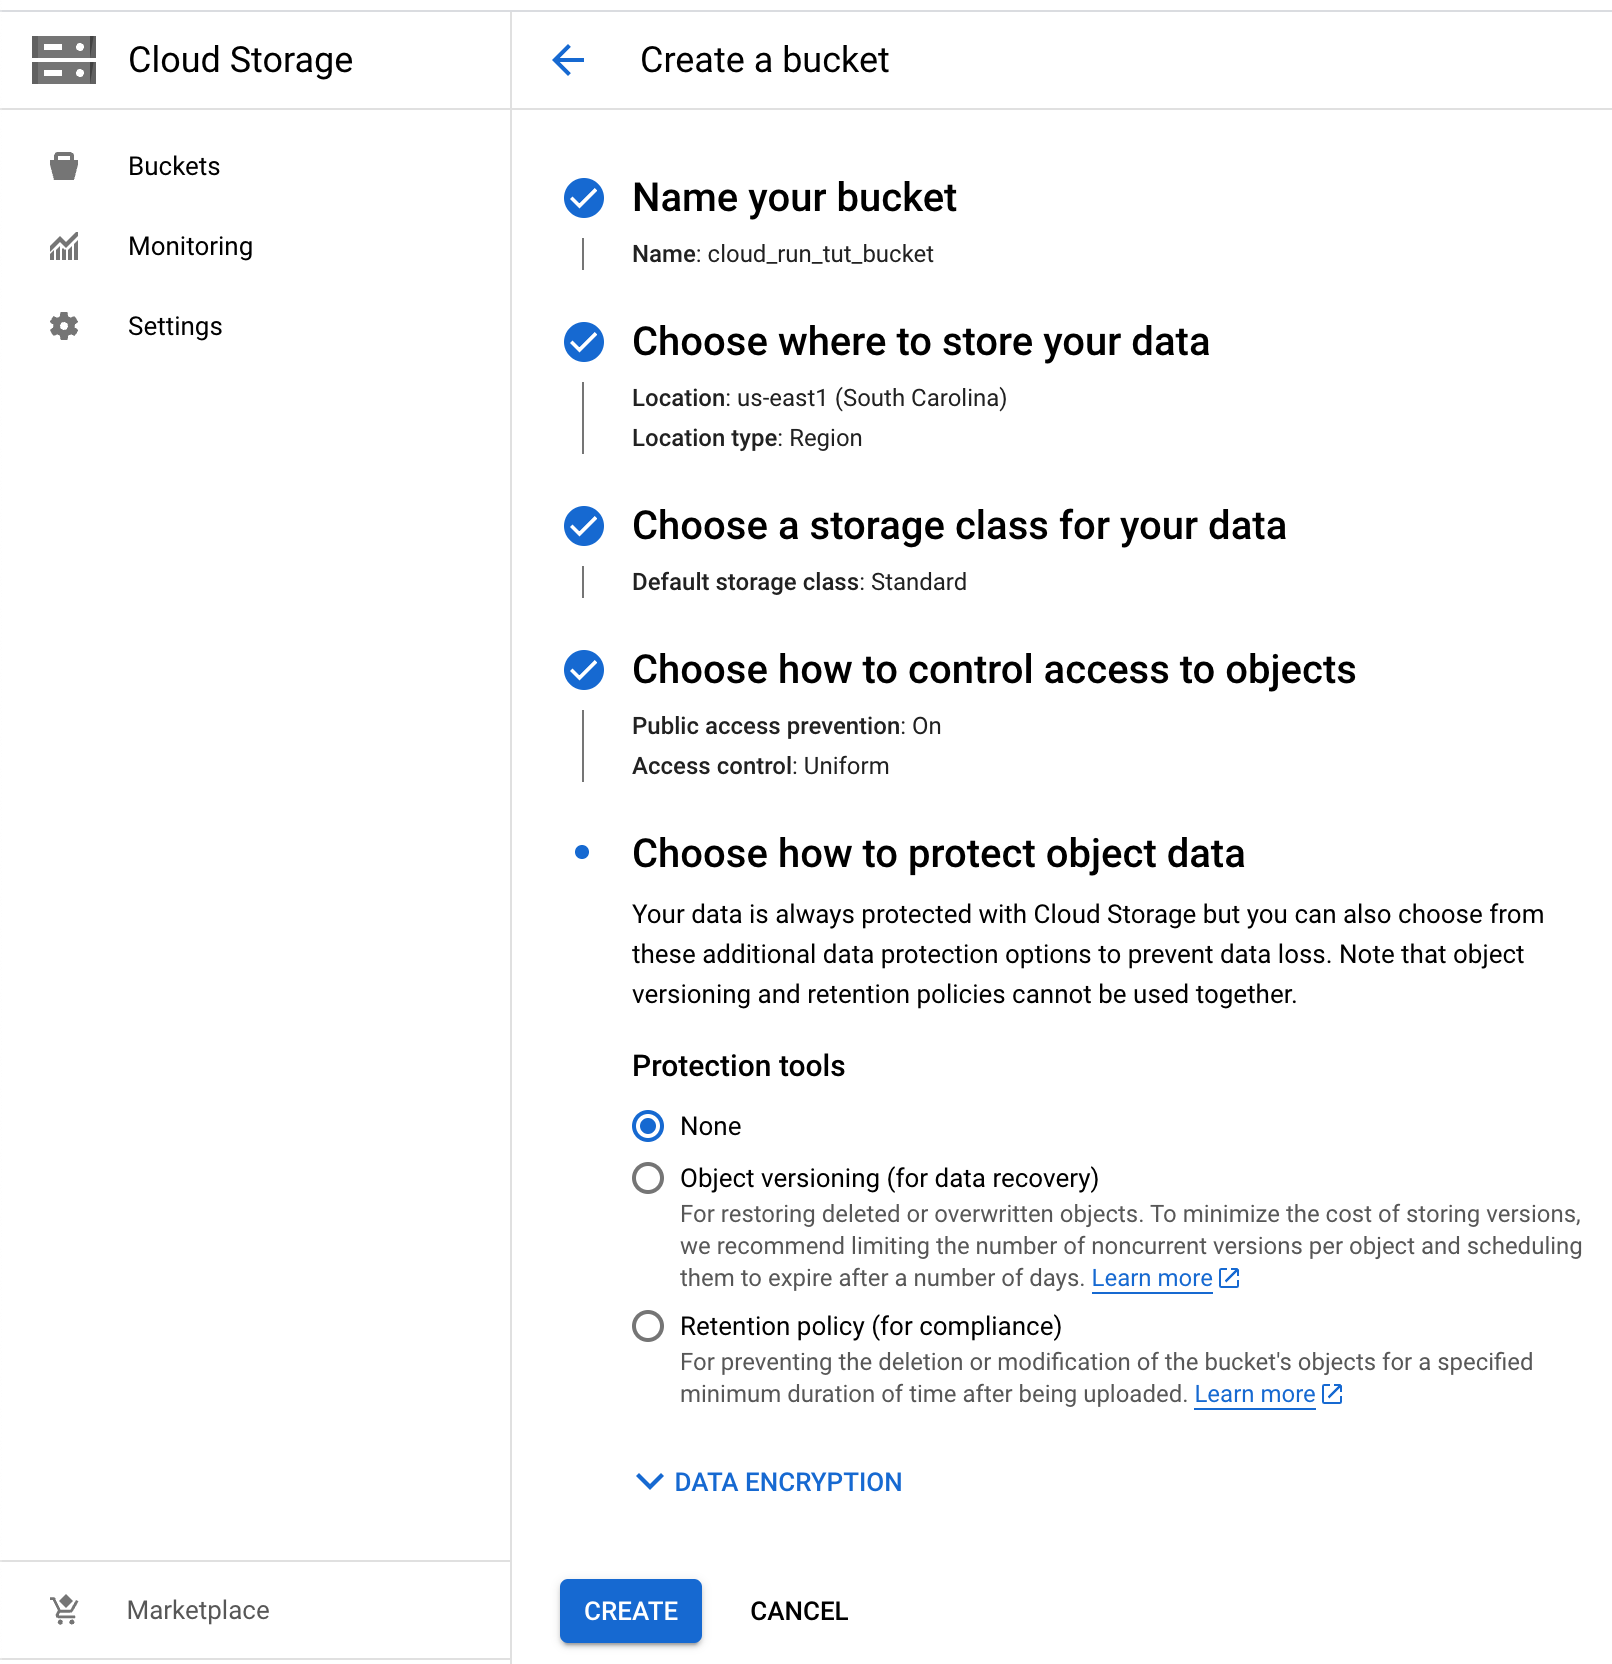
-
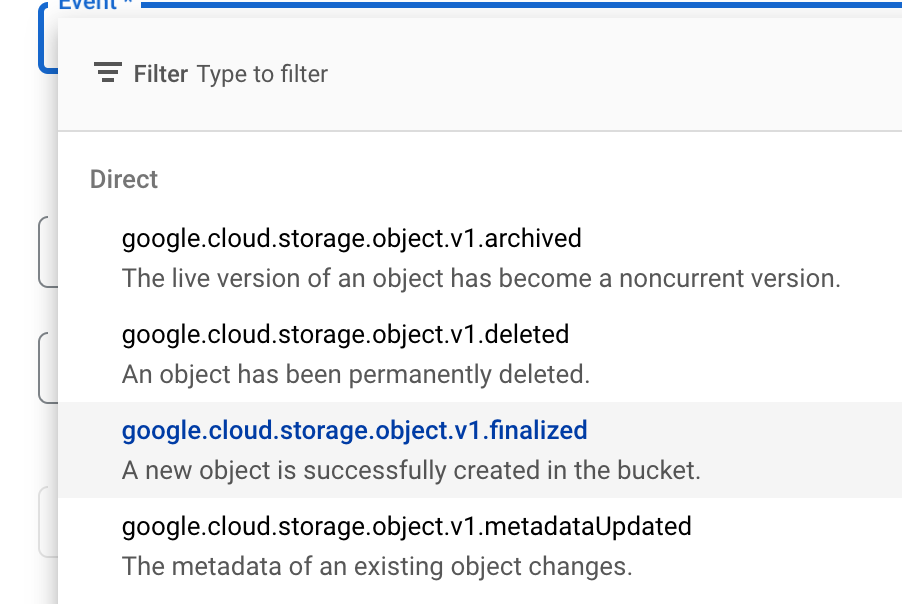
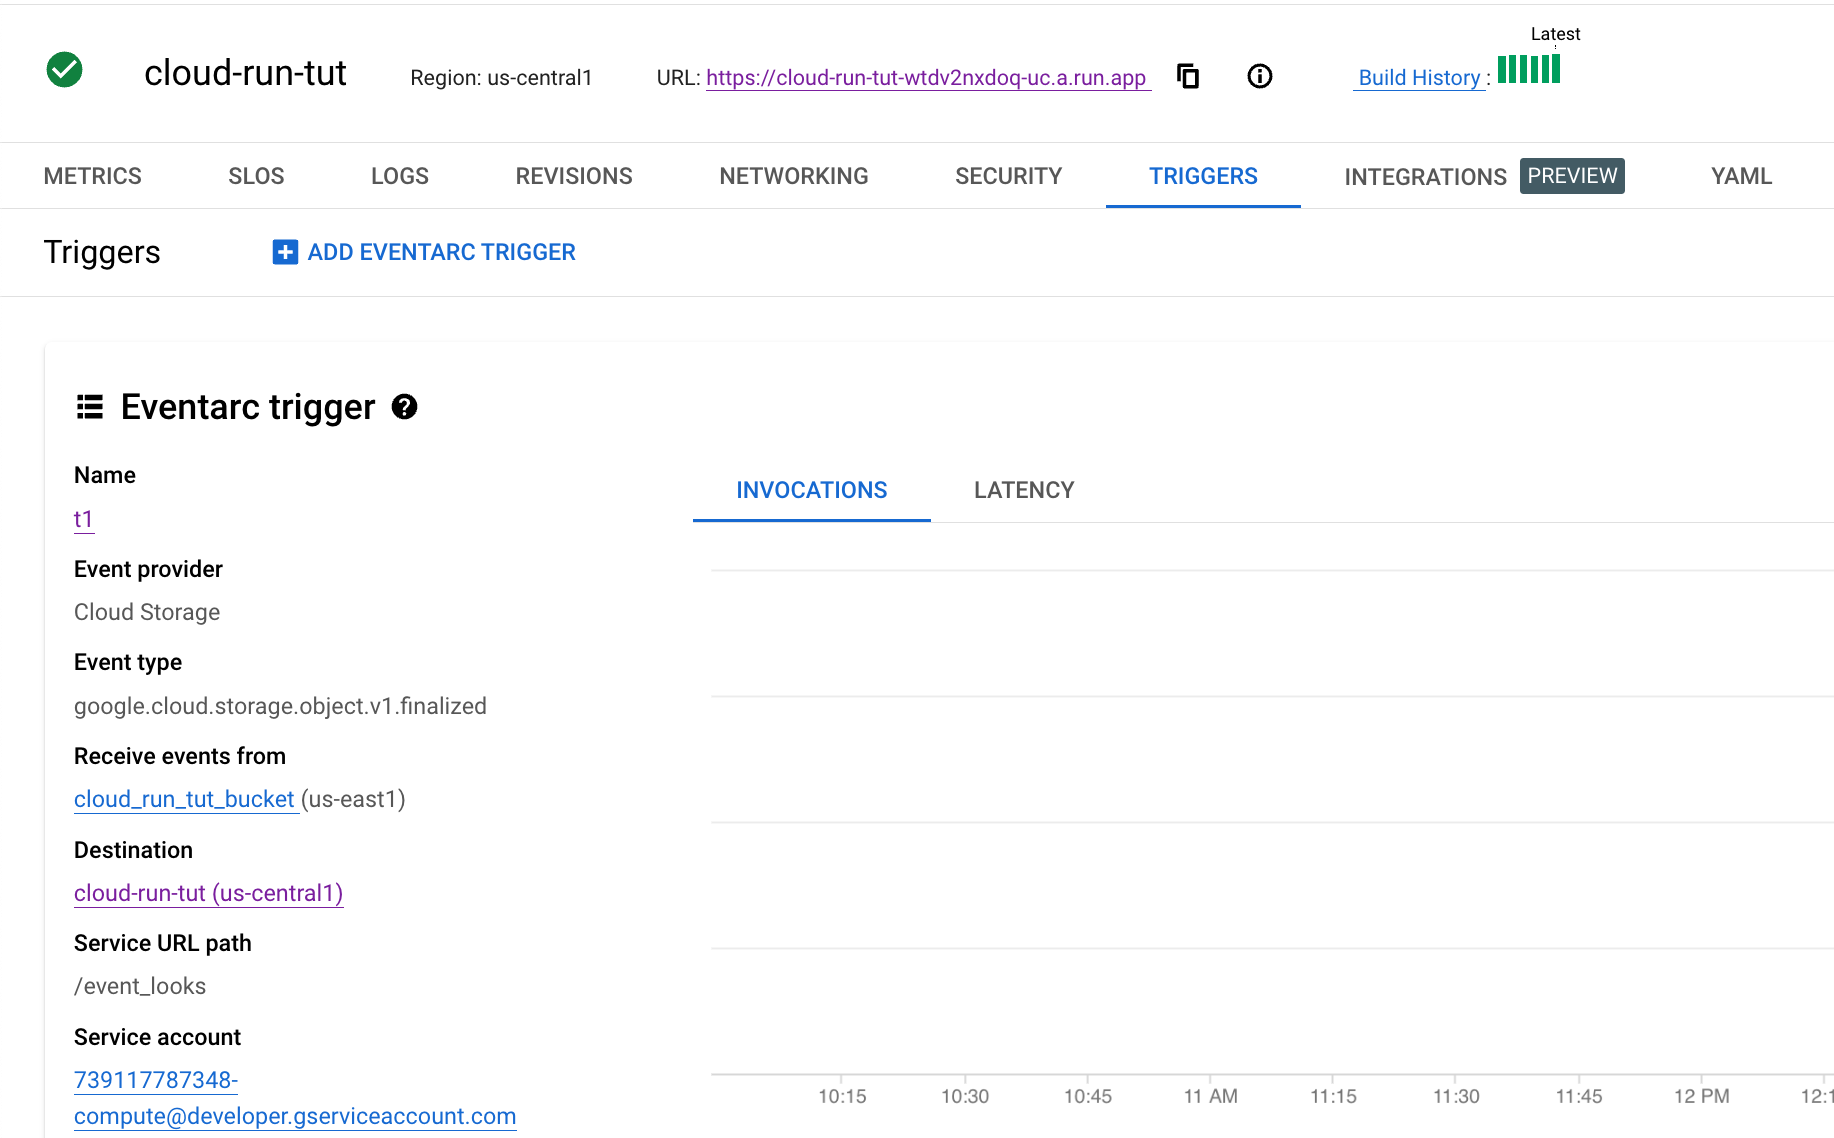
Create an Eventarc trigger named
t1, select the following event type, link it to thecloud_run_tut_bucketstorage and thecloud_run_tutRun service of endpoint/event_looks: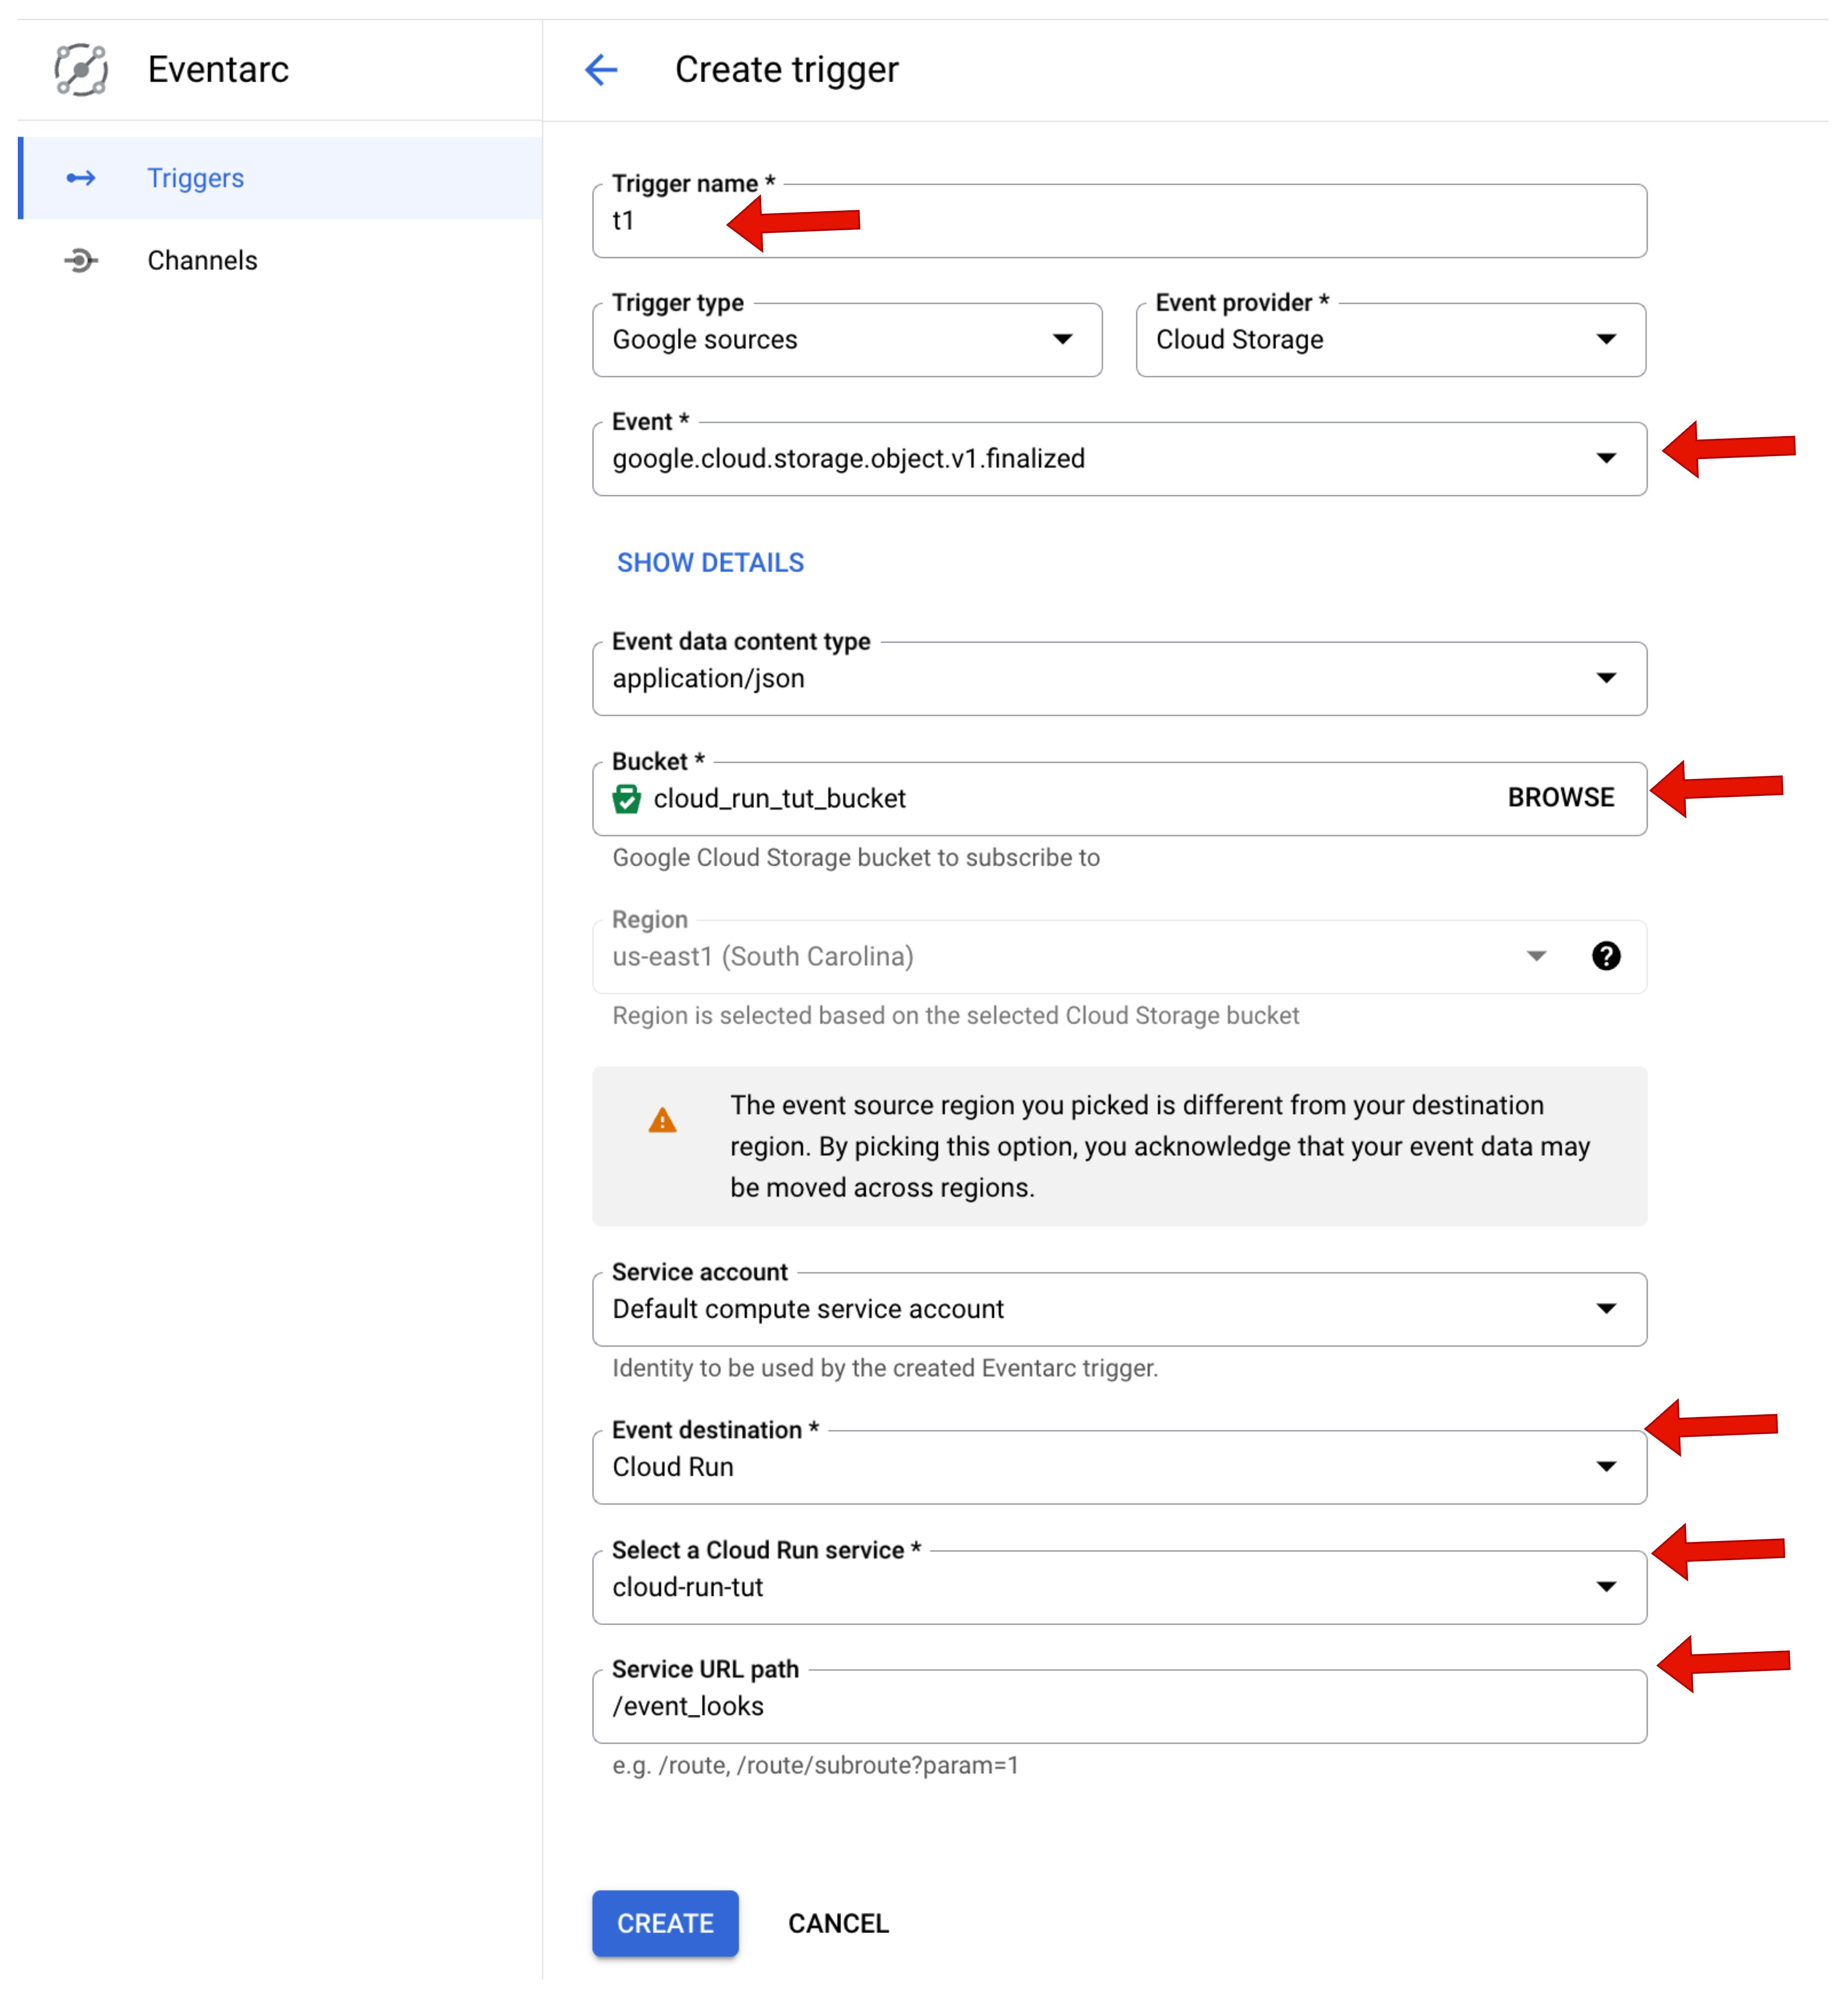
For the event type, you should select the following option since uploading a file creates a new object to the bucket:
Once the trigger is created, you can find it on the Cloud Run Service page:
-
Upload one PNG file to the bucket, and then you can get the following message from the LOGS of the service.
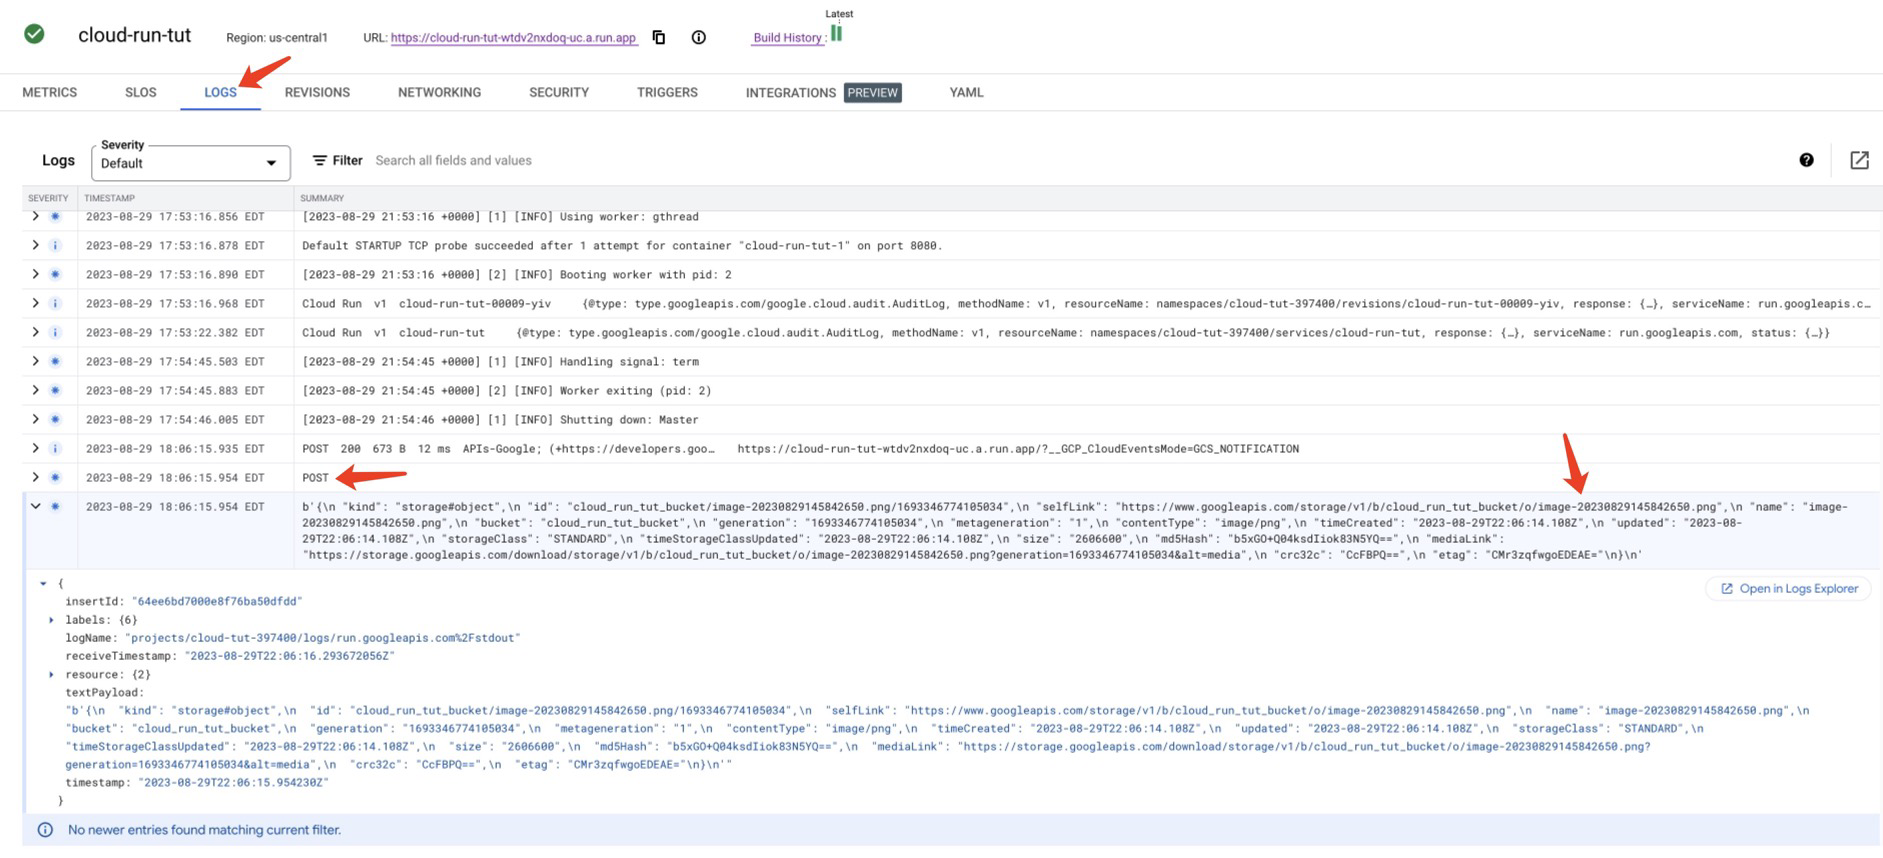
Now you know what is the incoming request from Eventarc.


Program the Python application to get the uploaded file and store it in the BigQuery by using the API Client Libraries:
- BigQuery API Client Libraries
- Loading CSV data from Cloud Storage
- Cloud Storage Client Libraries (optional)
Before using these libraries, you must set up the authentication: https://cloud.google.com/docs/authentication/client-libraries. If the code runs on Google Cloud Run, it is set by default, and no action is needed.
But if the code runs locally, follow https://cloud.google.com/docs/authentication/provide-credentials-adc#local-dev by just:
gcloud auth application-default loginThere are many ways you could do the loading. One way is to use the Storage Client Libraries to download and upload the file with the BigQuery Client Libraries. The other way is to use the BigQuery Client Libraries to create the table directly from a Cloud Storage URL (starts with gs://).
Please read:
The main.py already has the demo code as endpoint /event_receive.
@app.route("/event_receive", methods=['POST'])
def event_receiver():
    payload = json.loads(request.data)

    file_name = payload['name']
    bucket_name = payload['bucket']

    # Construct a BigQuery client object.
    client = bigquery.Client()

    # TODO(developer): Set table_id to the ID of the table to create.
    # the format of the table id is:
    # table_id = "your-project.your_dataset.your_table_name"
    # for example, mine was:
    table_id = f"cloud-tut-397400.cloud_run_tut_dataset.iris"

    job_config = bigquery.LoadJobConfig(
        schema=[
            bigquery.SchemaField("Id", "INT64"),
            bigquery.SchemaField("SepalLengthCm", "FLOAT64"),
            bigquery.SchemaField("SepalWidthCm", "FLOAT64"),
            bigquery.SchemaField("PetalLengthCm", "FLOAT64"),
            bigquery.SchemaField("PetalWidthCm", "FLOAT64"),
            bigquery.SchemaField("Species", "STRING"),
        ],
        skip_leading_rows=1,
        # The source format defaults to CSV, so the line below is optional.
        source_format=bigquery.SourceFormat.CSV,
    )
    uri = f"gs://{bucket_name}/{file_name}"

    load_job = client.load_table_from_uri(
        uri, table_id, job_config=job_config
    )  # Make an API request.

    load_job.result()  # Waits for the job to complete.

    destination_table = client.get_table(table_id)  # Make an API request.
    print("Loaded {} rows.".format(destination_table.num_rows))

return "Event Received"-
Create a BigQuery dataset named
cloud_run_tut_datasetin BigQuery.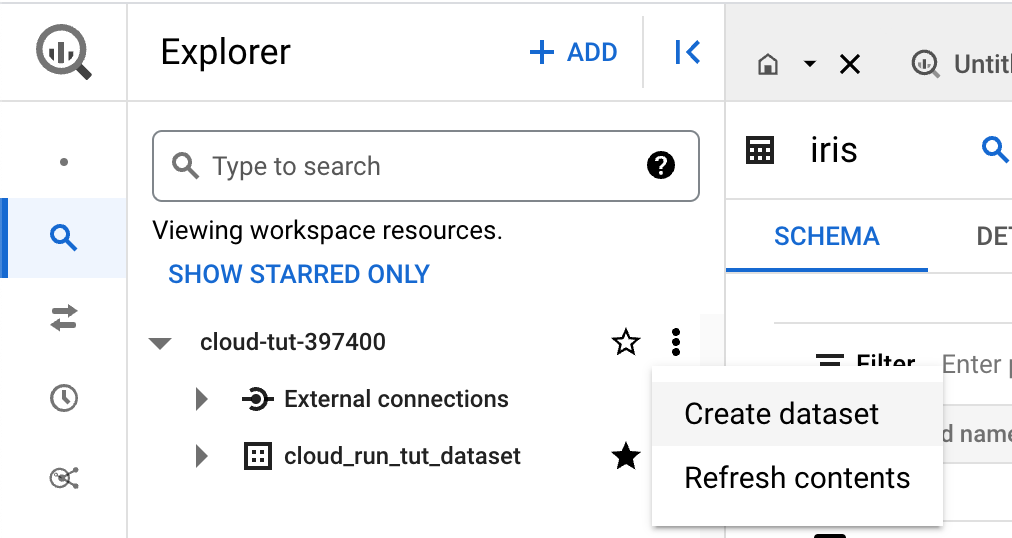
-
Please replace the
table_idinside the endpoint/event_receiveto your case.Note that the
table_idstrictly follows the formatyour-project.your_dataset.your_table_name.-
The
your-projectis replaced with the project ID, which can be found while selecting Project in the Console. You may also use the project name. -
The
your_datasetis replaced with the dataset name. -
The
your_table_nameis the only term we could decide. In this case, it isiris.
-
-
Then, create a new Eventarc trigger for the endpoint
/event_receiveon the Cloud Run service's TRIGGER panel, similar to what we did before: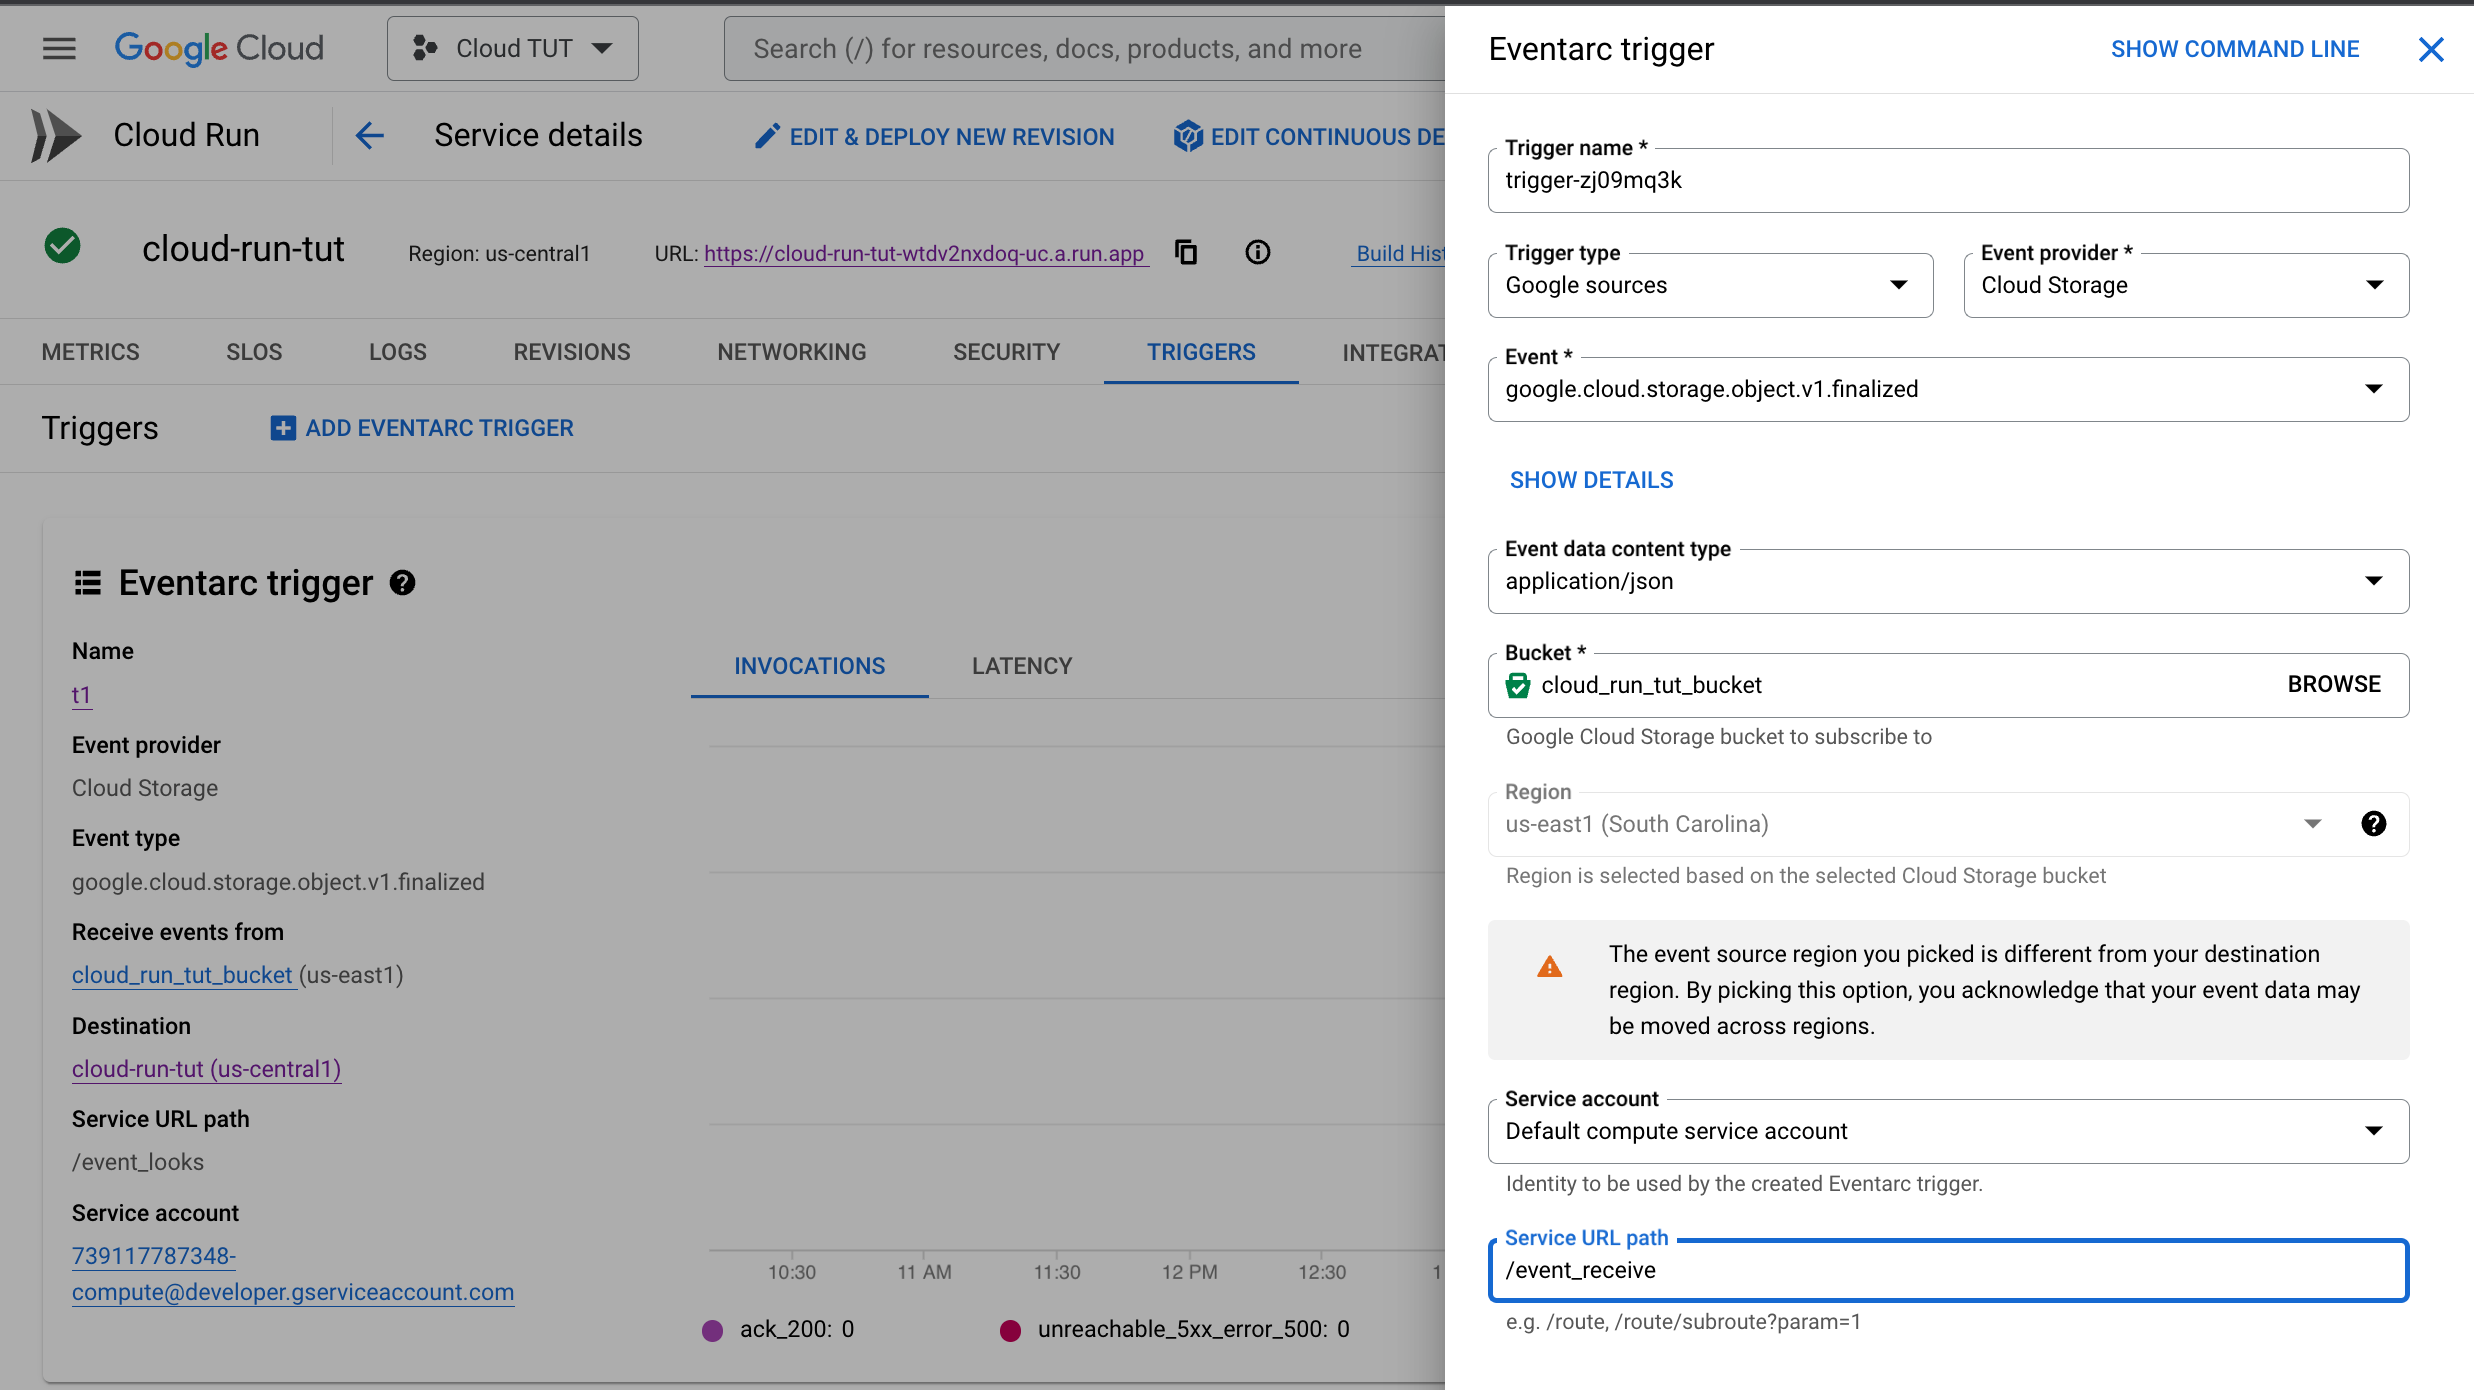
-
Now, you can upload the
Iris.csvfile in this repository to the bucket.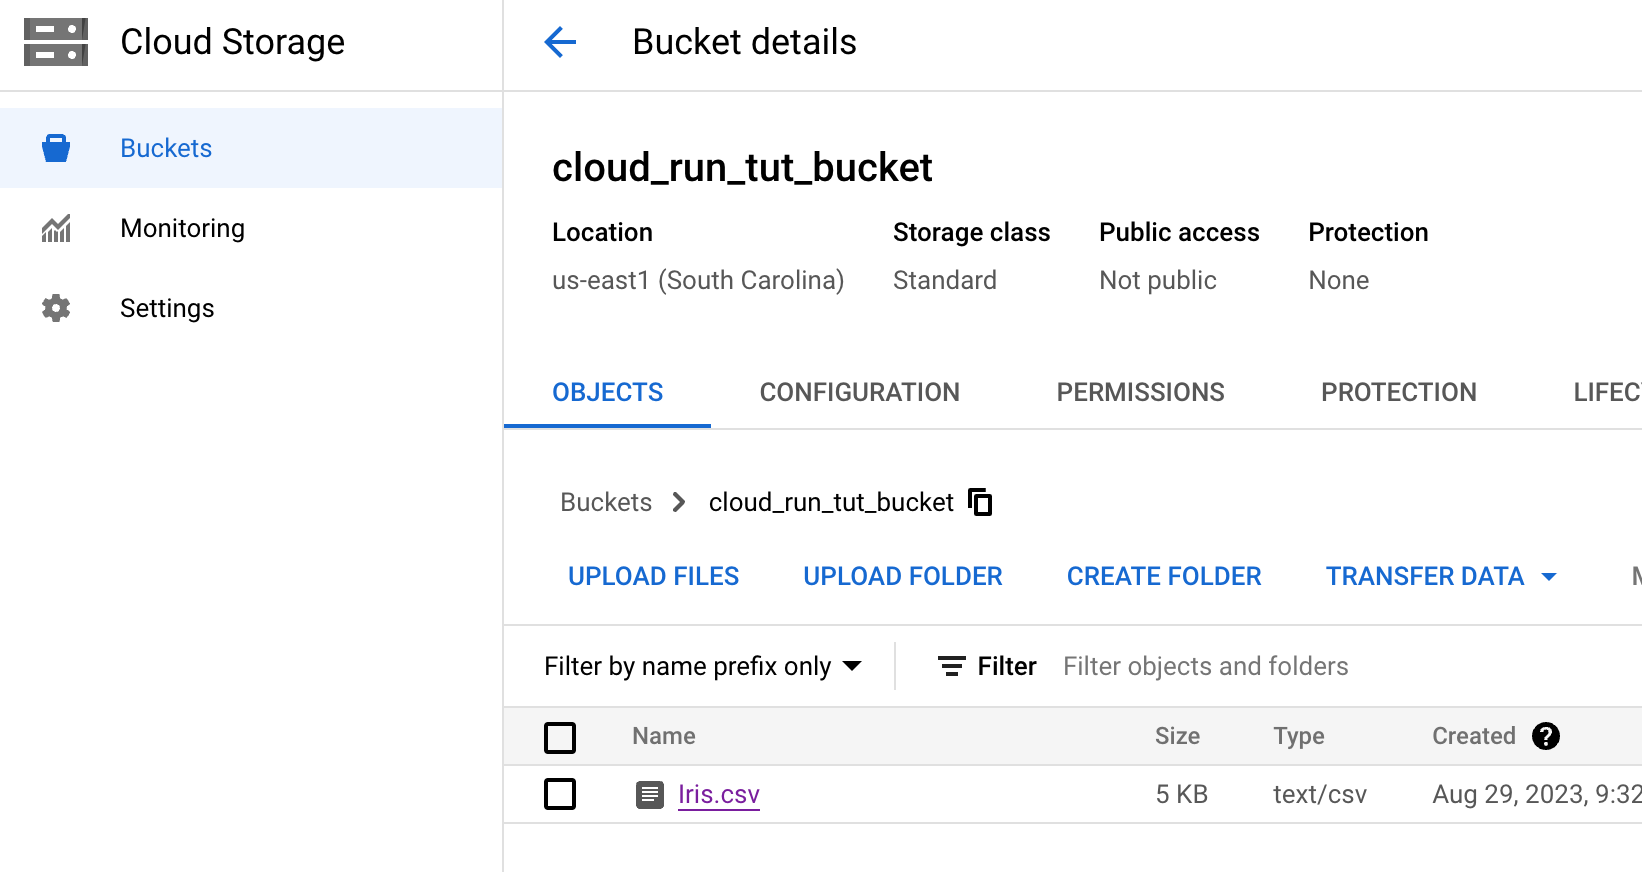
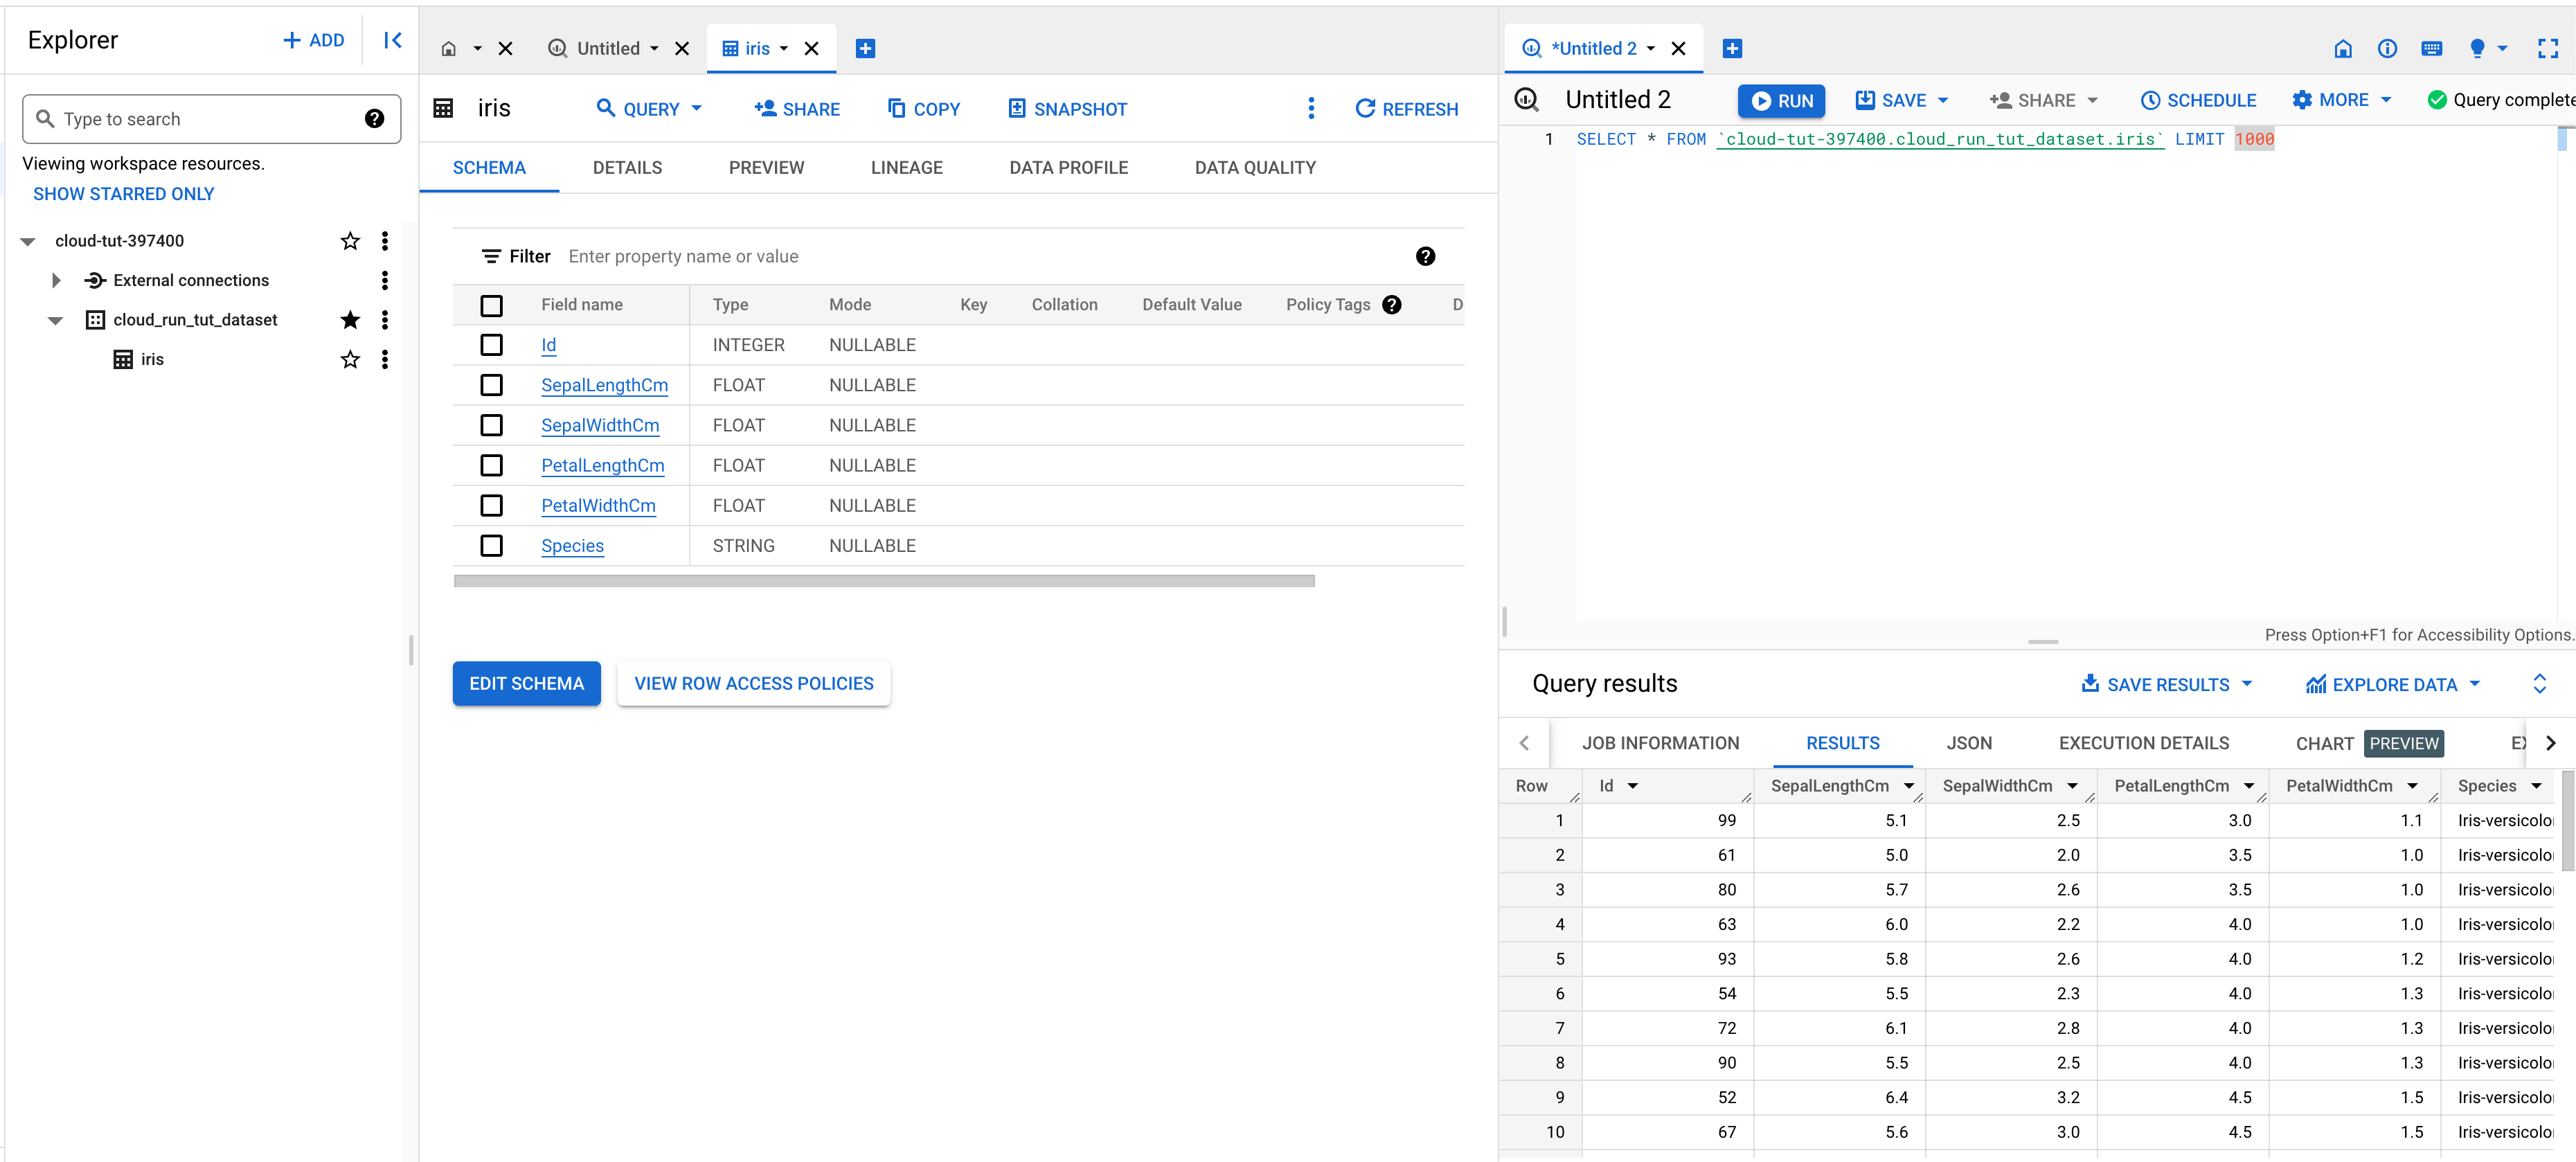
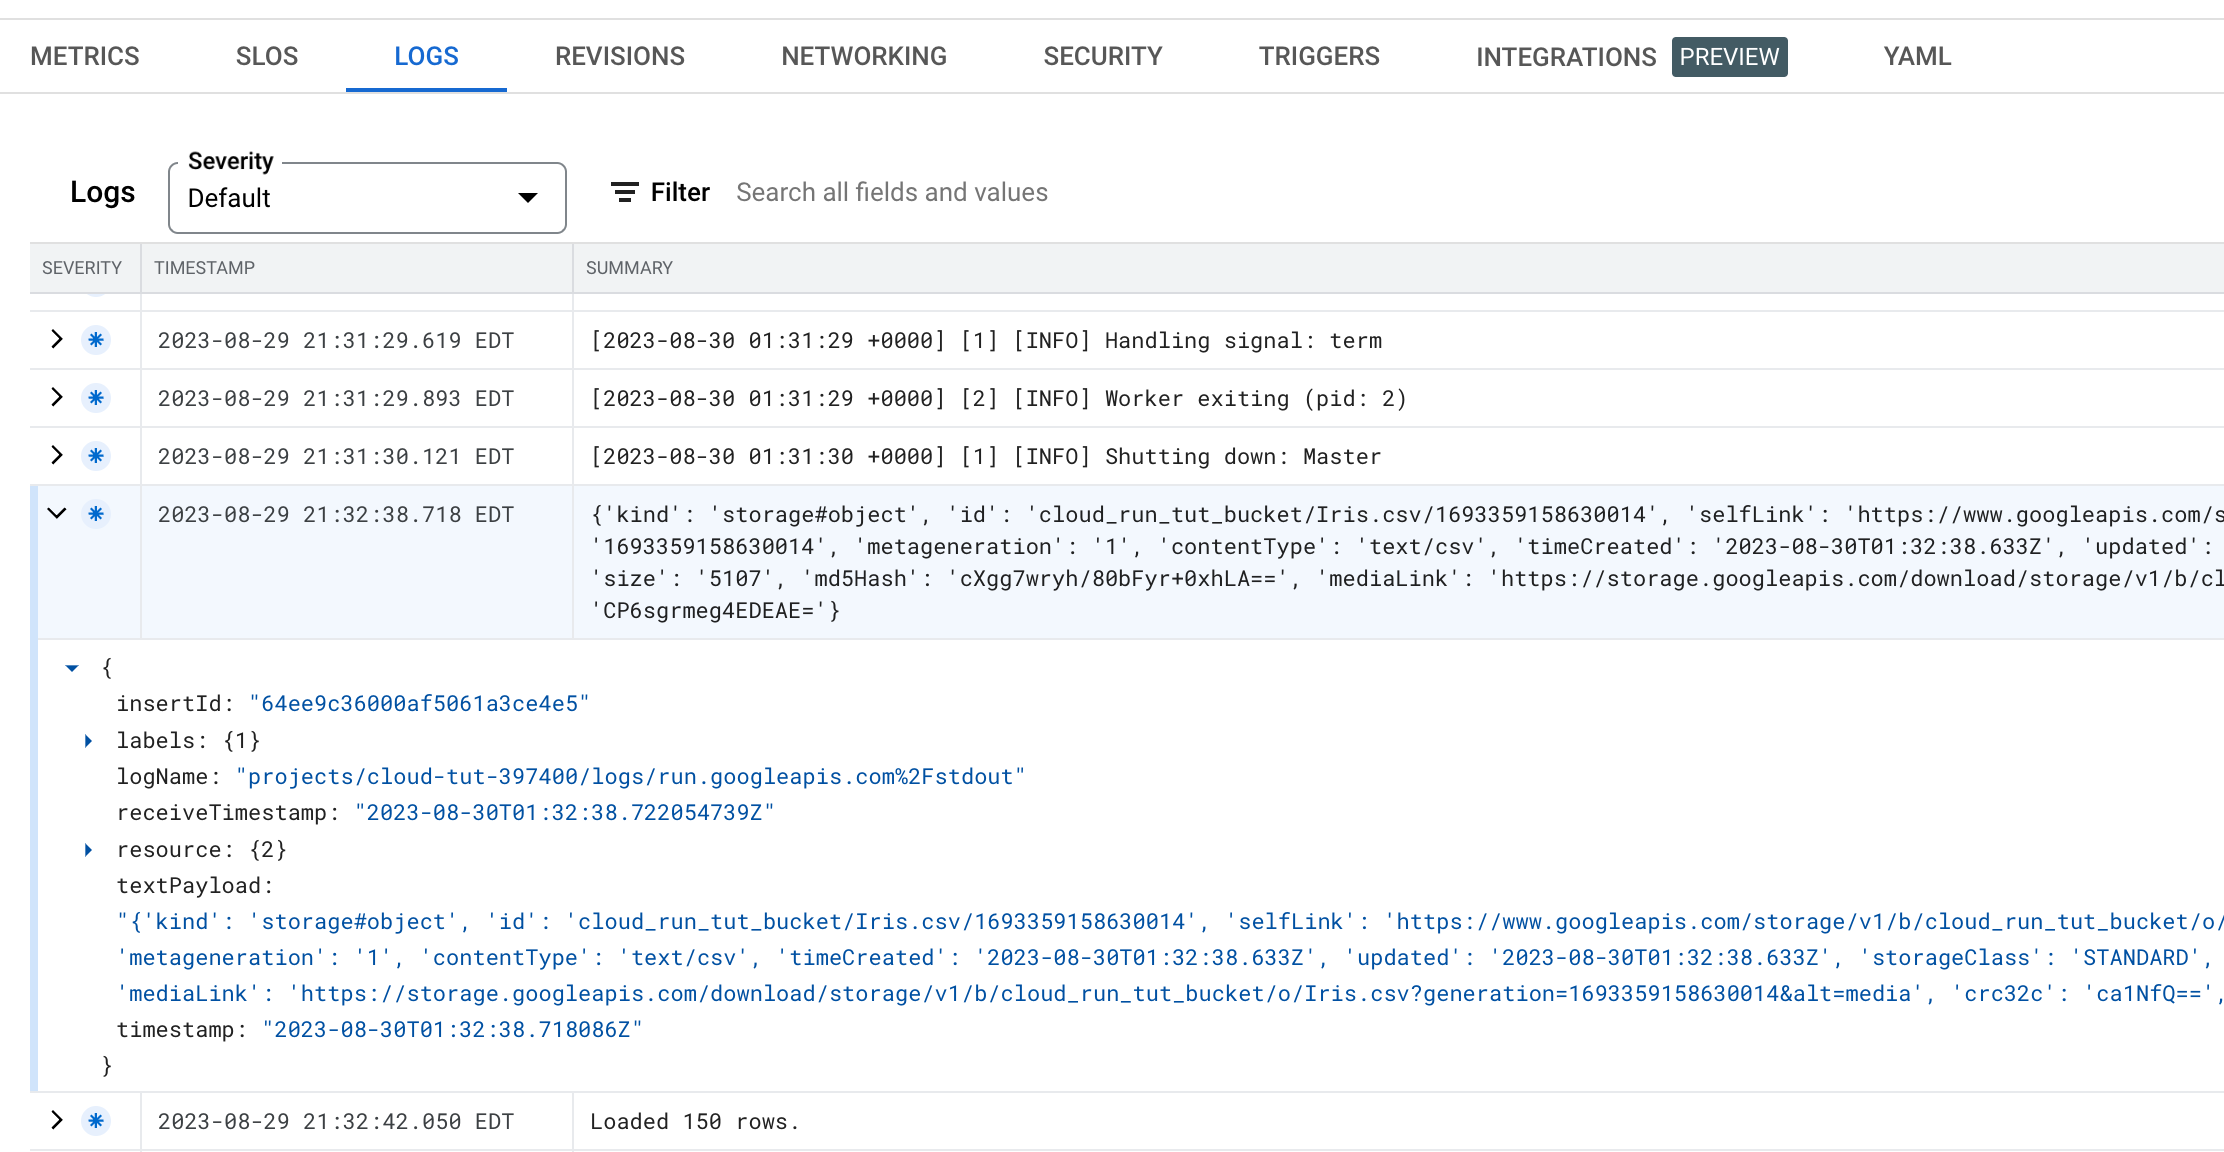
Go to the LOGS of the service. The payload and the number of rows are printed.
-
Finally, you can query the iris data from the created table in BigQuery: