- Linux系统
目前ChipSum仅支持Linux系统
- CMake
ChipSum以及第三方库kokkos和kokkos-kernels的编译, 都需要Cmake>3.16,推荐使用3.20.0。
- 获取
ChipSum代码
# get ChipSum
git clone https://gitee.com/chip-sum/ChipSum.git

# get kokkos and kokkos-kernels
cd ChipSum/

git submodule init
git submodule update
若您使用成都或昆山超算上使用DCU进行编译和运行,需要将KOKKOS版本切换至3.3.01
cd tpls/kokkos
git checkout
为了方便用户编译,ChipSum使用了一个python脚本帮助完成编译过程。已分别在AMD VEGA906和NVIDIA 2080ti等架构上完成编译并运行。
1 AMD VEGA906
# AMD Vega906/900
python3 setup.py arch=VEGA906 compiler=/path/to/your/rocm(i.e. 4.0.1)/bin/hipcc hip=/path/to/your/rocm(i.e. 4.0.1)/hip
2 NVIDIA 2080ti
# NVIDIA 2080ti
python3 setup.py arch=Turing75 cuda=/Path/To/Your/Cuda
3 Volta72
# for Volta72
python3 setup.py cuda=/Path/To/Your/Cuda arch=Volta72
4 MX350(Pascal61)
# for MX350(Pascal61)
python3 setup.py cuda=/Path/To/Your/Cuda arch=Pascal61
5 CPU编译
根据设备CPU架构输入arch参数,多数情况下为WSM
python3 setup.py arch=WSM compiler=g++ j=20
6 其他
若想指定安装目录,可以使用prefix参数
mkdir /anywhere/you/like
python3 setup.py prefix=/anywhere/you/like
若想指定核编译,可以使用j参数
python3 setup.py j=32
注意:第一次编译时需编译kokkos和kokkos-kernels,耗时较久。后续使用时仅编译ChipSum内容,耗时很快。
ChipSum在test.cpp中提供了一个简单的用例示范,默认路径编译完成后,可以在./build中查看编译结果。
# default path
cd ./build
./ChipSum
预期输出:
origin matrix A:
densemat_0_mirror(5,5):
 [0.840188, 0.394383, 0.783099, 0.79844, 0.911647]
 [0, 0.197551, 0.335223, 0.76823, 0.277775]
 [0, 0, 0.55397, 0.477397, 0.628871]
 [0, 0, 0, 0.364784, 0.513401]
 [0, 0, 0, 0, 0.95223]

return expect 0: 0
inverse:A
densemat_0_mirror(5,5):
 [1.19021, -2.37608, -0.244662, 2.71905, -1.75077]
 [0, 5.06197, -3.06314, -6.65166, 4.13262]
 [0, 0, 1.80515, -2.36242, 0.0815571]
 [0, 0, 0, 2.74134, -1.47801]
 [0, 0, 0, 0, 1.05017]
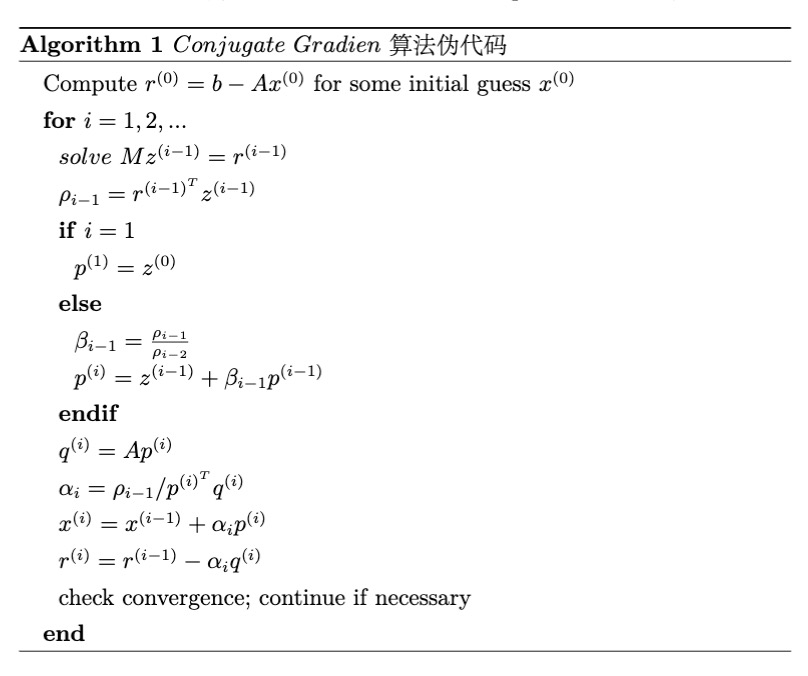
按默认路径完成编译后,在 ./build/examples/chipsumSolver路径下存在cg算法的可执行文件,可以实现一个简单的求解算例:
cd path_to_chipsum
./build/examples/chipsumSolver/cg
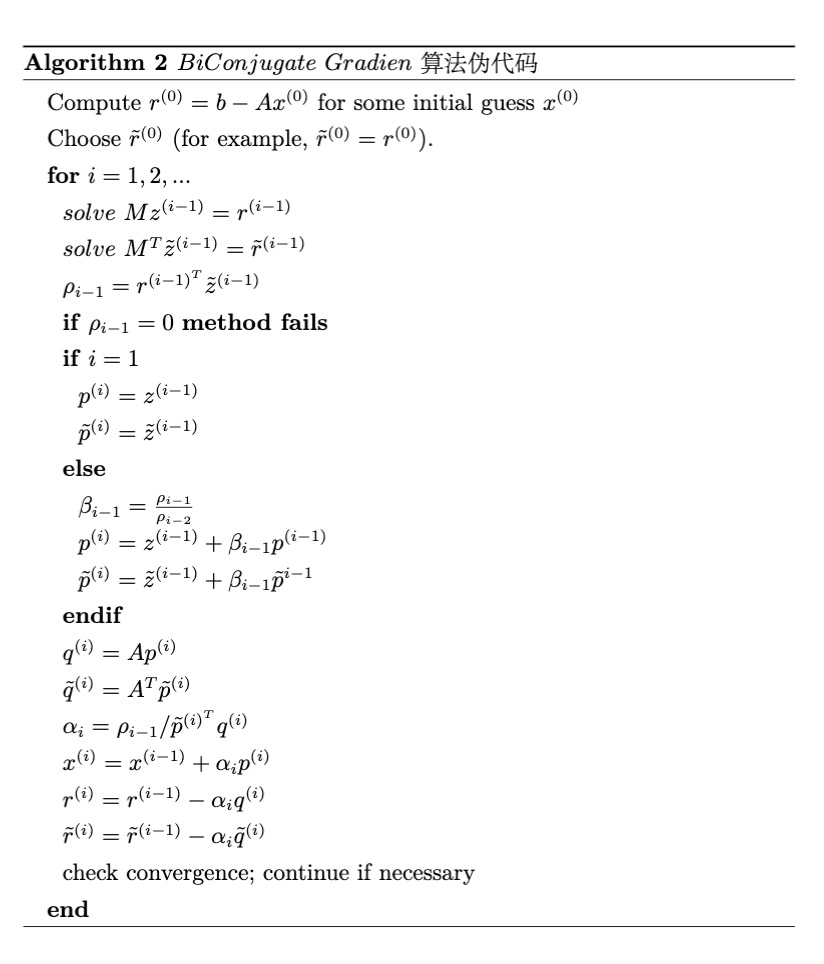
按默认路径完成编译后,在 ./build/examples/chipsumSolver路径下存在BiCG算法的可执行文件,可以实现一个简单的求解算例:
cd path_to_chipsum
./build/examples/chipsumSolver/bicg
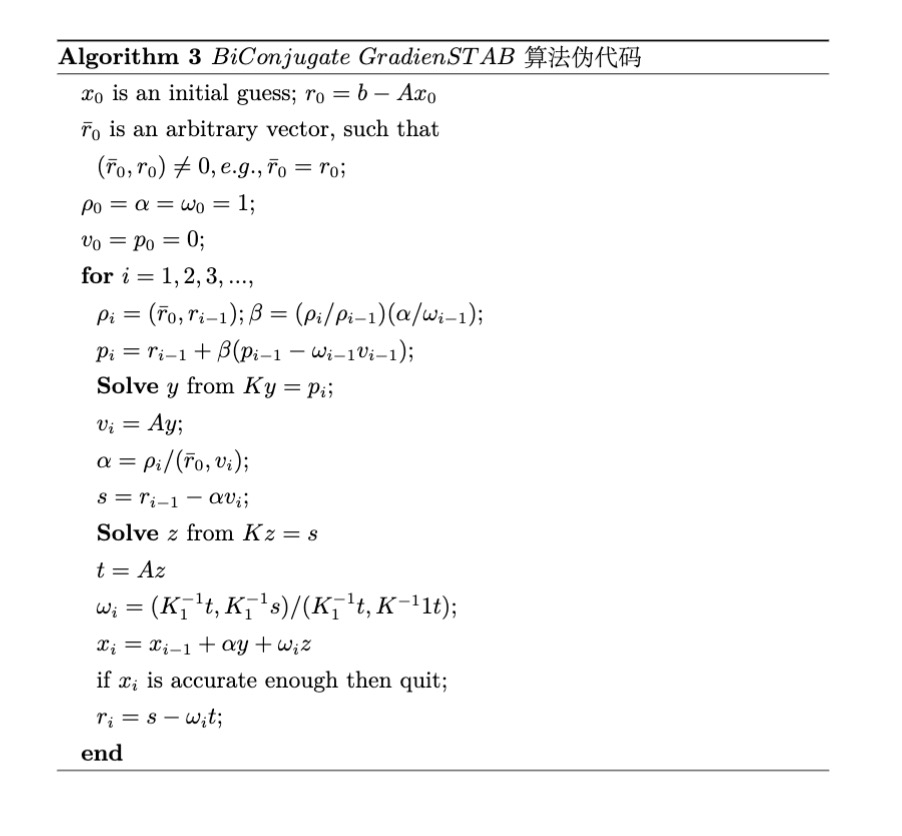
按默认路径完成编译后,在 ./build/examples/chipsumSolver路径下存在BiCGSTAB算法的可执行文件,可以实现一个简单的求解算例:
cd path_to_chipsum
./build/examples/chipsumSolver/bicgstab
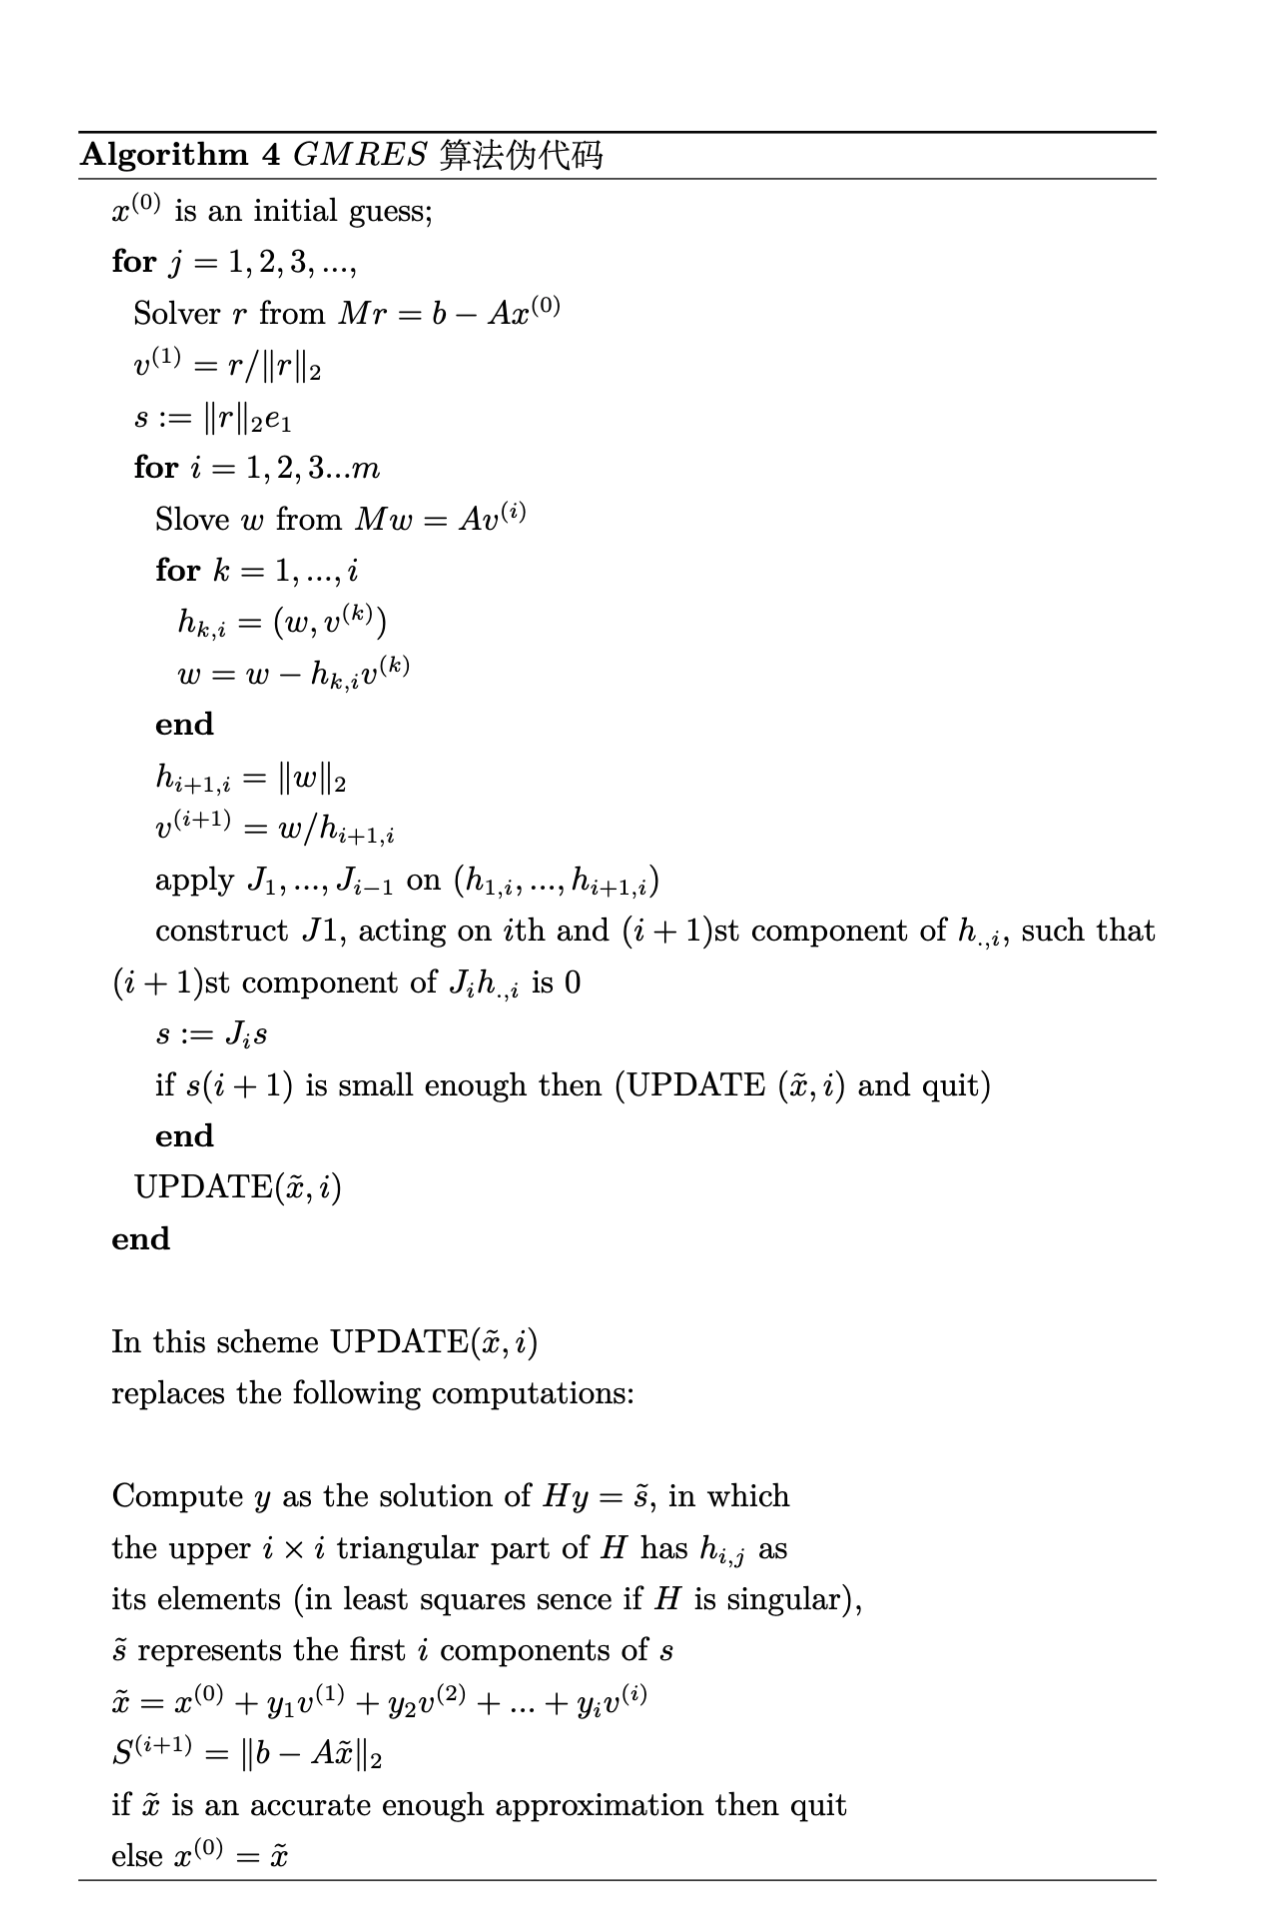
按默认路径完成编译后,在 ./build/examples/chipsumSolver路径下存在GMRES算法的可执行文件,可以实现一个简单的求解算例:
cd path_to_chipsum
./build/examples/chipsumSolver/gmres
我们实现了一个基于ChipSum的应用,chipsumAI。该应用利用ChipSum的函数方法和数据结构等,完成了一个mnist手写体识别样例。该部分将介绍如何编译和运行chipsumAI。
首先需要将ChipSum编译并make install至指定文件夹,如:examples/chipsumAI/install_lib
cd path_to_chipsum
cd ./build
cmake -DCMAKE_INSTALL_PREFIX=../examples/chipsumAI/install_lib ..
make install
ll ../examples/chipsumAI/install_lib
成功make install后,会在目标文件夹下(例子中,install_lib文件夹下)新生成以下文件。
.
├── bin
│   └── ChipSum
├── include
│   ├── chipsum
│   └── ChipSum.hpp
├── lib
│   └── libchipsum.a
此时,若需在其他文件中使用ChipSum,仅需#include "ChipSum.hpp"即可使用相应数据结构和函数。
在运行手写体识别代码样例前,需要对项目进行编译,已获得可运行的可执行文件。
cd path_to_chipsum
cd ./examples/chipsumAI
mkdir build && cd build

# ChipSum_DIR should be absolute path
export ChipSum_DIR=/path/to/chipsum/

# ChipSumLib_DIR should be absolute path
export ChipSumLib_DIR=/path/to/install_lib/

cmake -DChipSum_DIR=${ChipSum_DIR} -DChipSumLib_DIR=${ChipSumLib_DIR} ..

make -j8

./mnist
使用命令./mnist运行mnist实现手写体识别,预期输出示例如下:
******input is****** : 9
 [                                                       ]
 [                                                       ]
 [                                                       ]
 [                                                       ]
 [                                                       ]
 [                                                       ]
 [                        # # # # # # # #                ]
 [                      # # # # # # # # # #              ]
 [                    # # # # # # # # # # #              ]
 [                    # # # # # # # # # # #              ]
 [                    # # # # #   # # # # #              ]
 [                    # # # # # # # # # # #              ]
 [                      # # # # # # # # # #              ]
 [                      # # # # # # # # # #              ]
 [                          # # # # # # #                ]
 [                          # # # # # #                  ]
 [                        # # # # # # #                  ]
 [                      # # # # # #                      ]
 [                    # # # # # #                        ]
 [                  # # # # # #                          ]
 [                # # # # # # #                          ]
 [                # # # # # #                            ]
 [              # # # # # #                              ]
 [            # # # # # #                                ]
 [              # # # # #                                ]
 [              # # # #                                  ]
 [                                                       ]
 [                                                       ]
*****prediction is***** : 9


