
Mötör-Werks is a mobile vehicle repairs and servicing e commerce website.
Take the stress out of vehicle servicing and repairs with our simple revolutionary 5 tier system.
--This is the last of five projects that I will undertake with CodeInstitute's Full stack programme--

Here is a link to the final project
-
As a user, I would like to be able to:
1.1 Register on the website using my username, email address and password
(MUST HAVE)1.2 View all services available on the site
(SHOULD HAVE)1.3 View details about all services
(SHOULD HAVE)1.4 Receive a confirmation email after registering
(MUST HAVE) -
As a logged in user, I would like to be able to:
2.1 Have a personalised profile that displays my vehicle information
(SHOULD HAVE)2.2 I want to be able to choose a new service
(SHOULD HAVE)2.3 Easily pay for my chosen service
(MUST HAVE)2.4 I want to be able to edit my personal information
(MUST HAVE)2.5 I want to be able to delete my personal information and leave the site
(MUST HAVE)2.6 I want to be able to view my service history (purchase history)
(SHOULD HAVE)
- Project Goal
Create a platform that allows people (users) to Login and purchase (via Stripe.com) a Service or Repair for their vehicle.
- A simple, straightforward, intuitive UX experience
- An explicit content
- An easy navigation for the user through all of the features
- A site that is visually appealing on most devices
Motor-werks Flowchart
Flowchart

Motor-werks Entity Relationship Diagram (ERD)
Database Schema

Agile Methodology
All functionality and development of this project were managed using Trello (https://trello.com/b/Ha79yDqn/motor-werks-pp5)
- A clear and straightforward layout is in place to ensure users can navigate intuitively and have a leisurely experience
- Navbar is fixed on top to facilitate users to navigate through pages easily
- A Small dropdown menu navigation is the same on all pages at small screen sizes to ensure easy navigation
- Create account, Edit/Update profiles are straight forward forms to allow users to use the features without issues
- Wireframes created with Balsamiq
- The project was developed from initial wireframes, and some modifications were made during the development process in response to user feedback
Click to see wireframes:
Home
Services
Single service
Register
Login
Home mobile
Services mobile
Single service mobile
Register mobile
Login mobile
- Colours
- I used Coolors to randomly generate a colour palette for this project
- I went bold and arguably opposite colours for this project
- The main colours are light and dark purple with light green accents and text
Click to see Colours:

Font Selection
-
Two fonts were chosen with Google Fonts to be used across the entire site
-
The chosen fonts were 'Uchen', with serif as back up fonts for lists, forms, buttons and paragraphs
Click to see Font style:

- For the purposes of the assessment a mock Facebook page was created to represent the company on a social media platform:
- The Facebook page includes links to the Motor-werks website to drive traffic from the social network to the site.
Social media buisness page
.png)
.png)
.png)
.png)
.png)
.png)
- Motor-werks is a business to consumer (B2C) ecommerce site for users (consumers) to find and purchase motor vehicle related services.
- A user is able to purchase a chosen service (eg. Major service)
- With the user stored information (eg. Name, address, vehicle registration), we as a company will
order the relevant parts in advance based on the users needs and requirements,
travel to the customer site and carry out the service they purchased - For repeat or returning users/consumers, they are able to log in to their account,
check when the last service was carried out
and purchase a repeat service or a different service at their leisure - Users are able to signup to our newsletter for special offers and discounts
- Social media has been utilised to drive traffic to the website to aid in further purchases
- Home page consists of:
- A welcome message (alternative message if user is logged in, see images below)
- The purpose of the site
- Two images,
- One motor-werks logo
- One image of an audi R8 in the dark with lights on (removed on smaller screen sizes)
- A button to login if user is logged out or has yet to sign up along with a button to view services
- A button to view services if the user is logged in


- Fixed Navbar to allow the user easy access to all pages
- Home, Services, Signup and Login buttons on the navbar are the only buttons present if the user is
notlogged in

- Home, Services, {username}'s profile and Logout buttons are only present if the user has successfully logged in

-
Services is available to view for all users (logged in or not), however, the services page is read-only until
the user logs in, or signs up -
Collapsed navbar on smaller devices to wrap in all options and ensure better navbar design.
- Rounded bottom left edge is part of the site-wide design

- On this page, users can view all available services:
- If the user is not logged in, a login button will be available
- If the user is logged in, a GO BACK button will be available


- Each button will take the user to the relevant service they wish to view which are:
Brake serviceMajor ServiceMinor ServiceSuspension repairsTyre repair or replacement
- Upon the user pressing a button, they will be taken to the
service-detailpage for the chosen service:- Once again, if the user is logged in, a button
Buy Nowwill appear within the detail card - If the user is not logged in, the card is read-only with a request 'Please login in to purchase this service' and a login button
- Once again, if the user is logged in, a button


-
After the
logged inuser has the clickedBuy Now!button on the service detail page, the user is taken to aPlease confirm if you wish to continue with your purchasepage -
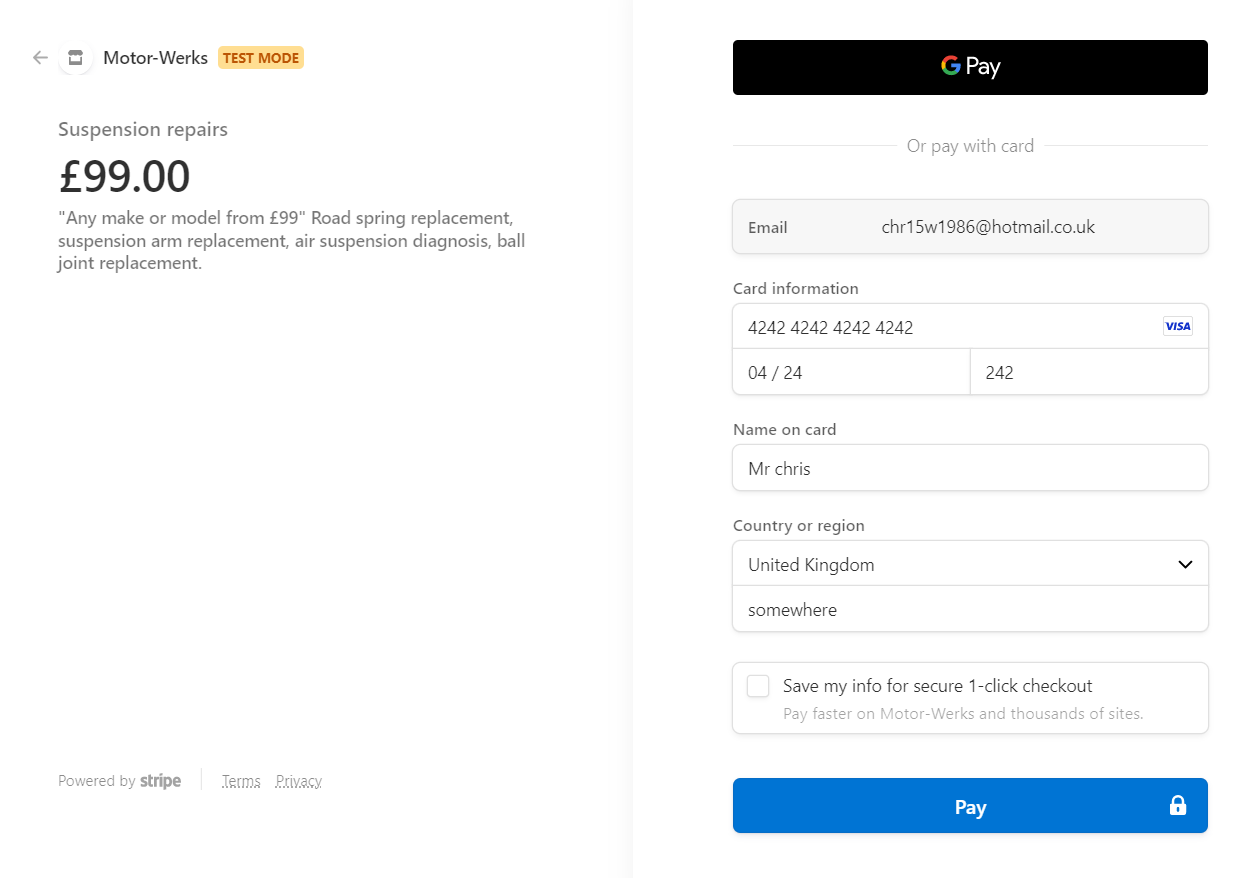
The user is then taken directly to the Stripe.com payment window
- Due to the nature of this project, only test payments are available
- Payment information is:
4242 4242 4242 4242(card number)04/24(MM/YY)424 or 242(CVC)Any nameAny postcode
-
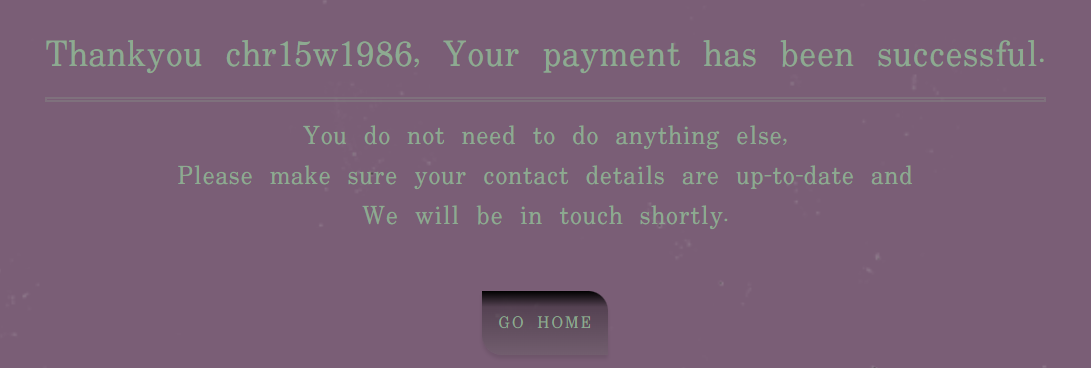
After entering the information above and clicking 'Pay',
the user is returned to the site to a payment confirmation page
-
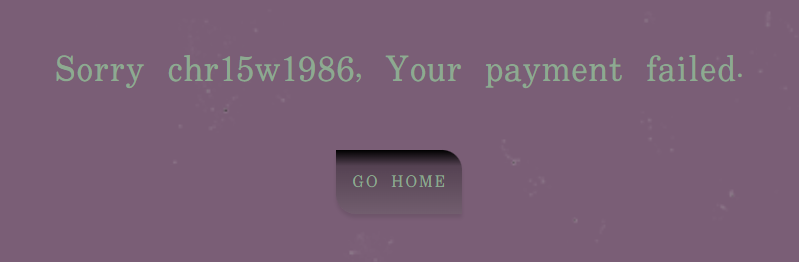
If, however, the payment failed, or the payment cancelled,
the user is returned back to the site, to a payment cancelled page


- Here the user is able to read, update and delete their own profile, including:
first namelast nameemailvehicle regstreet address1street address2town or citycountypostcodephone number
1.1. With validation, only the logged in user can view this page

i. For Edit profile, a custom modal pops up which contains a fully editable form,
where the user can change details


1.2. Delete profile, will take the user to a confirmation page

1.3. At the confirmation page, the cancel button will return the user to Home with no effect to the database
1.4. But if the user wishes to delete their profile, all data is removed after confirmation and the user is sent back to a delete-success page where the user has 3 choices, Login, Signup or Services we offer

1.4.1. If the user attempts to log back in with the recently deleted information, The e-mail address and/or password you specified are not correct message will appear. The user must signup again.
-
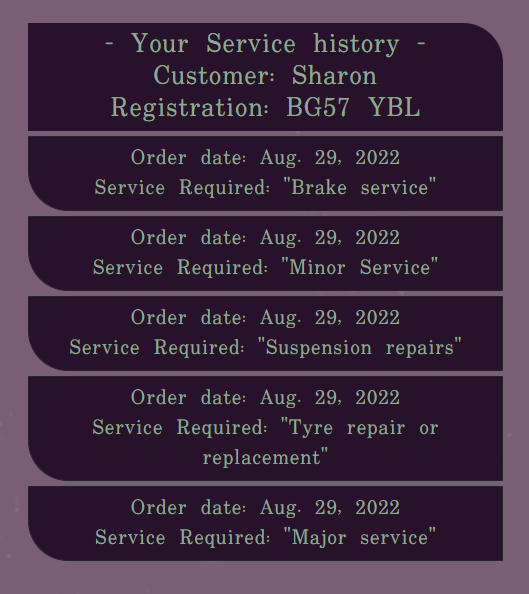
The service history is available only to the logged in user:
- Everytime a
Serviceis purchased, the date and type of service purchased will be stored within the profile page next to the logged in users information.
- Everytime a

- I have created a custom 500 error page to redirect to if there are any issues with the database including a button to redirect back to home

- I have created a custom 404 error page to catch if the user inputs the wrong page number, or if a page or feature does not exist
- I have included a button to redirect back to home

- I have created a custom 403 forbidden error page to redirect to if there are any instances where a user tries to access a secure area of the site (e.g admin), including a button to redirect back to home

- I have also created a custom 405 method not allowed error page to redirect to if there are any instances where the server knows the request method, but the target resource doesn't support the method, including a button to redirect back to home
I would like to...
- Add an option for the user to purchase more than one service e.g with a basket or checkout system
- Add an online chat service to hone in on the specifics the customer needs e.g If the user purchased tyres, they could talk to me about brands or sizes
- Include a comments or ratings section that all users can view, that could be linked to the service they purchased


- Django 3.2: Framework used to add structure to the platform
- Django AllAuth used to provide enhanced user account functionality
- Django templating language used to insert data from the database into the sites pages
- Bootstrap: Framework used to add structure and responsiveness
- Favicon Generator: Used to create favicon used on the website
- GitHub: GitHub respository is used to store the project's code after being pushed from Gitpod
- Google Fonts: Google fonts are used to add fonts for aesthetic and UX purposes
- Balsamiq: Balsamiq was used to create the wireframes during the design process
- Git: Gitpod IDE was used for version control by utilizing the Gitpod terminal to commit and Push to GitHub
- Grammarly: Used to correct any spelling mistakes on readme and app text
- AmIResponsive: Used to generate mockup image
- Python modules installed:
- asgiref==3.5.2
- boto3==1.24.46
- botocore==1.27.46
- dj-database-url==1.0.0
- Django==3.2.13
- django-allauth==0.51.0
- django-crispy-forms==1.14.0
- django-lint==2.0.4
- django-storages==1.13.1
- gunicorn==20.1.0
- jmespath==1.0.1
- logilab-astng==0.24.3
- logilab-common==1.9.7
- oauthlib==3.2.0
- psycopg2==2.9.3
- psycopg2-binary==2.9.3
- PyJWT==2.4.0
- pylint==0.28.0
- python3-openid==3.2.0
- pytz==2022.1
- requests-oauthlib==1.3.1
- s3transfer==0.6.0
- sqlparse==0.4.2
- stripe==2.63.0
All testing and code validation details are described in a separate file TESTING.md
Motor-werks is deployed using Heroku
Heroku Deployment steps:
- Ensure all dependencies are listed within the requirements.txt file
Within the terminal in Gitpod type pip3 --local freeze > requirements.txt, and a list with all requirements will be created to be read by Heroku.
-
Setting up Heroku
2.1 Navigate to the Heroku website
2.2 Login to Heroku
2.3 Click on
New(top right) and Create a new app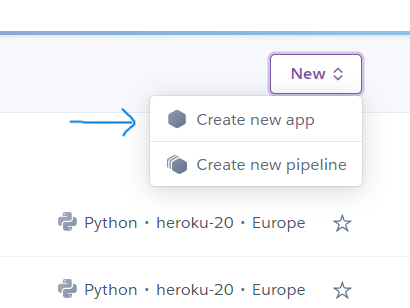
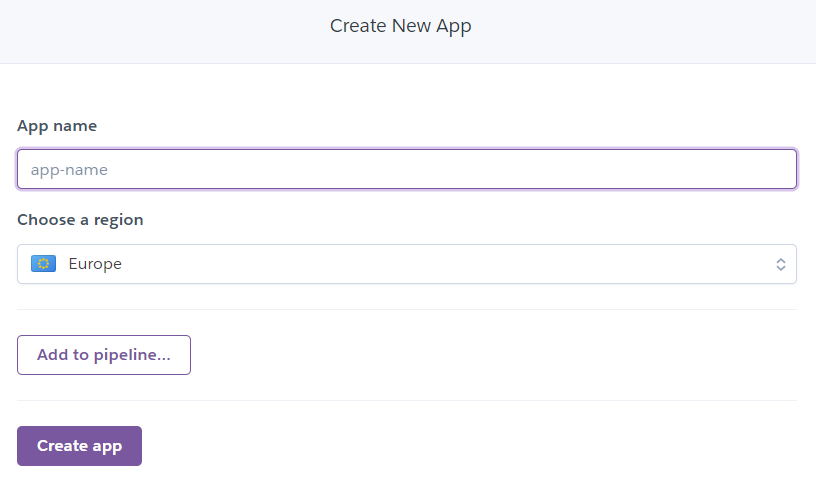
2.4 Choose a project name and set your location
2.5. Navigate to the
Resourcestab
2.6. In the
Add onssection, search for Heroku Postgres and select it on the list- A pop up will appear, select, 'Hobby Dev' and click
Submit order form

2.7. Next, navigate to the
deploytab;- Click on connect to Github
- Search for the repository named
Motor-werks - And connect heroku to Github.
2.8. Navigate to the settings tab
2.9. Click on Config Vars, add Database URL (from Heroku-Postgres) and Secret key,
- Add relevent secret keys and environment variables
- A pop up will appear, select, 'Hobby Dev' and click


Forking the GitHub Repository
-
By forking the GitHub Repository, you will be able to make a copy of the original repository on your own GitHub account, allowing you to view and/or make changes without affecting the original repository by using the following steps:
- Log in to your own GitHub and locate the GitHub Repository you wish to fork
- At the top of the Repository (not top of page), just above the "Settings" button on the menu, locate the "Fork" button.
- You should now have a copy of the original repository in your GitHub account
-
Making a Local Clone
- Log in to your own GitHub and locate the GitHub Repository
- Under the repository name, click "Clone or download"
- To clone the repository using HTTPS, under "Clone with HTTPS", copy the link
- Open Git Bash
- Change the current working directory to the location where you want the cloned directory to be made
- Type git clone, and then paste the URL you copied in Step 3
$ git clone https://github.com/Chr15w1986/Motor-Werks
Press Enter. Your local clone will be created
AWS S3 (Amazon web services storage)
- Navigate in a browser to Amazon AWS, log in, or create an account
- Create a new S3 bucket for the site and create a static directory and media directory within the bucket
- From the dashboard - copy the bucket details into the settings.py file:
- you will require the following:
- Storage Bucket Name
- Storage Bucket Region Name
- Access Key ID
- Secret Access Key - Add these settings to the env.py file to link AWS:
- os.environ["AWS_ACCESS_KEY_ID"] ='your access key'
- os.environ["AWS_SECRET_ACCESS_KEY"] ='your secret access key' - Back in Heroku, add the keys and values from AWS and env.py to the config vars
Stripe payments Setup
- This project uses Stripe as a payment provider -
- Create a stripe account at stripe.com
- Make sure you click
developeraccount to gain access to the api keys required to run the payment processes - Once you have successfully created your stripe account:
- Copy the stripe public key, stripe secret key and stripe webhook key into your env.py file and into heroku config vars
- Configure the settings file to find the variables required by stripe
STRIPE_PUBLISHABLE_KEY = os.environ.get('STRIPE_PUBLISHABLE_KEY')STRIPE_SECRET_KEY = os.environ.get('STRIPE_SECRET_KEY')STRIPE_ENDPOINT_SECRET = os.environ.get('STRIPE_ENDPOINT_SECRET')DOMAIN_URL = os.environ.get('DOMAIN_URL')
- Copy the stripe public key, stripe secret key and stripe webhook key into your env.py file and into heroku config vars
-
All images have been compressed using tinypng.com
-
Main home screen image of an audi R8 in the dark, wallpaperflare.com
-
Image of two chicks doing a burnout in a toy R8 for the error handler pages (bit of comedy.), wallpaperflare.com
-
Motor-werks logo, squarespace.com
-
Tool to remove the Motor-werks background to create transparent logo, remove.bg
-
Background image of scratched/worn (border/surround), pngwing.com
- Mailchimp and form code was used for the signup newsletter in the footer of the site mailchimp.com
- A walkthough was used for the Stripe Python, javascript and settings for payments within the site Stripe.com
and from Testdriven.io
- Code institute for the amazing Tutors on the course, Scott, Ger and Sean!
- My excellent Mentor Ben Kavanagh, BAK2K3 for his patience, excellent advice on my code, pushing me back on track when I felt like 'throwing in the towel', taking time out of his own day and duties to answer ALL of my questions with absolute perfection, and just generally being a Python genius! I cannot thank you enough! "One last push!!"
- Matt Bodden MattBCoding, Yet again for being an absolute genius at pointing out the obvious. Thanks Matt!
- My family for their support, patience and testing
- My wonderful wife for being my personal spell checker/grammar police and for listening to me when I needed to blow off steam!
- Everybody on Slack for tips, advice, quick fixes and support