We use CycleGAN to generate handwritten Chinese characters.
pip3 install pywebio
python3 demo.py
Then you can open http://localhost:8080/ in your web browser to transform text to your own handwritten. We have four different handwritten styles and paper textures.

sudo apt-get install poppler-utils
pip install pdf2image
In buffer/article_text and buffer/article_pdf, prepare your labeling article(.txt) and own handwritten(.pdf) in the directory, respectively.
Change arguments to create directory and test datasets.
python3 dataPreprocess.py --dirName test --test 1
A clean and readable Pytorch implementation of CycleGAN (https://arxiv.org/abs/1703.10593)
Code is intended to work with Python 3.6.x, it hasn't been tested with previous versions
Follow the instructions in pytorch.org for your current setup
To plot loss graphs and draw images in a nice web browser view
pip3 install visdom
First, you will need to prepare your text image and handwritten image. Or you can unzip the datasets.zip in ./datasets. Build your own dataset by setting up the following directory structure:
.
├── datasets
|   ├── <dataset_name>         # i.e. text2handwritten
|   |   ├── train              # Training
|   |   |   ├── A              # Contains domain A images (i.e. real text)
|   |   |   └── B              # Contains domain B images (i.e. self handwritten)
|   |   └── test               # Testing
|   |   |   ├── A              # Contains domain A images (i.e. real text)
|   |   |   └── B              # Contains domain B images (i.e. self handwritten)
If you don't own a GPU remove the --cuda option, although I advise you to get one!
If you have multi-GPU, you need to add device_id in ./train.py.
train.py
    line 56 - 59:
        netG_A2B = nn.DataParallel(netG_A2B, device_ids=[0])
        netG_B2A = nn.DataParallel(netG_B2A, device_ids=[0])
        netD_A = nn.DataParallel(netD_A, device_ids=[0])
        netD_B = nn.DataParallel(netD_B, device_ids=[0])
python3 train.py --cuda --dataroot datasets/claire2_128/ --input_nc 1 --output_nc 1./train.py --dataroot datasets/<dataset_name>/ --cuda
This command will start a training session using the images under the dataroot/train directory with the hyperparameters that showed best results according to CycleGAN authors. You are free to change those hyperparameters, see ./train.py --help for a description of those.
Both generators and discriminators weights will be saved under the output directory.
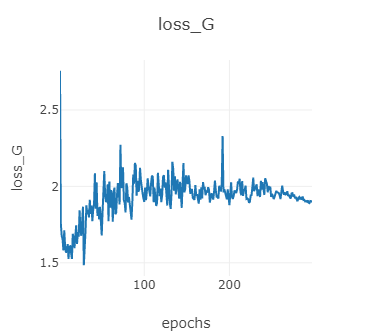
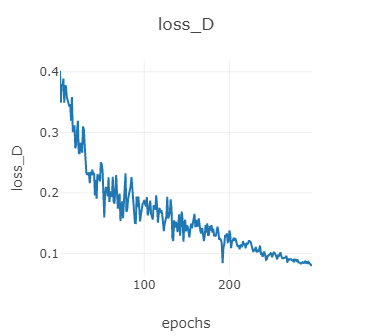
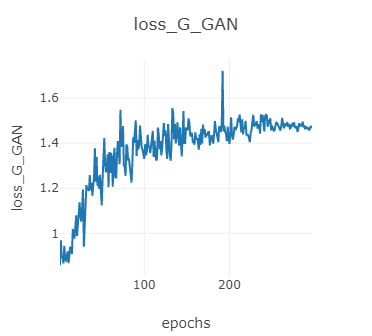
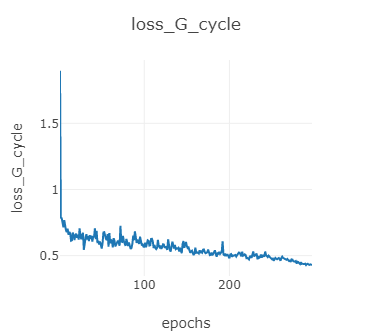
If you meet connection problems, you can try start visdom.server. View the training progress as well as live output images by running python3 -m visdom in another terminal and opening http://localhost:8097/ in your favourite web browser. This should generate training loss progress as shown below (default params, horse2zebra dataset):
python3 test.py --dataroot datasets/test/ --cuda --input_nc 1 --output_nc 1./test.py --dataroot datasets/<dataset_name>/ --cuda
This command will take the images under the dataroot/test directory, run them through the generators and save the output under the output/A and output/B directories. As with train, some parameters like the weights to load, can be tweaked, see ./test.py --help for more information.
Examples of the generated outputs (real text, fake handwritten):
real handwritten fake handwrittenThis project is licensed under the GPL v3 License - see the LICENSE.md file for details
Code is basically a cleaner and less obscured implementation of pytorch-CycleGAN-and-pix2pix. All credit goes to the authors of CycleGAN, Zhu, Jun-Yan and Park, Taesung and Isola, Phillip and Efros, Alexei A.


