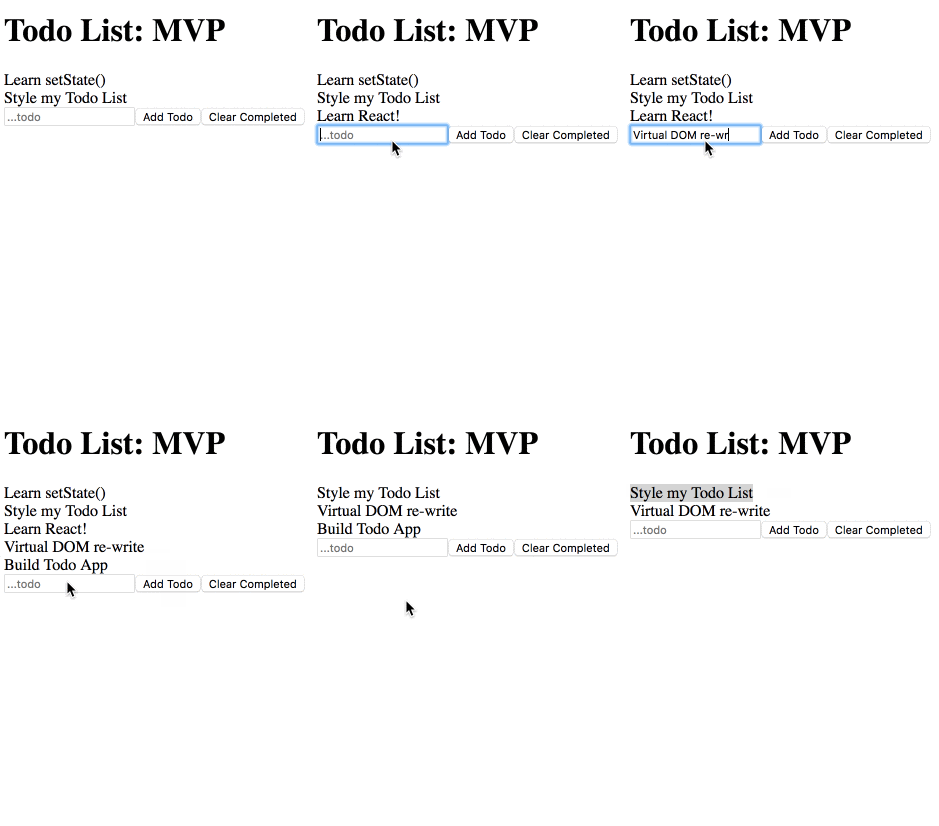
We're going to practice building a stateful class component with this project. Even though hooks are gaining popularity among react developers, class components are going to be around for a long time. It's imperative that you get use to class components, and feel comfortable working with class components since you'll most likely need to work with them if you are hired to work on a React app.
Fork and clonethis project and cd into your cloned version.npm installoryarn installwill pull in all the node_modules you need.npm startoryarn startwill start a development server on yourhttp://localhost:3000.- If npm or yarn asks you to select different port with some error message, just confirm and it will pull it up on port 3001. This simply means you have a development server up and running on that port already.
- Your job is to write the components to complete the Todo List application.
- Your todo list should be fully functional and you should design it however you'd like. Feel free to get creative here. I have supplied a gif for you to see what the MVP functionality is.
- Your todo data should be an array of objects that look a lot like this:
[
  {
    task: 'Organize Garage',
    id: 1528817077286,
    completed: false
  },
  {
    task: 'Bake Cookies',
    id: 1528817084358,
    completed: false
  }
];- The
taskfield is the todo title that will be shown to the user. - The
completedfield should default tofalseand will be the field that we toggle when we complete a todo. - The
idfield is a uniqueTime Stampthat will be assigned byDate.now().
- Don't focus on styling yet. We want you to worry about function over form today.
- Your todo list should display a list of todos, an input field, a submit button, and a clear all button.
- Be sure to use the given files for building out these components.
<App />will hold all the data needed for this project. It will also be the container for your Todo Components.- All of your application data will be stored here on
<App />. - All of your
handlerfunctions should live here on<App />.
- All of your application data will be stored here on
<TodoList />receives your Todos array and iterates over the list generating a new<Todo />for each element in the array.<Todo />is a component that takes in thetododata and displays the task to the screen.<TodoForm>will hold your input field and yourAdd TodoandClear Completedbuttons.- Your input field should take in user input, and allow a user to press
Enteror click on theSubmit Buttonto add a todo to your list. - Once a todo is submitted, the Todo List should re-render and show the added todo.
- Your input field should take in user input, and allow a user to press
- Add the functionality to toggle your todo's completed flag from
falsetotrue.- Once a todo is completed, be sure to demonstrate to the user that the todo is completed by adding a line-through style property if the completed flag is true.
- Add the ability to remove any todos that you have completed.
.filterwill be your best friend here. When a user clicks on theClear Completedbutton call your handler function that will filter out any todos that have the completed flag toggled totrue. - Now is the time to style Take your time to make this an app that you can be proud of.
-
Persist your data in
window.localStorage()hint: you may have to pass your data to a stringifier to get it to live inside thelocalStorage()of the browser. This will cause it to persist past the page refresh. -
Search Functionality Add a input bar that allows you to search through your tasks and only show the ones that match the search input.
-
Hosting Create a Netlify Account and follow the tutorial on how to host your shiny new todo app on the world wide web.
