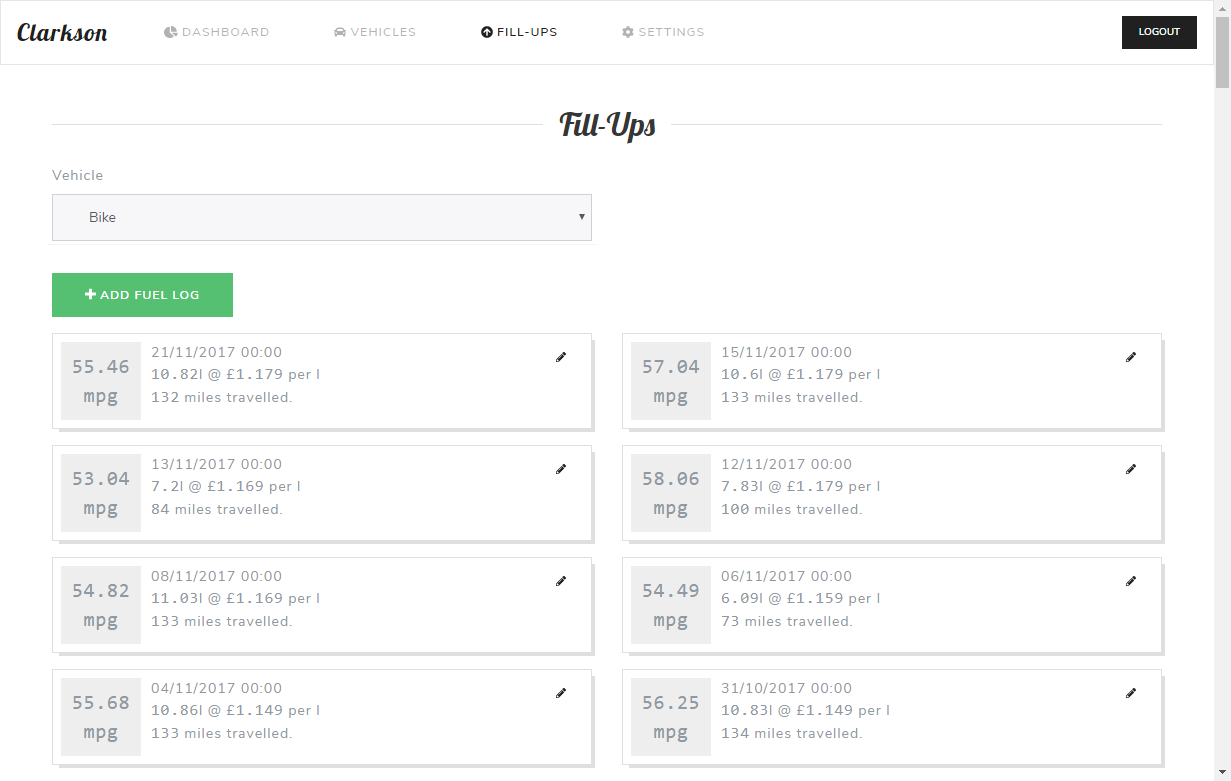
Clarkson is a web-based dashboard application that gives you a neat and clean interface for logging your fuel fill-ups for all of your vehicles. The application has full multi-user support, as well as multiple vehicles per user. Whenever you fill-up your car or motorcycle, keep the receipt and record the data in Clarkson.
- Dashboard giving you high-level statistics on your vehicle fill-ups, including:
- Total spent on fill-ups on all your vehicles
- Total distance traveled
- Graphs showing fuel consumption trends
- Add/edit/remove an unlimited number of vehicles
- Include basic information such as Make, Model, Registration, VIN, Fuel Type
- Add/edit/remove fuel fill-ups
- Total cost or unit cost will be automatically calculated as you enter the data
- Include any notes
- Inform the app whether or not the fill-up was to the top (full tank), or if you missed any previous fill-ups
- Choose your units - available settings:
- Fuel Units: Litres, Gallons, or US Gallons
- Consumption Units: MPG, L/100KM
- Distance Units: Miles, Kilometres
- Currency Units: GBP, USD, EUR, AUD, CAD
Clarkson has an Angular front-end, with ExpressJS backend, connecting to a MySQL database. It uses Flyway as a means of managing incremental migrations of the database schema.
To get the application running, you'll need node and npm installed. Firstly, install the angular-cli (plus ts dependencies):
npm install -g @angular/cli ts-node typescriptThen grab all of the dependencies for the app itself:
npm installDepending on how you run the application, you'll need to update the src/environments/environment.prod.ts file so the frontend points to the right server URL:
export const environment = {
    production: true,
    apiBaseUrl: 'https://your-domain-here/api' // or use 'http://<local_network_ip>:3000' if not behind a reverse proxy
};Once you're happy with the endpoint in config, build the frontend:
ng build --prodThis will create a dist/ directory, which is where the frontend gets served.
Before you run the application, you'll need to run a database migration using flyway. This will create the schema and initial tables/procedures that are used by Clarkson. To do this, run:
./flyway/flyway -user=<mysql_user> -password=<mysql_user> -schemas=clarkson -url=jdbc:mysql://<mysql_host_ip> migrateNote: The -user, -password and -url values must match those that you use when running the application (see below).
JRE: Flyway is a Java tool, so requires the JRE to be available in $PATH. It is not packaged as part of this application due to variations in OS requirements.
Finally, start the application by running:
MYSQL_HOST=<mysql_host_ip> MYSQL_USERNAME=<mysql_user> MYSQL_PASSWORD=<mysql_user> ENABLE_REGISTRATIONS=true APP_PORT=3000 node clarkson.jsEnvironment variables at startup:
| Env | Required? | Used for |
|---|---|---|
| MYSQL_HOST | Yes | Points the backend to the MySQL database |
| MYSQL_USERNAME | Yes | The user with access to the clarkson schema |
| MYSQL_PASSWORD | Yes | The password for the user |
| ENABLE_REGISTRATIONS | No | Defaults to false. If set to true, allows new users to register |
| APP_PORT | No | Defaults to 3000. Changes the running port of the application |
- Web Framework: Angular
- Server: ExpressJS
- Security: Helmet
- Charts: ChartJS
- Charts: ng2-charts
- Theme: Bootstrap
- Theme: Bootswatch
- Flash Notifications: angular2-flash-messages

