Brain Computer Interface Authenticator
OVERVIEW
Neural Lock will be a potential new form of biometric identification that can be used to unlock a device. As neurotechnology becomes more advanced and convenient this type of technology could have many uses. Neurotechnology has many strengths making it an incentive to be utilized. One extreme strength for this is security for the individual and the system. Brain waves are always active in the mind until death. At this point the term "Brain Dead" is used and there is no longer any brain activity active. This would make it impossible for anyone to authenticate as this individual keeping the data safe. In this project we plan to create a deep neural network that will be able to authenticate a user with high accuracy. As well as making it almost impossible for any other user to be accepted into the system.
Prerequisites
- Python 3.7+
- TensorFlow >= 2.2.0
- TensorBoard >= 2.2.0
- CUDA 10.1 (GPU Drivers 418.x+)
Neural Lock GUI
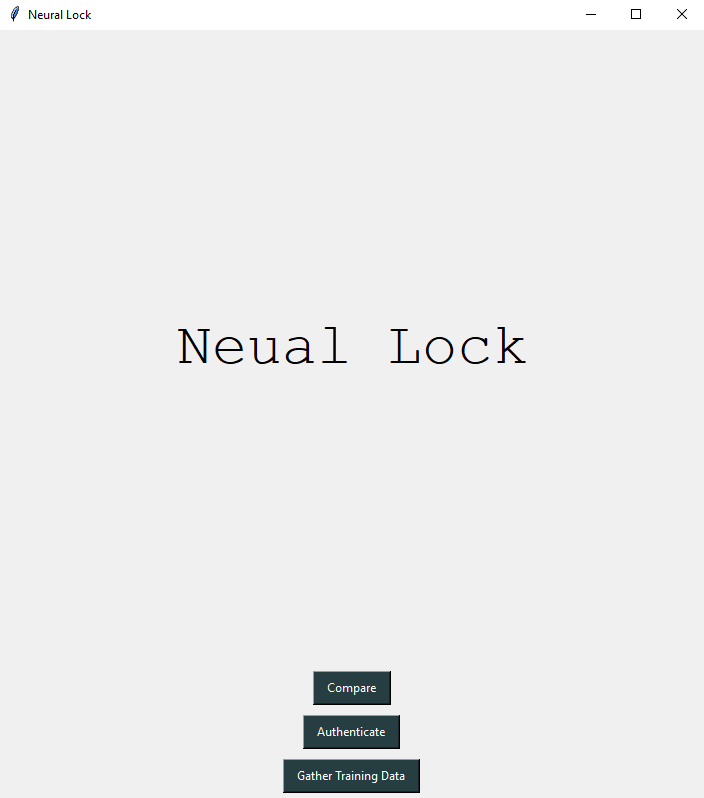
The Neural Lock GUI allows for a ease of use when working with data that was collected with this program. This GUI can be run once this repository is cloned with python 3.7 or higher (with all required libraries). Neural_lock_GUI.py is the main controller in this application. This main page allows for navigation to collect data/view data/and authenticate.
NOTE: Authentication and Compare data are yet to be hooked up to the controller. Compare Data can be run directly from the CompareData.py directly, changing the directories to the correct file destination
Gathering Data
In order to begin gathering data the OpenBCI Hub needs to be installed (https://github.com/openbci-archive/OpenBCI_Hub). Connect the OpbenBCI's headset to the software.
NOTE: "SYNTHETIC (algorithmic)" option can be chosen to run this application without an OpenBCI headset.
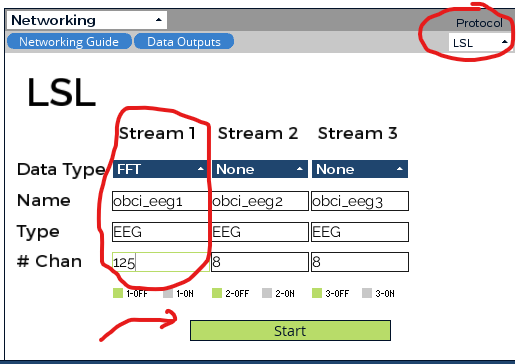
One the OpenBCI Hub is running be sure to Start Data Stream as well as set up the Networking interface. The configurations of the Networking interface can be seen in the image below.
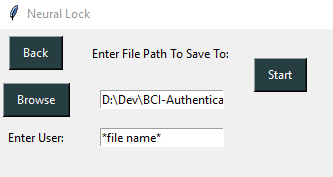
Once this is set up and streaming data it is able to begin streaming data. When Gather Training Data is selected it will bring you to a page to set up a file directory to save to as well as the prefix of the file name.
If the OpenBCI Hub is configured correctly a screen should appear stating that the LSL communication has been initiated and will begin gathering data. After three seconds of a timer a black and white checkered pattern will begin to flash. To get clear data it is best to stay perfectly still without blinking for the 12 seconds of the presentation.
Comparing Data
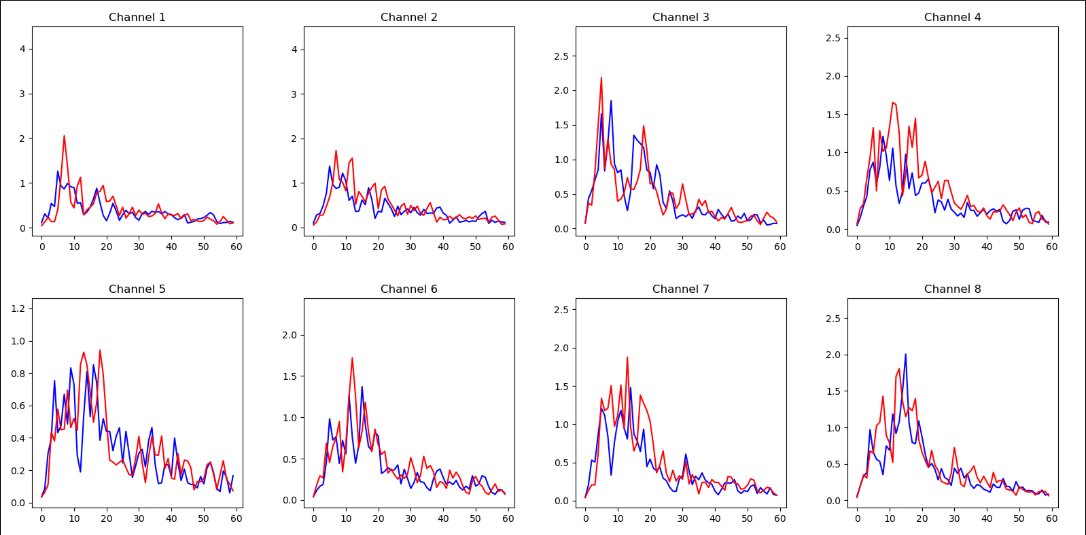
As we have not attached the CompareData.py to the main controller the Compare button on the home page will not compare data. It is possible to still utilize this function by calling this file directly. Changing the file paths to the correct file will allow this application to execute correctly. Below is an example of two files being compared. Each file 1 is illustrated by the red line whereas the blue like representing file 2.
Authenticate
Is a feature we plan to add in the future. This would begin an active reading in the same way gathering training data does. Connect to the device and begin a 3 second timer. Then a black and white checkered pattern would begin flashing. It would then take this data that it just read and fed through the machine learning model to give judgement on whether it recognizes the subject or not.
ReshapeData.py
This function allows you to reshape the data collected into different dimensions arrays. We take in data and store it in a 3D-array (x,8,60). This ReshapeData.py file allows us to trim the data into uniform 3D-array (275,8,60).
Test/Train Folders
This folder hold all important data that is used to train the machine learning model. Within each of these folders contains a y_(train or test).txt file that holds all the correct labels for the machine learning model to check after its gone through and made it's guess. The subfolder EEG Signals contain a masterFile.txt which contains several lines each containing a 1D-array (1,132000). These lines are fed through the convolutional neural network in order to train and validate itself.
CNN.py To make the Neural network run you will need to make sure the directories in the load_dataset function are changed with respect to your own system:
- the prefix_variable, variable needs to be changed to the directory of the data in your own system.
the epochs and batch_size variables in test_model control how the model runs and trains against the data set.
-
Changing the epochs variable changes how long the neural network trains with the training data set.
-
changing the batch size changes how much of the data the neural network sees in one epoch.
-
you can change activation functions by changing the activation variable on the respective layer in test_model.
-
you can change the pool_size variable to change how much data the neural network processess, lower the number the more data it processes the higher the number the less data it processes.
-
you can change the optimization function by changing the optimizer variable used in the test_cnn.compile line of test_model function. you can change the loss function by changing the loss variable used in the test_cnn.compile line of test_model function.
-
change the repeats variable in the run network method to change how many times the neural network will run before the results are summarized.
once you've set the parameters you want, run newCNN.py and wait, it will print out the results and summarize them with a percentage and standard deviation.


