
- Project Overview
- Design & Planning
- Technologies
- Dependencies
- Reusable Components
- Setup and Installation
- Testing
- Deployment
- Credits
The aim of the Social Food Posting platform is to provide a dynamic and simple space where users can:
- Share their culinary creations: Users can post photos, recipes, and descriptions of the dishes they created.
- Connect with other food lovers: Share ideas, inspire one another, and comment on their creations.
-
User Registration and Authentication:
- Sign Up: New users can register on the platform with a username, email, and password.
- Login/Logout: Registered users can log in and out securely.
- Profile Management: Users can create and manage their profiles, including uploading profile pictures and adding a bio.
-
Create Posts:
- Post Creation: Users can create posts with photos of their culinary creations, along with detailed descriptions, recipes, and ingredients.
- Edit and Delete Posts: Users can edit or delete their posts as needed.
-
Follow Users:
- Following and Followers: Users can follow others to stay updated with their latest posts and activities.
- Follower Notifications: Users receive notifications when they gain new followers.
-
Likes and Comments:
- Liking Posts: Users can like posts they find interesting or inspiring.
- Commenting on Posts: Users can leave comments on posts to provide feedback, ask questions, or share thoughts.
- Comment Management: Users can edit or delete their comments.
-
Explore and Discover:
- Search Functionality: Users can search for posts and users based on keywords.
-
User Management:
- Profile Update: Able to update profile name (will not change the login username), update profile image, and add a bio.
- Content Moderation: Super-users can review and moderate user-generated content to ensure it is valid to be published.
-
Analytics Insights:
- Likes Tracking: On the Popular Profiles page, users can follow other profiles and see a list of the most popular profiles based on likes on their posts.
- Dinner Clubs: Host and invite other profiles for dinners at your home. (Ran out of time to add this feature.)
- Development Process: While working on this project, an agile development approach was followed as much as possible.
- Development Preparation: The initial steps involved thorough planning of the website, creating a class diagram for the models, and wireframes for the UI.
- Feature Tracking & Task Management: Features were categorized and moved through different columns (Todo, In Progress, Done) as they were worked on and completed.
Created with Balsamiq


Had to skip the dinner club idea, due to time constraint

- Fonts Used: 'Montserrat' for headings and 'Barlow Condensed' for text.
- Vite + React
- How install and get started with Vite + React :
Install Node.js
- Create a Vite + React Project Open your terminal and run the following command to create a new Vite project with React:
npm create vite@latest .
-
axios -
Axios is a promise-based HTTP client compatible with node.jsand across browsers.
-
bootstrap -
For responsive design and pre-styled components.
-
react-loader-spinner -
provides simple React.js spinner component which can be implemented for async wait operation before data load to the view
-
react-query -
Is a hook library for handling asynchronous and remote data in React applications. It provides features such as caching, syncing, querying, mutations.
-
https://refine.dev/blog/react-query-guide/#performing-basic-data-fetching
-
lodash -
For utility functions, debounce in search functionality.
-
js-cookie -
For managing cookies,for authentication.
-
@fortawesome/free-solid-svg-icons -
To use the iconic font, CSS, and SVG framework in your project.
-
Express -
Express is a fast, unopinionated, minimalist web framework for Node.js It is used for developing servers and provides small, robust tooling for HTTP servers
-
compression
npm install axios@latest
bootstrap@latest
react-loader-spinner@latest
@tanstack/react-query@latest
lodash@latest
js-cookie@latest
@fortawesome/react-fontawesome@latest
express@latest
compression@latest
- Modal
- PostCard
- Searchbar
FeedPage First checks :

![After]

- Currentuser in the postcard is for the publish function. Not fixing it.
- Alert error is empty, errors messages sent from the backend.
- Response in ProfilePage is Successfull update message - Not fixing it.
- https://dev.to/mbarzeev/testing-a-simple-component-with-react-testing-library-5bc6
- https://jestjs.io/docs/tutorial-react
-
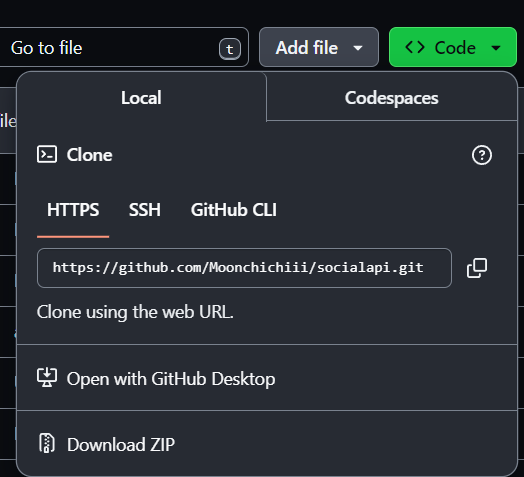
Clone the Repository
-
Install Dependencies
npm install -
Start the Development Server
npm run dev


The server.js file sets up an Express server to serve the built React application.
It uses the compression middleware to compress responses, improving load times. In production,
it serves the static files from the dist directory and handles any requests by sending the index.html file,
enabling client-side routing to function correctly.
import express from 'express';
import { fileURLToPath } from 'url';
import path from 'path';
import compression from 'compression';

const filename = fileURLToPath(import.meta.url);
const dirname = path.dirname(filename);

const app = express();
const PORT = process.env.PORT || 3000;

app.use(compression());

if (process.env.NODE_ENV === 'production') {
    app.use(express.static(path.resolve(dirname, 'dist')));
    app.get('*', (req, res) => {
        res.sendFile(path.resolve(dirname, 'dist', 'index.html'));
    });
}

app.listen(PORT, () => console.log(`Server running on port ${PORT}`)); import { defineConfig } from 'vite';
import react from '@vitejs/plugin-react';
// https://vitejs.dev/config/
export default defineConfig({
plugins: [react()],
build: {
outDir: 'dist',
minify: 'terser'
},
server: {
proxy: {
'/api': {
target: process.env.VITE_BASE_URL,
changeOrigin: true,
secure: false,
rewrite: path => path.replace(/^\/api/, '')
}
}
}
});Heroku Deployment
Login to the Heroku website and create a new app.
Select your region and name your app as you want.
In the Heroku dashboard, go to the "Settings" tab and
click on "Add buildpack". Select "Node.js" and add it.
This tells Heroku to use Node.js to run your application.
You can either build the project before deploying or let Heroku handle the build process.
If you want to keep the project size smaller during deployment, let Heroku run the build during deployment.
Build the project locally,:
npm run build
This will generate a dist folder containing the built files.
You can then move this to your backend and deploy it as one app on Heroku.
If you prefer to let Heroku handle the build, no need to run the build command locally.
This approach reduces the project size during deployment.
Heroku will use the build script specified in your package.json to build the project during deployment.
Add a Procfile
Create a Procfile in the root of your project.
This file tells Heroku how to run your application. Add the following line to your Procfile:
web: node server.js
This configuration allows Heroku to run the build script during deployment.
Ensure that your package.json includes the necessary scripts for building and running your application.
  "scripts": {
    "dev": "vite",
    "build": "vite build",
    "lint": "eslint . --ext js,jsx --report-unused-disable-directives --max-warnings 0",
    "preview": "vite preview"
  },
  "engines": {
    "node": "20.x",  // This can change
    "npm": "10.8.0"  // This can change - has changed a few times keep the up to date version.
},Use the Heroku GitHub integration to automatically deploy from a GitHub repository.
In the Heroku dashboard, navigate to the "Settings" tab and click on "Reveal Config Vars".
Add the necessary environment variables required to communicate with the backend and other settings.
After deploying, Heroku will automatically run the build script defined in package.json.
This will compile your frontend code. Your server will start according to the command defined in Procfile.
You can monitor the deployment process and application logs using the Heroku dashboard or the Heroku
Special thanks to:
-
The Moments Walkthrough Project for guidance and inspiration
-
React Query Very Good reading and Source of information!
-
https://refine.dev/blog/react-query-guide/#performing-basic-data-fetching
This template provides a minimal setup to get React working in Vite with HMR and some ESLint rules. Currently, two official plugins are available:
- @vitejs/plugin-react uses Babel for Fast Refresh
- @vitejs/plugin-react-swc uses SWC for Fast Refresh