A full-stack PERN (PostgreSQL, Express, React, Node) project that aims to ease the tracking and recording of workers' hours.
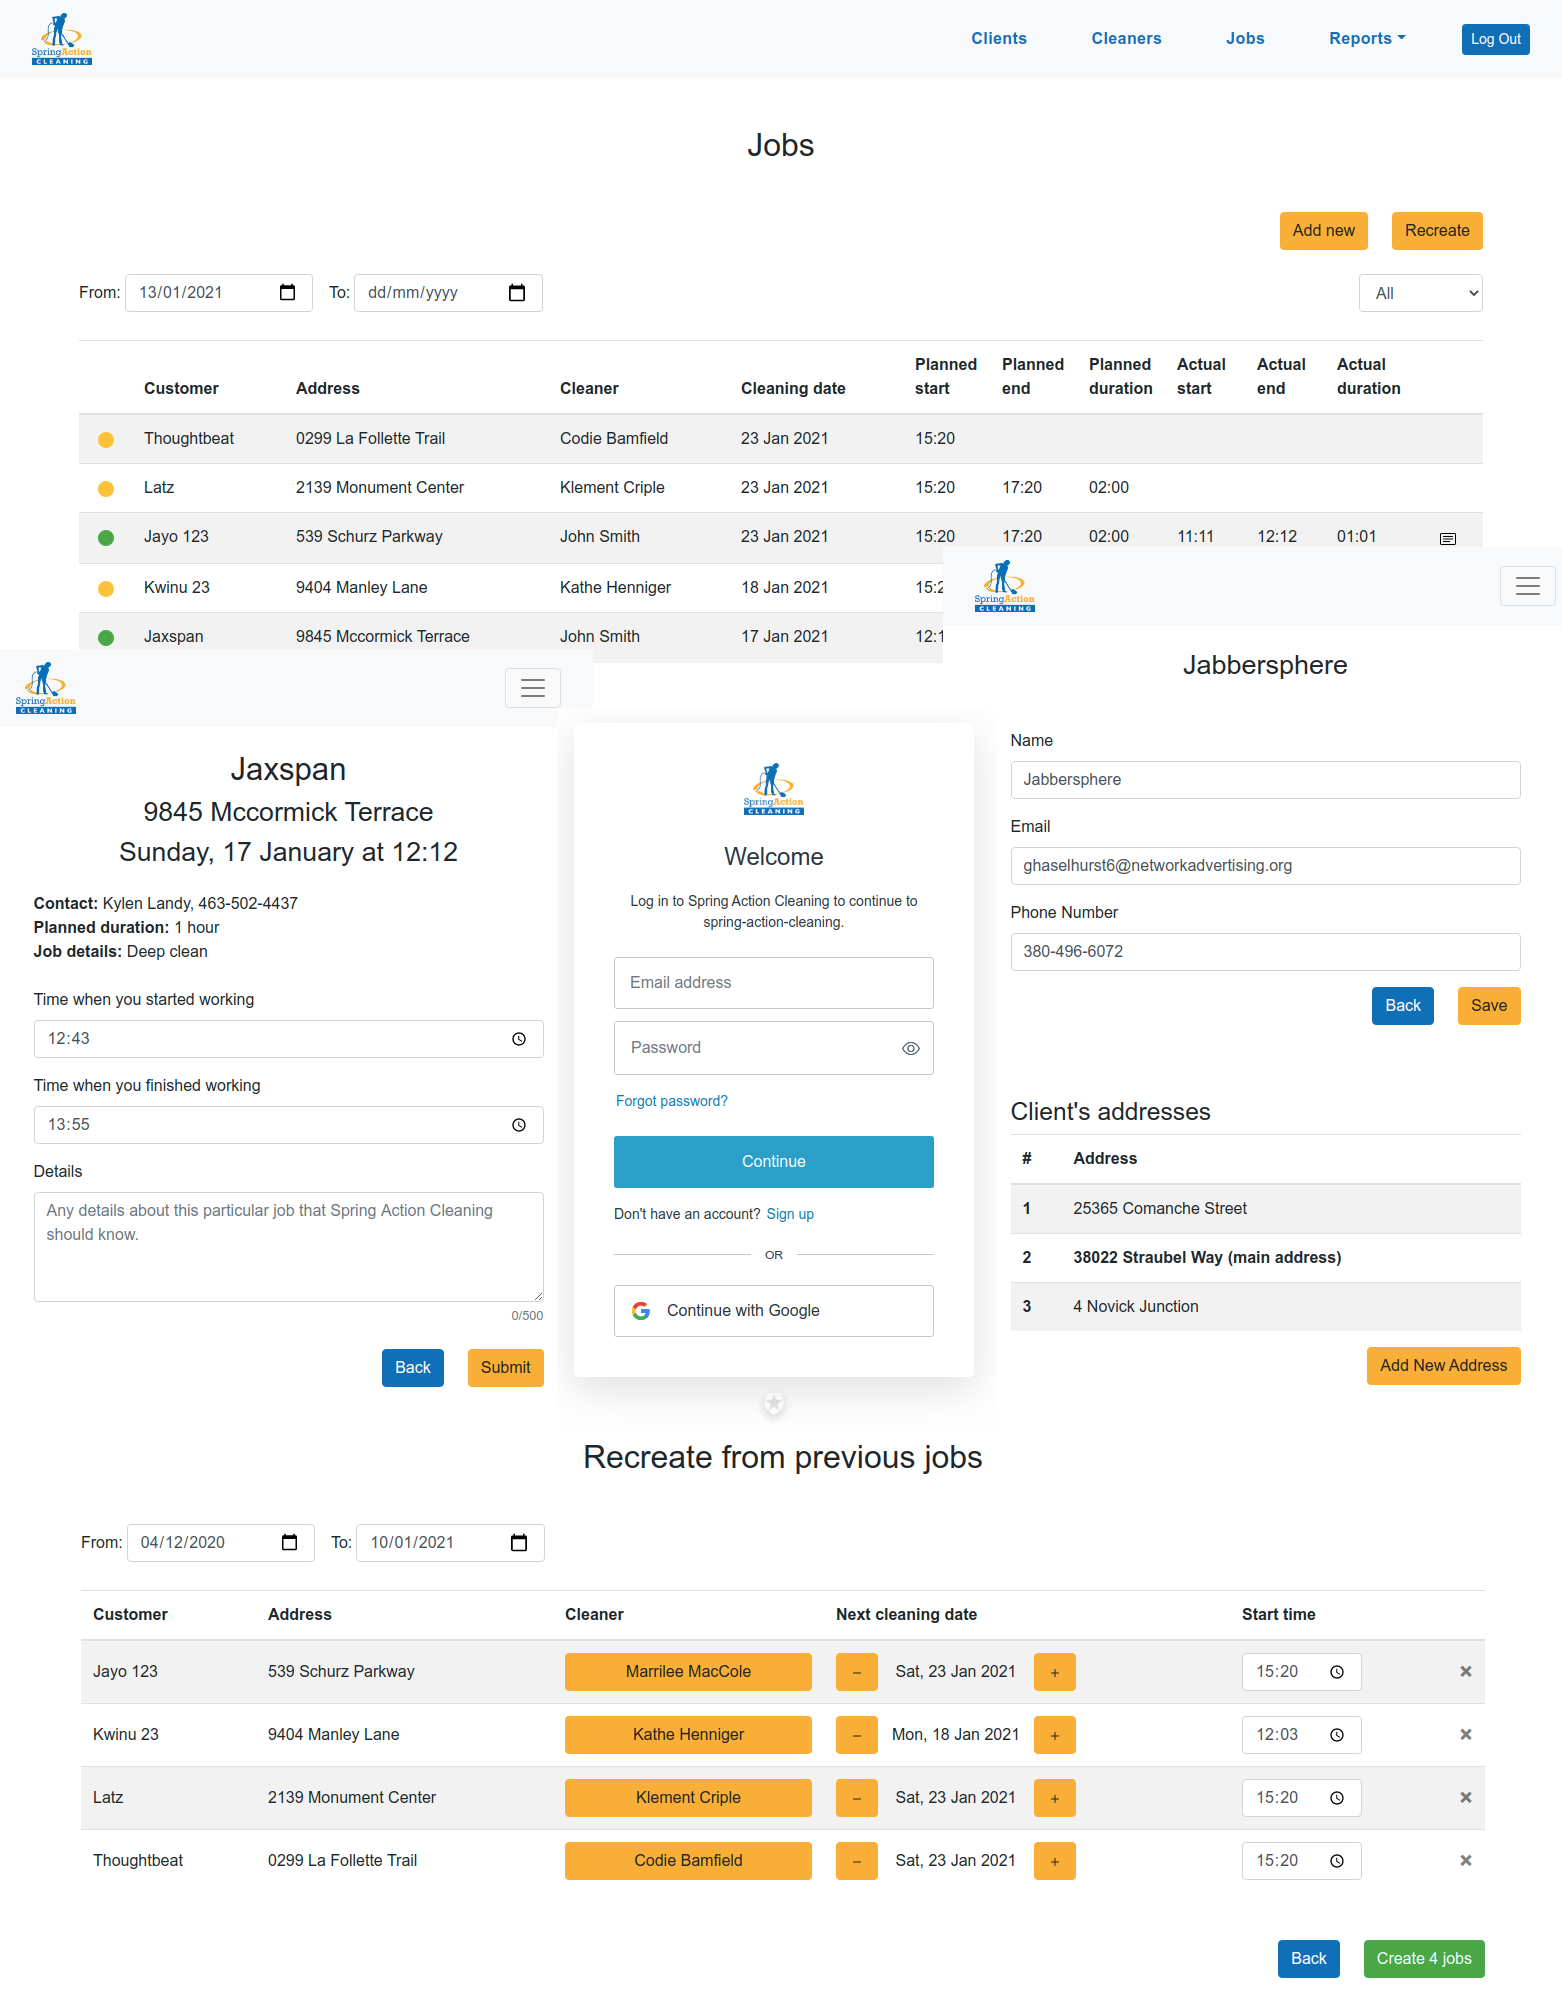
- Add and edit Clients, Cleaners & Jobs
- Cleaners can log in and submit their working times
- Generate reports to calculate total time of services provided for a given period
- Node (10+)
- PostgreSQL
- Free Auth0 account
- Terminal access
- Web browser
- Fork and clone this repository
- Install packages by running
npm installin the project's root directory from your terminal. - Create
.envfile and populate with your values. Check.env.examplefor variables/format used.
DB_NAME=spring-action-cleaning # your database name
DB_PASSWORD=1234 # your database passwordFor application to work properly regarding user roles you have to properly configure your auth0.com application.
- When you signed up for Auth0, a new application was created for you, or you could have created a new one.
- Get Domain and Client ID from application settings and update
/client/src/components/auth/config.jsfile'sdomainandclientIdvalues with yours. - Configure Callback, Logout and Allowed Web Origins in the application settings (probably it's
http://localhost:3000for development and after a comma, you can add production URL). - Create a new custom API and in the RBAC settings switch ON the
Enable RBACandAdd Permissions in the Access Tokentoggles.- Add the API identifier (in the format of
https://yourname/) as audience value in the auth config file. - Change
roleUrlvalue in the config file tohttps://yourname/roles
- Add the API identifier (in the format of
- In the
/server/middleware.jsfile incheckAuth()function changejwksUri,audienceandissuervalues with your Domain and API identifier values. - In APIs section select your API, go in Permissions tab and create all permissions from the table below.
| Permission | Description |
|---|---|
| get:branches | Get branches |
| get:branches/:branch_id | Get branch by id |
| get:branches/customer/:customer_id | Get branches by customer id |
| get:customers | Get customers |
| get:customers/:id | Get customer by id |
| get:customers/select | Get customers for selection list in job creation page |
| get:workers/select | Get workers for selection list in job creation page |
| get:general_reports/worker | Get report for all workers |
| get:general_reports/customer | Get report for all customers |
| get:general_reports/branch | Get report for all customer branches |
| get:jobs | Read jobs |
| get:jobs/branches/:id | Get jobs info for branch |
| get:jobs/customers/:id | Get jobs info for customer |
| get:jobs/:id | Get job by id |
| get:jobs/range | Get jobs for specified date rang |
| get:jobs/workers/:id | Get jobs info for worker |
| get:reports/customer | Get reports for customer from start to end date |
| get:reports/customer_detailed | Get reports for customer with dates |
| get:reports/worker | Get hours worked for different addresses |
| get:reports/worker_detailed | Get reports for worker with dates |
| get:reports/branch | Get hours worked for different addresses |
| get:reports/branch_detailed | Get reports for branch with dates |
| get:general_reports/general | Get general report |
| get:invoice | Get invoice |
| get:workers | Read workers |
| get:workersById | Get worker by id |
| post:batch_of_jobs | Post multiple jobs at once |
| post:branches/:customerId | Post branch |
| post:customers | Post customer |
| post:jobs | Post job |
| post:workers | Post workers |
| put:branches/:customerId/:branchId | Update branch |
| put:customers/:id | Update customer |
| put:jobs/:id | Update job |
| put:jobs/:id/log_time | Update job start and end times |
| put:workers | Update workers |
| get:workers/job/:id | Worker access single job |
| get:workers/jobs | Worker access his jobs |
- In the Users & Roles section create two new roles:
adminandworker. - For the
adminassign all permissions. - For the
workerrole assign these permissions:
| Permission | Description |
|---|---|
| get:workers/job/:id | Worker access single job |
| get:workers/jobs | Worker access his jobs |
| put:jobs/:id/log_time | Worker update job start and end times |
- All those permissions can be found in
server/routesroutes files as router middleware checks. - Now you need to add the following rules:
- Rule to assign a role to the user on the first login. You can get role id from the address bar when you are in the role page, it's in the format of
rol_xxxxxxxxxxxxxxxxin the URL.
function (user, context, callback) {
  	const ManagementClient = require('auth0@2.31.0').ManagementClient;

    const management = new ManagementClient({
      token: auth0.accessToken,
      domain: auth0.domain
    });

    const count = context.stats && context.stats.loginsCount ? context.stats.loginsCount : 0;
    if (count > 1) {
        return callback(null, user, context);
    }

    const params =  { id : user.user_id};
  	const { email } = user;
  	const adminsEmails = ['foo@bar.com', 'admin@baz.com']; // populate this array with admins emails
    let role;
  	if (adminsEmails.includes(email)) {
      role = ['rol_xxxxxxxxxxxxxxxx']; // admin's roleId
    } else {
    	role = ['rol_xxxxxxxxxxxxxxxx']; // worker's roleId
    }
    const data = { "roles" : role};

    management.users.assignRoles(params, data, function (err, user) {
      if (err) {
        // Handle error.
        console.log(err);
      }
    callback(null, user, context);
    });

}- Rule to add roles to the Access Token:
function (user, context, callback) {
  const namespace = 'https://changeWithyourAPIidentifier';
  const assignedRoles = (context.authorization || {}).roles;

  let idTokenClaims = context.idToken || {};
  let accessTokenClaims = context.accessToken || {};

  idTokenClaims[`${namespace}/roles`] = assignedRoles;
  accessTokenClaims[`${namespace}/roles`] = assignedRoles;

  context.idToken = idTokenClaims;
  context.accessToken = accessTokenClaims;

  callback(null, user, context);
}- Rule to add email to the Access Token
function addEmailToAccessToken(user, context, callback) {
	const namespace = "https://changeWithyourAPIidentifier/";

	context.accessToken[namespace + "email"] = user.email;

	return callback(null, user, context);
}- (Optional but recommended) Rule to force email verification
function emailVerified(user, context, callback) {
	if (!user.email_verified) {
		return callback(
			new UnauthorizedError("Please verify your email before logging in.")
		);
	} else {
		return callback(null, user, context);
	}
}
That was a lot but now your role based access control system should be all set and working!
If you need to see more examples of auth0 and react you can check this, this and this resource.
-
Role based access control in the frontend (see
client/src/App.js) is implemented the naive way. There is a better architecture pattern more suited for scaling and larger apps. -
Various scripts are provided in the package file, but many are helpers for other scripts; here are the most needed ones:
dev: starts the frontend and backend in dev mode, with file watching (note that the backend runs on port 3100, and the frontend is proxied to it).lint: runs ESLint against all the JavaScript in the project.serve: builds and starts the app in production mode locally.populatedb:local: automatically create a database on your machine and populates it with fake data for local development. Name of the created database isspring-action-cleaning, so update your.envfile'sDB_NAMEvariable to use this name. Depending on your setup it might prompt you to enter your database password.test: runs unit tests.
-
CSP (content security policy) is turned off by default.
helmet({
	contentSecurityPolicy: false,
});- Andrea Nagel - Product Manager
- Sonjide Hussain - Product Manager (Trainee)
- Harriet Horobin-Worley - Technical Assistant
- Gennady Tabala - Developer
- Hadiyah Lawal - Developer
- Gintaras Stankus - Developer

- Full stack ES8+ with Babel
- Node LTS support (verified working on 10.x, 12.x and 14.x LTS releases)
- Express server
- React client with Webpack
- Linting with ESLint
- Dev mode (watch modes for client and server, proxy to avoid CORS issues)
- Production build (single deployment artifact, React loaded via CDN)
- Heroku Postgres database
- Heroku deployment
- Cloud Foundry deployment
- Docker build
While running the dev mode using npm run dev, you can attach the Node debugger to the server process via port 9229.
If you're using VS Code, a debugging configuration is provided for this.
There is also a VS Code debugging configuration for the Chrome debugger, which requires the recommended Chrome extension, for debugging the client application.
This project was started with this starter-kit.
See the guidance in the starter kit's wiki.