This is a toolkit to build a static, multi-language Guidelines for Digital Inclusion website using Markdown.
The toolkit is built upon Jekyll, a static website generator (think of it like a file-based CMS, without the complexity) using a fork of the Jekyll Documentation Theme.
Jekyll is based on Ruby and RubyGems, which are usually installed by default on Mac. If not, you can install it via brew.
Be sure to have Xcode installed on your computer (you can install it from the app store) and also be sure to run it at least once so that it can complete installation of "Additional Components"
To install the jekyll gem itself, type:
sudo gem install jekyll bundlerTo serve/preview the site locally, open a terminal window (use Applications/Utilities/Terminal.app on a Mac), cd to the root directory of the toolkit, then type:
jekyll serveThis will make it reachable from http://localhost:4000. You can also serve the site to a mobile device for testing purposes by using:
jekyll serve --host=0.0.0.0This will make the site reachable from outside your computer: simply type the address on a browser on a device connected to the same Wi-Fi network on your computer type the above address (replace localhost with the IP address of your computer).
While the jekyll serve command is running, you can modify the site files and jekyll will continuosly rebuild the site on each file change, so you can simply reload a page in the browser to see the changes.
To build the site to ./_site directory, type
jekyll buildOnce built, you can upload the contents of the ./_site directory to the production server using (S)FTP.
Each page is built starting from a markdown file in the /contents directory. The tree structure of the folder is fixed and based upon the following structure:
- contents/
   - en/
      - pages/
         - section1/
            - page1.md
            - page2.md
         - section2/
            - page1.md
            - page2.md
   - it/
      - pages/
         - section1/
            - page1.md
            - page2.md
         - section2/
            - page1.md
            - page2.md
Thus, in the contents directory you can find a folder for each language/localization, each containing a pages folder containing your pages. You can actually use whatever folder structure inside the pages directory, but our advice is to use a subfolder for each section and use the same file names for each page localization, as you can see in the example tree above.
All images must be placed inside the /images directory. When building the website, Jekyll will copy all images in the /images folder of the website, without recompressing them, so be sure to:
- Use only PNG and JPG images
- Check the file size
- Use unique names for the images
Each page content is built from a markdown (.md) file. Markdown is a lightweight markup language with plain text formatting syntax that you can modify using whatever text editor (e.g. Sublime Text or Visual Studio Code).
The markdown syntax is really easy to use and understand. The following is an example that will help you quick start with the syntax. For a complete guide, please refer to this page:
# This is a section title
## This is a subsection title
This is normal paragraph text, also containing some _italic_ and **bold** text.
Here's how to create an unordered list:
- item 1
- item 2
- item 3
Here's how to create an ordered list:
1. Item 1
2. Item 2
3. Item 3
Here is an external link to the [Conversa](http://www.conversa.it) website and an internal link to [another page](en-introduction-00-home.html)
Here's how to add an image

You can also take a look to the already existing pages inside the contents directory to see how they are built.
The frontmatter is an additional section included in each page markdown file, containing the page metadata. This section is really important, since it allows to define the name of the page file in the built website, its title, but also its layout. There are two bundled layouts, basic and advanced, each one with its own, specific frontmatter.
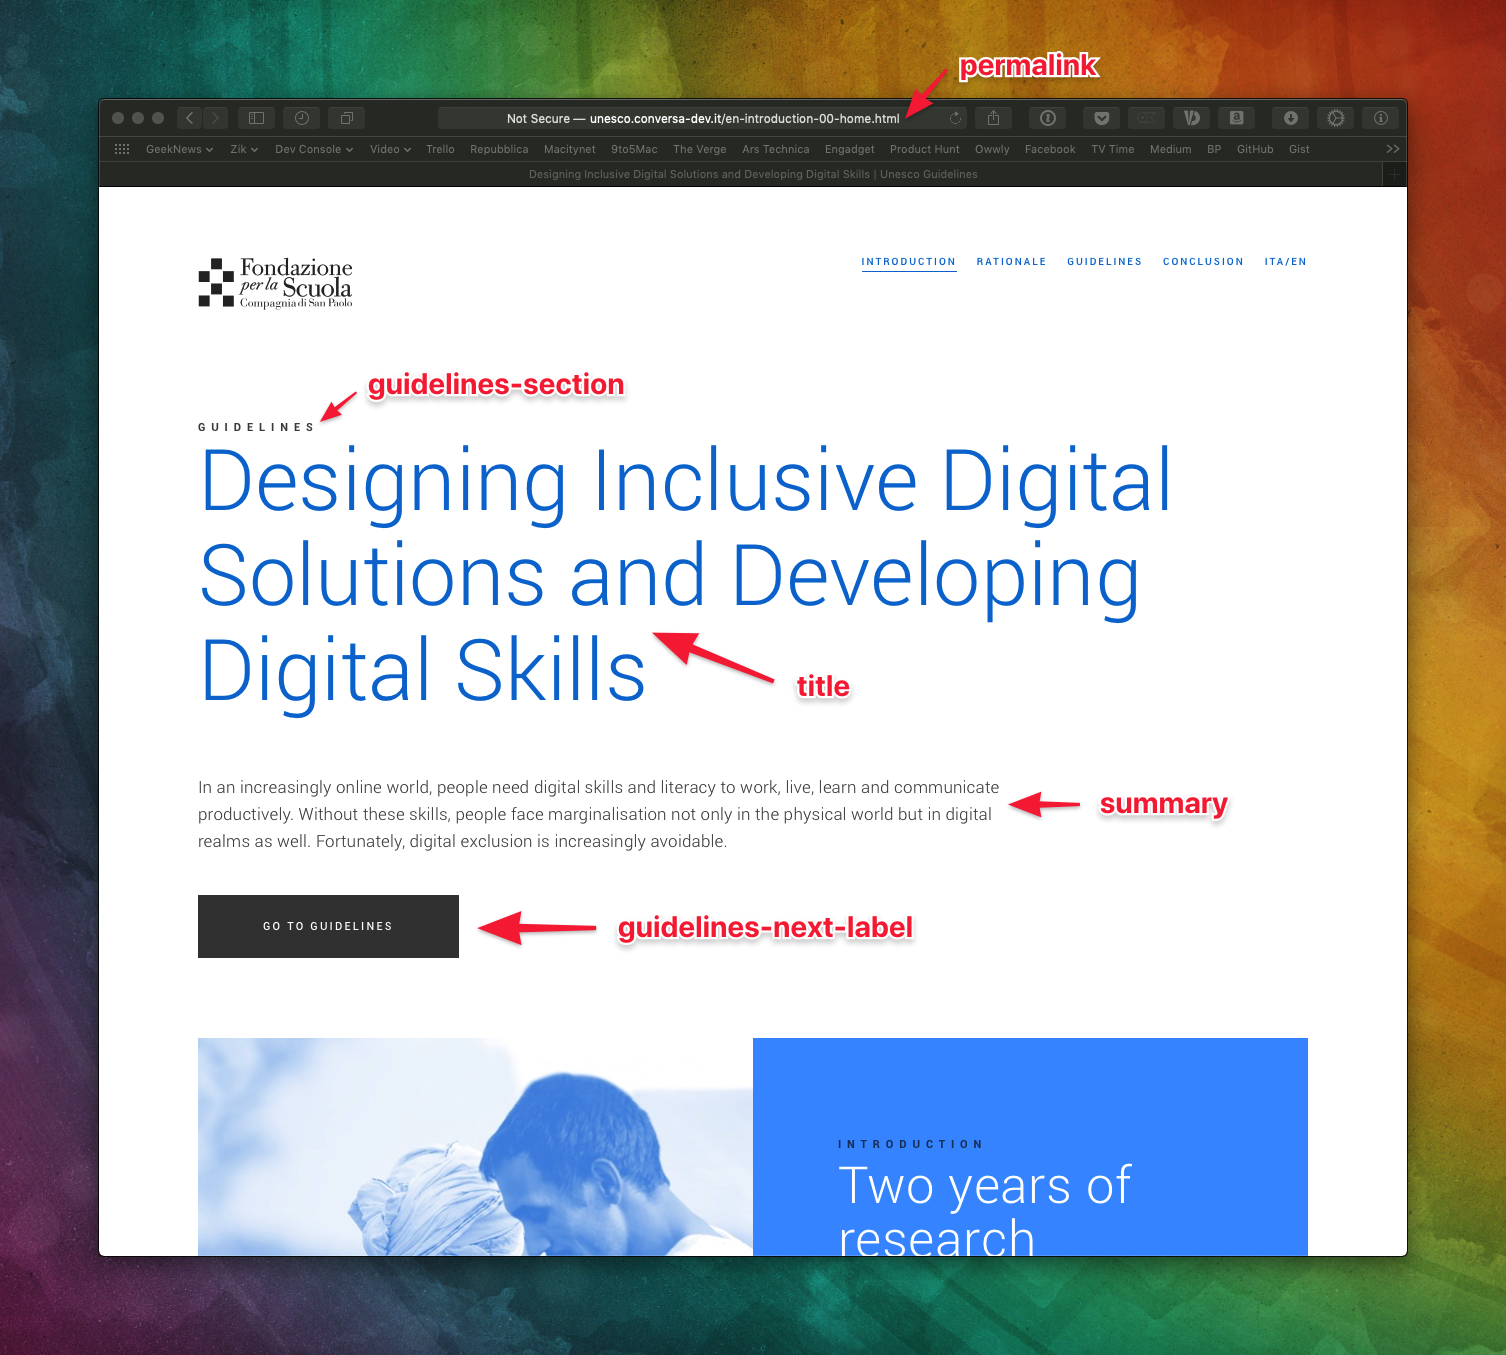
The basic layout defines a page with one-column layout, without any heading image. This setup is used for sections introduction and homepages. The frontmatter is defined as follows:
---
permalink: en-introduction-00-home.html
guidelines-section: "guidelines"
title: Designing Inclusive Digital Solutions and Developing Digital Skills
summary: "In an increasingly online world, people need digital skills and literacy to work, live, learn and communicate productively. Without these skills, people face marginalisation not only in the physical world but in digital realms as well. Fortunately, digital exclusion is increasingly avoidable."
guidelines-next-label: "Go to Guidelines"
guidelines-next-link: en-guidelines-00-home.html
---
The following is a description of the basic metadata for the frontmatter:
permalink: the name of the page file. This is very important since it will define the actual URL of the page, so be sure to always use unique names, otherwise one page will overwrite another.guidelines-section: defines the text that will appear above the page title in the page headertitle: the title of the page, will appear both in the page header and in the browser windowsummary: a summary of the topic of the page, will appear in the page header, just below the page titleguidelines-next-labelandguidelines-next-link: these are optionals. If specified, it define text and link of a button that will be placed right below the summary, in the page header
And here's an example of the resulting page layout:
The advanced layout defines a page with two-column layout, with a heading image and an optional next step widget eventually to jump to the next step in the guideline. This setup is used for internal guidelines steps.
The frontmatter is defined as follows:
---
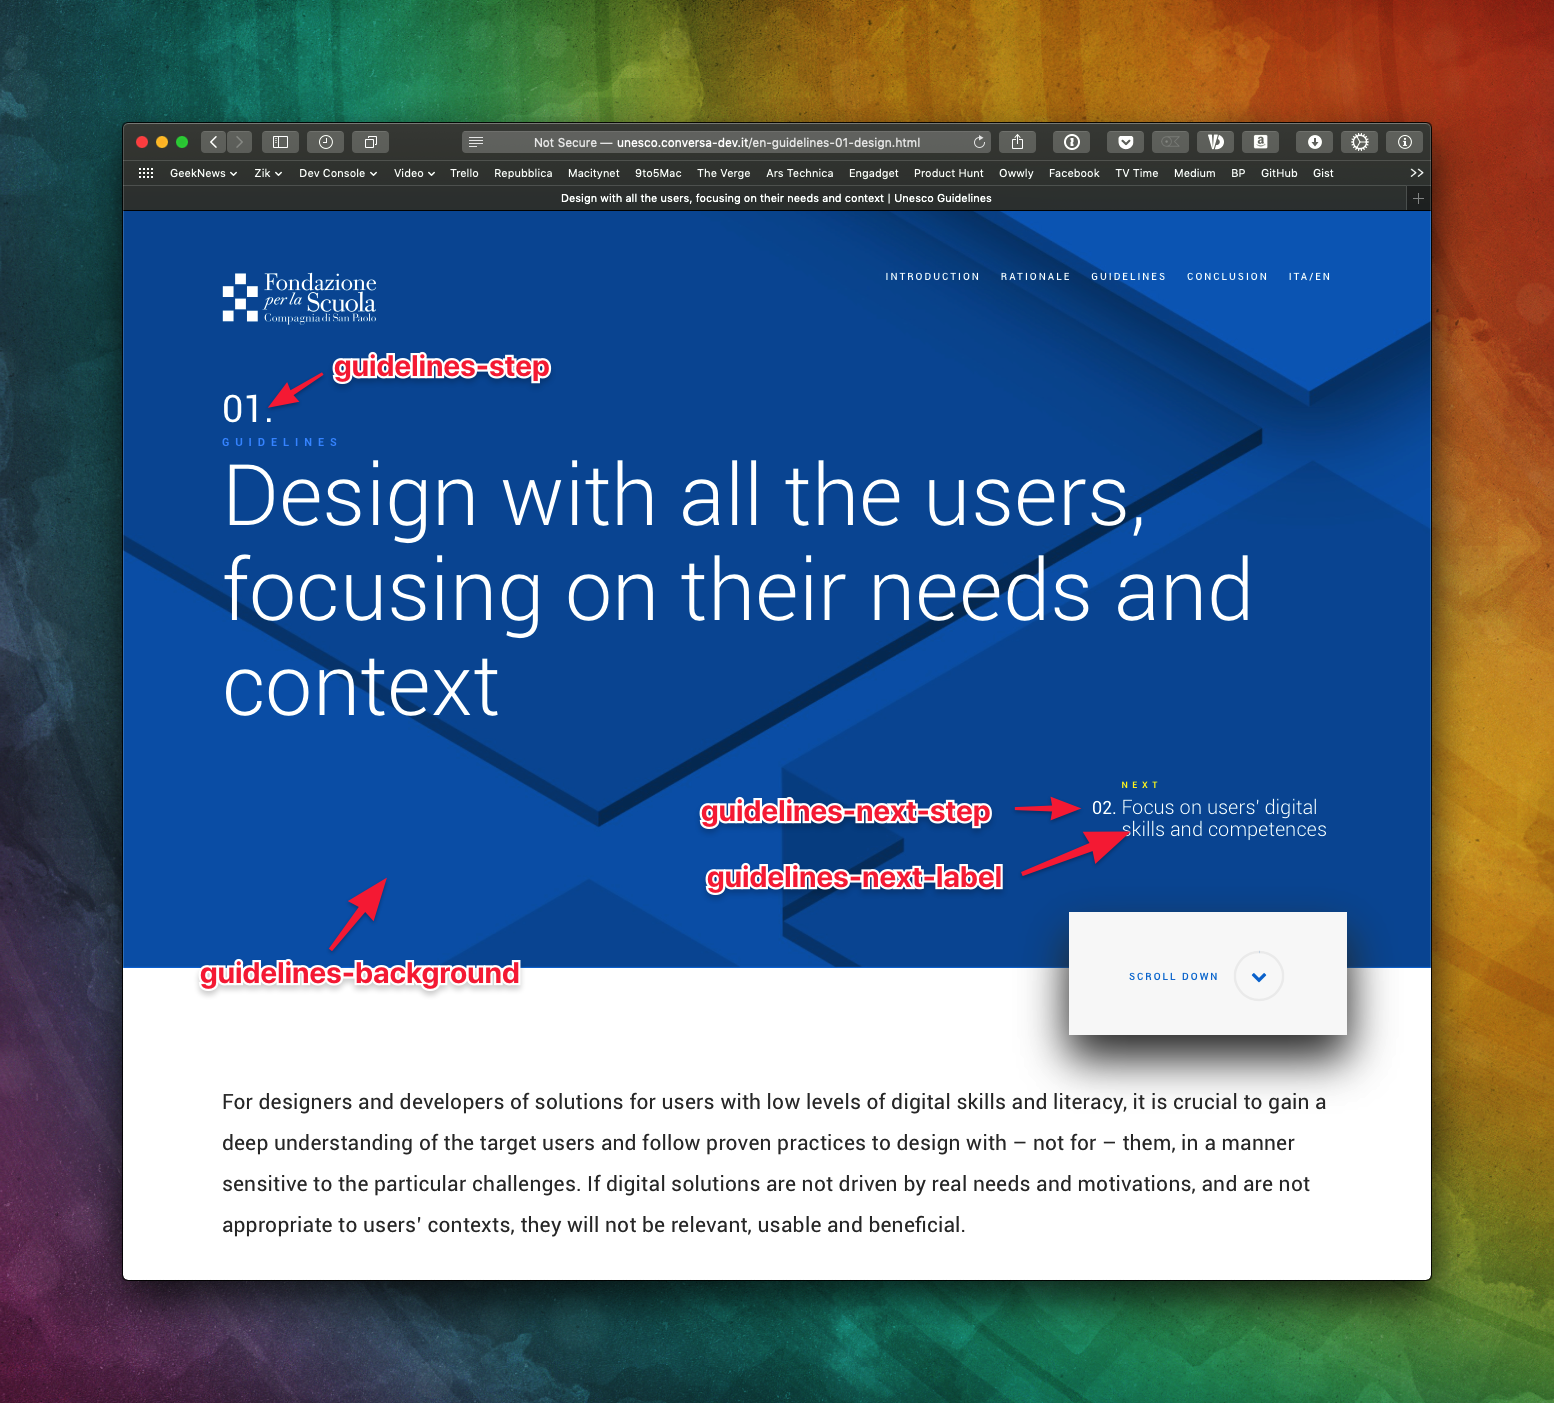
permalink: en-guidelines-01-design.html
guidelines-section: "guidelines"
guidelines-background: "background-blue@2x.jpg"
title: Design with all the users, focusing on their needs and context
summary: "For designers and developers of solutions for users with low levels of digital skills and literacy, it is crucial to gain a deep understanding of the target users and follow proven practices to design with – not for – them, in a manner sensitive to the particular challenges. If digital solutions are not driven by real needs and motivations, and are not appropriate to users’ contexts, they will not be relevant, usable and beneficial."
guidelines-step: "01"
guidelines-next-step: "02"
guidelines-next-label: "Focus on users' digital skills and competences"
guidelines-next-link: en-guidelines-02-focus.html
---
As you can see, most of the metadata are the same ones of the basic layout, plus some additions:
guidelines-background: the image to be used as heading background image. The presence of this metadata actually tells the toolkit to use the advanced layoutguidelines-step: a number that defines the current step of the guideline, will be displayed above the page titleguidelines-next-step,guidelines-next-labelandguidelines-next-link: define the next step header widget content and link
Here's an example of the resulting page layout:
The toolkit also offers some widgets that allow to easily add more structured contents to a page, such as graphically emphasized links to sections or resources and use cases slideshows.
These can be added to the content directly in the markdown files, using the code described for each one in the following sections.
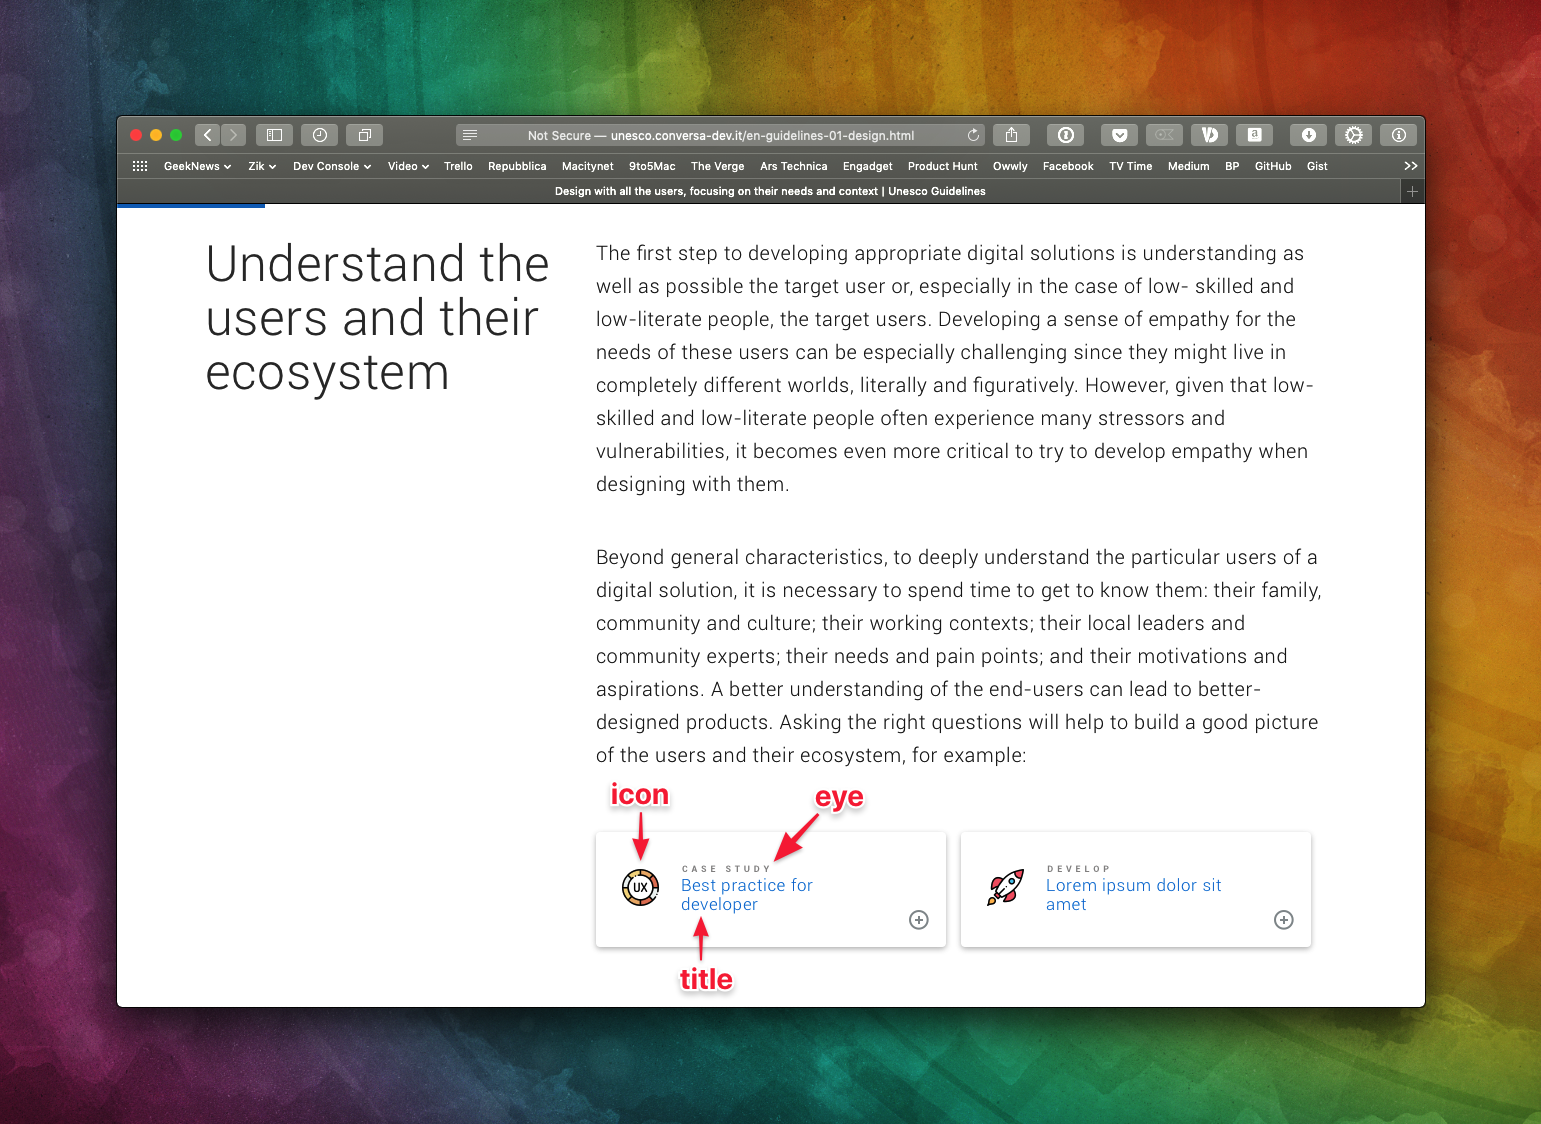
The resource box is a graphic box that allows to jump to internal or external resources linked to the content:
The code to create a resource box is really simple and should be self-explaining:
{% include resourcebox.html
link="en-guidelines-02-focus.html"
icon="icon-ux.png"
eye="Case Study"
title="Best practice for developer"
%}The link box is a block that allows to jump to another page or section inside the website. It is more prominent and complex compared to the resource box, allowing more content to be placed in and offering more customizations options.
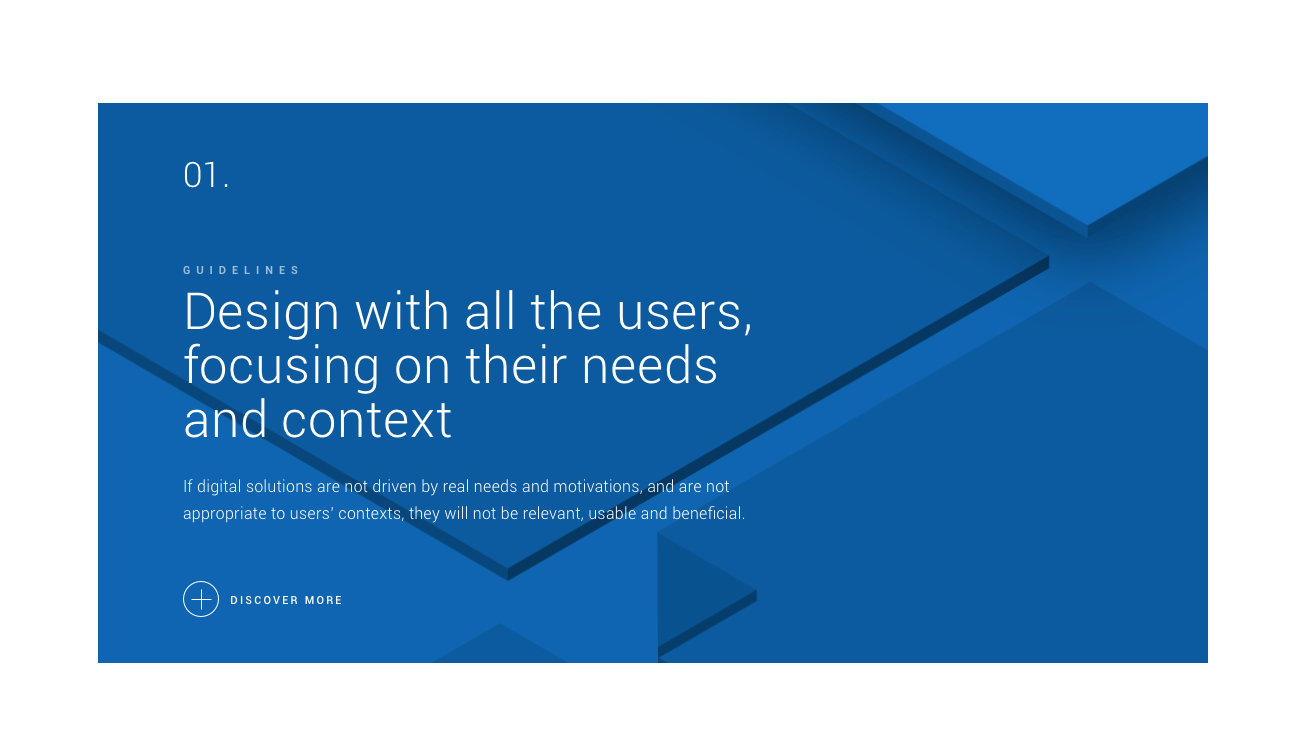
Here's how a base link box appea on the page:
And here's the code to obtain the above link box:
{% include linkbox.html
link="en-guidelines-01-design.html"
step="01"
eye="Guidelines"
title="Design with all the users, focusing on their needs and context"
subtitle="If digital solutions are not driven by real needs and motivations, and are not appropriate to users’ contexts, they will not be relevant, usable and beneficial."
background-image="background-blue@2x.jpg"
%}
A description of the various parameters follows. Notice that most of them are optionals and can be simply skipped if the corresponding functionality is not neeeded:
link: internal page name or external address to link tostep: optional step number, displayed on top of the blockeye: optional eyelet, displayed above the titletitle: title for the link boxsubtitle: optional subtitle, displayed below the titlebackground-image: optional image to be used as backgroundbackground-color: optional background color. Predefined values areblueandpinkbut any valid CSS color can be used eventually
The discover more button displayed below is automatically localized.
There's also an alternative appearence using an arrow instead of the plus button:
To use it, just add the parameter button-type="arrow" to the definition, for example:
{% include linkbox.html
link="en-guidelines-02-focus.html"
step="02"
eye="Next"
title="Focus on users’ digital skills and competences"
background-image="background-yellow@2x.jpg"
button-type="arrow"
%}
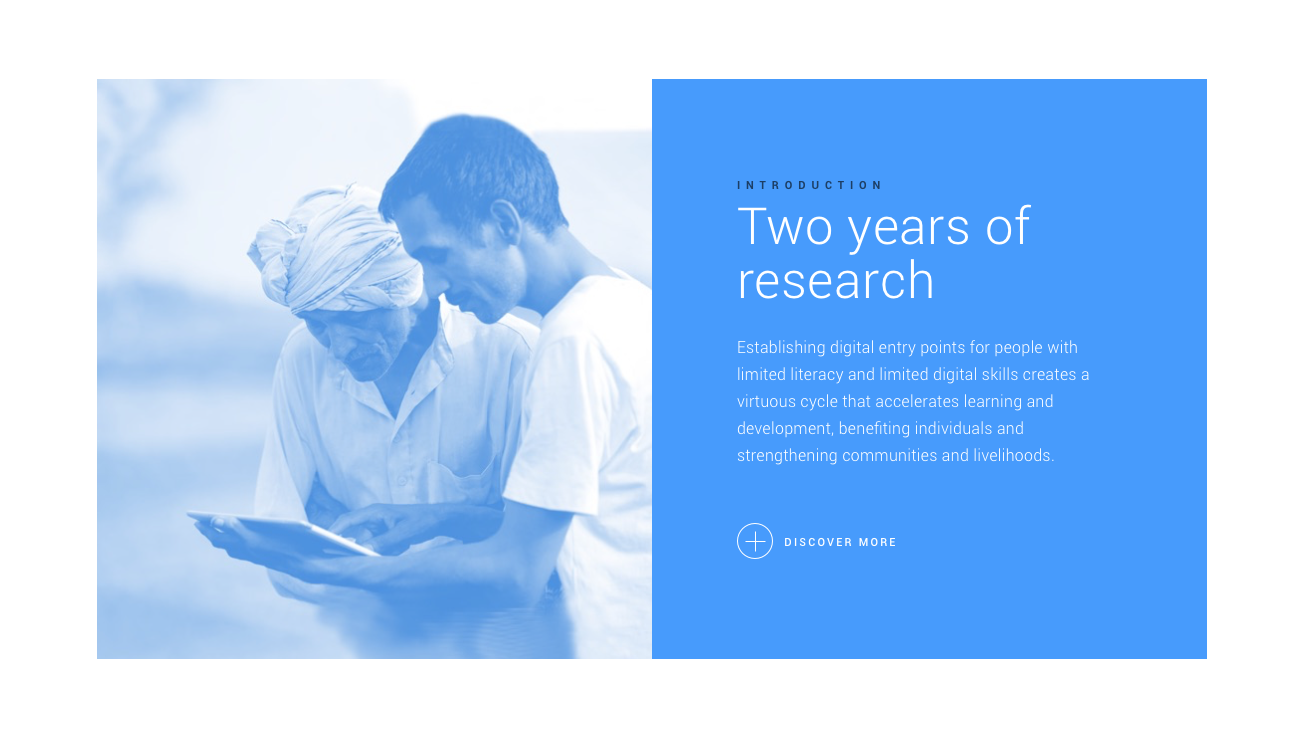
Yet another variant of the link box allows to add a photo to the box, which will be presented on the left (desktop) or on top (mobile) of the box:
To use it, just add the parameter image to the definition, with the file name of the image you want to use, for example:
{% include linkbox.html
link="en-guidelines-01-design.html"
background-color="blue"
image="people1.jpg"
eye="Introduction"
title="Two years of research"
subtitle="Establishing digital entry points for people with limited literacy and limited digital skills creates a virtuous cycle that accelerates learning and development, benefiting individuals and strengthening communities and livelihoods."
%}
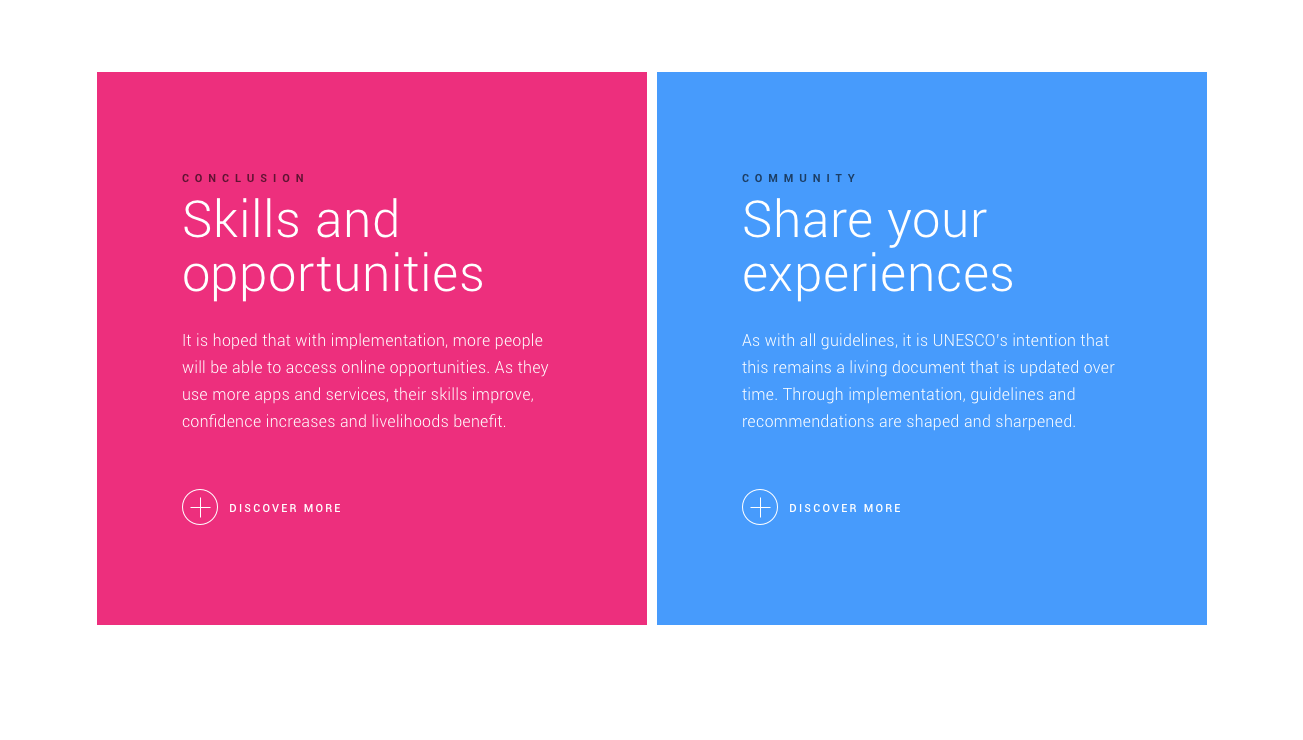
Finally, you can use parameters inline=1 and inline=2 if you want two link boxes to be displayed side by side.
Note that this configuration works only on pages using basic layout and is not compatible with the image parameter described just above.
{% include linkbox.html
link="en-guidelines-01-design.html"
background-color="pink"
eye="Conclusion"
title="Skills and opportunities"
subtitle="It is hoped that with implementation, more people will be able to access online opportunities. As they use more apps and services, their skills improve, confidence increases and livelihoods benefit."
inline=1
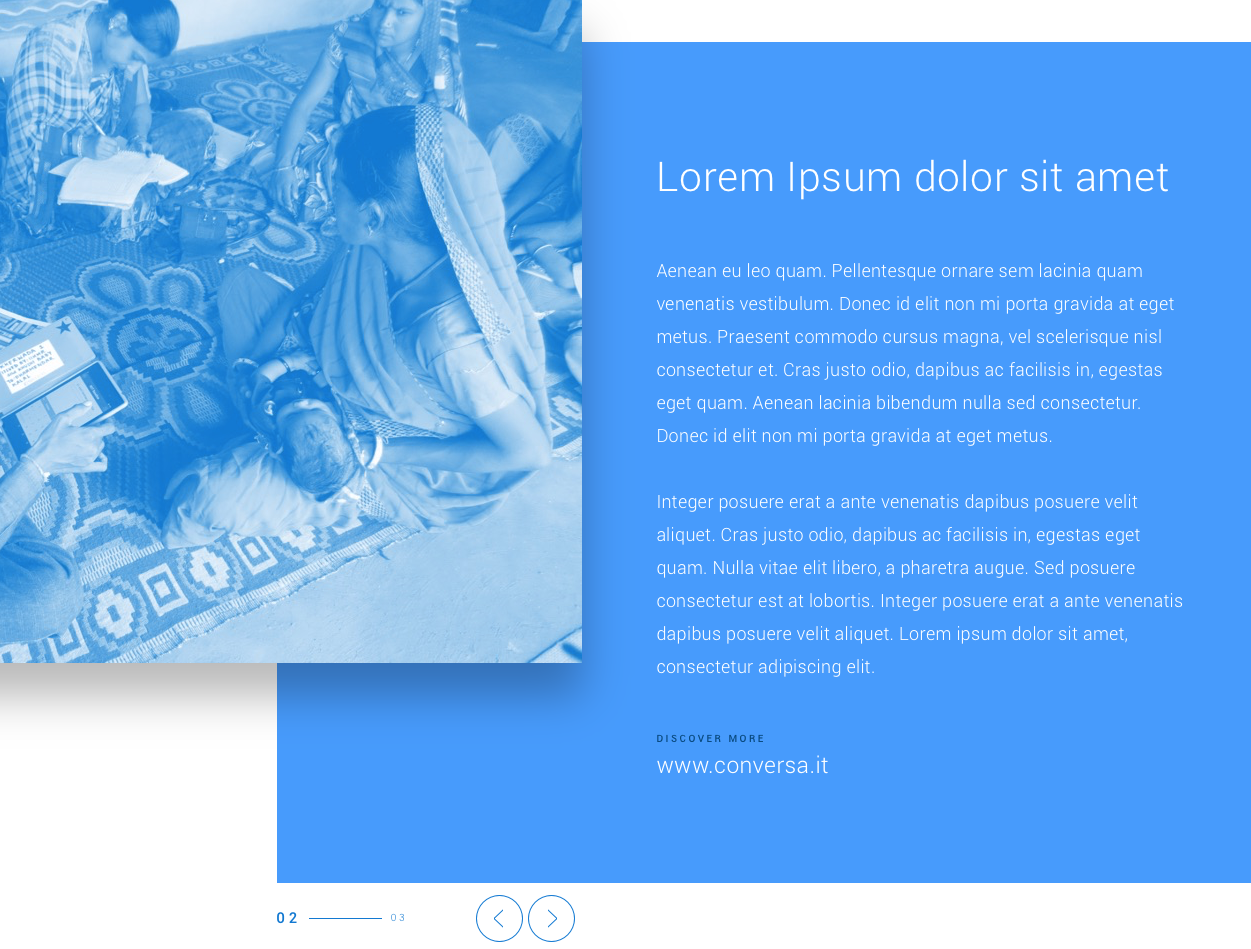
%}The use cases slideshow allows to add a paginated and animated slideshow of use cases on the page. Each slideshow must have a unique id (containing only alphanumeric characters and underscore _) and one slide for each use case.
Each slide has the following mandatory parameters (where <N> is the actual number of the slide):
slide<N>_title: the title of the use caseslide<N>_text: the text of the use caseslide<N>_link: the page file name or external link for the use caseslide<N>_image: the file name of an image related to the use case
Here's an example of a slideshow with three use cases:
{% include case_studies_slideshow.html
id="usecase_slideshow2"
background-color="blue"

slide1_title="title 1"
slide1_text="text 1"
slide1_link="http://bit.Ly/khushibabydesign"
slide1_image="people1.jpg"

slide2_title="title 2"
slide2_text="text 2"
slide2_link="http://bit.Ly/khushibabydesign"
slide2_image="people2.jpg"

slide2_title="title 3"
slide2_text="text 3"
slide2_link="http://bit.Ly/khushibabydesign"
slide2_image="people3.jpg"

%}
And here's how it looks on the page:
