This ROS 2 package leverages third-party dependencies, which are managed via a thirdparty.repos file. Additionally, a Python virtual environment named py_deps is required for managing Python dependencies and allowing access to system packages.
Follow these steps to configure and build this package:
Ensure that the third-party dependencies are cloned into the thirdparty directory. Use the thirdparty.repos file to handle this:
mkdir -p my_workspace/src
cd my_workspace/src
git clone https://github.com/CoreSenseEU/cs4home_examples
vcs import < thirdparty.reposA virtual environment named py_deps is required. This environment will include system packages as well as specific third-party dependencies.
-
Create the virtual environment with access to system packages:
python3 -m venv --system-site-packages py_deps
-
Activate the virtual environment:
source py_deps/bin/activate -
Install the required packages in py_deps:
 pip install -r thirdparty/hri_face_detect/requirements.txt
 pip install -r thirdparty/yolov8_ros/requirements.txt
-
Add custom PYTHONPATH to the activate script:
Edit py_deps/bin/activate to add the following line:
export PYTHONPATH="${PYTHONPATH}:/path_to_your_venv_packages"
Replace /path_to_your_venv_packages with the absolute path to your desired directory for custom Python packages.
With dependencies and environment set up, you can build your ROS 2 package:
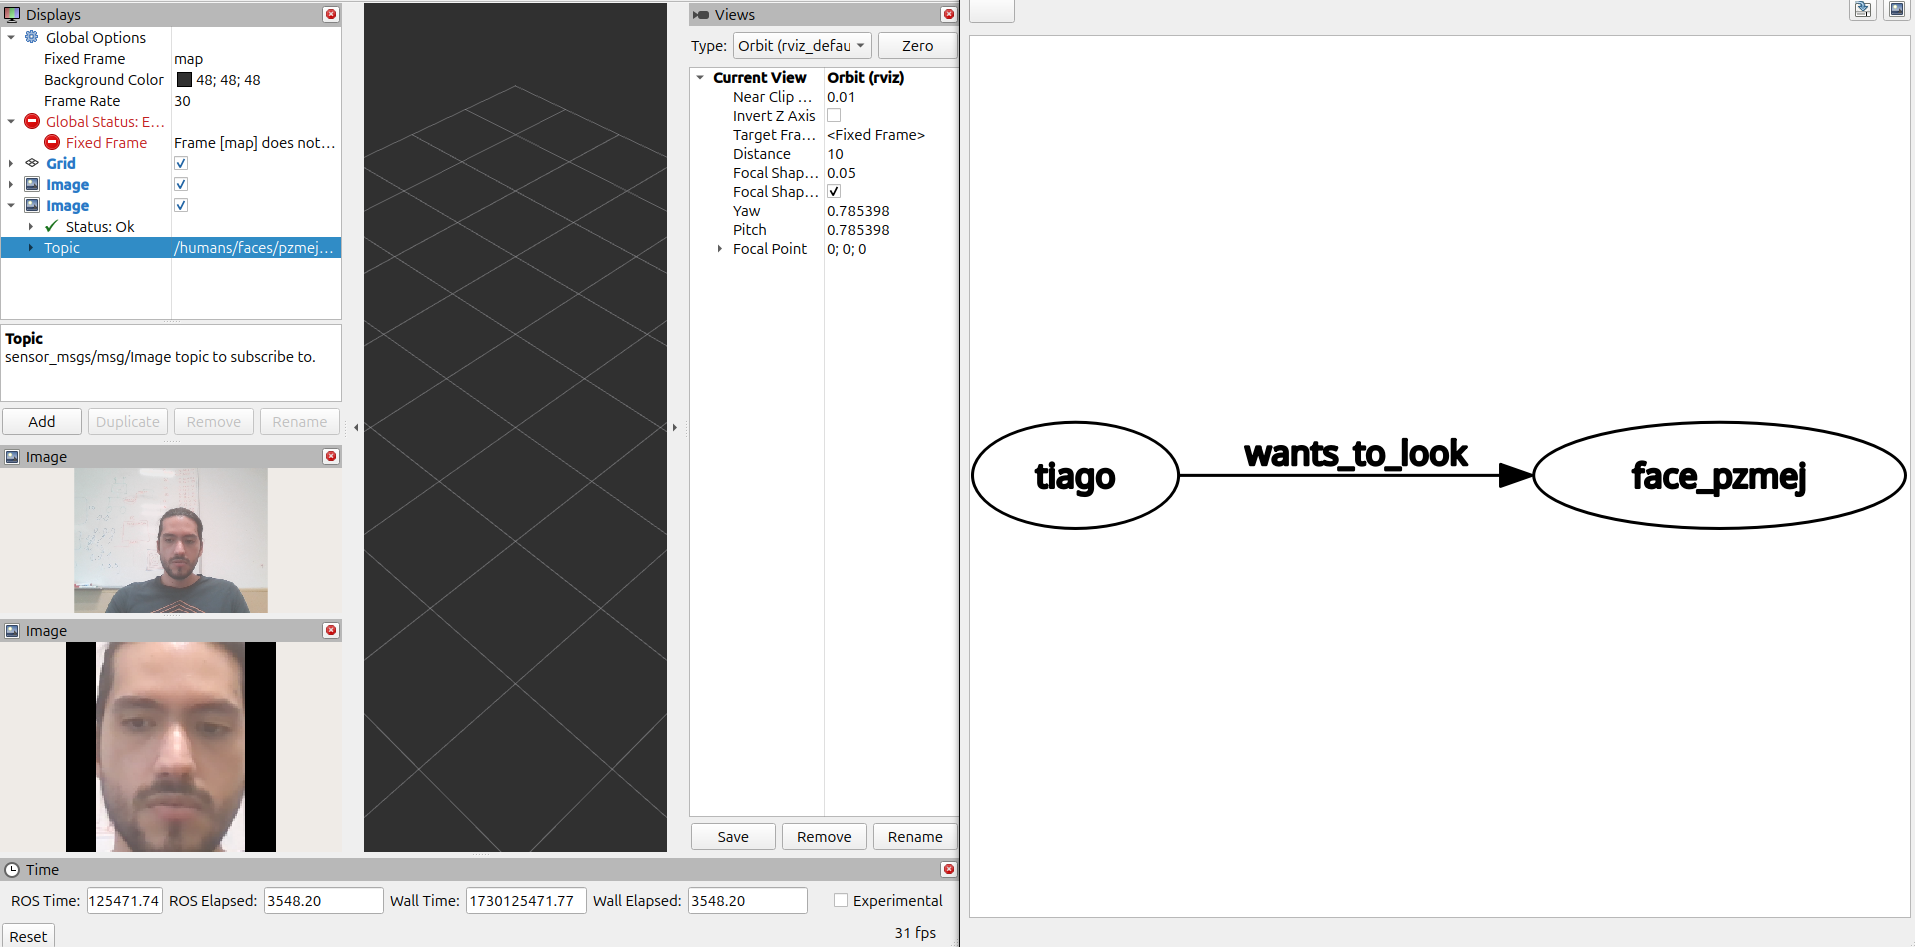
colcon build --symlink-installThe face example node is a simple implementation in which you convert a hri_msgs/msg/IdList from hri_face_detect package to a knowledge graph representation.
After building, source the environment and activate the virtual environment you can ron the example as:
source install/setup.bash
source py_deps/bin/activate
run hri_face example, then execute the node
ros2 launch coresense cs4home_simple_project face_example.launch.pyfinally if you want to visualize the output graph you can
rqt --force-discover then navigate to knowledge_graph plugin
if everything went ok you will see something like this:
