CF DDT is a tool developed to bring ManageIQ (https://github.com/ManageIQ/manageiq) / Redhat Cloudforms into a true agile, CI/CD environment. The tool helps address the common challenges and pitfalls when customizing ManageIQ/Cloudforms in an agile environment while leveraging a CI/CD strategy.
The main tools employed are ManageIQ/Cloudforms, RubyMine, Git (Bitbucket), Ansible and custom developed helper tools to facilitate integration among these.
Checkout your git repo
$ git clone https://user@github.com/this-does-not-exist.git
Initiate Project on ManageIQ appliance
$ cf_ddt config_file /path/to/your/config.yml ide_project_root /path/to/your/git/this-does-not-exist hosts manageiq-ui.example.com ansible init
Export Datastore from ManageIQ and push to git
$ cf_ddt config_file /path/to/your/config.yml ide_project_root /path/to/your/git/this-does-not-exist hosts manageiq-ui.example.com ansible export_automate
Once you have a successful run, git pull from your IDE or execute git pull from the command line. You will see a folder structure like this
-- Datastore | --- CloudForms_Essentials | --- ManageIQ | --- RedHat
Add,update,delete a method, class or instance, commit and push your changes. Then, update ManageIQ/Cloudforms:
$ cf_ddt config_file /path/to/your/config.yml ide_project_root /path/to/your/git/this-does-not-exist hosts manageiq-ui.example.com ansible update_automate
Changes will be picked up and available for UI, testing, etc.
Cloudforms 3.x, 4.x Ansible Tower Ruby Bitbucket or another Git provider
Ansible Tower provides a 10 node free license sufficient for managing a Cloudforms environment.
$ vagrant init tower http://vms.ansible.com/ansible-tower-2.4.5-virtualbox.box
$ vagrant up
$ vagrant ssh
$ vi Vagrantfile
  # config.vm.network "forwarded_port", guest: 443, host: 4443
$ vagrant reload
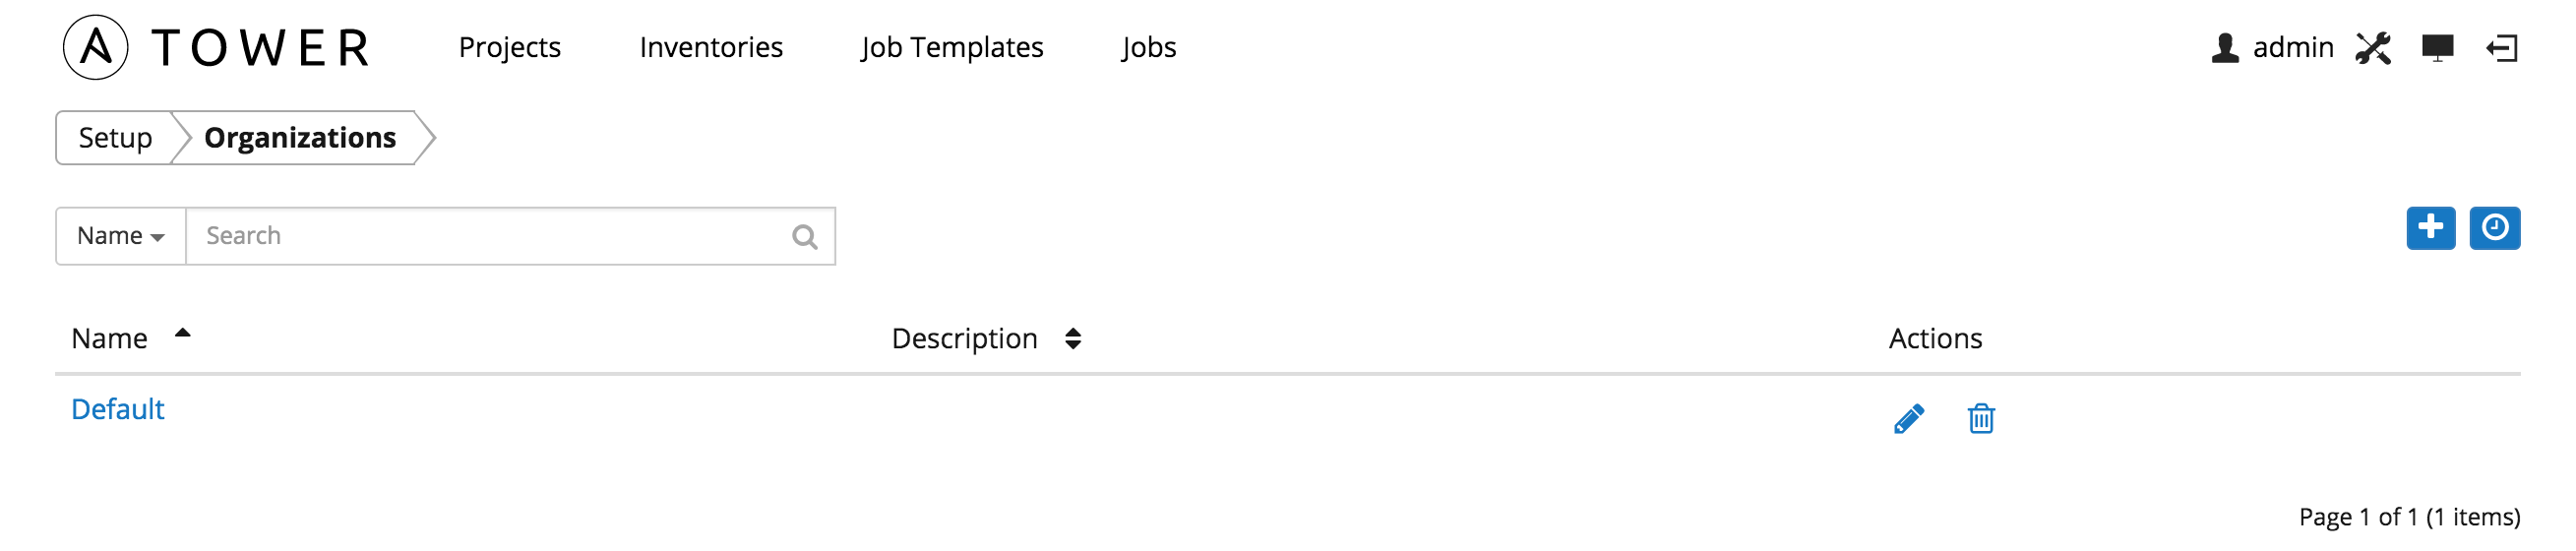
An organization is a logical collection of Users, Teams, Projects, and Inventories, and is the highest level in the Tower object hierarchy. For more information about Ansible Organizations, please see Ansible Organizations
In this setup guide we will use the "Default" default Organization.
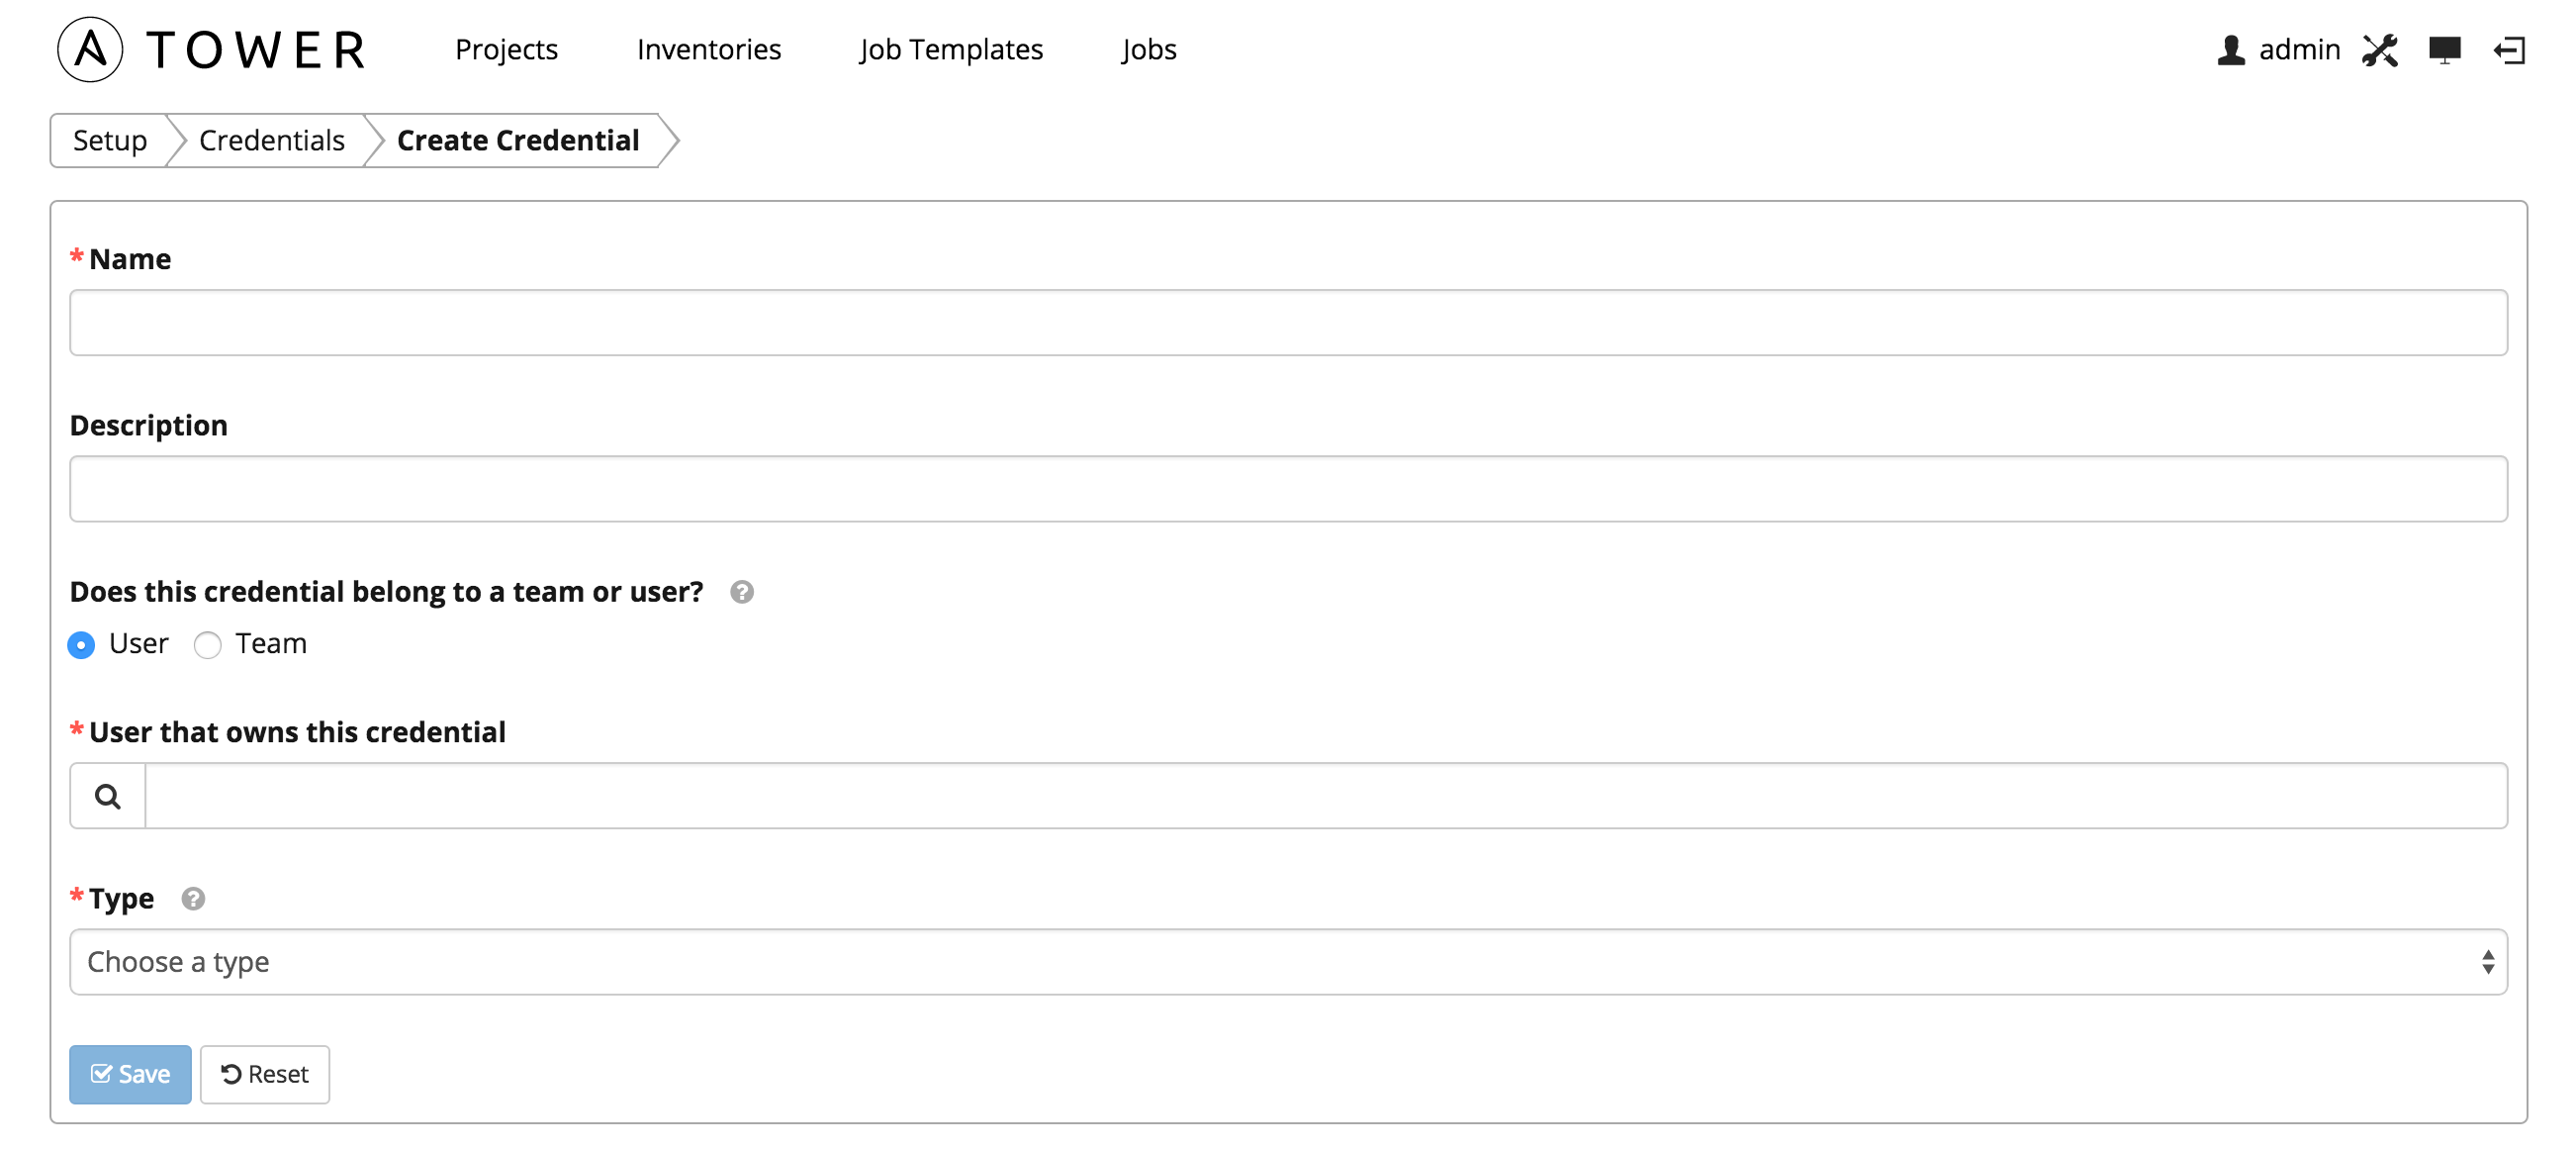
Credentials are utilized by Tower for authentication when launching jobs against machines, synchronizing with inventory sources, and importing project content from a version control system. For more information about Ansible Credentials, please see Ansible Credentials
To create new credentials for use with Cloudforms DDT, navigate to Setup -> Credentials -> Add (blue +)
This is needed to login into the Ansible Tower instance to setup the ansible environment. We will use the default "admin" user.
Used with Projects to clone and update local source code repositories from a remote revision control system such as Git, Subversion, or Mercurial. This credential is created via the Ansible Tower portal or via the Ansible Tower REST API. Ansible uses scm credentials to login to Bitbucket and checkout a repository that contains the playbooks used when running jobs.
This credential will be contain the information utilized when creating a SSH credential under Bitbucket. Please see the Bitbucket SSH Credential Setup guide. Enter the SSH user's Username, Password (optional), SCM Private Key.
The SCM Private Key is used to authenticate to Bitbucket. It should be the private SSH key associated with the public key used when creating the Bitbucket credential.
Machine credentials define ssh and user-level privilege escalation access for playbooks. They are used when submitting jobs to run playbooks on a remote host. These nodes are any ssh capable systems in the organization, in this case, the Cloudforms UI instance.
This credential will be used to login to the Cloudforms UI to execute rake tasks. Here, we will need the Username, Password (optional), Private Key, Privilege Escalation {Username, Password} (optional).
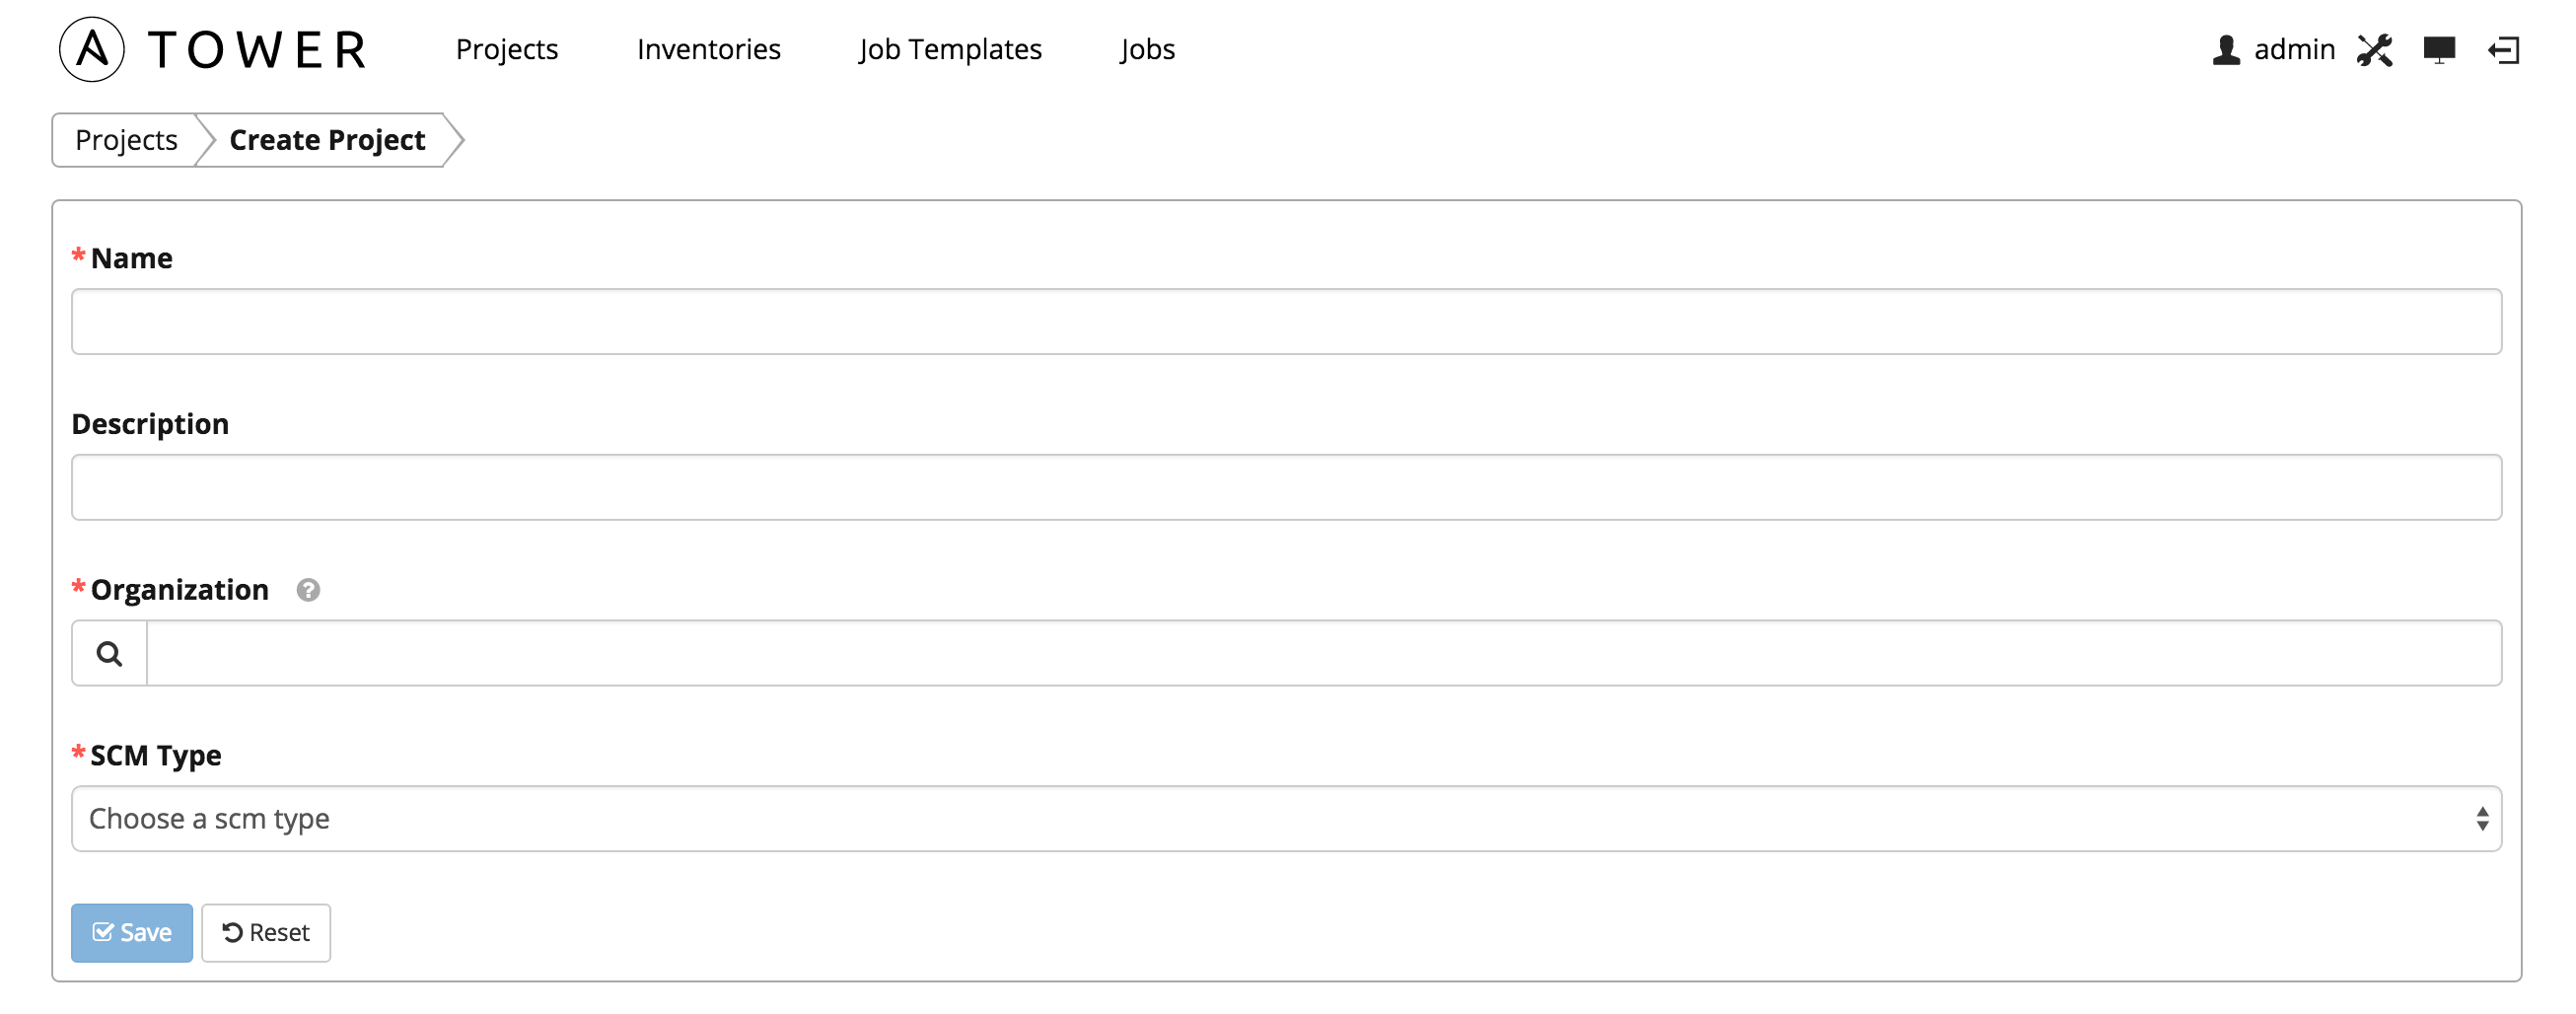
A Project is a logical collection of Ansible playbooks, represented in Tower.
You can manage playbooks and playbook directories by either placing them manually under the Project Base Path on your Tower server, or by placing your playbooks into a source code management (SCM) system supported by Tower, including Git, Subversion, and Mercurial. For more information about Ansible Projects, please see Ansible Projects To create a new project, click the button, which launches the Create Project dialog. Enter in the Name, Organization and SCM Type (Git).
Playbooks are Ansible’s configuration, deployment, and orchestration language. They can describe a policy you want your remote systems to enforce, or a set of steps in a general IT process. For more information on Ansible Playbooks, please see Ansible Playbooks
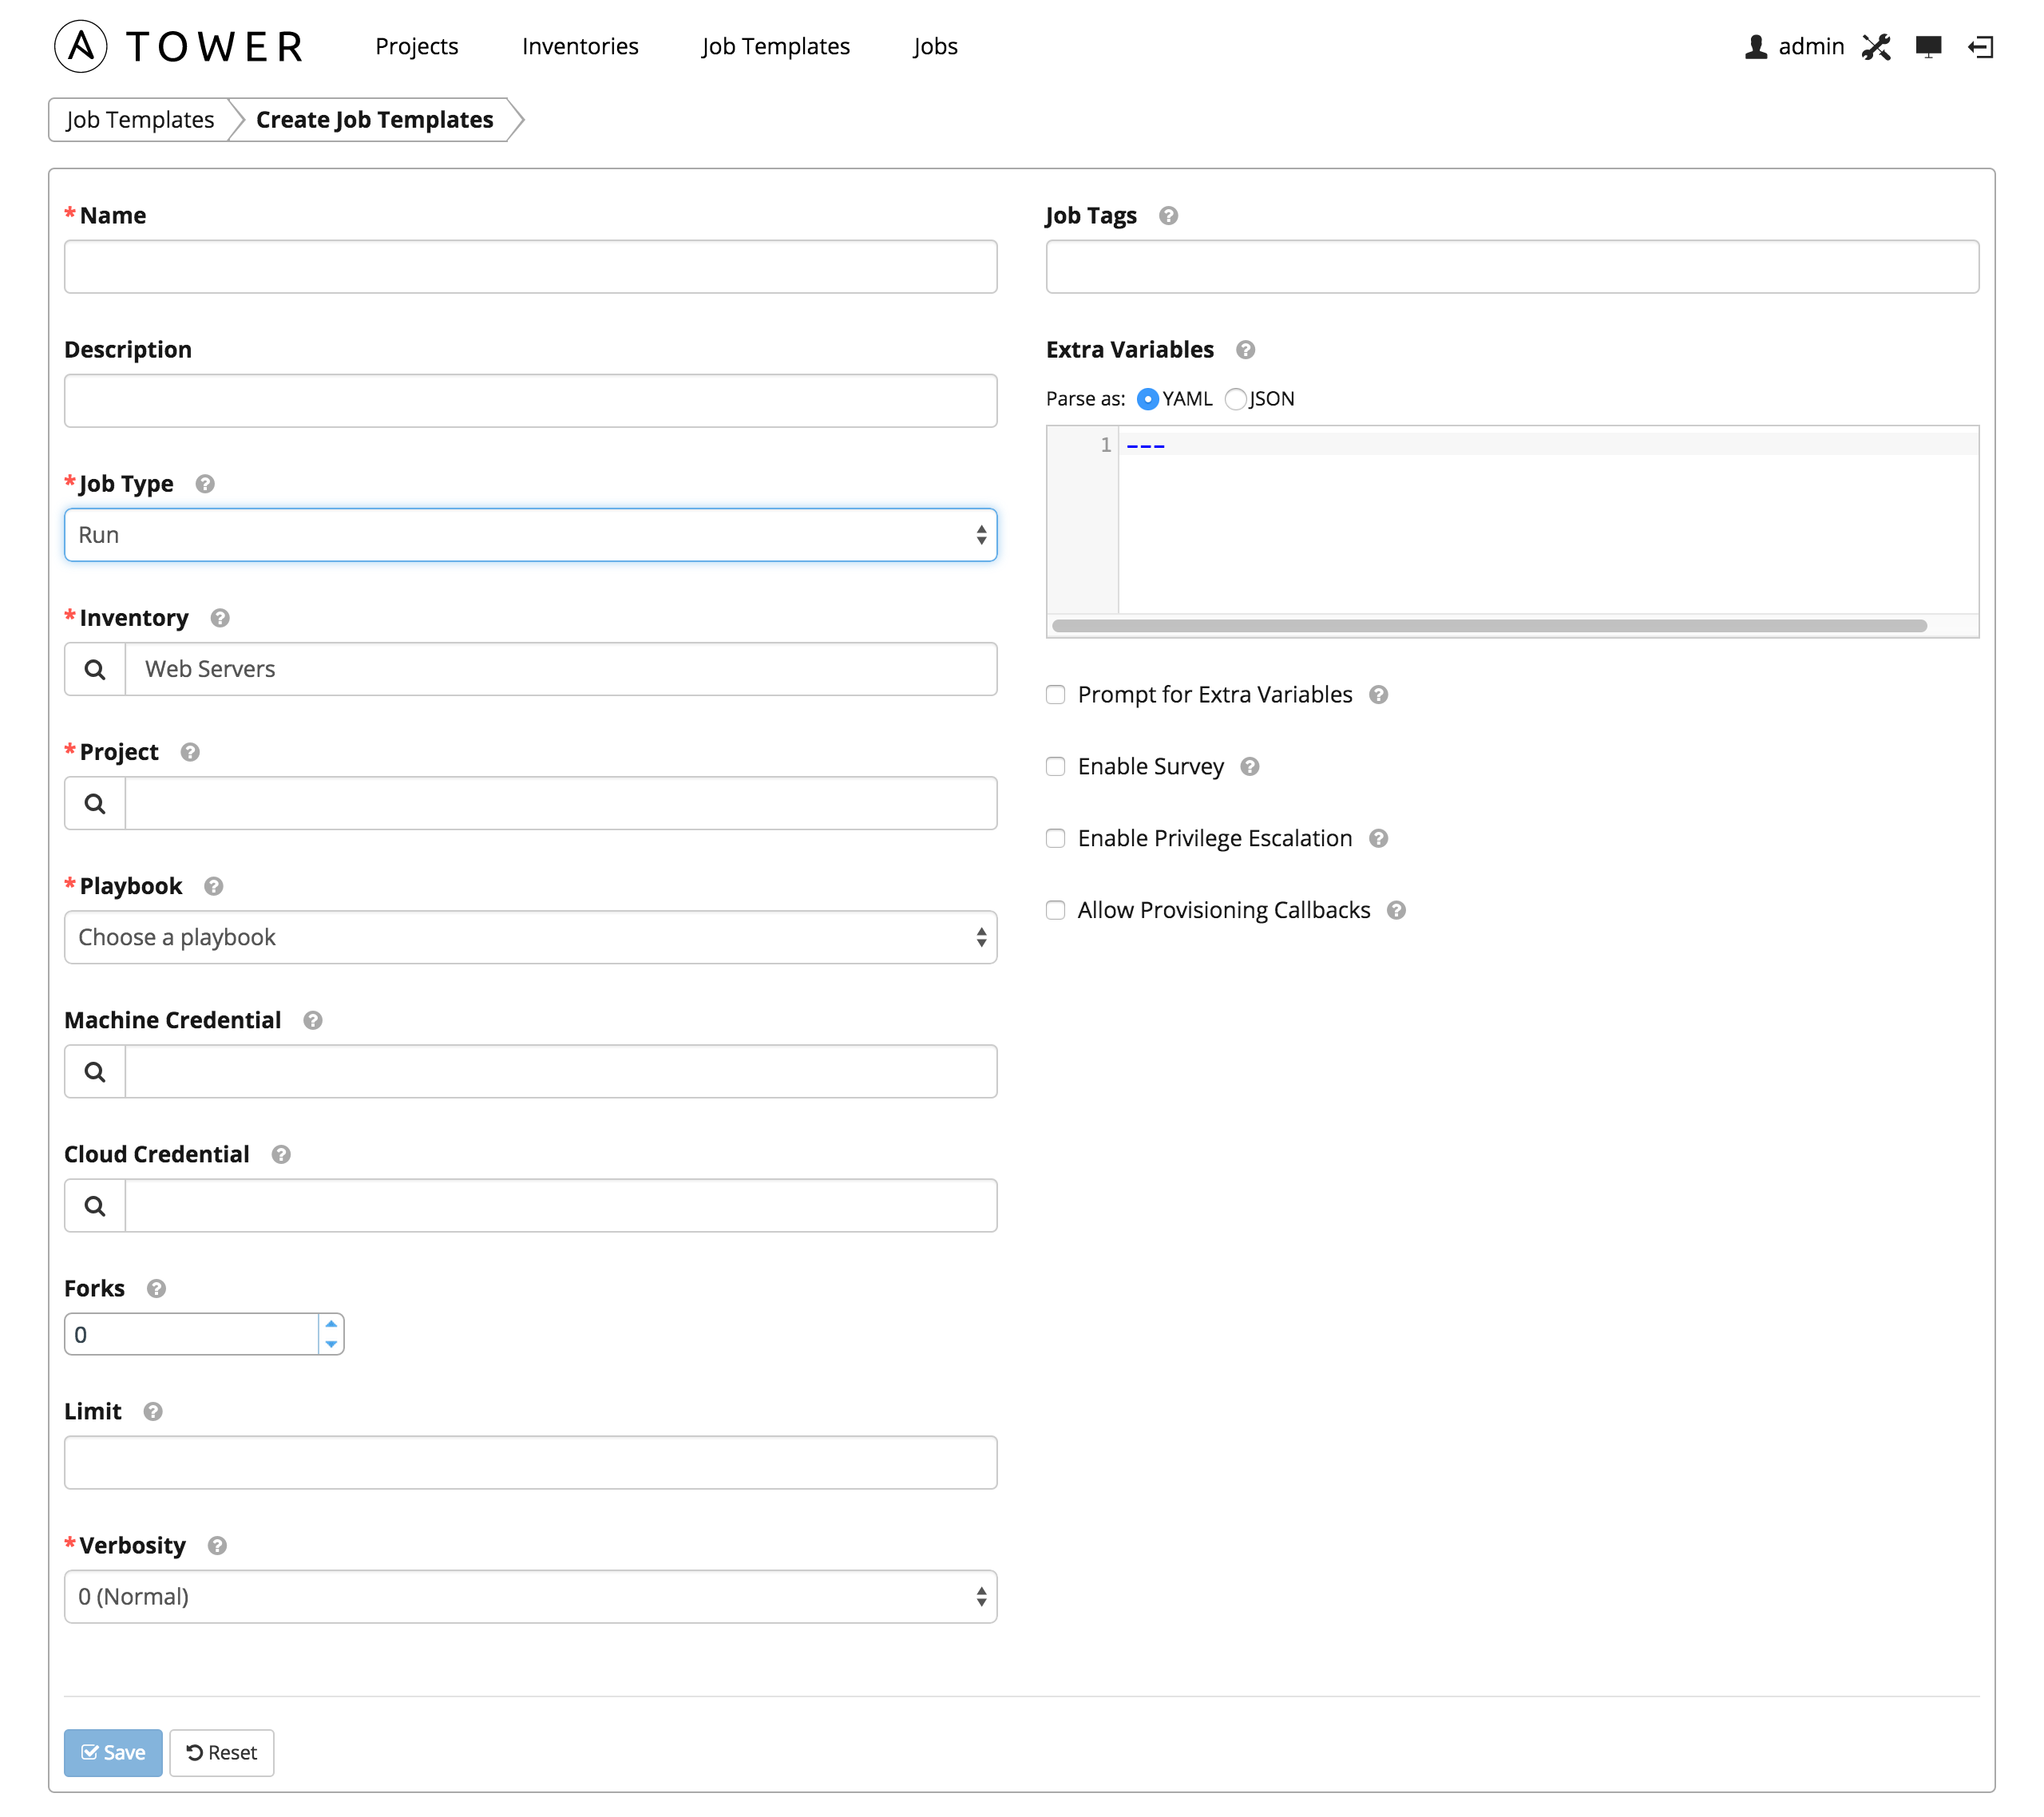
A job template is a definition and set of parameters for running an Ansible job. Job templates are useful to execute the same job many times. While the REST API allows executing jobs directly, Tower requires first creating a job template. For more information about Ansible Job Templates, please see Ansible Job Templates
Cloudforms DDT utilizes Job Templates to determine the Cloudforms appliance (Inventory) where the job will execute along with the tasks (Playbook) to execute.
To create a new job template click the button.
An inventory is a collection of hosts against which jobs may be launched. Inventories are divided into groups and these groups contain the actual hosts. Groups may be sourced manually, by entering host names into Tower, or from one of Ansible Tower’s supported cloud providers. For more information about Ansible Inventories, please see Ansible Inventories
Ansible Jobs execute exclusively against a Ansible Inventory Host Group or Ansible Inventory Host(s). In our case, this will almost always be the Cloudforms UI we are pushing changes to.
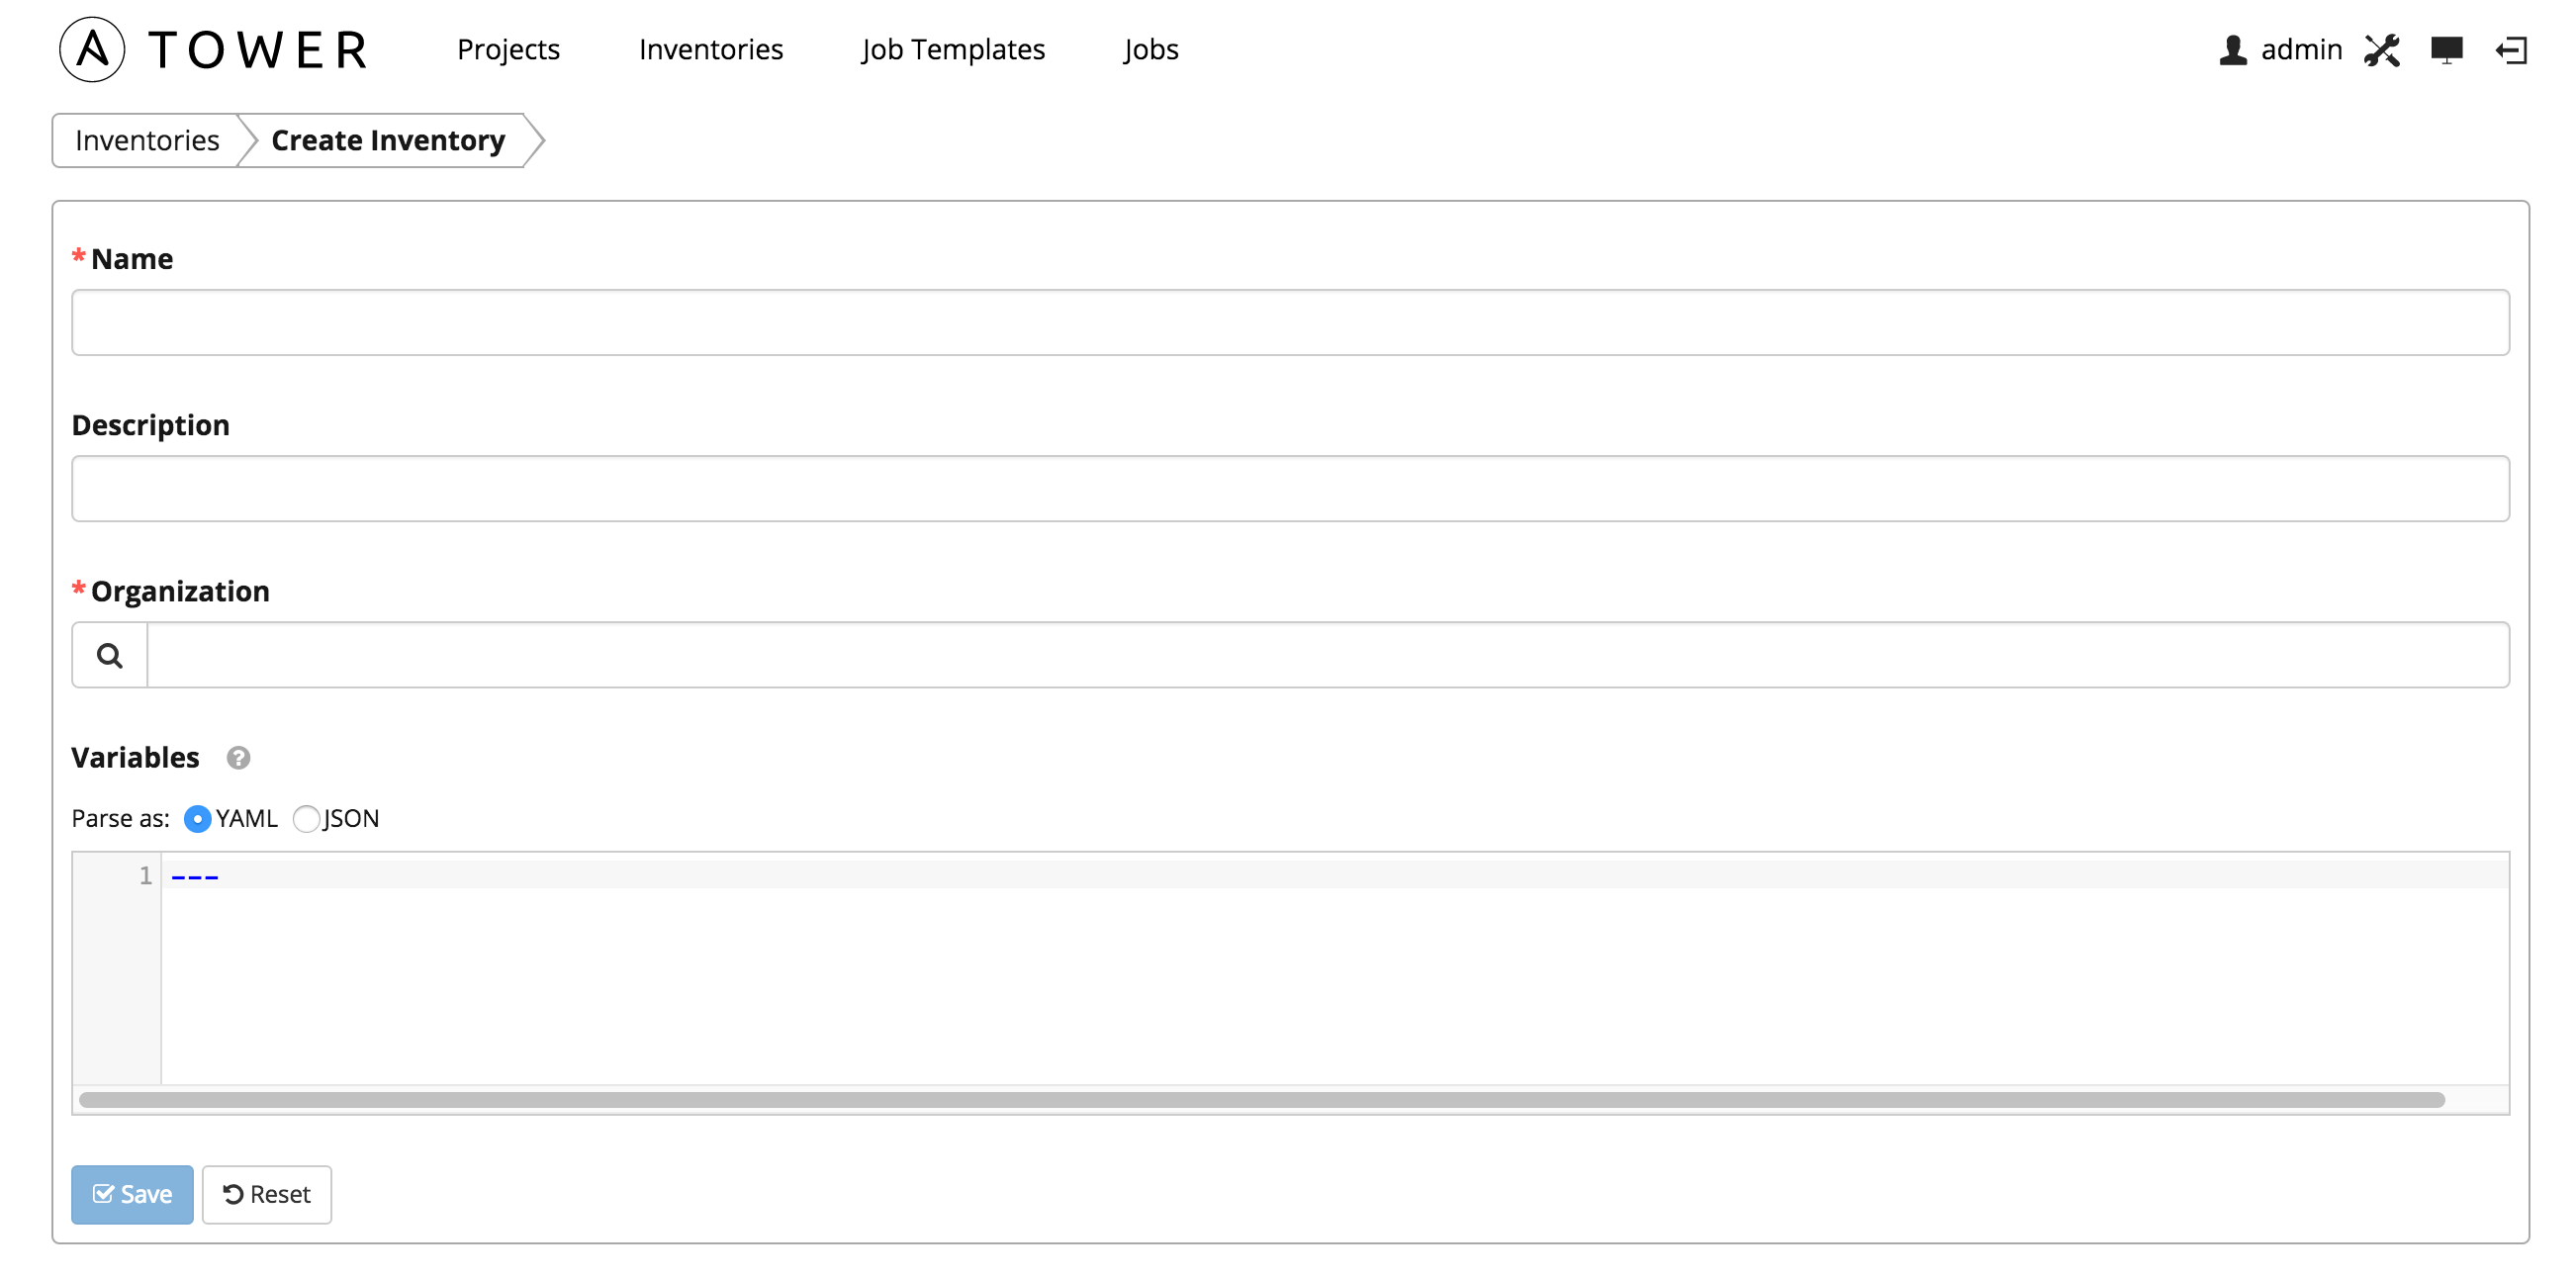
To create a new inventory click the button, which opens the Create Inventory window. Enter in the Name, Organization, Description, and Variables (optional).
A job is an instance of Tower launching an Ansible playbook against an inventory of hosts. For more information about Ansible Jobs, please see Ansible Jobs
All Jobs executed via Cloudforms DDT will be done via the APIs.
- From Bitbucket, click Repositories > Create repository button at the top of the page.
- Enter BitbucketStationLocations for the Name field.
- Bitbucket uses this Name in the URL of the repository. For example, if the user the_best has a repository called awesome_repo, the URL for that repository would be https://bitbucket.org/the_best/awesome_repo.
- For Access level, leave the This is a private repository box checked.
- For Access level, leave the This is a private repository box checked.
- A private repository is only visible to you and those you give access to. If this box is unchecked, everyone can see your repository.
- Pick **Git **for the Repository type. Keep in mind that you can't change the repository type after you click Create repository.
- Click Create repository.
- Bitbucket creates your repository and displays its Overview page.
- Open a terminal in your local system.
- Enter ssh-keygen at the command line.
- The command prompts you for a file where you want to save the key. If the .ssh directory doesn't exist, the system creates one for you.
- Press the Enter or Return key to accept the default location.
- Enter and re-enter a passphrase when prompted.
- Unless you need a key for a process such as script, you should always provide a passphrase. The command creates your default identity with its public and private keys.
- Install the public key on your Bitbucket account
- From Bitbucket Cloud, choose avatar** > Bitbucket settings** from the application menu. The system displays the Account settings page.
- Click SSH keys.
- The** SSH Keys** page displays. If you have any existing keys, those appear on this page.
- Back in your terminal window, copy the contents of your public key file.
- For example, in Linux you can cat the contents.
- Back in your browser, enter a Label for your new key, for example, Default public key.
- Paste the copied public key into the SSH** Key** field.
- Press Add key.
- The system adds the key to your account. Bitbucket sends you an email to confirm addition of the key.
There are three main consumers of the Cloudforms git repository,
- RubyMine/IDE User/Developer
- Cloudforms UI Appliance
- Ansible Tower for playbook(s) store