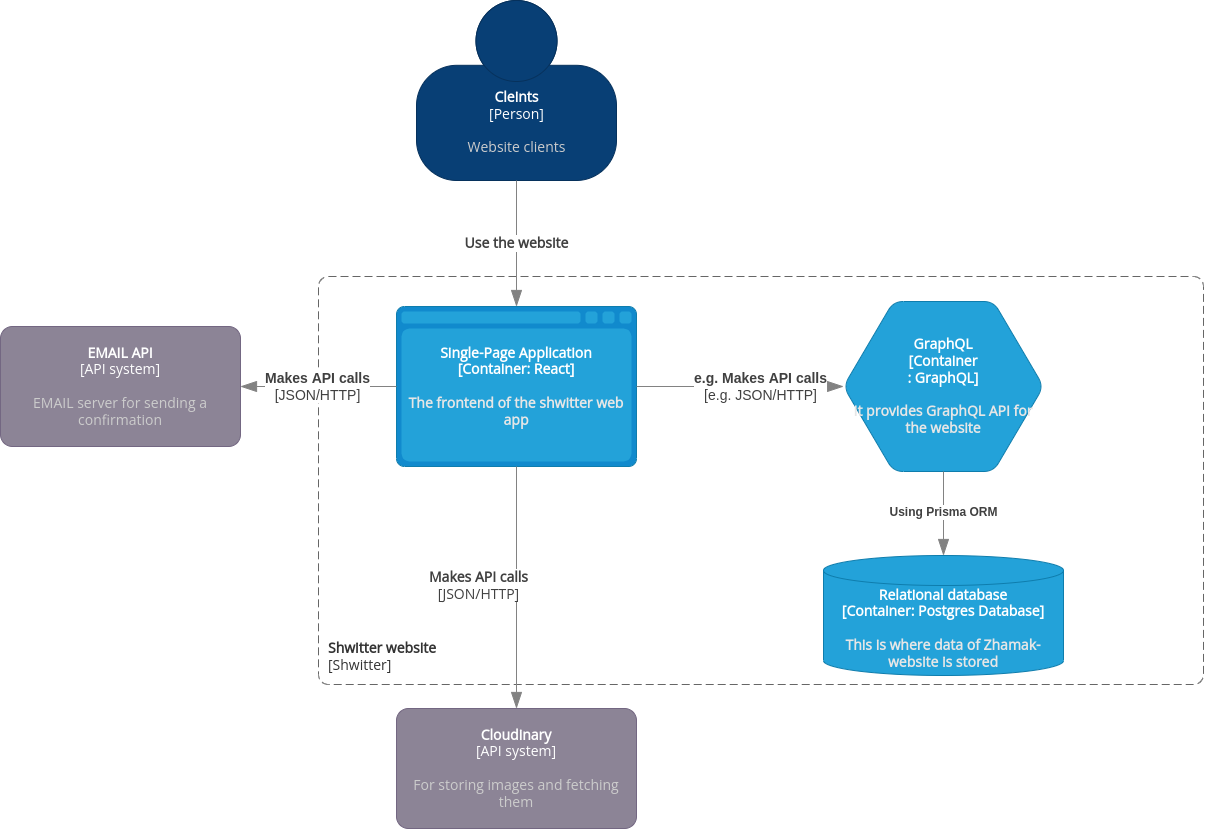
Shwitter is a persian clone of twitter. This example shows how to implement a simple micro-service architecture using modern stack. Following is the C4 of the software architecture:
- Apollo Server: HTTP server for GraphQL APIs
- GraphQL Nexus: GraphQL schema definition and resolver implementation
- Prisma Client: Databases access (ORM)
- Prisma Migrate: Database migrations
- Postgres: SQL database
- React: front-end JavaScript library for building user interfaces based on UI components
- React-Hook-Form: Performant, flexible and extensible forms with easy-to-use validation
- Yup: Yup is a JavaScript schema builder for value parsing and validation
- TailwindCss: A utility-first CSS framework
In this project, we take the schema-first approach, meaning first we create the schema by which back-end and front-end will communicate. Here is the first draft of the schema:
type Query {
  allUsers(data: FilterInputType): AllUsers!
  feed(filter: String, orderBy: [ShweetOrderByInput!], skip: Int, take: Int): Feed!
  me: User
  user: User
}

type Mutation {
  deleteShweet(id: Int!): Shweet!
  editProfile(data: ProfileInput!): Profile
  like(shweetId: Int!): LikedShweet
  login(email: String!, password: String!): AuthPayload!
  shweet(content: String!): Shweet!
  signup(email: String!, name: String!, password: String!, username: String!): AuthPayload!
  updateShweet(content: String!, id: Int!): Shweet!
}

type Feed {
  count: Int!
  shweets: [Shweet!]!
}

type LikedShweet {
  likedAt: DateTime!
  shweet: Shweet
  shweetId: Int!
  user: User
  userId: Int!
}

type Profile {
  avatar: String
  bio: String
  createdAt: DateTime
  location: String
  name: String
  userId: Int!
  website: String
}

type Shweet {
  author: User
  content: String!
  createdAt: DateTime!
  id: Int!
  likedShweet: [LikedShweet!]!
  updatedAt: DateTime!
}

type User {
  email: String!
  id: Int!
  profile: Profile
  shweets: [Shweet!]!
  username: String!
}

enum Sort {
  asc
  desc
}
Install latest version of Docker and Docker Compose (Windows users should use WSL!)
- First, make sure you provide .env file both for back and front
cp front/env.example front/.env
cp back/env.example back/.env- To fire up the back-end use following command:
docker compose up db back
# use docker-compose if you haven't installed docker compose plugin for docker
This will setup Postgresql database on port 5432 and a GraphQL server on port 4000.
Open up this http://localhost:4000 to make sure everything is OK.
- Although there is containerized version of the front as well, for smoother experience, I suggest to run it locally. In that case, run the following commands:
# install lts version of yarn in your machine first
yarn install
yarn start
Now you should see the browser staring at http://localhost:3000
optional: To support image upload you need create a cloudinary account and set up unauthorized preset for your cloud path
- Create CI/CD for the front and back
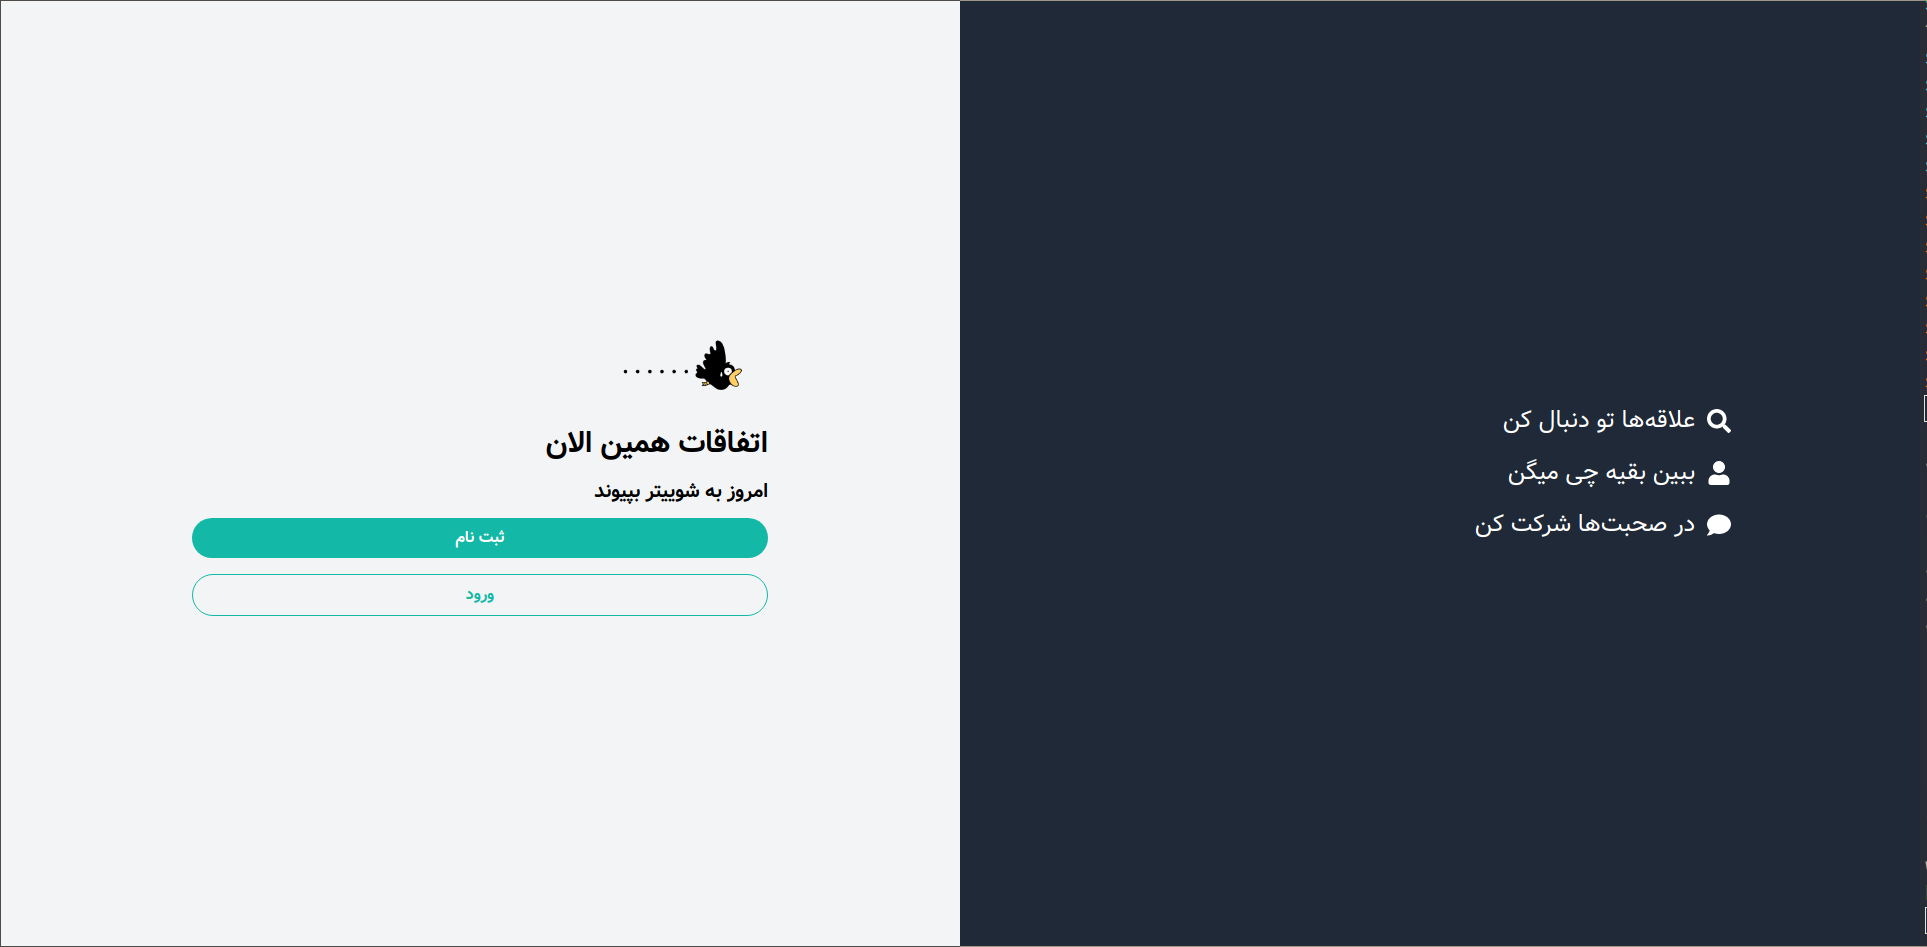
- Signup and Login page
- Adding GraphQL Schema
- User can change their profile info
- Connection to cloudinary
- Users can shwit
- Unit test for Front
- Unit test for back
- HOWTOGRAPHQL: A complete resource for setting up the GraphQL server and client
This project is licensed under the terms of the MIT license.

