
The following README will guide you on how to automatically deploy an ArcBox for use with the Azure Arc-enabled servers LevelUp training.
Azure VMs leverage the Azure Instance Metadata Service (IMDS) to communicate with Azure,and is also how Azure knows that a particular VM is running inside Azure (or even running as anested VM within an Azure VM). Onboarding such Azure VMs to Arc is not allowed and the process will fail.
However, for demo purposes only, the below lab and guide will allow you to use and onboard VMs running on Hyper-V within an Azure VM to Azure Arc by blocking communication to IMDS. This will allow us to simulate servers which are deployed outside of Azure (i.e "on-premises" or in other cloud platforms)
Note: It is not expected for an Azure VM to be projected as an Azure Arc-enabled server. The below scenario is unsupported and should ONLY be used for demo and testing purposes.
-
ArcBox LevelUp requires 16 DSv4-series vCPUs when deploying with default parameters such as VM series/size. Ensure you have sufficient vCPU quota available in your Azure subscription and the region where you plan to deploy ArcBox. You can use the below Az CLI command to check your vCPU utilization.
az vm list-usage --location "<location>" --output table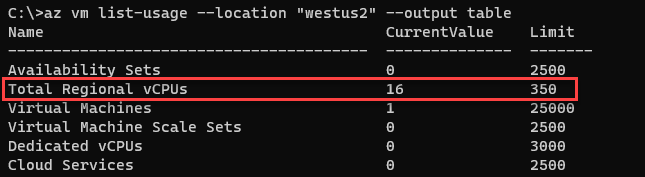
-
Install or update Azure CLI to version 2.40.0 and above. Use the below command to check your current installed version.
az --version
-
Create Azure service principal (SP).
You will need
Microsoft.Authorization/roleAssignments/writepermission on the target subscription in order to successfully assign the appropriate permissions to the Service Principal used in the automation. Azure built-in roles which contain this permission are as follows:For additional information on assigning a user as a Subscription administrator, click here
To be able to complete the scenario and its related automation, Azure service principal assigned with the “Contributor” role on the subscription is required. To create it, login to your Azure account run the below command (this can also be done in Azure Cloud Shell).
az login
az account set --subscription "<Subscription Id>"
az ad sp create-for-rbac -n "<Unique SP Name>" --role "Owner" --scopes /subscriptions/<Subscription ID>
For example:
az ad sp create-for-rbac -n "http://AzureArcLevelUp" --role "Owner" --scopes /subscriptions/31c4b5fc-xxxx-xxxx-xxxx-5e377c3f41af
Output should look like this:
{
    "appId": "XXXXXXXXXXXXXXXXXXXXXXXXXXXX",
    "displayName": "AzureArcLevelUp",
    "name": "http://AzureArcLevelUp",
    "password": "XXXXXXXXXXXXXXXXXXXXXXXXXXXX",
    "tenant": "XXXXXXXXXXXXXXXXXXXXXXXXXXXX"
}
Note: It is now mandatory to scope the SP to a specific Azure subscription. Please save this output as you will need it throughout the lab.

ArcBox must be deployed to one of the following regions:
Deploying ArcBox outside of these regions may result in unexpected results or deployment errors.
- East US
- East US 2
- West US 2
- North Europe
- West Europe
- France Central
- UK South
- Australia East
- Japan East
- Korea Central
- Southeast Asia
-
Click the button below to deploy the LevelUp ArcBox template via the Azure Portal:
-
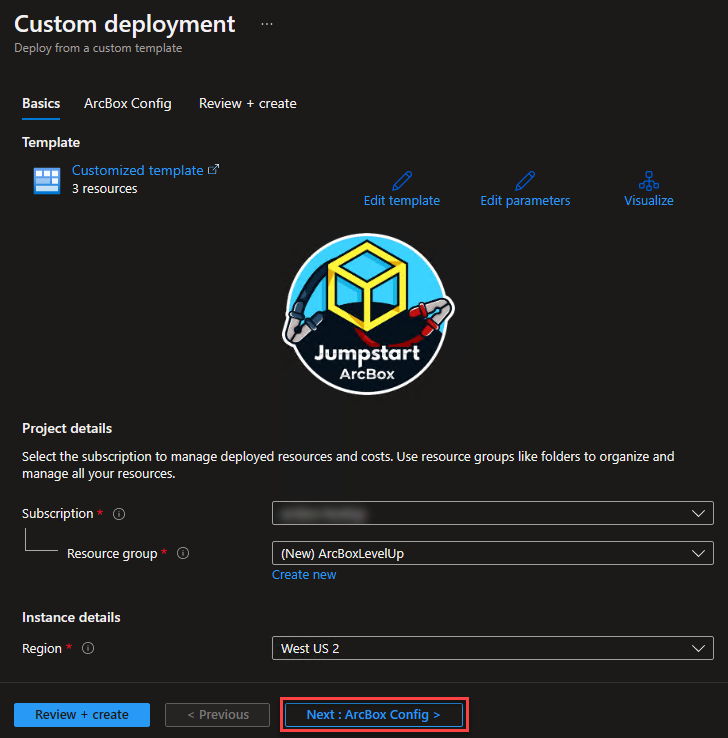
Choose a target subscription, region, resource group (or create a new one), and region. Click next:
-
Fill in the corresponding fields from the Service Principal creation step above and the Windows VM login credentials. Click next:
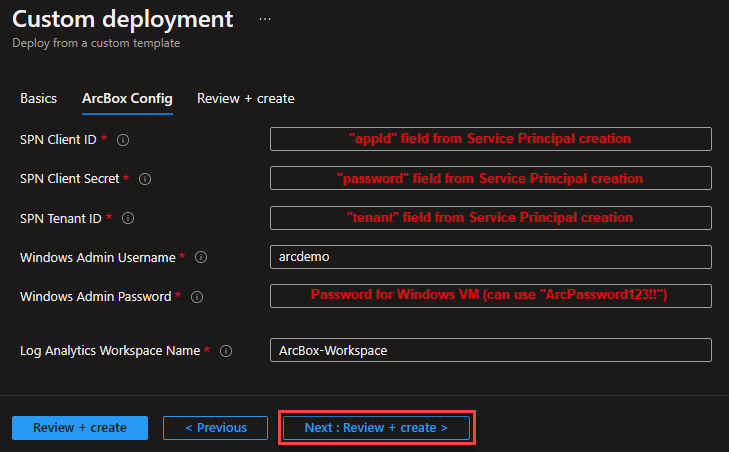
Please make sure to select a unique value for the Log Analytics Workspace Name (e.g. it doesn't overlap any existing Log Analytics Workspace within the target Resource Group)
-
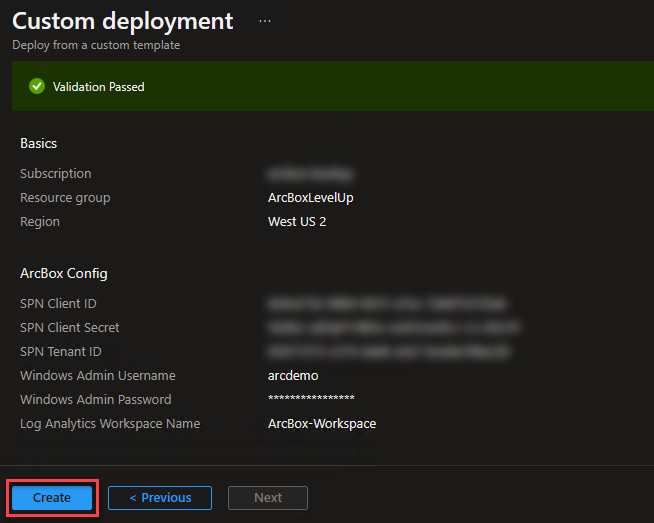
Review the deployment details, then click create to begin the deployment:
-
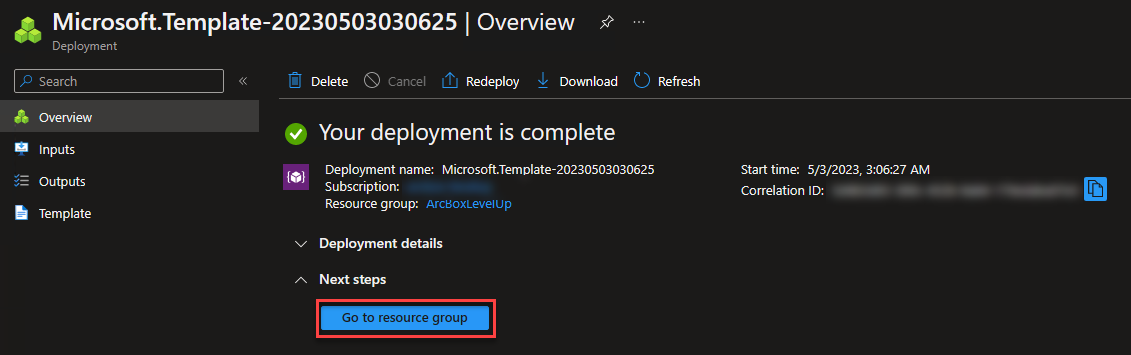
Once the deployment has finished, click go to resource group:
-
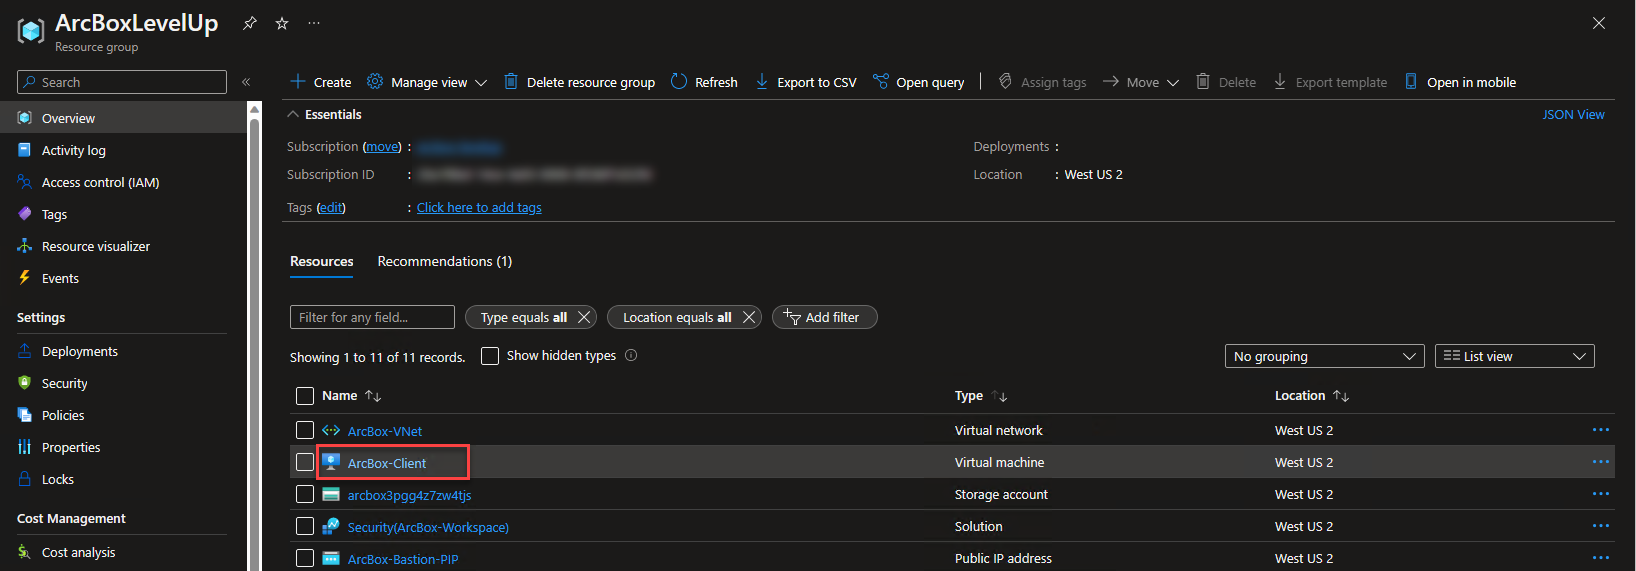
Select the ArcBox-Client virtual machine:
-
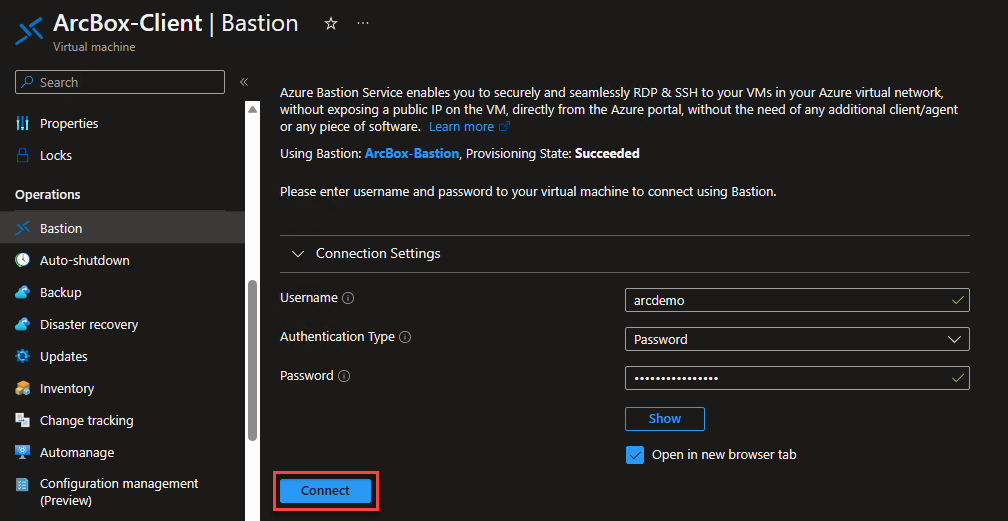
Click on Bastion under Operations in the left-hand menu:

-
Enter the Username and Password you set during the deployment (above) and click Connect:
-
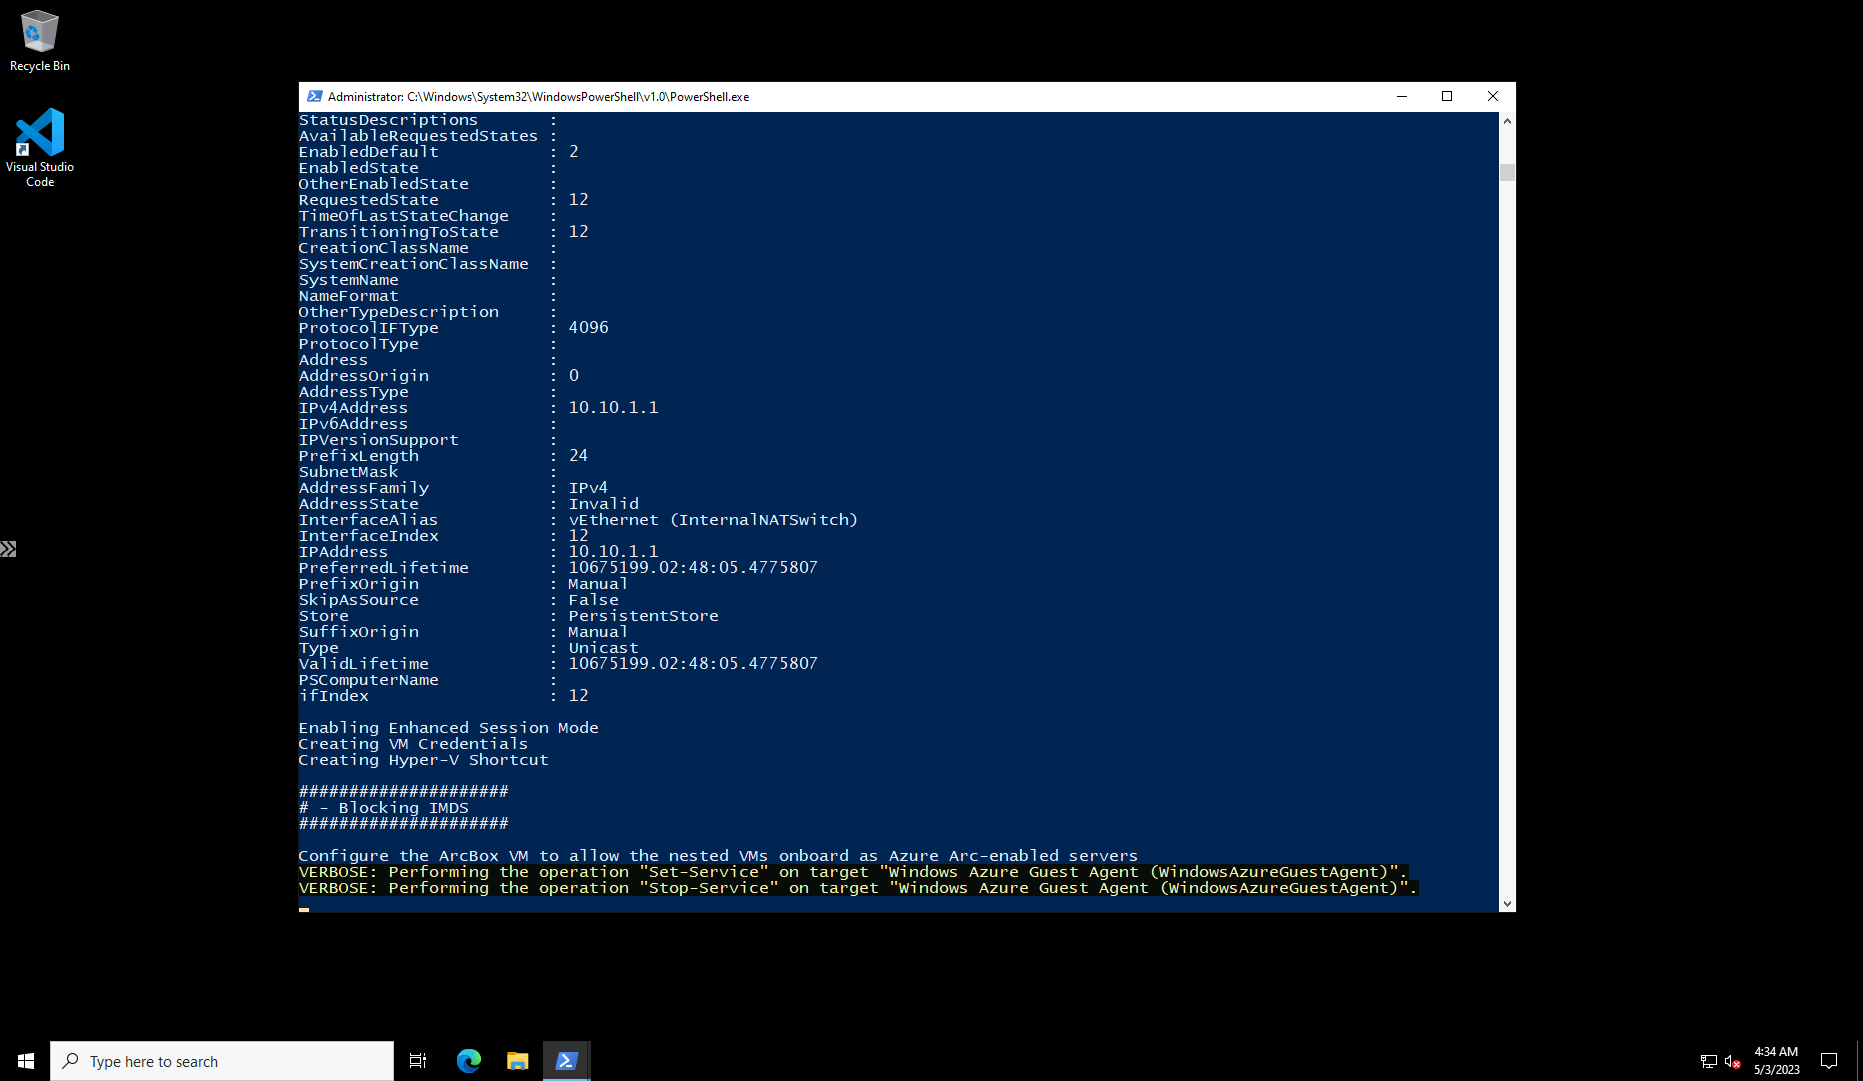
Watch and wait for the post-deployment automation script to finish:
-
Once the scripts have completed you should have 2 Linux and 2 Windows VMs, which can be found in Hyper-V Manager on the desktop:
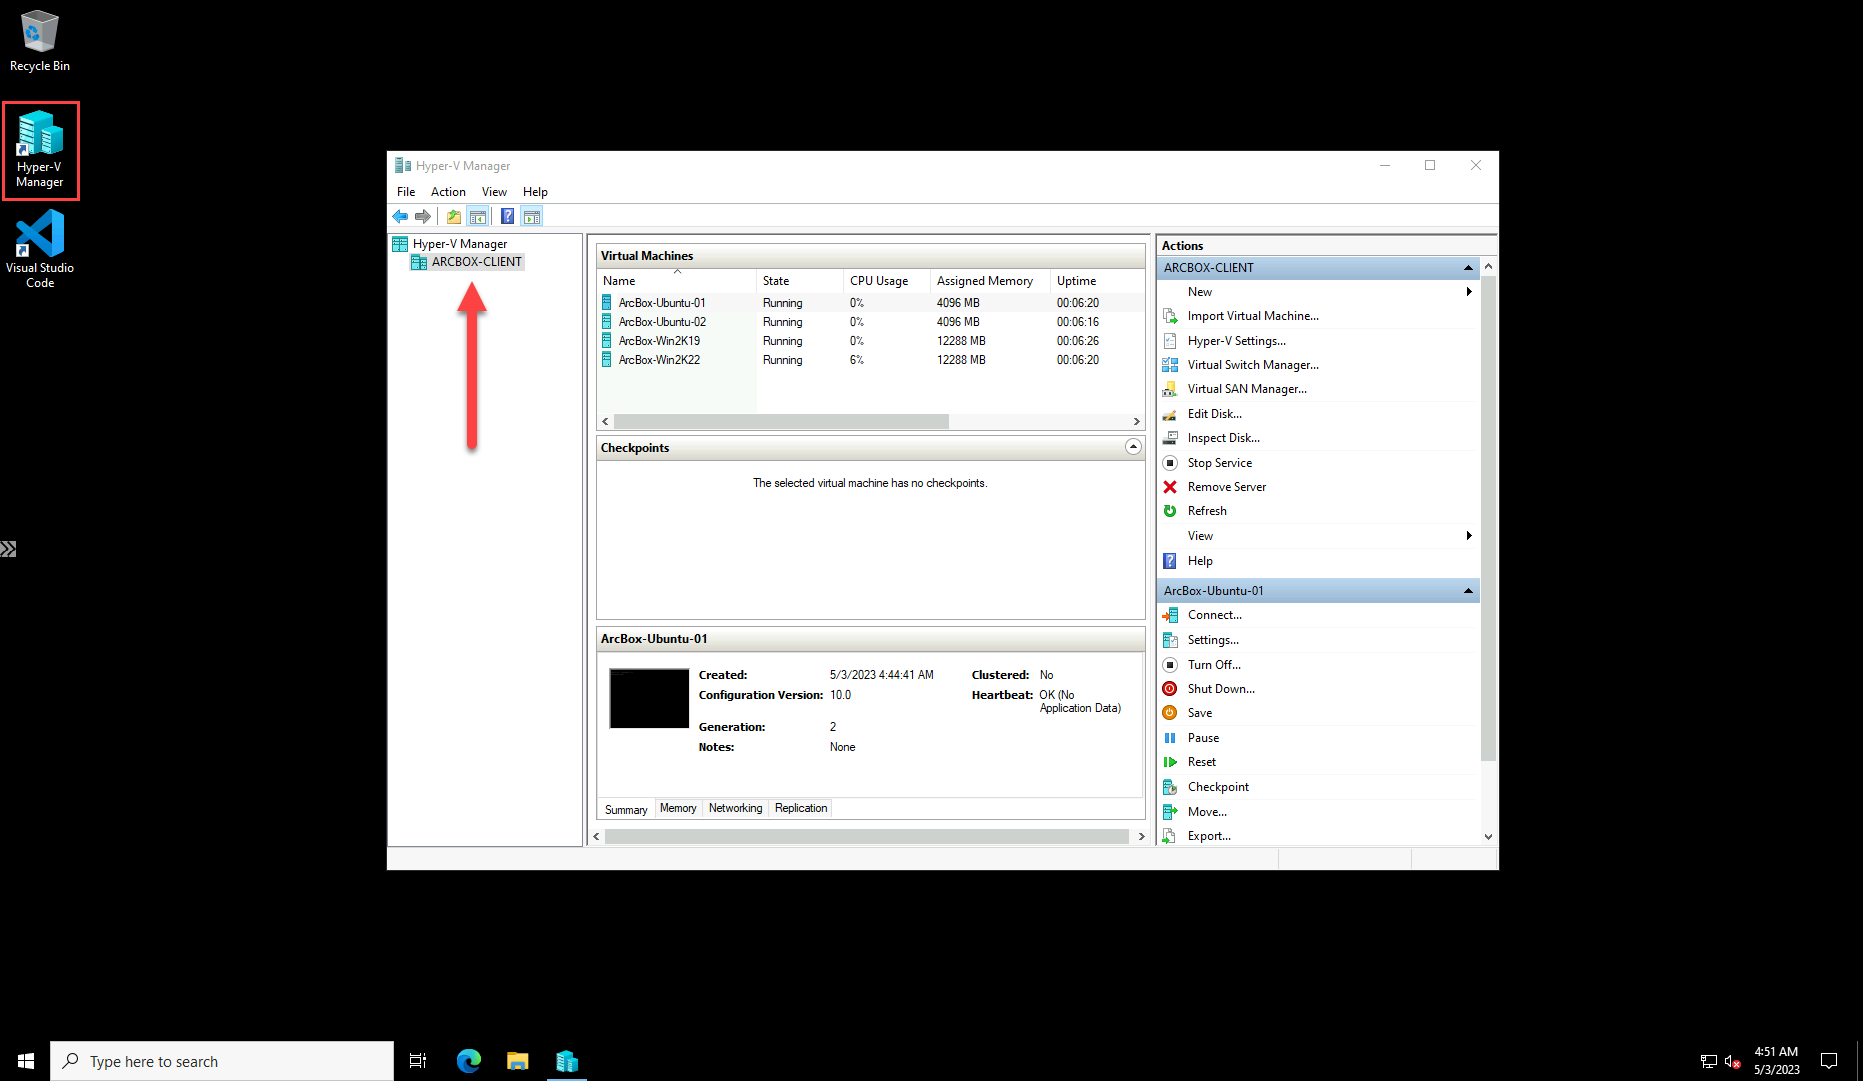
-
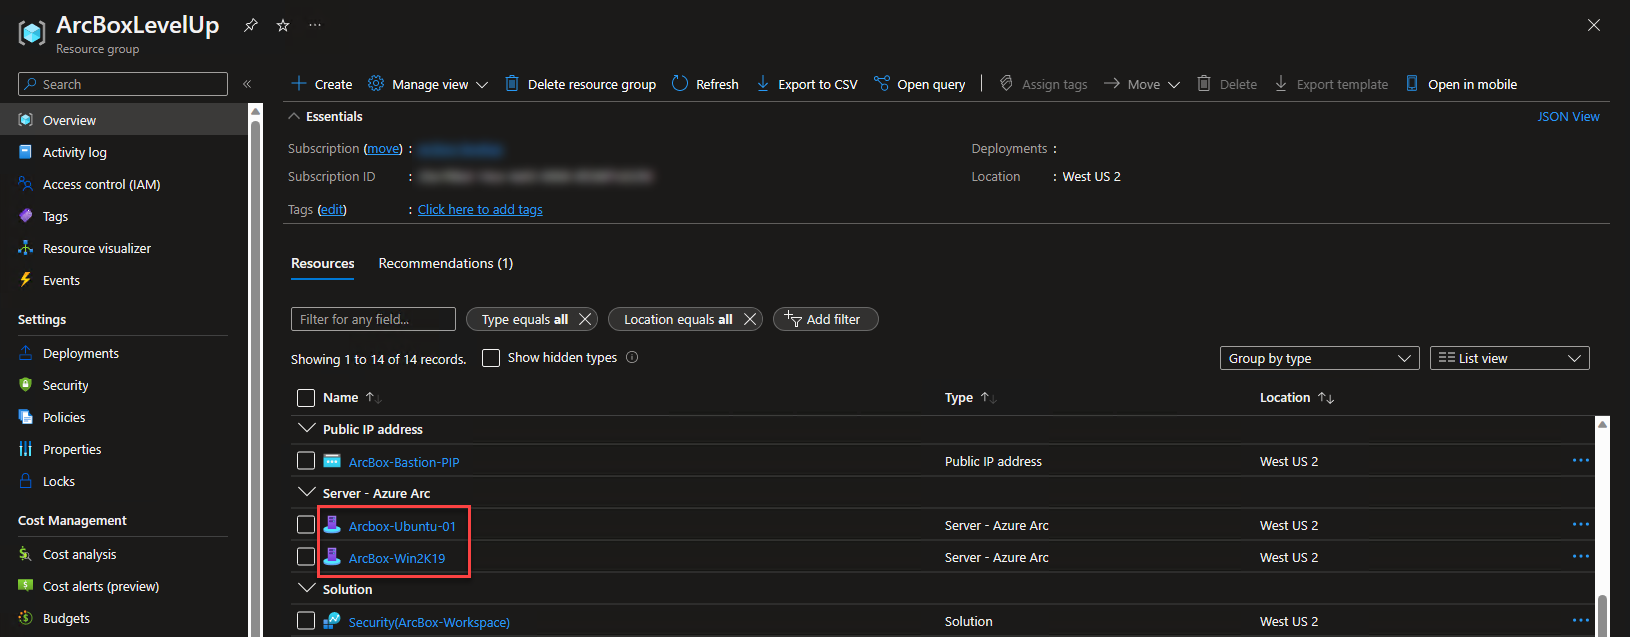
Back in the Resource Group view, you can see that two of the Hyper-V VMs (Ubuntu-01 & Win2K19) have already been onboarded to Azure Arc on your behalf:


Use the below credentials for logging into the nested Hyper-V virtual machines:
- Windows Server (2019/2022)
- Username:
Administrator - Password:
ArcDemo123!!
- Username:
- Linux (Ubuntu/CentOS)
- Username:
arcdemo - Password:
ArcDemo123!!
- Username: