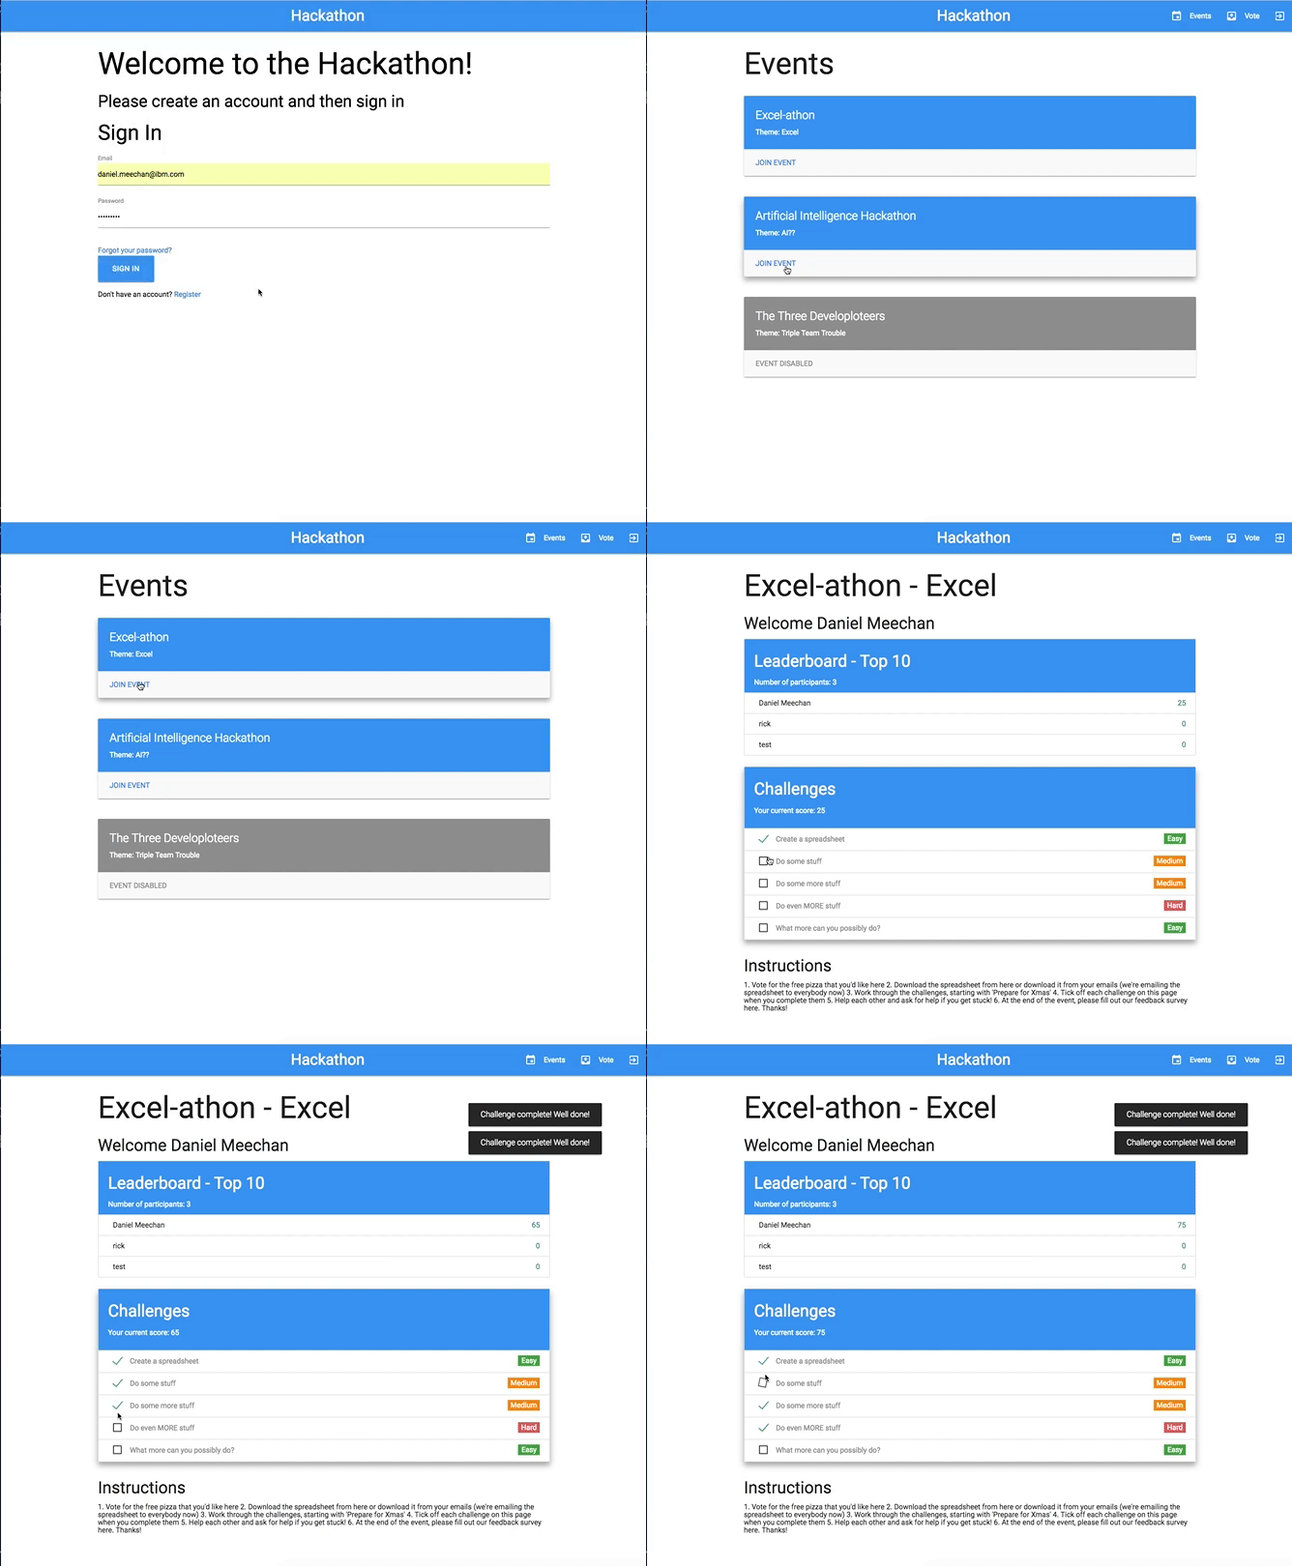
Users' view:
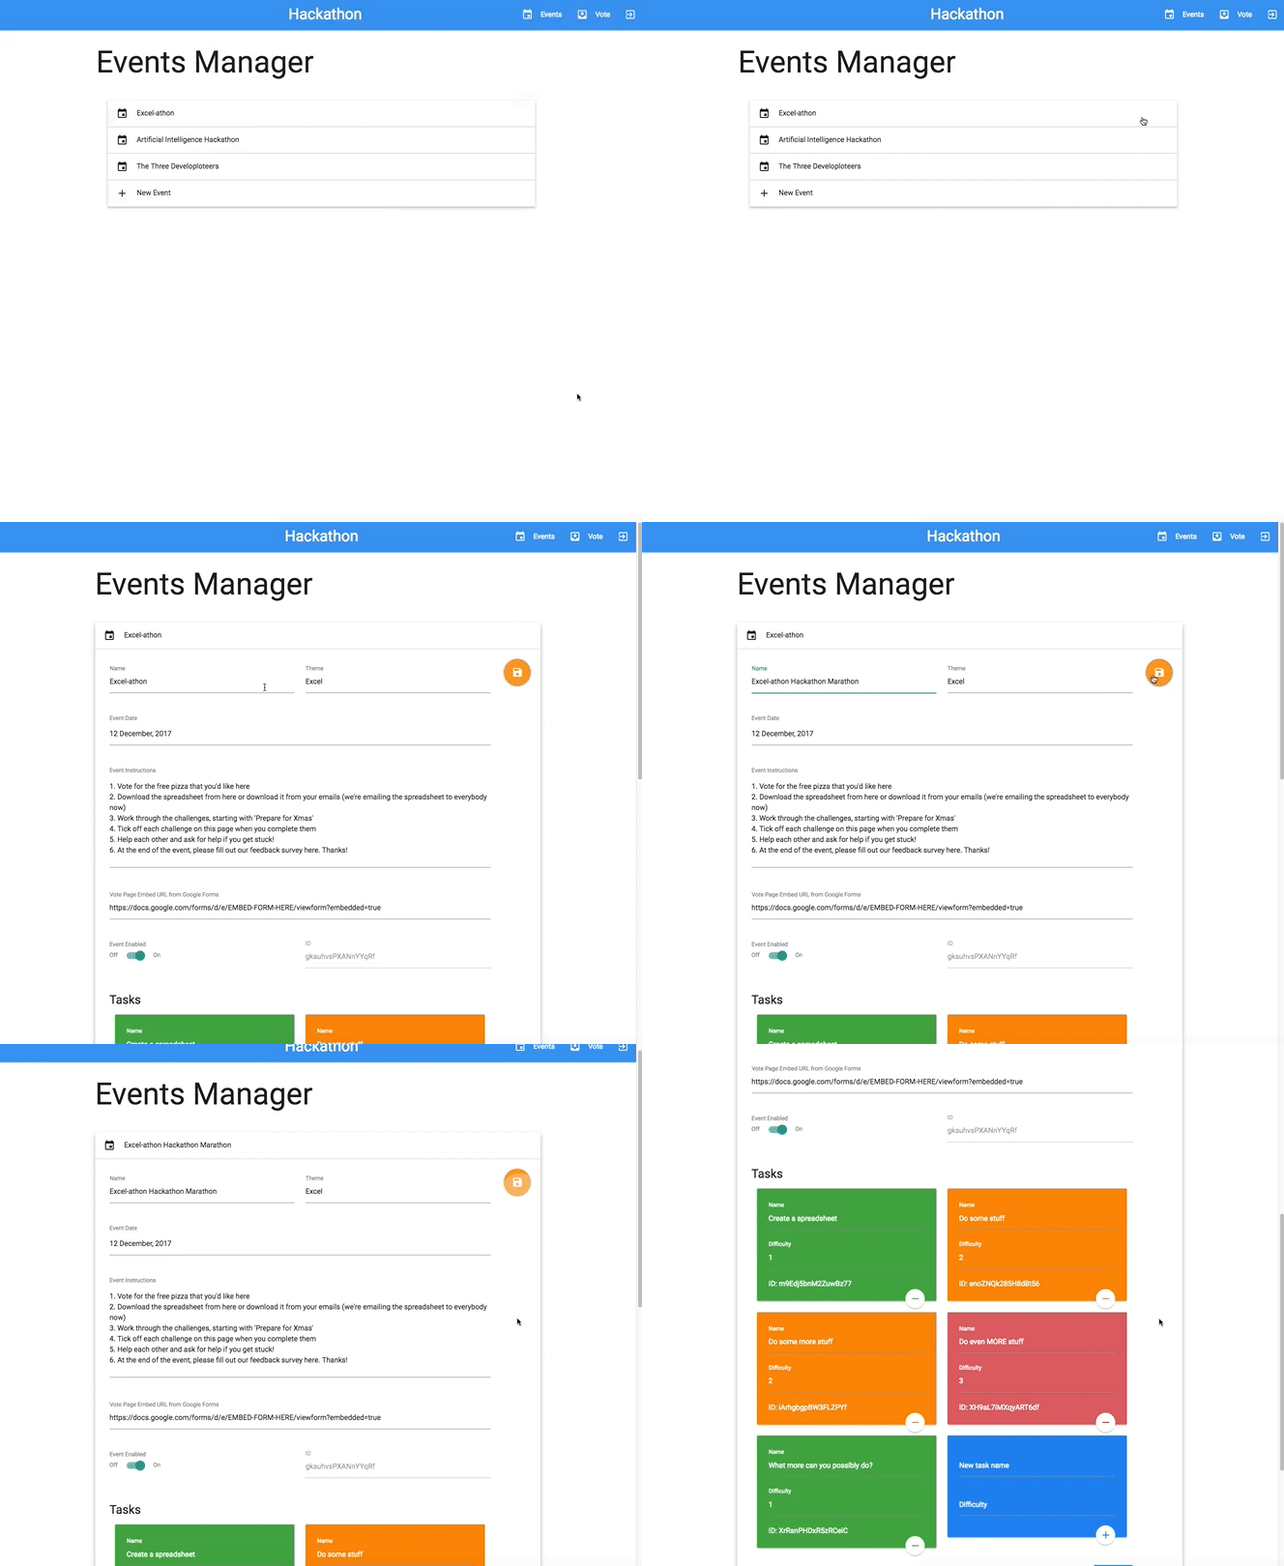
Admins' view:
My team and I at work decided to run an internal hackathon, and realised we needed a dashboard to help manage it. We wanted to create challenges which give participants points when they complete each one and can watch themselves climb up the leaderboard in real time. I'd been working with Meteor for a about a month prior to this, so I figured I'd make the dashboard using Meteor.
Meteor massively sped up the development process. It only took 2 or 3 days to build a fully operational dashboard.
We ran our server on Heroku, but you can use pretty much any host you like, as long as you get Meteor up and running on it.
Everything in the dashboard is dynamic and (almost) fully customisable, and all runs off a MongoDB database.
To run your own hackathon dashboard, first install the following:
Then enter git clone https://github.com/DMeechan/Hackathon-Dashboard.git in your Terminal, followed by cd Hackathon-Dashboard.
Now that the repository is downloaded on your system, open up settings.json and replace the example email address with your own email address.
Now that your account is enabled as an admin, we need to start the Meteor server on your computer. To do this, run meteor --settings settings.json. The --settings settings.json part tells Meteor to look in the settings.json file for your server's settings. You'll see error messages in the web console if you don't add that part.
Give the server some time to spin up and download any dependencies. Eventually you should see the following:
=> Started proxy.
=> Started MongoDB.
=> Started your app.

=> App running at: http://localhost:3000/
If all has gone according to plan, navigate to http://localhost:3000/ and you should see a login page! Create an account, sign in, and then you should see an empty Events page.
To populate the page with some events, navigate to http://localhost:3000/admin and create an event! Once you've created it, click the Edit button, fill in all the glorious details, and then click Save.
Head back to the Events page, and you should see your event listed now. Click Join Event. Now here comes the cool part. Open up a new window in your browser, navigate to the admin page, and put it side-by-side with the page for the event you just created. You should then have the event page side-by-side with the admin page.
Next, click the Edit button in the Admin page, change the name of it, and then click the Save button. You should see your change appear instantly on the event page without needing to reload the page. Pretty darn cool, right? That's the power of Meteor.
Now that the server is running on your local computer, you can play around with it, do some changes, and then push it to a production server so your hackathon attendees can access it too.
To run Meteor in production, you'll need a server and a MongoDB database. I recommend trying it out by running your Meteor server on a free Heroku instance, and using mLab's free sandbox MongoDB database.
😴 Note: Heroku's free instances go to sleep after 30 mins. Keep this in mind if you do end up using it for a live website. You may need to refresh the page every 25 mins to make sure it doesn't go to sleep while people are on it.
I'm using Meteor Buildpack Horse to get Meteor working on my Heroku instance. To do the same, follow the instructions found here.
Version 1 ✅:
- Remove all organisation-specific content
- Add admin page verification
- Add features to admin panel:
- Event activation / deactivation
- Admin access rights controls
- Add custom embeded form URL for Vote page
- Set up custom event description
- Fix bugs with admin panel buttons
- Get enabled / disabled toggle switches to update on page load
Version 2:
- Customise dashboard name
- Add optional email domain restrictions
- Refactor Tasks collection to store tasks for numerous events
- Add ability to enable / disable 'Vote for Pizza'
- Add scalable secret codes
- Add event deletion
- Write up instructions on how to run dev environment
- Write up how to deploy for production on Heroku
- Add 'Click to Deploy' Heroku button
- Add Docker support
- Add lots and lots of comments

