The NBS Open Banking API documentation can be found here: https://ob-api.innovationwide.co.uk/docs/.
To get started with the Open Banking API, there are two different routes you can take:
- Option A: run a development environment and web server on your local machine, and then push your changes to a cloud-hosted web server
- Option B: run a development environment and web server on the cloud so you don't need anything installed on your local machine
If you're familiar a specific server-side technology (like Node.js, Java, .NET, etc.), pick Option A because it gives you more control.
If you're unable to install anything on your machine, or would like to use Node.js but are not very familiar with it, pick Option B.
When you've chosen your preferred option, scroll down to the appropriate tutorial and get started.
IBM Cloud supports a number of different runtimes and has a tutorial for each. These tutorials run through setting up a local web server, deploying it locally, and then deploying it on IBM Cloud.
Here are the guides for each runtime. Select your chosen one and get started with the tutorial.
When you've completed a tutorial, it's time to start using the Open Banking API. Please have a look at the index.js and (especially) the routes.js files in this repository for some examples of this.
Now your local development environment and cloud deployment should be fully set up.
Enjoy building your project and good luck!
Here's what we'll be doing:
- Setting up your account on a cloud provider (IBM Cloud in this tutorial)
- Setting up a development environment on the cloud
- Deploying your web server (running Node.js) on the cloud
- Using live edit in your cloud development environment
If you don't already have an IBM Cloud account, sign up here.
IBMers: use your IBM email Nationwide: use your personal email
If you already have an account, sign in here.
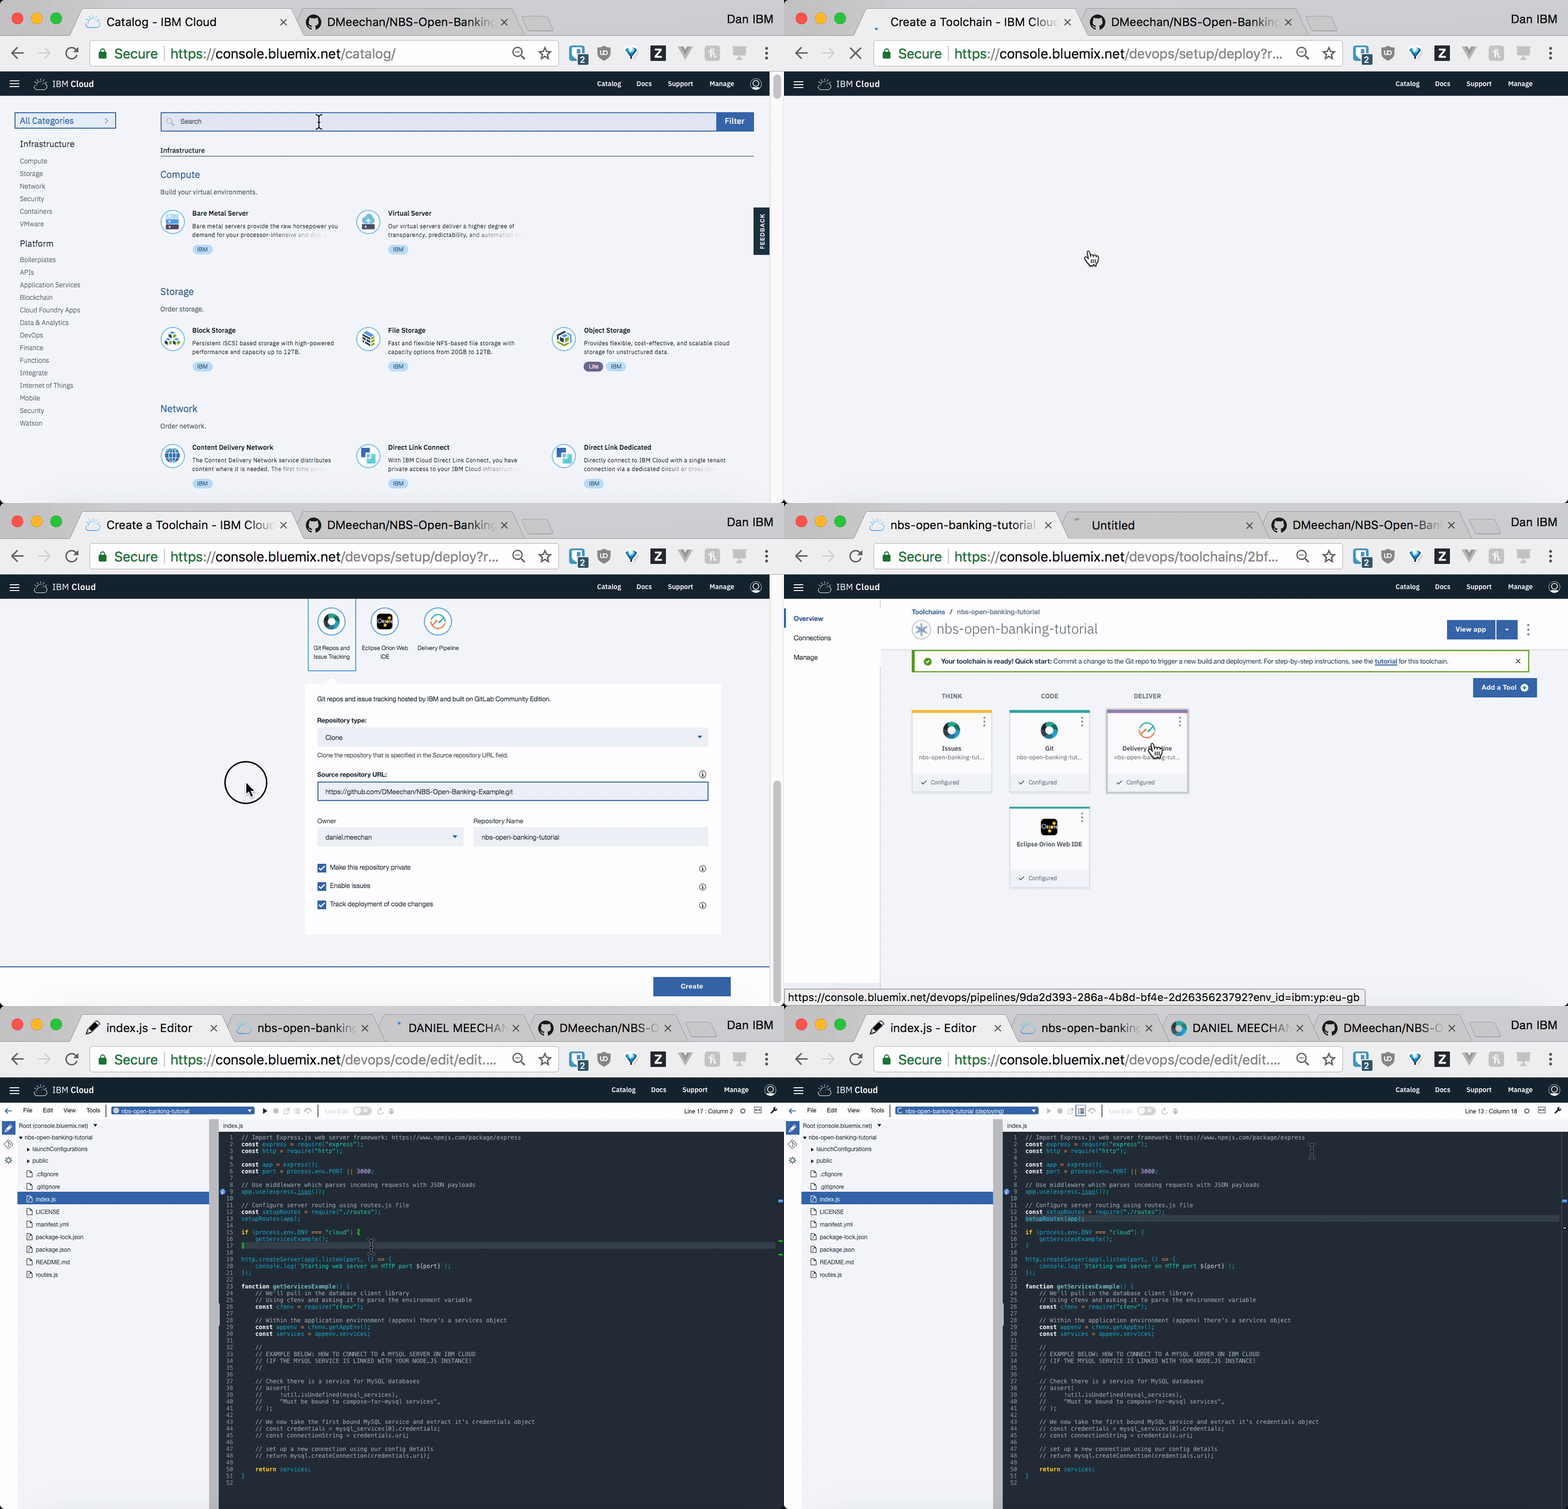
If you have any trouble with the instructions below, here's a short video demonstrating how to set up your cloud development environment on IBM Cloud:

- Go to the IBM Cloud dashboard and click the
Create resourcebutton - Enter
continuous deliveryinto the search bar and click onContinuous Delivery - Type in the name of your service (like
continuous-deliveryorhackathon-project), select the appropriate region, and then clickCreate - On the Get started with Continuous Delivery page, click the
Start Herebutton - Click
Develop a Cloud Foundry app - Type in the name of your toolchain (like
hackathon-project-toolchain) and select the appropriate region - Inside the Git Repos and Issue Tracking section towards the bottom of the page, make sure your Repository type is set to
Cloneand paste in this repository URL:https://github.com/DMeechan/NBS-Open-Banking-Example.git. This will give you a clone of the example repository that we've prepared. Note: if you're asked to authenticate, make sure to use a GitHub.com account, not GitHub Enterprise credentials - Type in the name you want to give your new Git repository (like
hackathon-project) and clickCreate - When that is done, you'll see a breakdown of your toolchain components. Open up the following components in a new tab:
Git,Delivery Pipeline, andEclipse Orion Web IDE
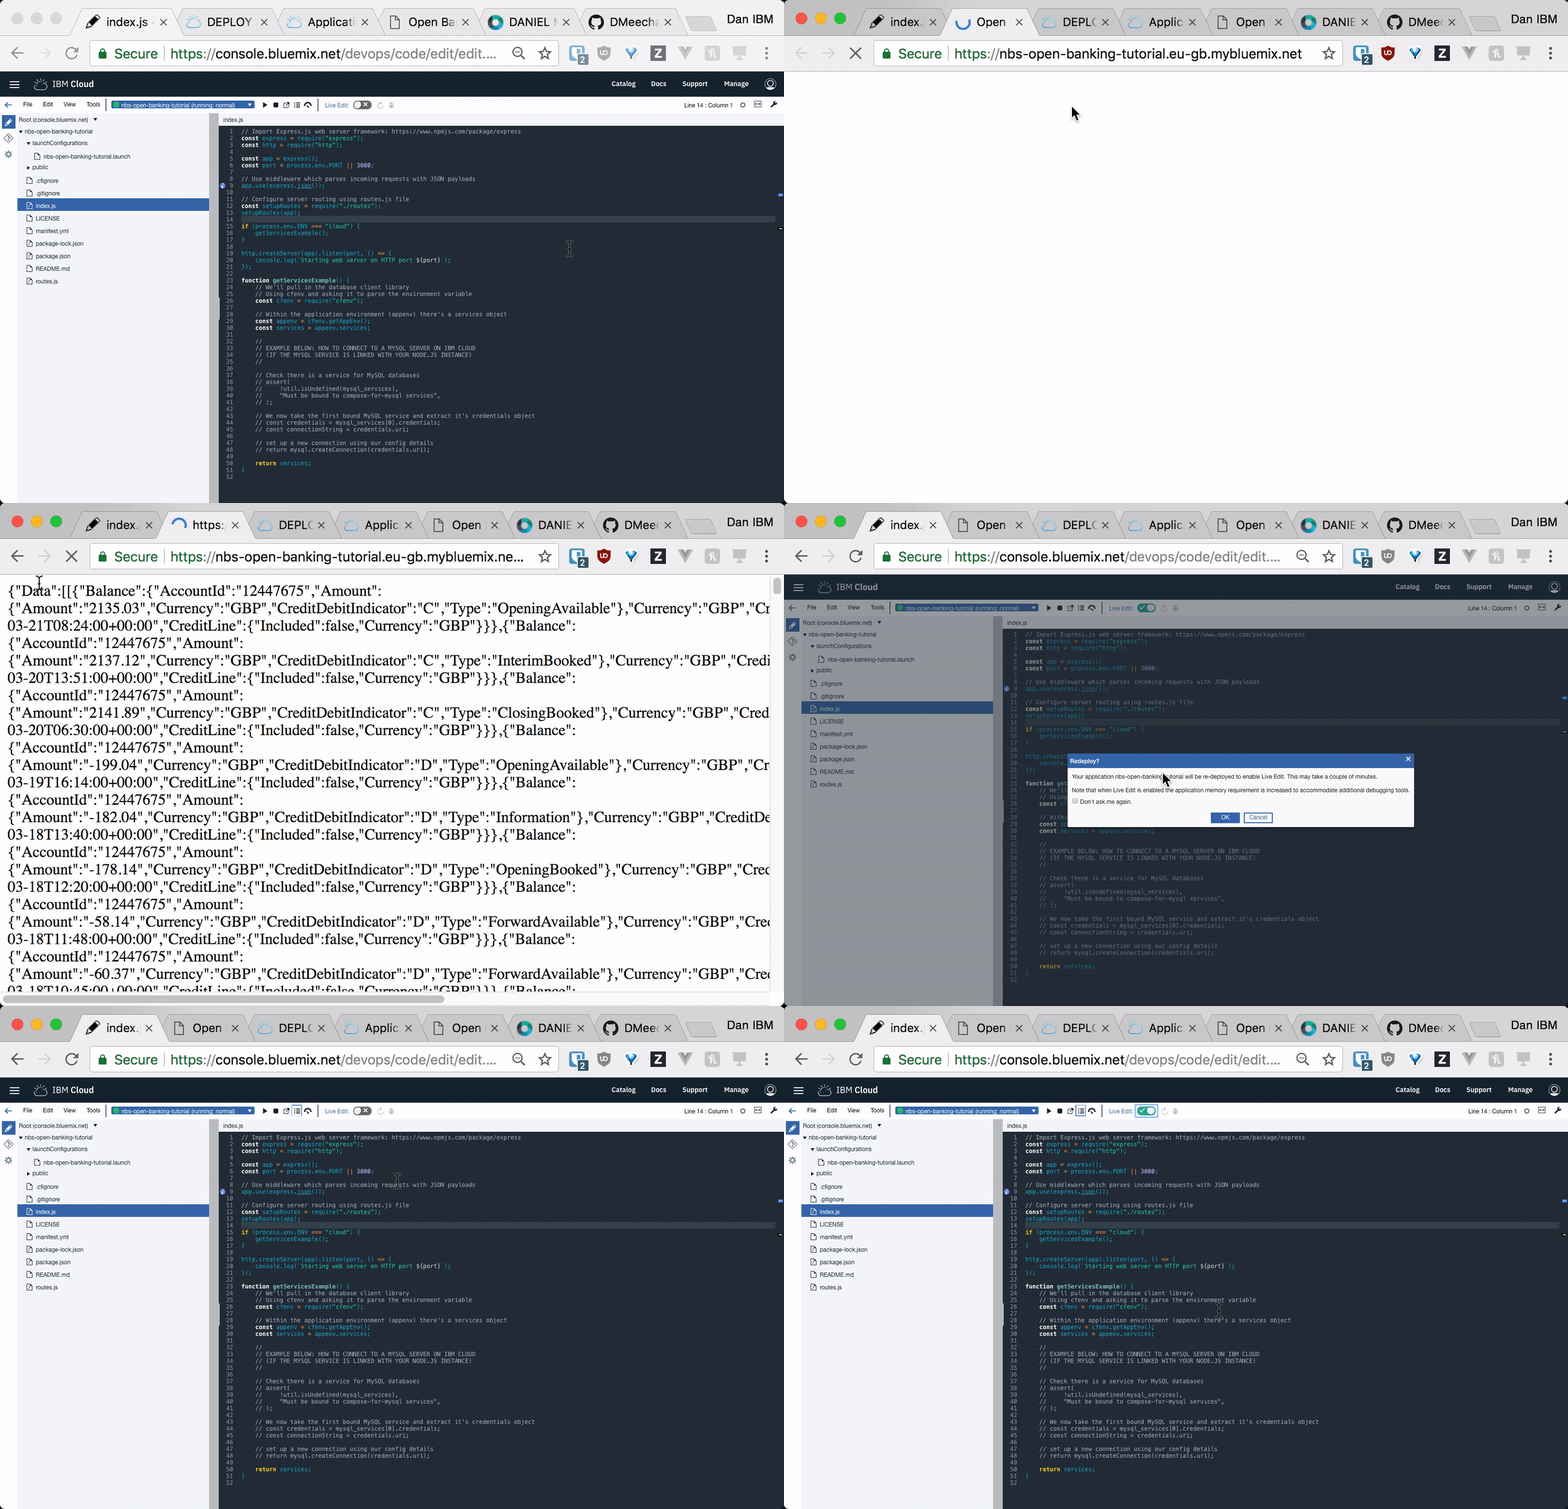
If you have any trouble with the instructions below, here's a short video demonstrating how to deploy your app on IBM Cloud:

- Go to the
Eclipse Orion Web IDEtab - In the navigation tree on the left, click the dropdown arrow next to your project's name, find the
index.jsfile, and then click on it - Have a read through the code (the first 21 lines are the most important)
- Next, navigate to the
routes.jsfile and have a look at the 5 GET endpoints we've provided as examples. Notice that the/balancesand/accountsendpoints both send requests to the NBS Open Banking API - Now that we're familiar with the project, click the Play button at the top of the page to deploy your application
- Wait a few minutes for the application to deploy
- When the application is deployed, click the
Open the Deployed Appbutton next to the Play button. This will open up your deployed web server in a new tab - You should see a page that says
Open Banking API Example. Click around and see what it does
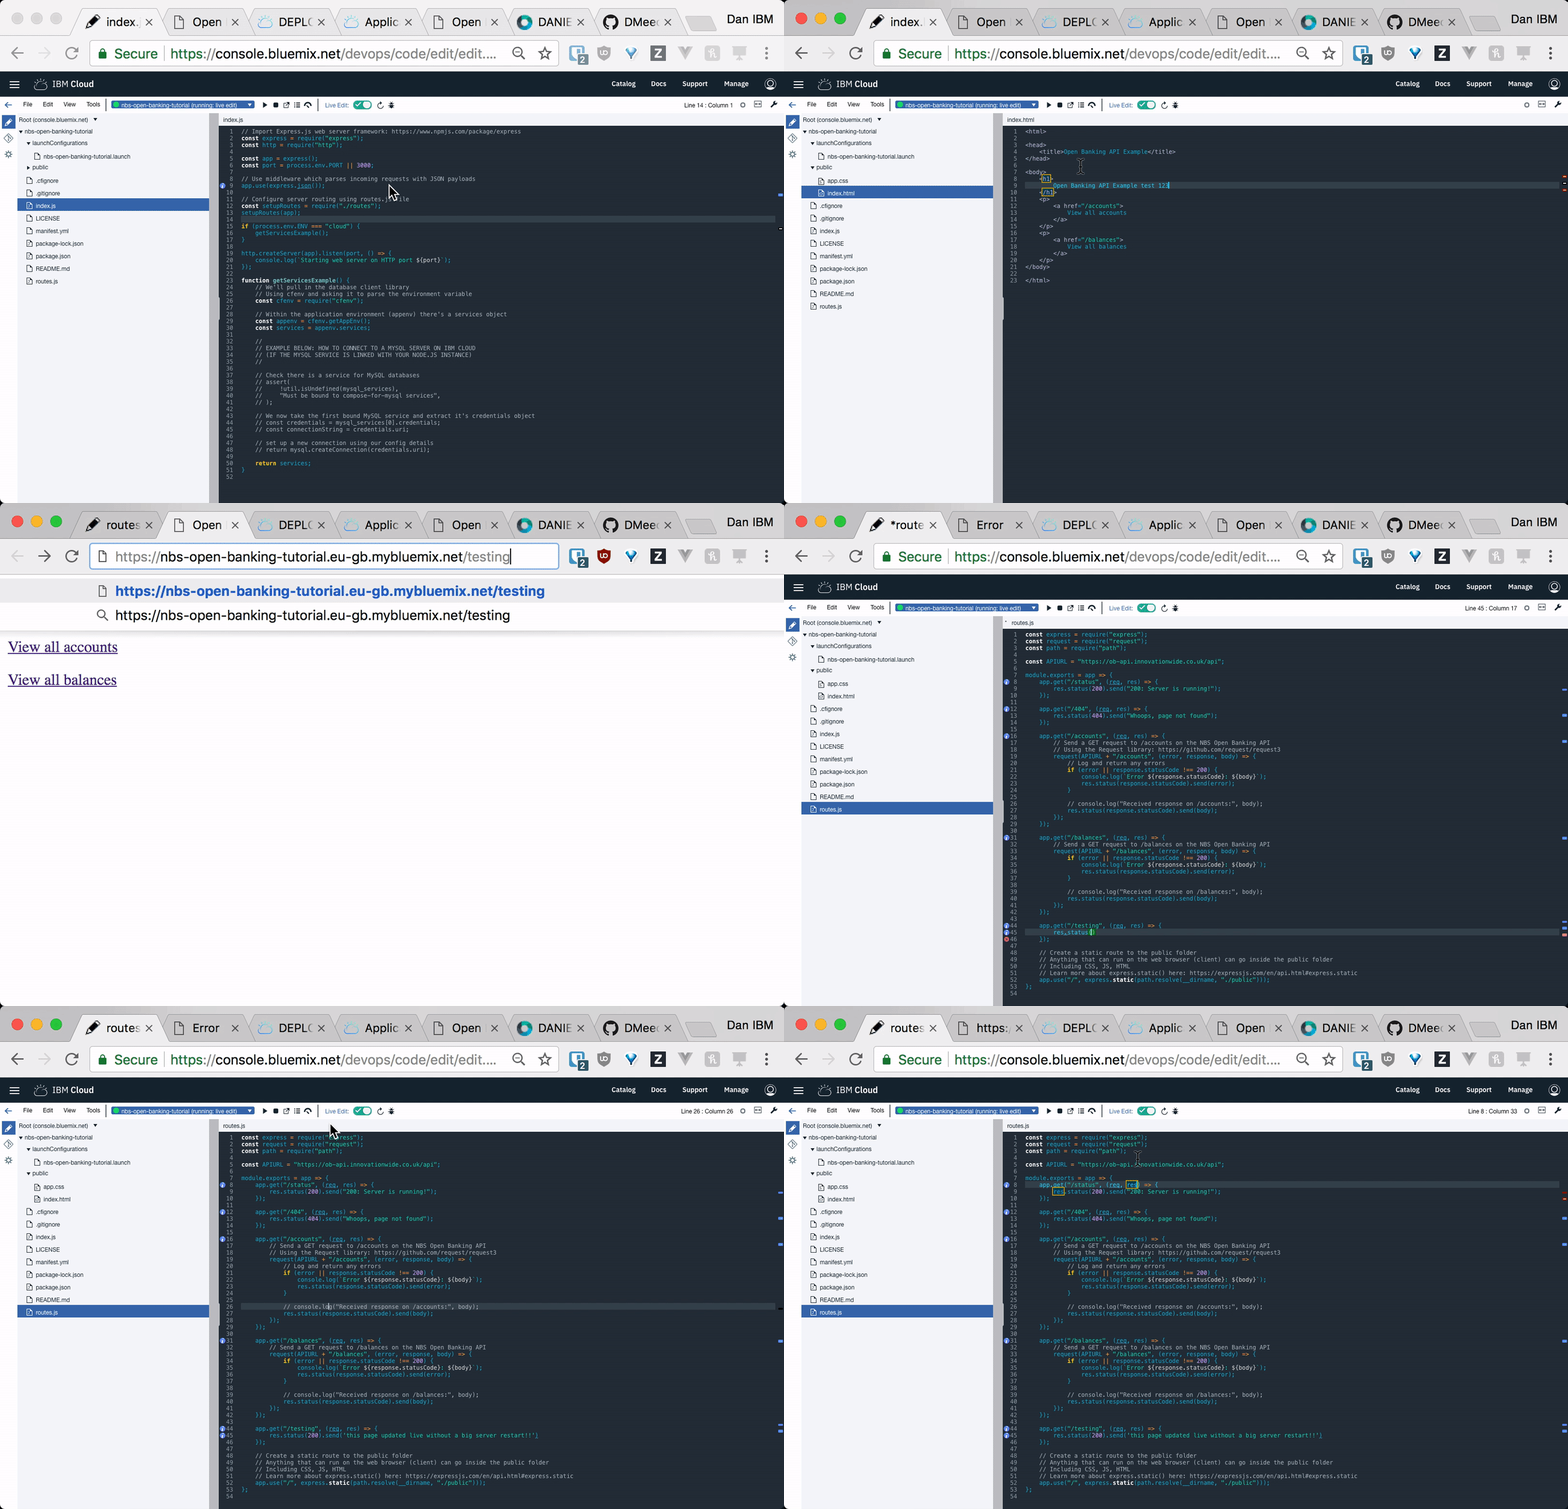
If you have any trouble with the instructions below, here's a short video demonstrating how to use live edit:

- Head back to the Orion Web IDE tab and enable 'Live Edit'
- Wait a few minutes for the application to re-deploy (you may need to re-enable Live Edit if it disables itself)
- When it is deployed, go back and refresh the web server page to make sure it's still working
- If it's working fine, go back to the Orion Web IDE and change something in the
public/index.htmlfile - Save the file, go back to the web app, and refresh the page. You should see your change has already updated without refreshing the server.
- Now go back to the Orion Web IDE and paste the following code on
line 45 of routes.js(see the tutorial-videos/3-live-edit.gif video for a demonstration of this):
app.get("/testing", (req, res) => {
    res.status(200).send('This is a testing page set up without a hard refresh of the server');
});- Save the file and click the
Restart the App Without Deployingbutton (next to the Live Edit switch) - Wait a few seconds, go to the web app page, and navigate to
/testing. You should see the new endpoint appear!
Now your cloud-hosted development environment and deployment are fully set up.
Enjoy building your project and good luck!

