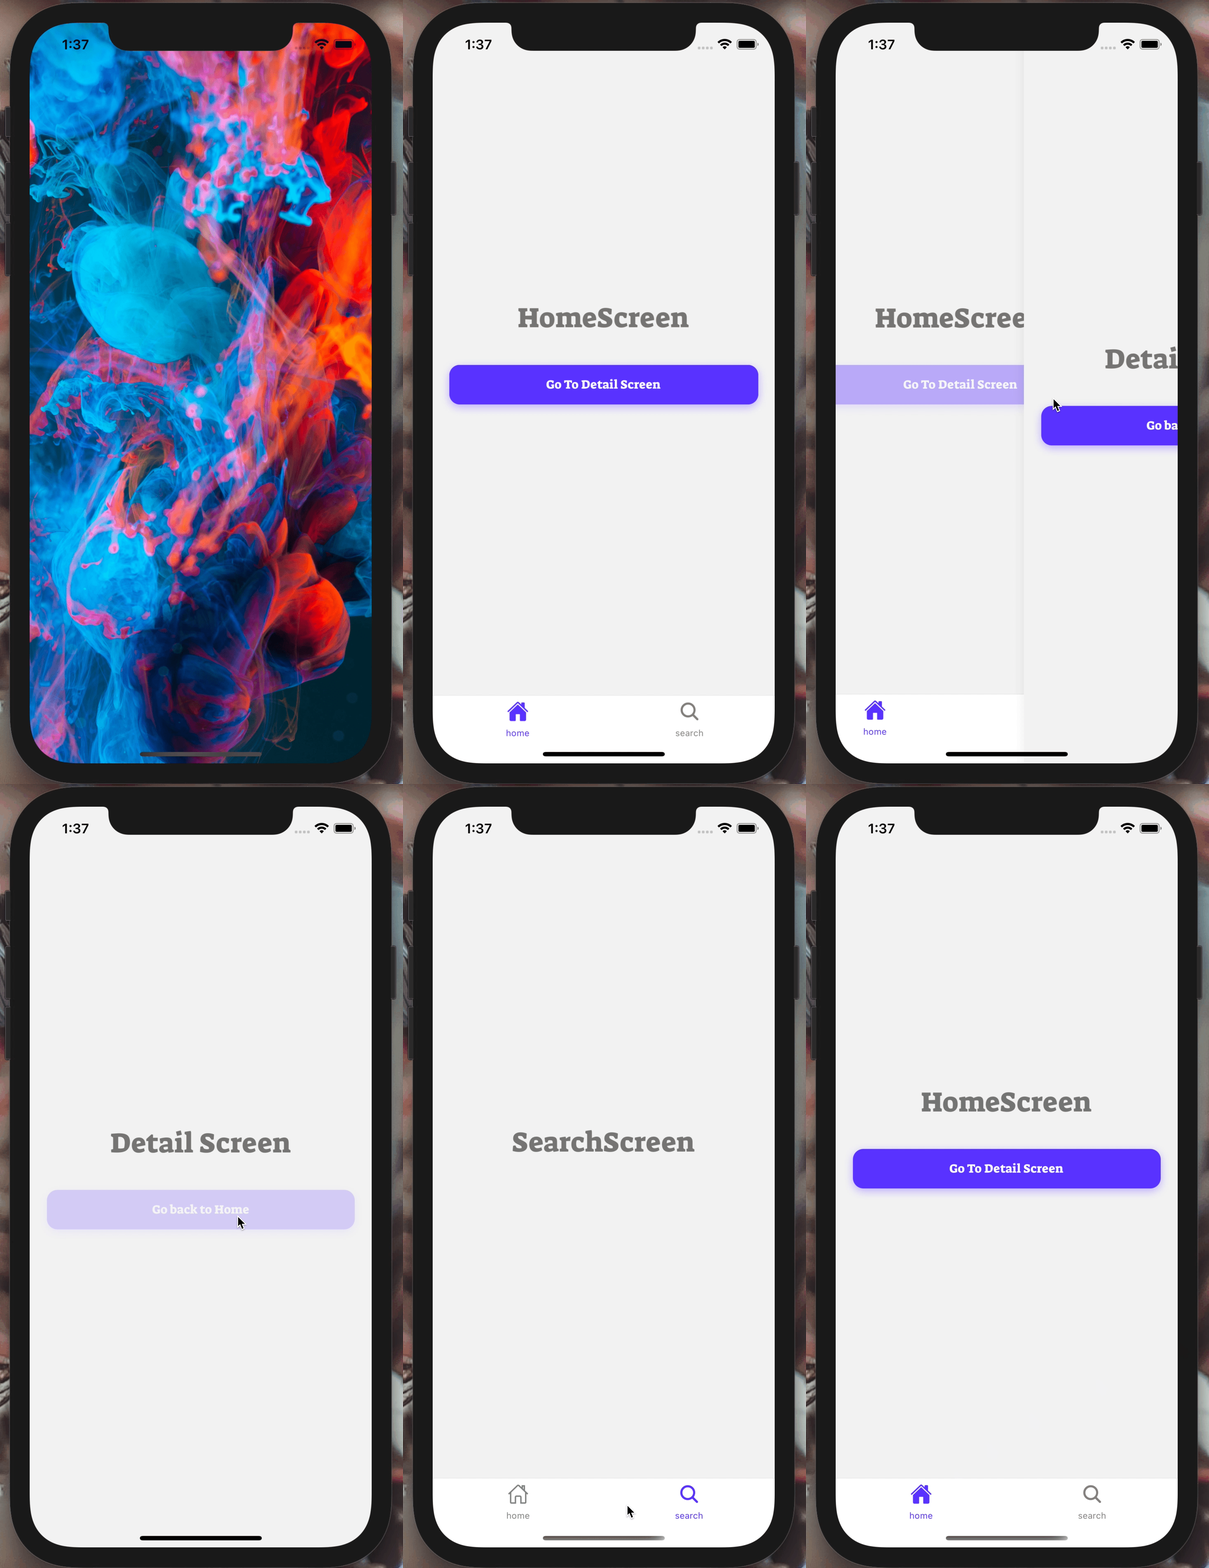
You can simply clone the project and start with your barebone project
git clone git@github.com:WrathChaos/react-native-typescript-boilerplate.git my-app-name- Navigation System
- React Navigation V6
- React Navigation Helpers
- Ready to use Stack and Tab Screens with navigation
- Built-in Theme System
- Colors
- Fonts
- Built-in TextWrapper for better Custom Text usage
- Ready to use React Native Reanimated 2 Integration
- Built-in Animated Splash Screen
- Built-in Localization (Multi-Language Support)
- HTTP Network Management
- Axios
- API Service with Usage Examples
- Built-in EventEmitter
- EventBus
- Built-in Local Storage asa MMKV Storage
- LocalStorage (Instead of AsyncStorage)
- Local Storage Ready to Use Util Functions
- Babel Plugin Module Resolver
- Fixing the relative path problem
- Visit
.babelrcto ready to use and more customization
- Pre-commit Husky Integration
- Ready to command husky setup with
npm run husky:setup commitlintIntegration for better commit linter- Auto prettier on pre-commit
- Ready to command husky setup with
- Built-in Custom Font Implementation
- All you need to do is copy-paste the .tff file and run
npx react-native-assetcommand
- All you need to do is copy-paste the .tff file and run
├───android
├───ios
├───src
│   ├───screens
│   │   ├───detail
│   │   │   ├───DetailScreen.style.ts
│   │   │   └───DetailScreen.tsx
│   │   ├───home
│   │   │   ├───HomeScreen.style.ts
│   │   │   └───HomeScreen.tsx
│   │   └───search
│   │       ├───SearchScreen.style.ts
│   │       └───SearchScreen.tsx
│   ├───services
│   │   ├───api
│   │   │   ├───api.constant.ts
│   │   │   └───index.ts
│   │   ├───event-emitter
│   │   │   └───index.ts
│   │   ├───models
│   │   │   └───index.ts
│   │   └───navigation
│   │       └───index.tsx
│   ├───shared
│   │   ├───components
│   │   │   └───text-wrapper
│   │   ├───constants
│   │   │   └───index.ts
│   │   ├───localization
│   │   │   └───index.ts
│   │   └───theme
│   │       ├───fonts
│   │       ├───colors.ts
│   │       ├───font-size.ts
│   │       ├───index.ts
│   │       └───theme.ts
│   └───utils
│       ├───local-storage
│       │   └───index.ts
│       └───index.ts
├───.babelrc
├───.buckconfig
├───.eslintrc.js
├───.gitattributes
├───.gitignore
├───.npmignore
├───.prettierrc.js
├───.watchmanconfig
├───App.tsx
├───README.md
├───app.json
├───index.js
├───metro.config.js
├───package-lock.json
├───package.json
├───react-native.config.js
├───tsconfig.json
- TextWrapper over default Text component
- Colors
- Fonts
- Theme
- Font Size
Predefined h tags are usable with TextWrapper
import Text from "@shared-components/text-wrapper/Text";

// ? Advanced Usage Example
<Text h3 bold right color="#913400" numberOfLines={1} style={{ margin: 16 }}>
  Heading 3 Bold Right Sided Custom Text
</Text>;
import colors from "@colors";
<Text h1 color={colors.light.primary}>
Heading 1 with custom color from theme
</Text>;import fonts from "@fonts";
<Text h5 fontFamily={fonts.helvetica.regular}>
Heading 1 with custom font usage
</Text>;import fontSize from "@font-size";import theme from "@theme";if you want to call them all at once
import { theme, fonts, colors, spacing, fontSize } from "@shared-styles/index";Clean up the files from the example repository and do not forget to install the dependencies
rm -rf .git README.mdrm -rf ./assetsgit initnpm inpm run husky:setupnpx pod-install(iOS Only)react-native run-ios/android
OR
npm inpm run clean-upnpm i && npx pod-installreact-native run-ios/android
Before doing anything else, please simply run the command to initalize the husky.
npm run husky:setuphusky:setup will handle the initizalition, installation and ready to use commitlint and prettier.
Rename the project: (Thanks to react-native-name)
npx react-native-rename <your-project-name>With custom Bundle Identifier (Android only. For iOS, please use Xcode)
npx react-native-rename <your-project-name> -b <bundleIdentifier>npm icd ios && pod installcd .. && react-native run-ios/android
npm icd android && mkdir local.propertiesnano local.properties
- Go to
Android -> local.properties - Change the your local android sdk and cmake path
Make sure that set your right path of Android SDK Make sure that set your right path of Android CMake
Replace your machine name instead of username
sdk.dir=/Users/username/Library/Android/sdk
cmake.dir=/Users/username/Library/Android/sdk/cmake/3.10.2.4988404
Replace your machine name instead of username
sdk.dir=/Users/username/Library/Android/sdk
cmake.dir=/Users/username/Library/Android/sdk/cmake/3.10.2.4988404
cd .. & react-native run-ios/android
-
LICENSE -
Better Husky: Linter, Prettier and Commintlint - Detox E2E Integration
- Removal of
react-native-animated-splash-screen - Implement the native splash screen with react-native-splash-screen
- Better and separated documentation
- Redux Fork Version
- MobX State Tree Fork Version
- Write an article about the lib on Medium
Photo by Lucas Benjamin on Unsplash
FreakyCoder, kurayogun@gmail.com
React Native Typescript Boilerplate is available under the MIT license. See the LICENSE file for more info.


