


Exploratory Data Analysis and Data Visualisation of Space Missions Since 1957, with a little bit of feature engineering and predictive modelling.
Who does not love Space? The DataSet was scraped from https://nextspaceflight.com/launches/past/?page=1 and includes all the space missions since the beginning of Space Race (1957).
  ├── datasets/         Dataset of Space Missions.
  ├── notebooks/        Contains the jupyter notebook files of Space Missions.
space_missions.csvis the dataset for the notebookspace_missions_eda.ipynbspace_missions_cleaned.csvis the dataset for the notebookspace_missions_prediction.ipynb
-
A web browser.
OR -
Anaconda software.
-
Very basic understanding of git and github:
- What are repositories (local - remote - upstream), issues, pull requests
- How to clone a repository, how to fork a repository, how to set upstreams
- Adding, committing, pulling, pushing changes to remote repositories
-
For EDA and Visualisation
- Basic syntax and working of
python.(This is a must) - Basic knowledge of
pandaslibrary. Reading this blog might help. - Basic knowledge of
matplotliblibrary. Reading this blog might help. - Basic knowledge of
seabornlibrary. Reading this blog might help. - Basic knowledge of
scikit learnlibrary. Reading this blog might help.
However the code is well explained, so anyone knowing the basics of Python can get a idea of what's happenning and contribute to this.
- Basic syntax and working of
There are two ways of running the code.
-
Running the code on web browser.(Google Colab) [Recommended]
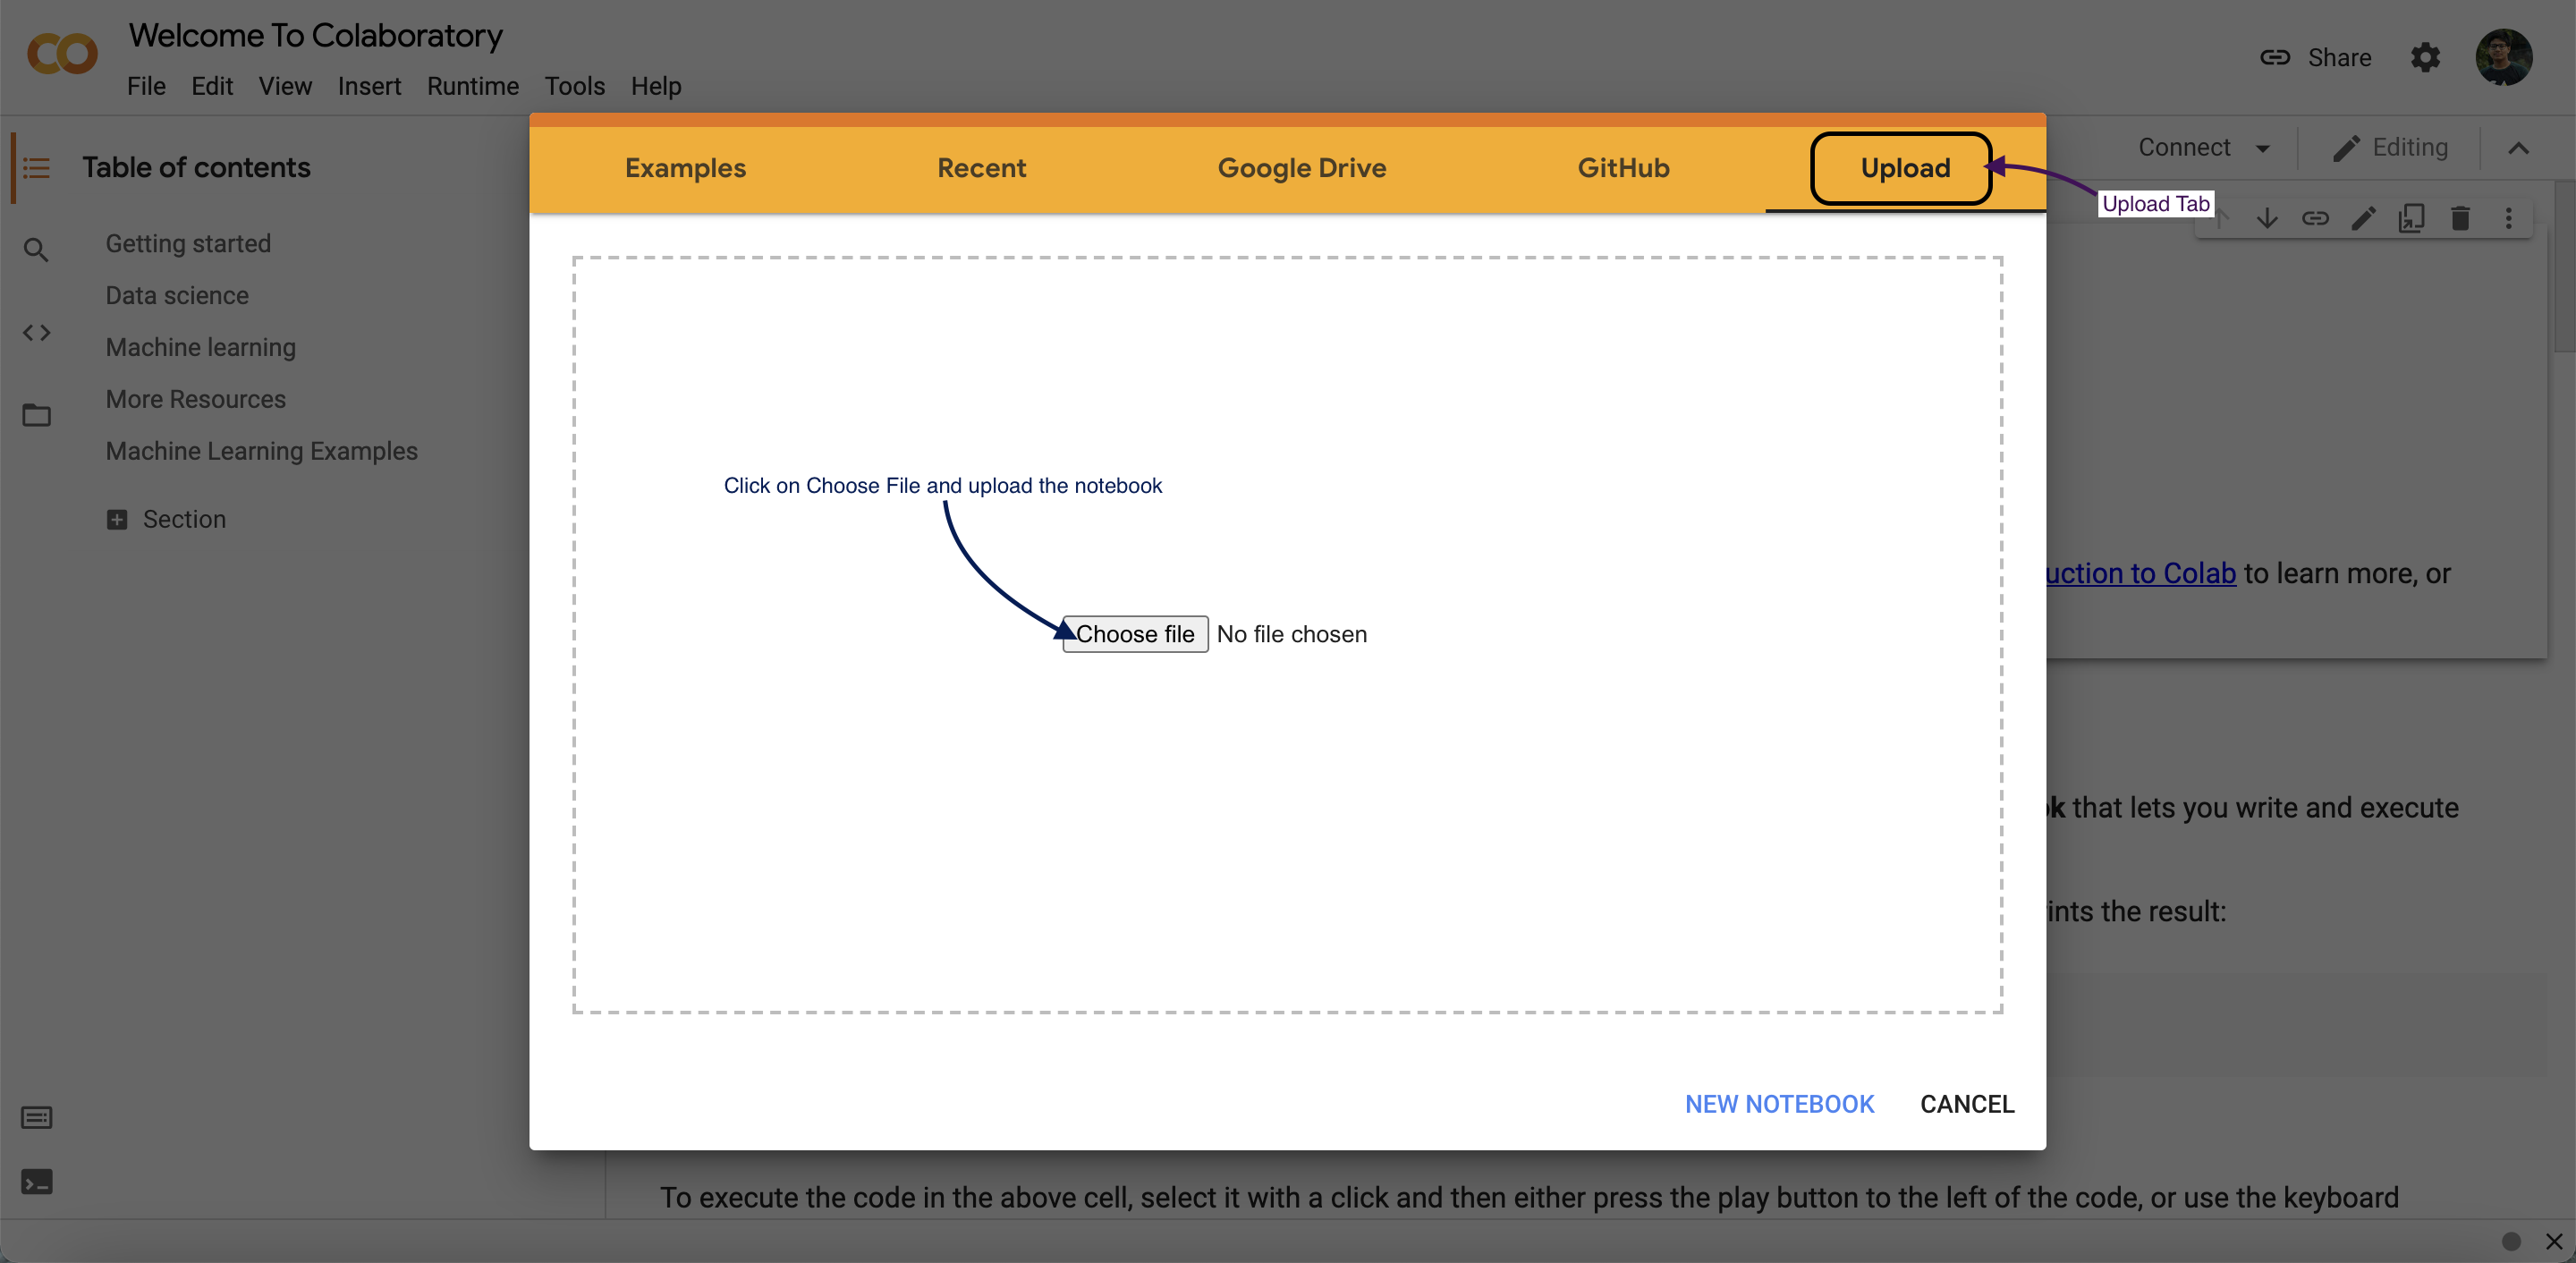
- Head on to Google colab
- Then click on
Upload NotebookTab. - Upload the notebook that you got from this repo.
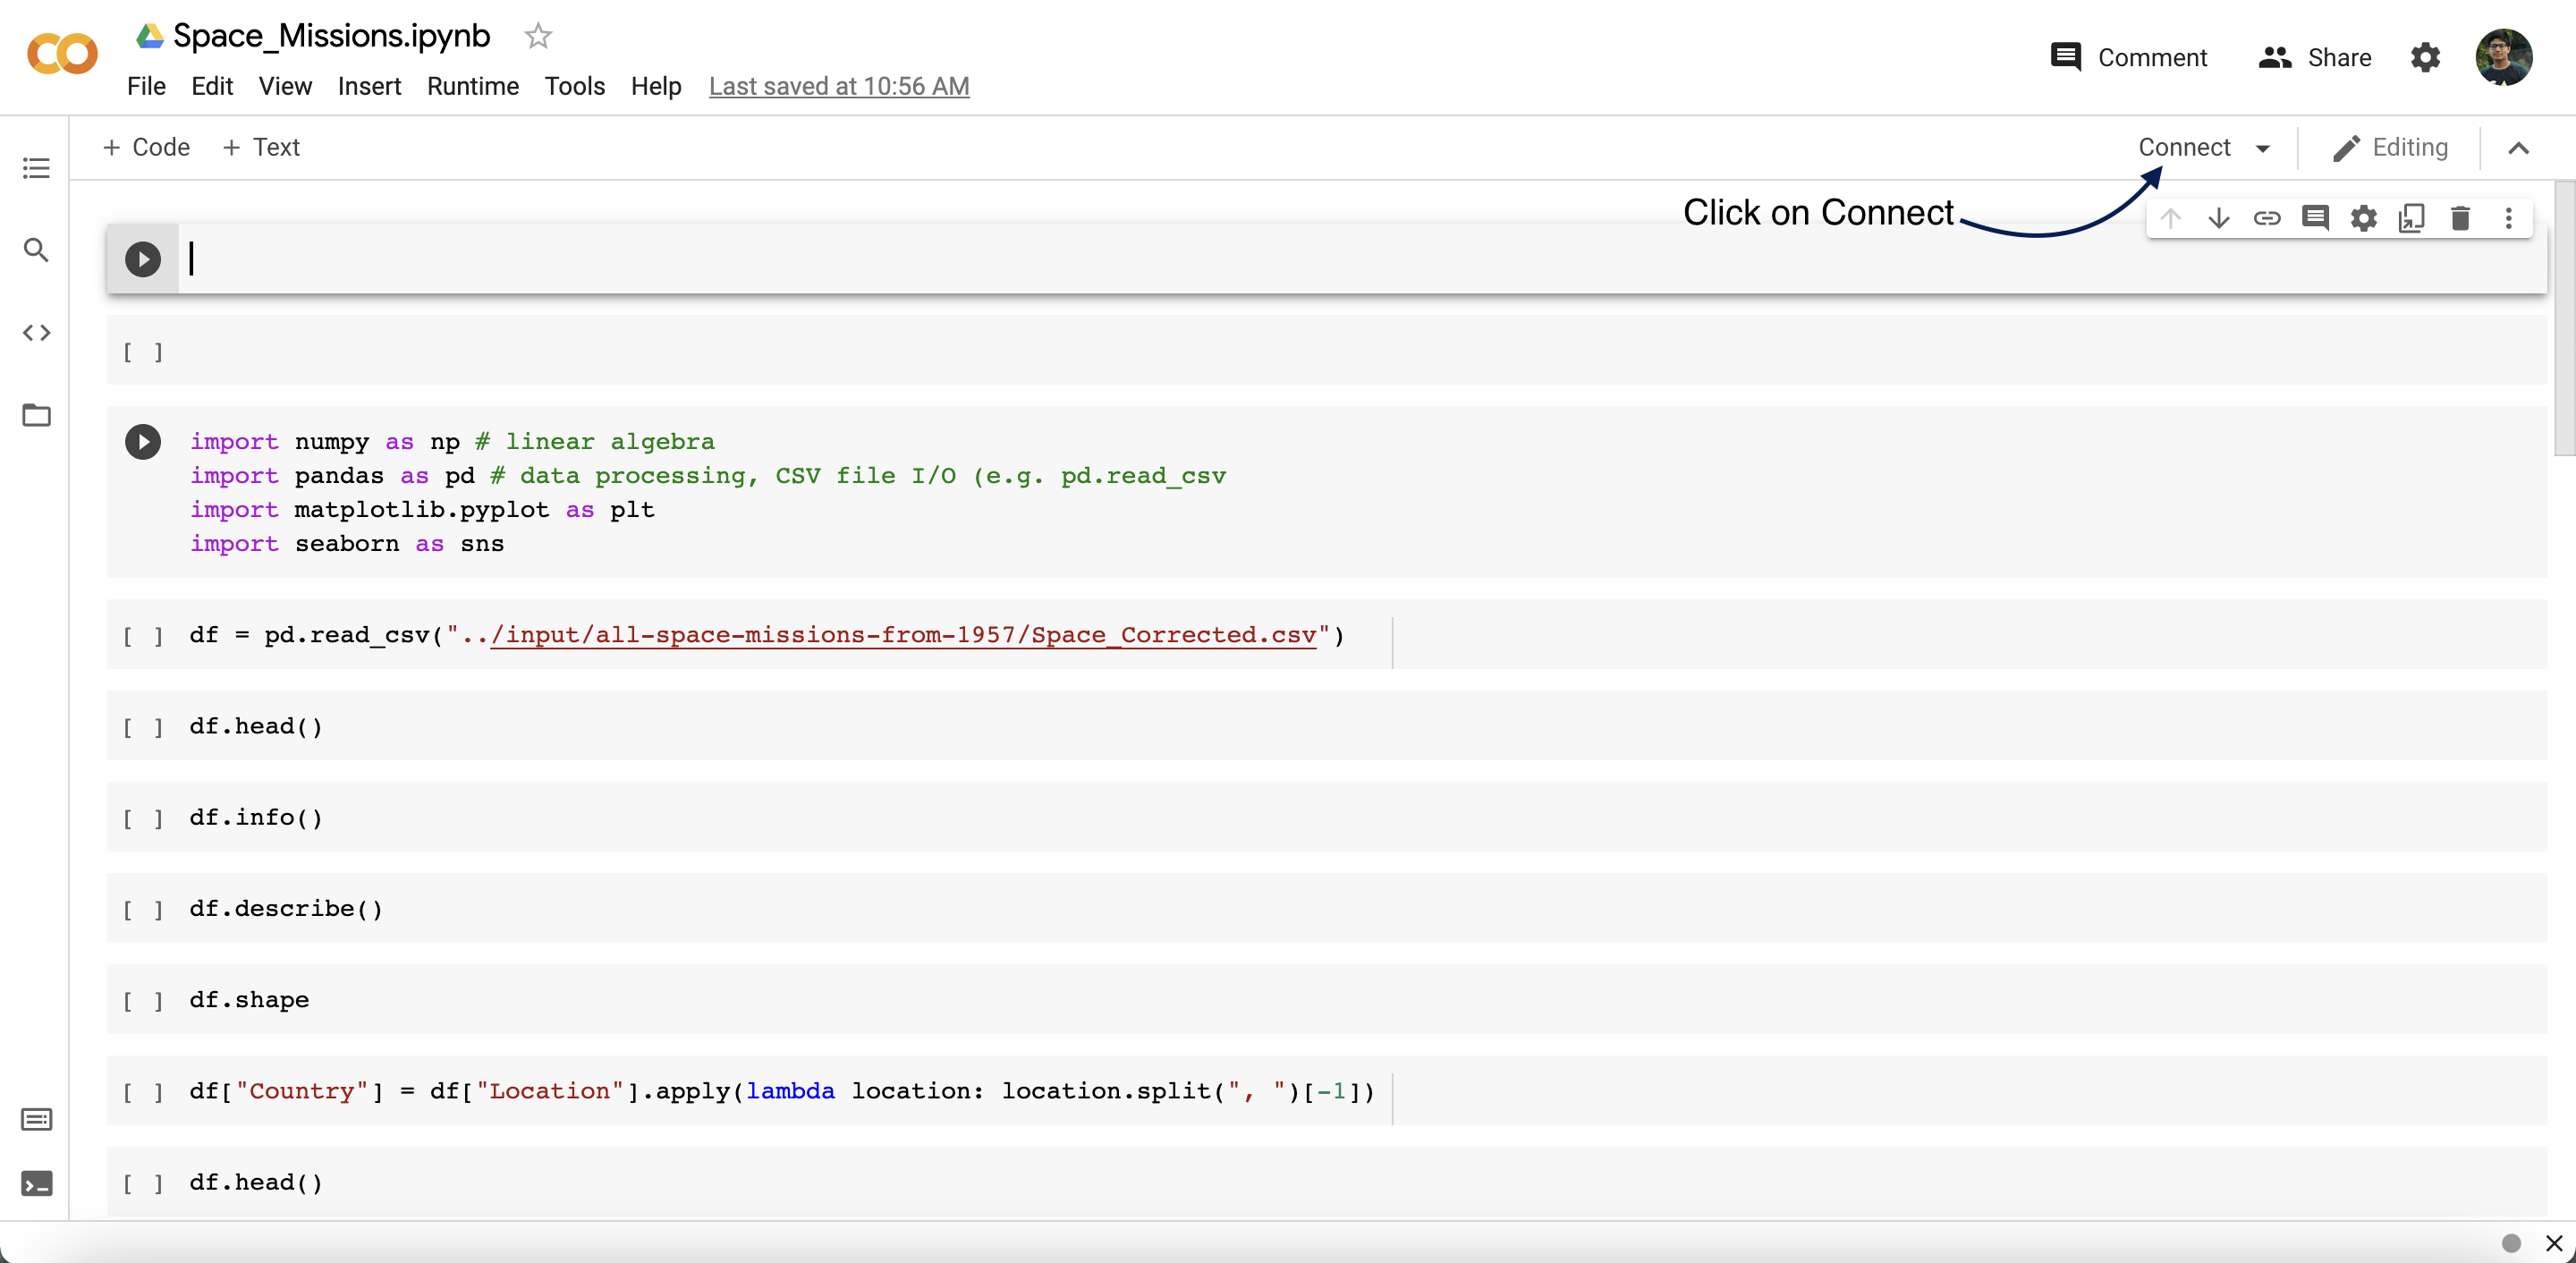
- Connect with the runtime.
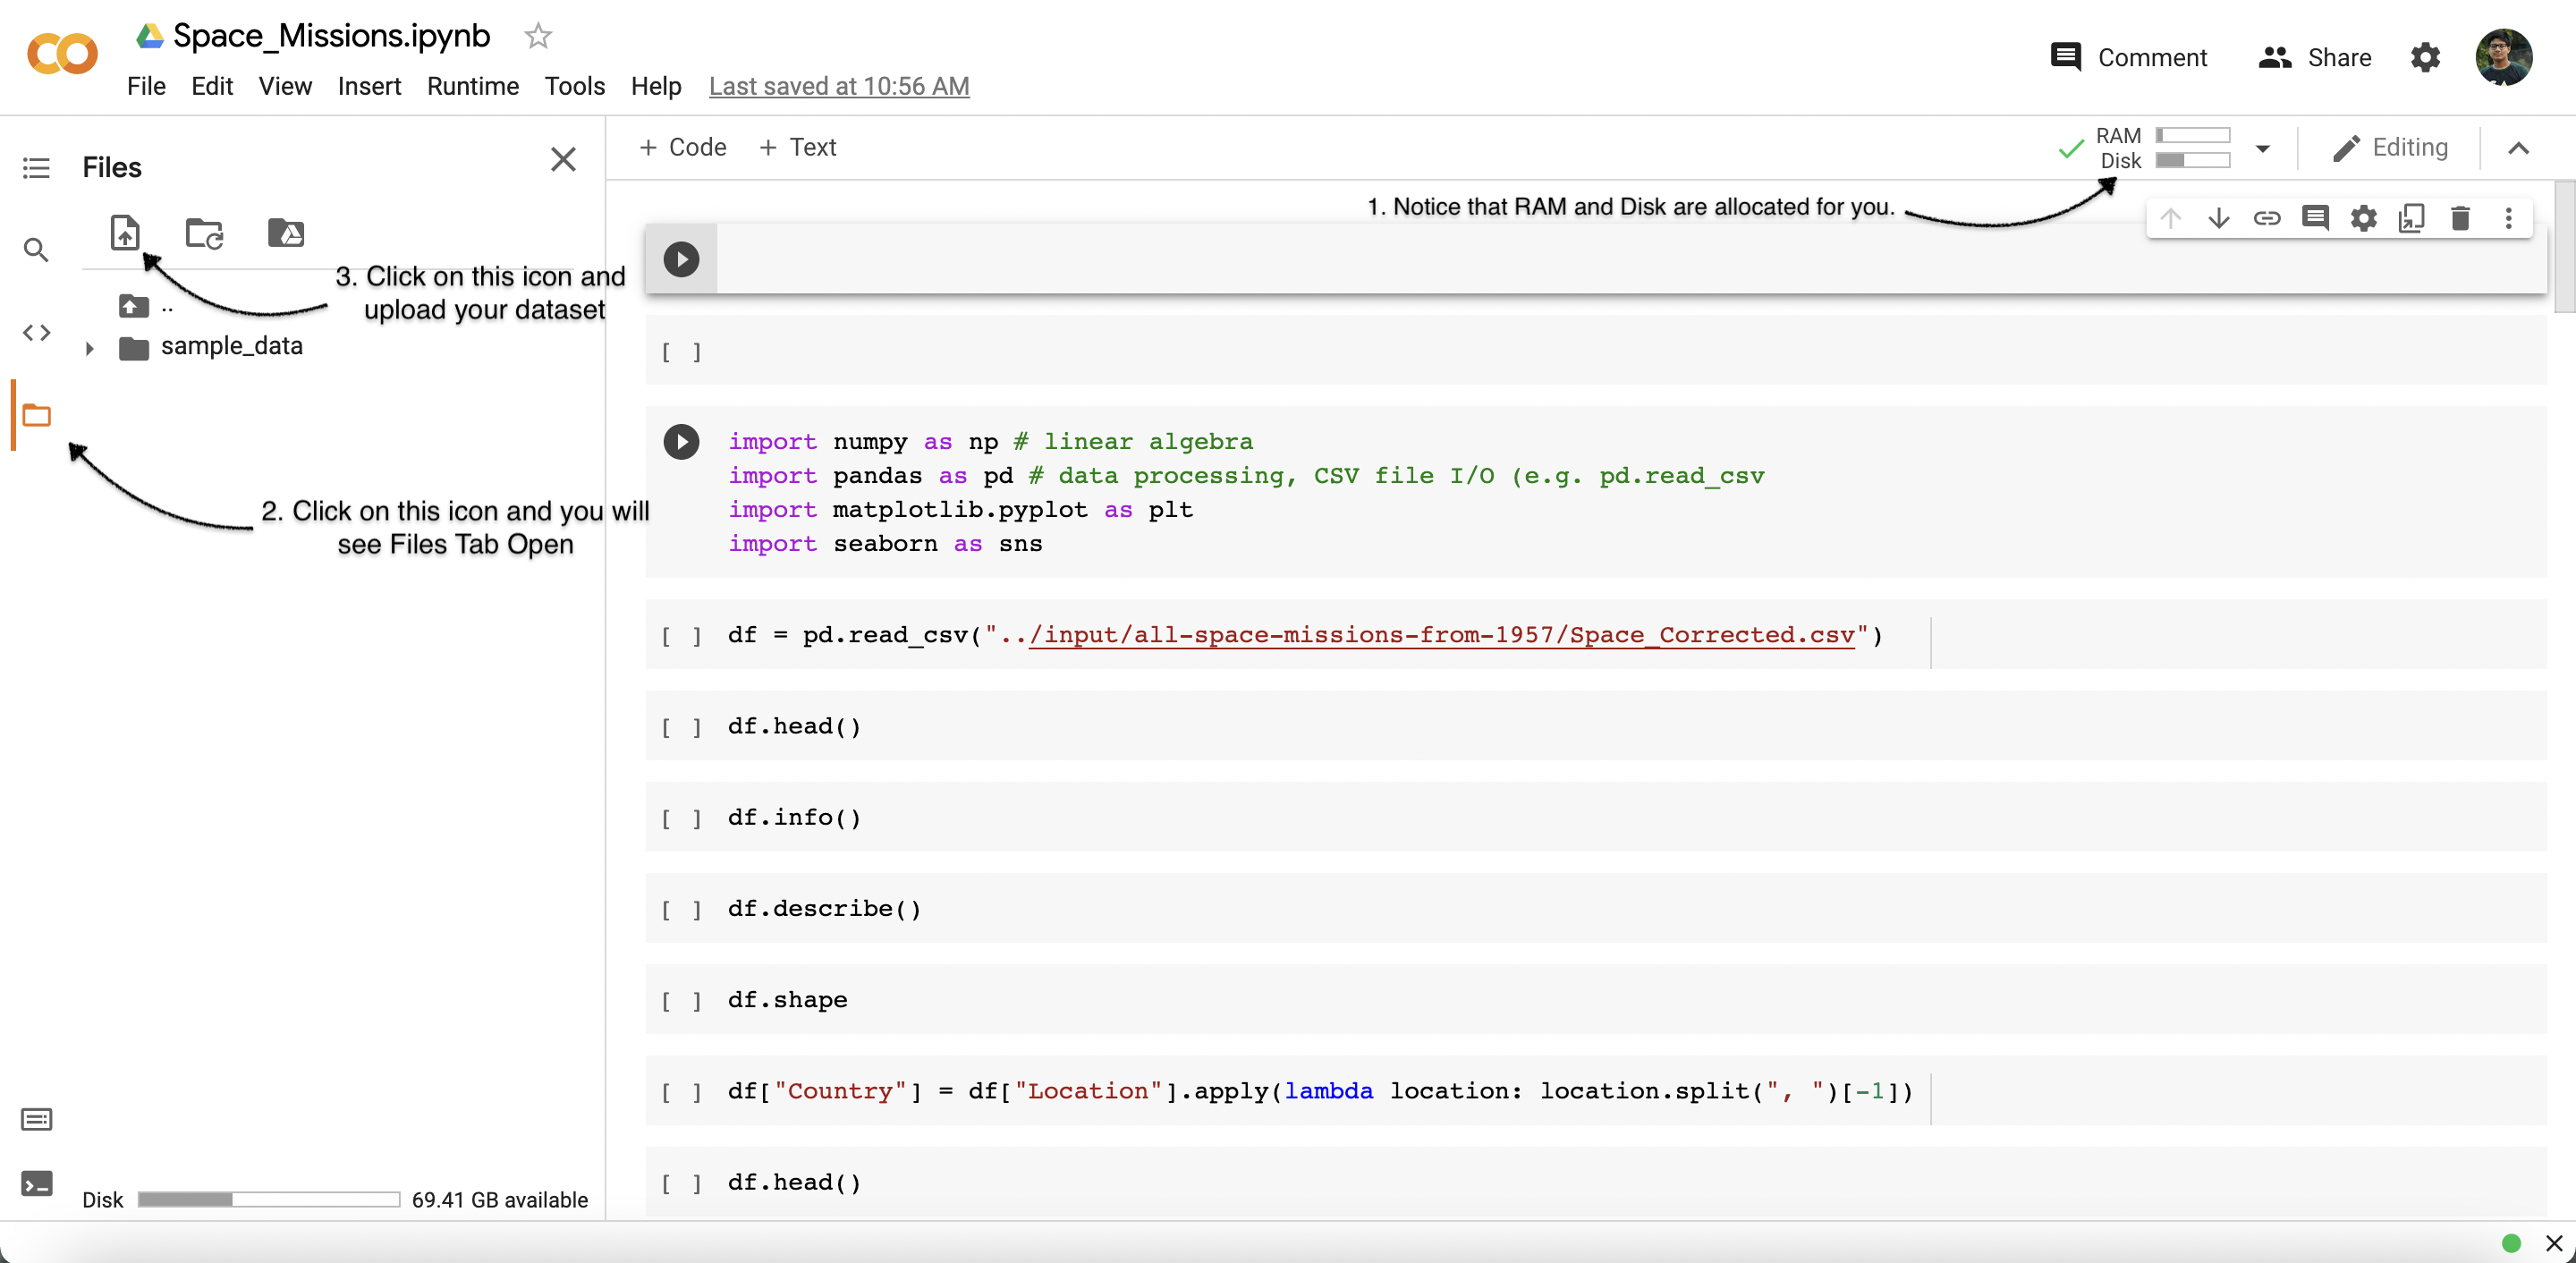
- Upload your dataset.
- Then Click on
Run All. - Start Editing.
-
You can also run the code locally in your computer by installing Anaconda.
- Install Anaconda. Follow these steps to install Anaconda on your computer
- Install jupyter notebook using
conda. Follow these steps to install jupyter notebook. - Make sure to install
pandas,matplotlib,seabornandscikit-learnto run the notebook. - Start Editing.

- Head to here for the
Space_Missions_EDAlive preview - Head to here for the
Space_Missions_Predictionslive preview
Contributions are what make the open source community such an amazing place to be learn, inspire, and create. Any contributions you make are greatly appreciated. Contributing is also a great way to learn more about social coding on Github, new technologies and and their ecosystems and how to make constructive, helpful bug reports, feature requests and the noblest of all contributions: a good, clean pull request.
- Before starting to work on any issue or feature, open an issue explaining the changes you want to make and wait for any of the project maintainers to assign it to you.
- Use better commit messages that explain the changes you make. View the example below:
- Bad commit message:
updated readme - Good commit message:
updated contributors list in readme
- Bad commit message:
- You should not, in any case, use resources or code snippets from sources that do not allow their public use.
- For solving an issue/adding a feature, write the code after the original code finishes and do not forget to add the issue name and number as a heading in the notebook.
- Before Submitting the PR, make sure to have a link of colab notebook of the feature/issue solved so that we can check easily. This even applies to those who are doing on anaconda.
This project is licensed under the MIT License - see the LICENSE file for details.