CVPR 2018 Paper | ArXiv | Project | Demo | BibTex
Example inpainting results of our method on images of natural scene (Places2), face (CelebA) and object (ImageNet). Missing regions are shown in white. In each pair, the left is input image and right is the direct output of our trained generative neural networks without any post-processing.
- Requirements:
- Install python3.
- Install tensorflow (tested on Release 1.3.0, 1.4.0, 1.5.0, 1.6.0, 1.7.0).
- Install tensorflow toolkit neuralgym (run
pip install git+https://github.com/JiahuiYu/neuralgym).
- Training:
- Prepare training images filelist.
- Modify inpaint.yml to set DATA_FLIST, LOG_DIR, IMG_SHAPES and other parameters.
- Run
python train.py.
- Resume training:
- Modify MODEL_RESTORE flag in inpaint.yml. E.g., MODEL_RESTORE: 20180115220926508503_places2_model.
- Run
python train.py.
- Testing:
- Run
python test.py --image examples/input.png --mask examples/mask.png --output examples/output.png --checkpoint model_logs/your_model_dir.
- Run
CelebA-HQ | Places2 | CelebA | ImageNet |
Download the model dirs and put it under model_logs/ (rename checkpoint.txt to checkpoint because google drive automatically add ext after download). Run testing or resume training as described above. All models are trained with images of resolution 256x256 and largest hole size 128x128, above which the results may be deteriorated. We provide several example test cases. Please run:
# Places2 512x680 input
python test.py --image examples/places2/wooden_input.png --mask examples/places2/wooden_mask.png --output examples/output.png --checkpoint_dir model_logs/release_places2_256
# CelebA 256x256 input
python test.py --image examples/celeba/celebahr_patches_164036_input.png --mask examples/center_mask_256.png --output examples/output.png --checkpoint_dir model_logs/release_celeba_256/
# CelebA-HQ 256x256 input
# Please visit CelebA-HQ demo at: jhyu.me/demo
# ImageNet 256x256 input
python test.py --image examples/imagenet/imagenet_patches_ILSVRC2012_val_00000827_input.png --mask examples/center_mask_256.png --output examples/output.png --checkpoint_dir model_logs/release_imagenet_256
Note: Please make sure the mask file completely cover the masks in input file. You may check it with saving a new image to visualize cv2.imwrite('new.png', img - mask).
Visualization on TensorBoard for training and validation is supported. Run tensorboard --logdir model_logs --port 6006 to view training progress.
CC 4.0 Attribution-NonCommercial International
The software is for educaitonal and academic research purpose only.
- Can other types of GANs work in current setting?
The proposed contextual attention module is independent of GAN losses. We experimented with other types of GANs in Section 5.1 and WGAN-GP is used by default. Intuitively, during training, pixel-wise reconstruction loss directly regresses holes to the current ground truth image, while WGANs implicitly learn to match potentially correct images and supervise the generator with adversarial gradients. Both WGANs and reconstruction loss measure image distance with pixel-wise L1.
- How to determine if G is converged?
We use a slightly modified WGAN-GP for adversarial loss. WGANs are demonstrated to have more meaningful convergent curves than others, which is also confirmed in our experiments.
- The split of train/test data in experiments.
We use the default training/validation data split from Places2 and CelebA. For CelebA, training/validation have no identity overlap. For DTD texture dataset which has no default split, we sample 30 images for validation.
- How does random mask generated?
Please check out function random_bbox and bbox2mask in file inpaint_ops.py.
- Parameters to handle the memory overhead.
Please check out function contextual_attention in file inpaint_ops.py.
- How to implement contextual attention?
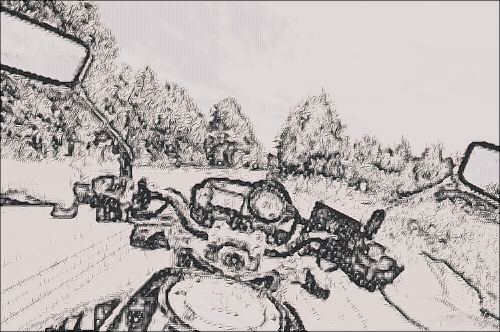
The proposed contextual attention learns where to borrow or copy feature information from known background patches to reconstruct missing patches. It is implemented with TensorFlow conv2d, extract_image_patches and conv2d_transpose API in file inpaint_ops.py. To test the implementation, one can simply apply it on RGB feature space, using image A to reconstruct image B. This special case then turns into a naive style transfer.
python inpaint_ops.py --imageA examples/style_transfer/bnw_butterfly.png --imageB examples/style_transfer/bike.jpg --imageOut examples/style_transfer/bike_style_out.png@article{yu2018generative,
title={Generative Image Inpainting with Contextual Attention},
author={Yu, Jiahui and Lin, Zhe and Yang, Jimei and Shen, Xiaohui and Lu, Xin and Huang, Thomas S},
journal={arXiv preprint arXiv:1801.07892},
year={2018}
}


