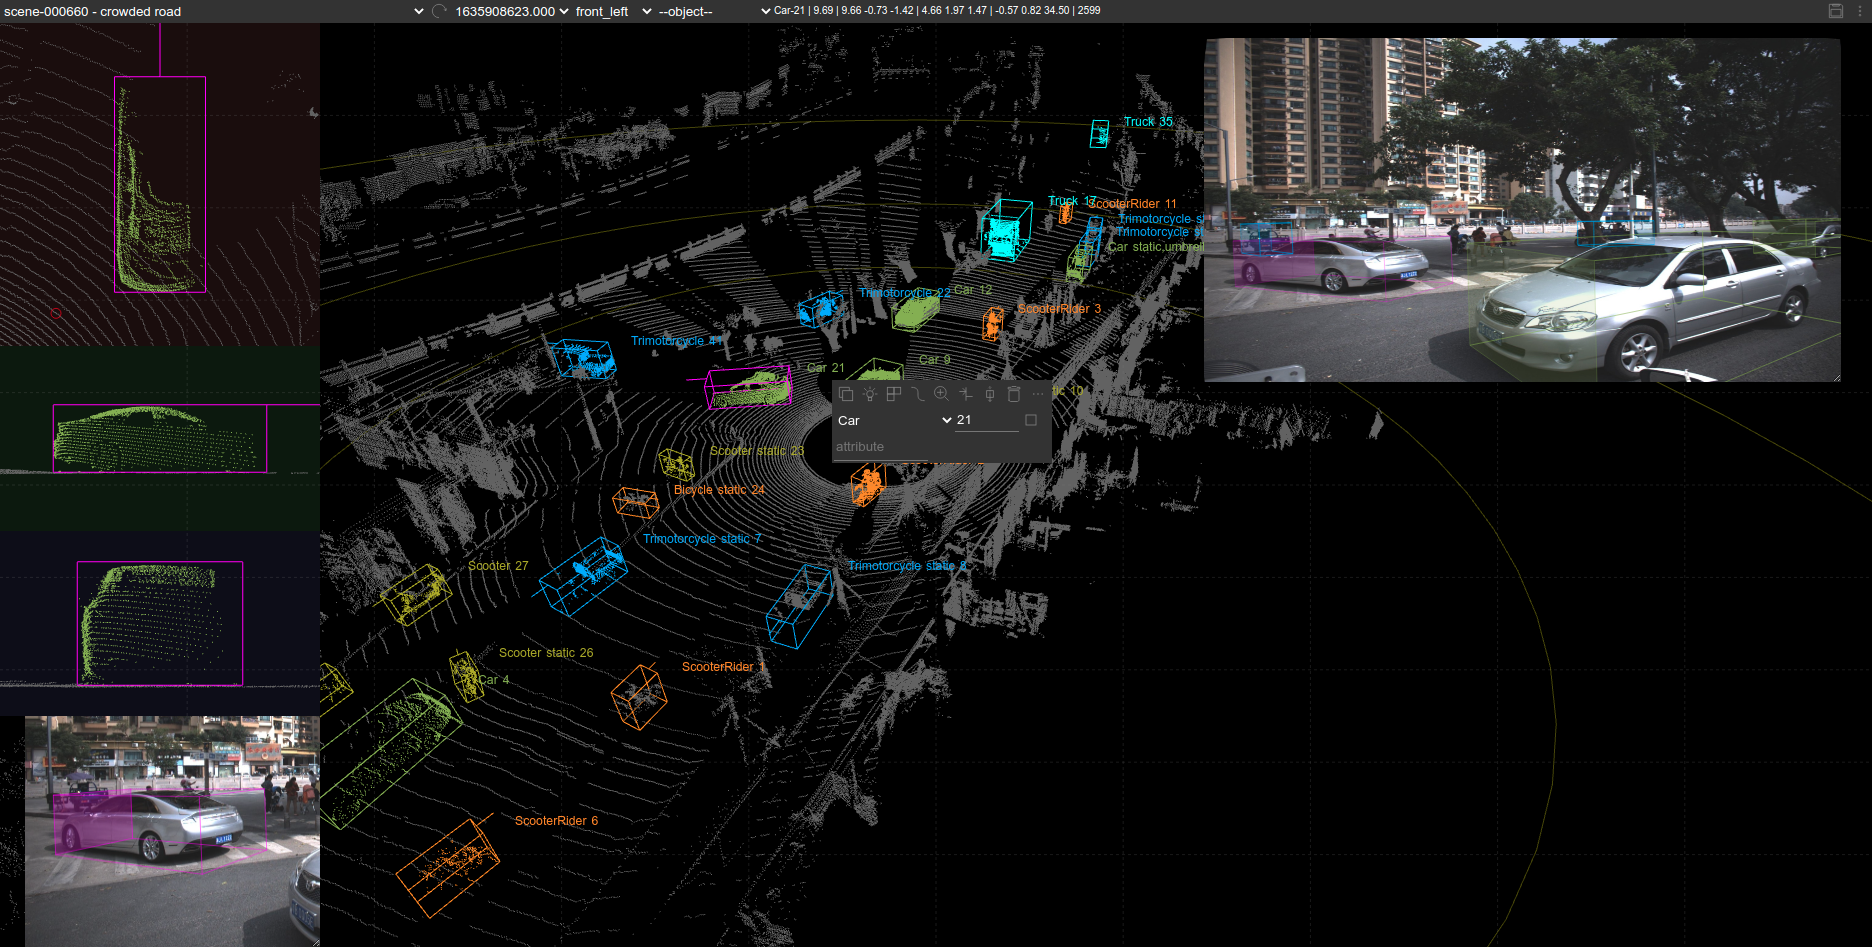
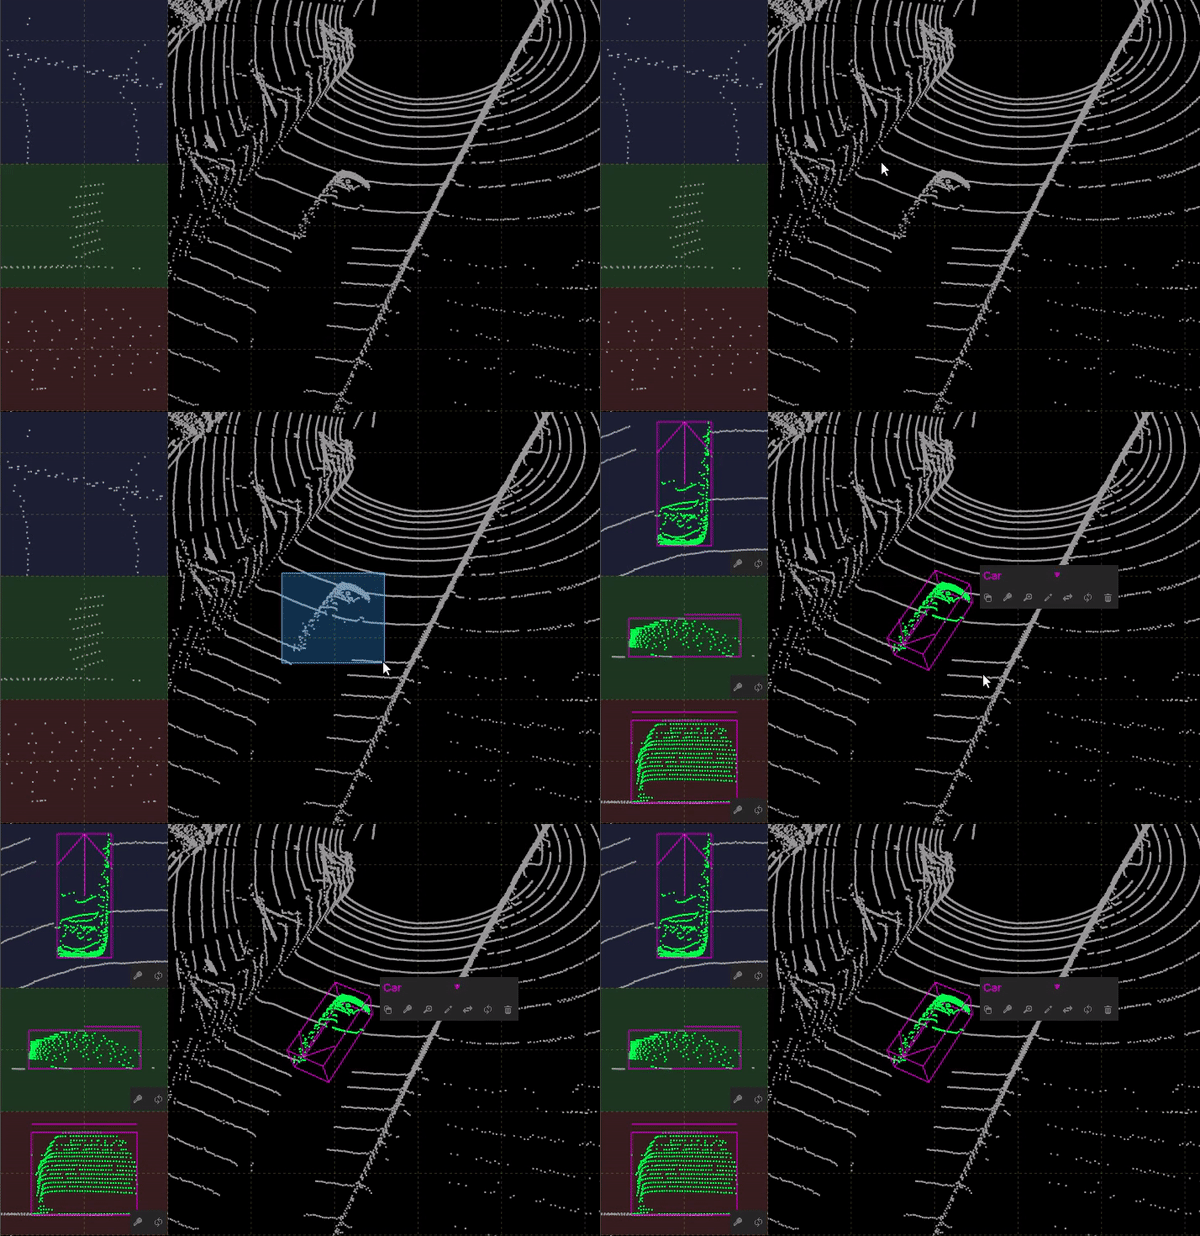
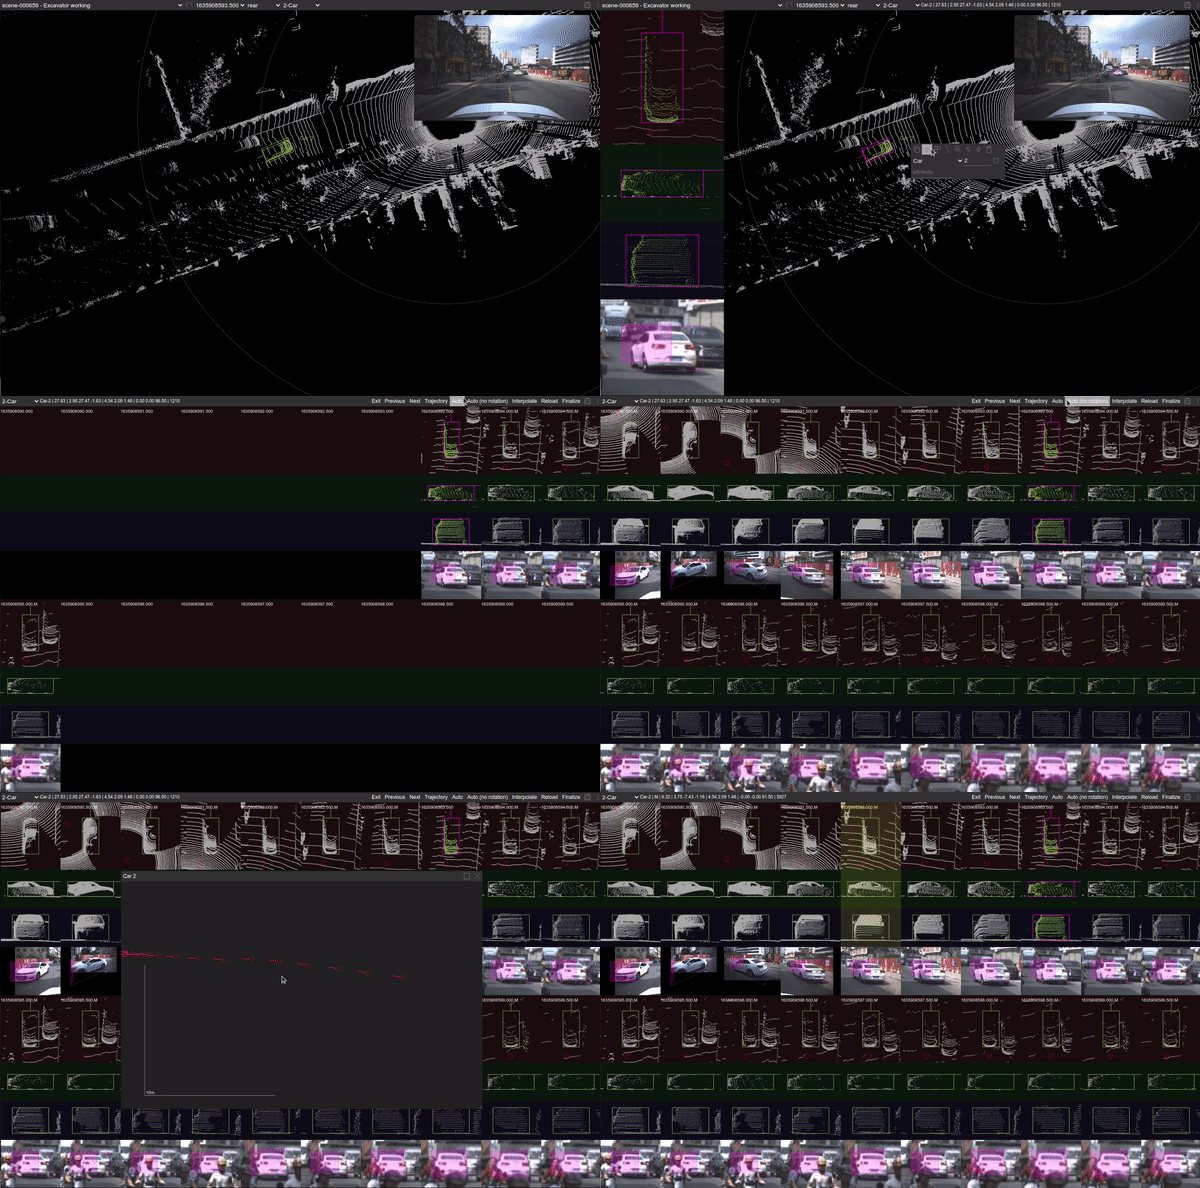
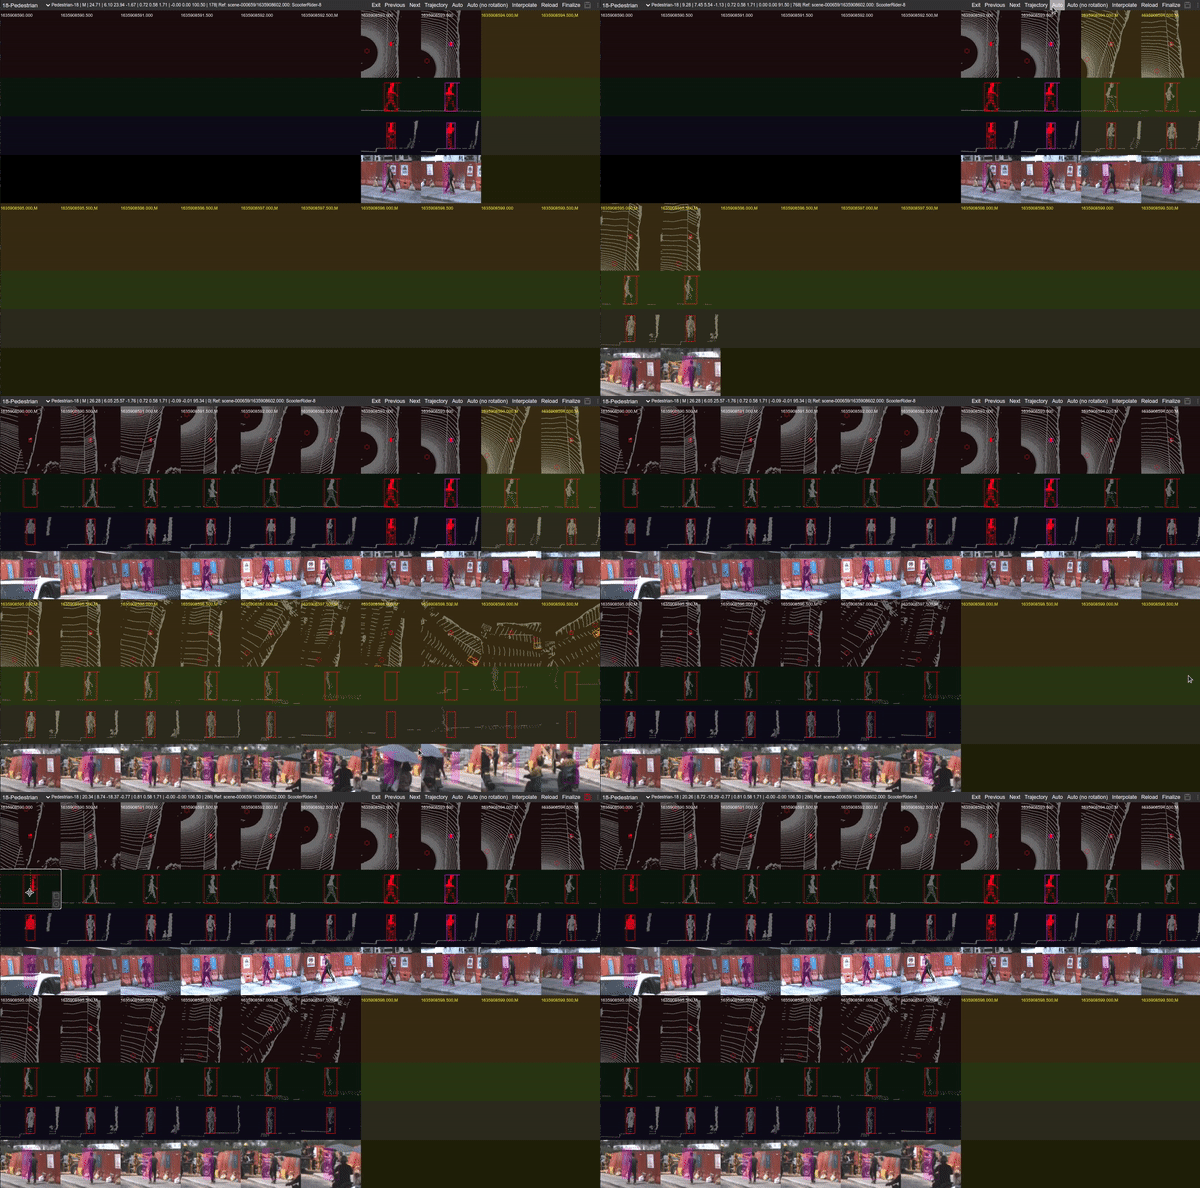
automatically annotate a car
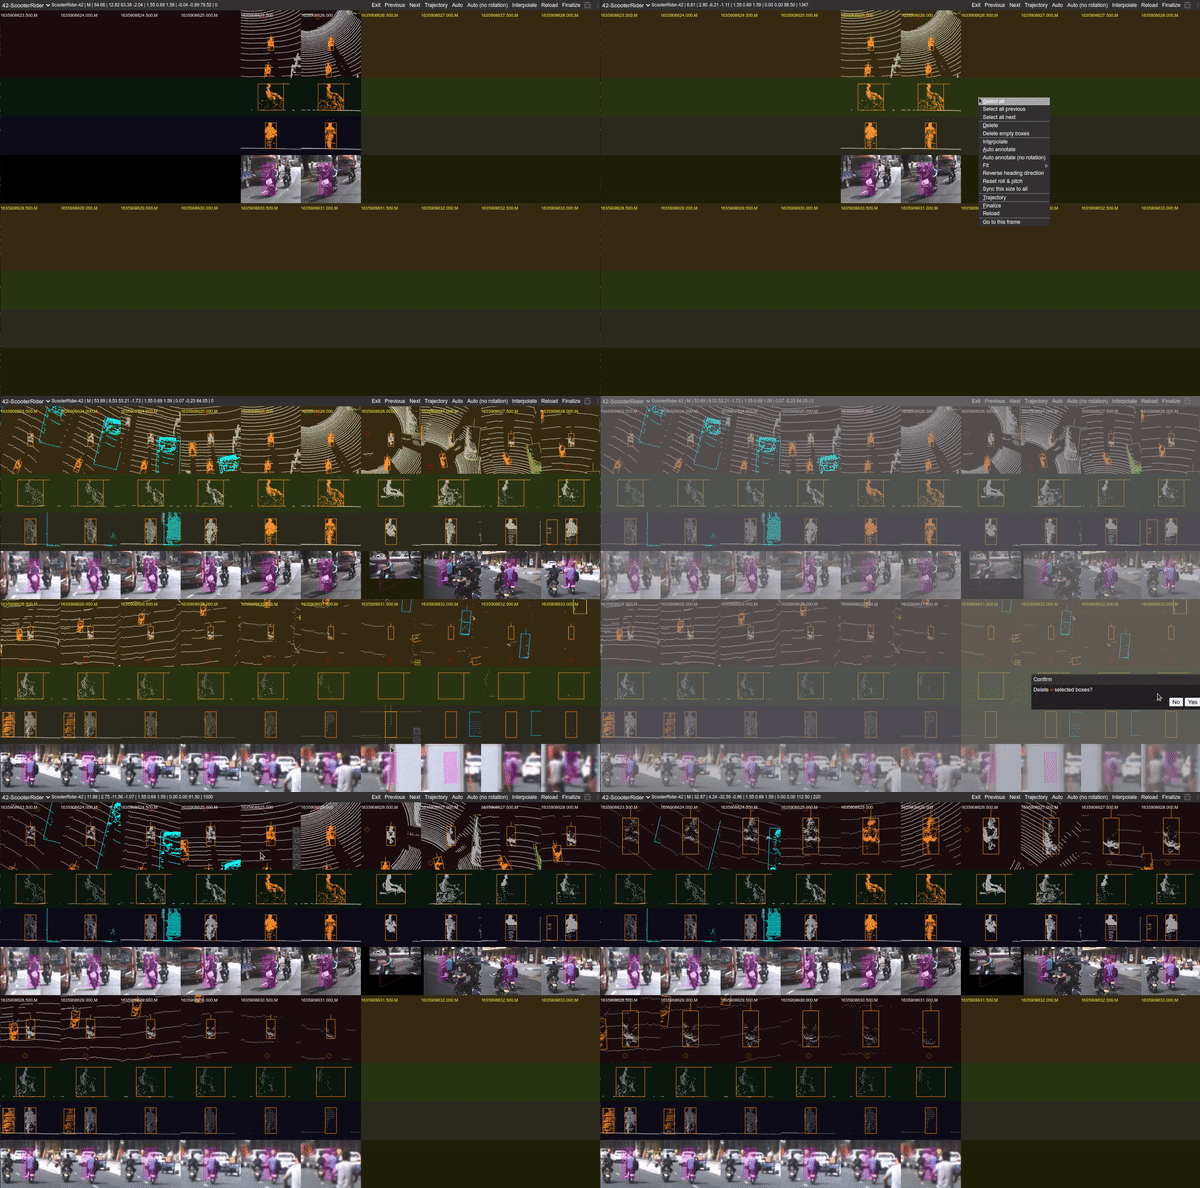
automatically annotate a scooter-rider
automatically annotate a pedestrian
- Batch-mode editing
- Automatic object rotation
- 9 DoF box editing
- Editing on perspective view and projective views
- Multiple camera images as context, with auto-camera-switching
- Camera-LiDAR fusion
- Binary/ascii pcd files
- Jpg/png image files
- Objects/boxes color by category
- Focus mode to hide background to check details easily
- Stream play/stop
- Auto object tracking id generation
- Interactive box fitting
python, cherrypy, tensorflow>=2.1
-
Install packages
pip install -r requirement.txt -
Download model
download pretrained model file deep_annotation_inference.h5, put it into
./algos/modelswget https://github.com/naurril/SUSTechPOINTS/releases/download/0.1/deep_annotation_inference.h5 -P algos/models
sudo apt install -y docker docker.io docker-registry
cd Docker

# Build docker image (构建镜像)

sudo docker build -t sustechpoints:v1.0.0 .

# Create container of server ,Please replace ${YourDataPath} with the path where you put data on (创建容器, 请将用你的数据存储路径将变量${YourDataPath}替换, 注意数据要符合data/example中的组织方式)

sudo docker run -it -d --restart=always --name STPointsSServer -p 8081:8081 -v ${YourDataPath}:/root/SUSTechPOINTS/data sustechpoints:v1.0.0 bash
sudo docker run -it -d --restart=always -p 8081:8081 juhaoming/sustechpoints:v1.0.0 bash

sudo docker run -it -d --restart=always -p 8081:8081 -v ${YourDataPath}:/root/SUSTechPOINTS/data juhaoming/sustechpoints:v1.0.0 bash
Run the following command in shell, then go to http://127.0.0.1:8081
python main.py
public
   +- data
       +- scene1
          +- lidar
               +- 0000.pcd
               +- 0001.pcd
          +- camera
               +- front
                    +- 0000.jpg
                    +- 0001.jpg
               +- left
                    +- ...
          +- aux_lidar
               +- front
                    +- 0000.pcd
                    +- 0001.pcd
          +- radar
               +- front_points
                    +- 0000.pcd
                    +- 0001.pcd
               +- front_tracks
                    +- ...
          +- calib
               +- camera
                    +- front.json
                    +- left.json
               +- radar
                    +- front_points.json
                    +- front_tracks.json
          +- label
               +- 0000.json
               +- 0001.json
       +- scene2
label is the directory to save the annotation result.
calib is the calibration matrix from point cloud to image. it's optional, but if provided, the box is projected on the image so as to assist the annotation.
check examples in ./data/example
default object configuration is in obj_cfg.js
You have 2 ways to add a new box:
- Right click on an object, choose object type in popup context menu
- Holding Ctrl, draw a rectangle enclosing the object.
Hint:
- Adjust the main view so that the objects (e.g. cars) are heading upward or downward along the screen, use 'g' if the direction need to be reversed, use 'r' or 'f' to adjust the yaw angle (z-axis rotation)
- Adjust the main view so it's almost in bird's eye view. (direct bird's eye view support is not complete yet)
Main View:
     mouse scroll up/down:  zoom in/out
     mouse left key hold/move: rotate (change main view)
     mouse right key hold/move: pan

     left click on a box: select
     left click on a selected box: show transform control
     left click on non-box area: hide transform control if present, or unselect box

     Ctrl+mouse drag: add a new box
     Shift+mouse drag: add a new box, w/o automatic box fitting

     Right click to show popup menu.

     -/=: adjust point size

     When transform control is enabled:
          v: switch transform modes among resize/translate/rotate
          z/x/c: turan on/off x/y/z axis
          use mouse to adjust the box.

     ctrl+s  save current frame
     del/ctrl+d  remove selected box

     1,2  select previous/next box
     3,4, or pageup/pagedown  show previous/next frame in current scene
     5,6,7  show camera helper box of sideviews.

     space: pause/continue stream play


     when a box is selected:
          t: show object trajectory

          del: delete the box
          ctrl+d: delete the box

          a,s,d,w,r,f,g: save as operations in top-view.

     when transform control in perspective view is active:
          z/x/c: toggle x/y/z asix handle
          v: switch among dimension/rotation/position


Side sbu-view (projective view):

     note:
     - in perspective view, all keyboard operations are same as operating in top-view
     - these shortcuts are applicable when a subview is activated by placing the mouse over it.

     a: move box left
     s: move box down
     d: move box right
     w: move box up
     q: rotate box counterclockwise
     e: rotate box clockwise
     r: rotate box counterclockwise, with box auto-fitting
     f: rotate box clockwise, with box auto-fitting
     g: reverse heading direction (rotate by PI)


     double click on center: auto-shrink box by adjusting all borders to nearest innner point.
     double click on border: auto-shrink box by adjusting the border to nearest innner point.
     double click on corner: auto-shrink box by adjusting the corresponding borders to nearest innner point.

     drag border/corner/center: move border/corner/box.
     ctrl + drag border/corner: move border/corner/box with box auto-fitting
     Shft + drag border/corner: move border/corner/box with box auto-fitting while keeping the box size


batch-editing mode:
     t: show object trajectory
     3/pageup: prev batch, or prev object (if one batch shows the whole scene)
     4/pagedown: nex batch, or next object (if one batch shows the whole scene)
     Escape: exit batch mode

     when context menu shown (underscored char):
          s: select all
          a: auto annotate selected frames
          f: finalize selected frames
          e: interpolate selected frames
          d: delete selected frames
If you find this work useful in your research, please consider cite:
@INPROCEEDINGS{9304562,
  author={Li, E and Wang, Shuaijun and Li, Chengyang and Li, Dachuan and Wu, Xiangbin and Hao, Qi},
  booktitle={2020 IEEE Intelligent Vehicles Symposium (IV)},
  title={SUSTech POINTS: A Portable 3D Point Cloud Interactive Annotation Platform System},
  year={2020},
  volume={},
  number={},
  pages={1108-1115},
  doi={10.1109/IV47402.2020.9304562}}
