Note
Template Project Next.js (Canary Version), Prisma ORM, and AWS S3 for Cloudflare R2 for Bootcamp devscale.id.
This is an example template, already set up:
- JWT_SECRET
Vercel Postgres
- POSTGRES_URL
- POSTGRES_PRISMA_URL
- POSTGRES_URL_NO_SSL
- POSTGRES_URL_NON_POOLING
- POSTGRES_USER
- POSTGRES_HOST
- POSTGRES_PASSWORD
- POSTGRES_DATABASE
OAuth Google Cloud Console
- GOOGLE_CLIENT_ID
- GOOGLE_SECRET_KEY
- GOOGLE_REDIRECT_URI
Cloudflare R2
- R2_BUCKET_NAME
- R2_ACCESS_KEY
- R2_SECRET_KEY
- R2_UPLOAD_ENDPOINT
- R2_PUBLIC_URL
- Clone this repo or use as template:
- Clone the repo.
git clone https://github.com/Devscale-Indonesia/devscale-nextjs-canary-r2.git <project-name>
# at current directory/folder
git clone https://github.com/Devscale-Indonesia/devscale-nextjs-canary-r2.git .

# using ssh
git clone git@github.com:Devscale-Indonesia/devscale-nextjs-canary-r2.git <project-name>
# at current directory/folder
git clone git@github.com:Devscale-Indonesia/devscale-nextjs-canary-r2.git .- Create project with template.
npx create-next-app@latest -e https://github.com/Devscale-Indonesia/devscale-nextjs-canary-r2 <project-name>
# at current directory/folder
npx create-next-app@latest -e https://github.com/Devscale-Indonesia/devscale-nextjs-canary-r2 .- Move to directory
cd <project-name>- Install dependencies:
npm install- Copy the
.env.exampleto.env:
cp .env.example .env- Setting provider database and create database model in the schema.prisma file.
prisma
└── schema.prisma- Do prisma migration:
Warning
This step if the database provider used is SQLite, otherwise ignore it and skip this step.
npm run db:migrate- Use
db pushto push the initial schema to the database:
npm run db:push- Do prisma generate:
npx prisma generate- Run the development server:
npm run dev-
Open http://localhost:3000 with your browser to see the result.
-
Do prisma studio:
npm run db:studio- Open http://localhost:5555 with your browser to see the result.
Tip
Don't forget adding prisma generate to the existing script build command Vercel.
Another way to configure prisma generate to be run on every deployment is to add the command to the build settings via Vercel's UI.
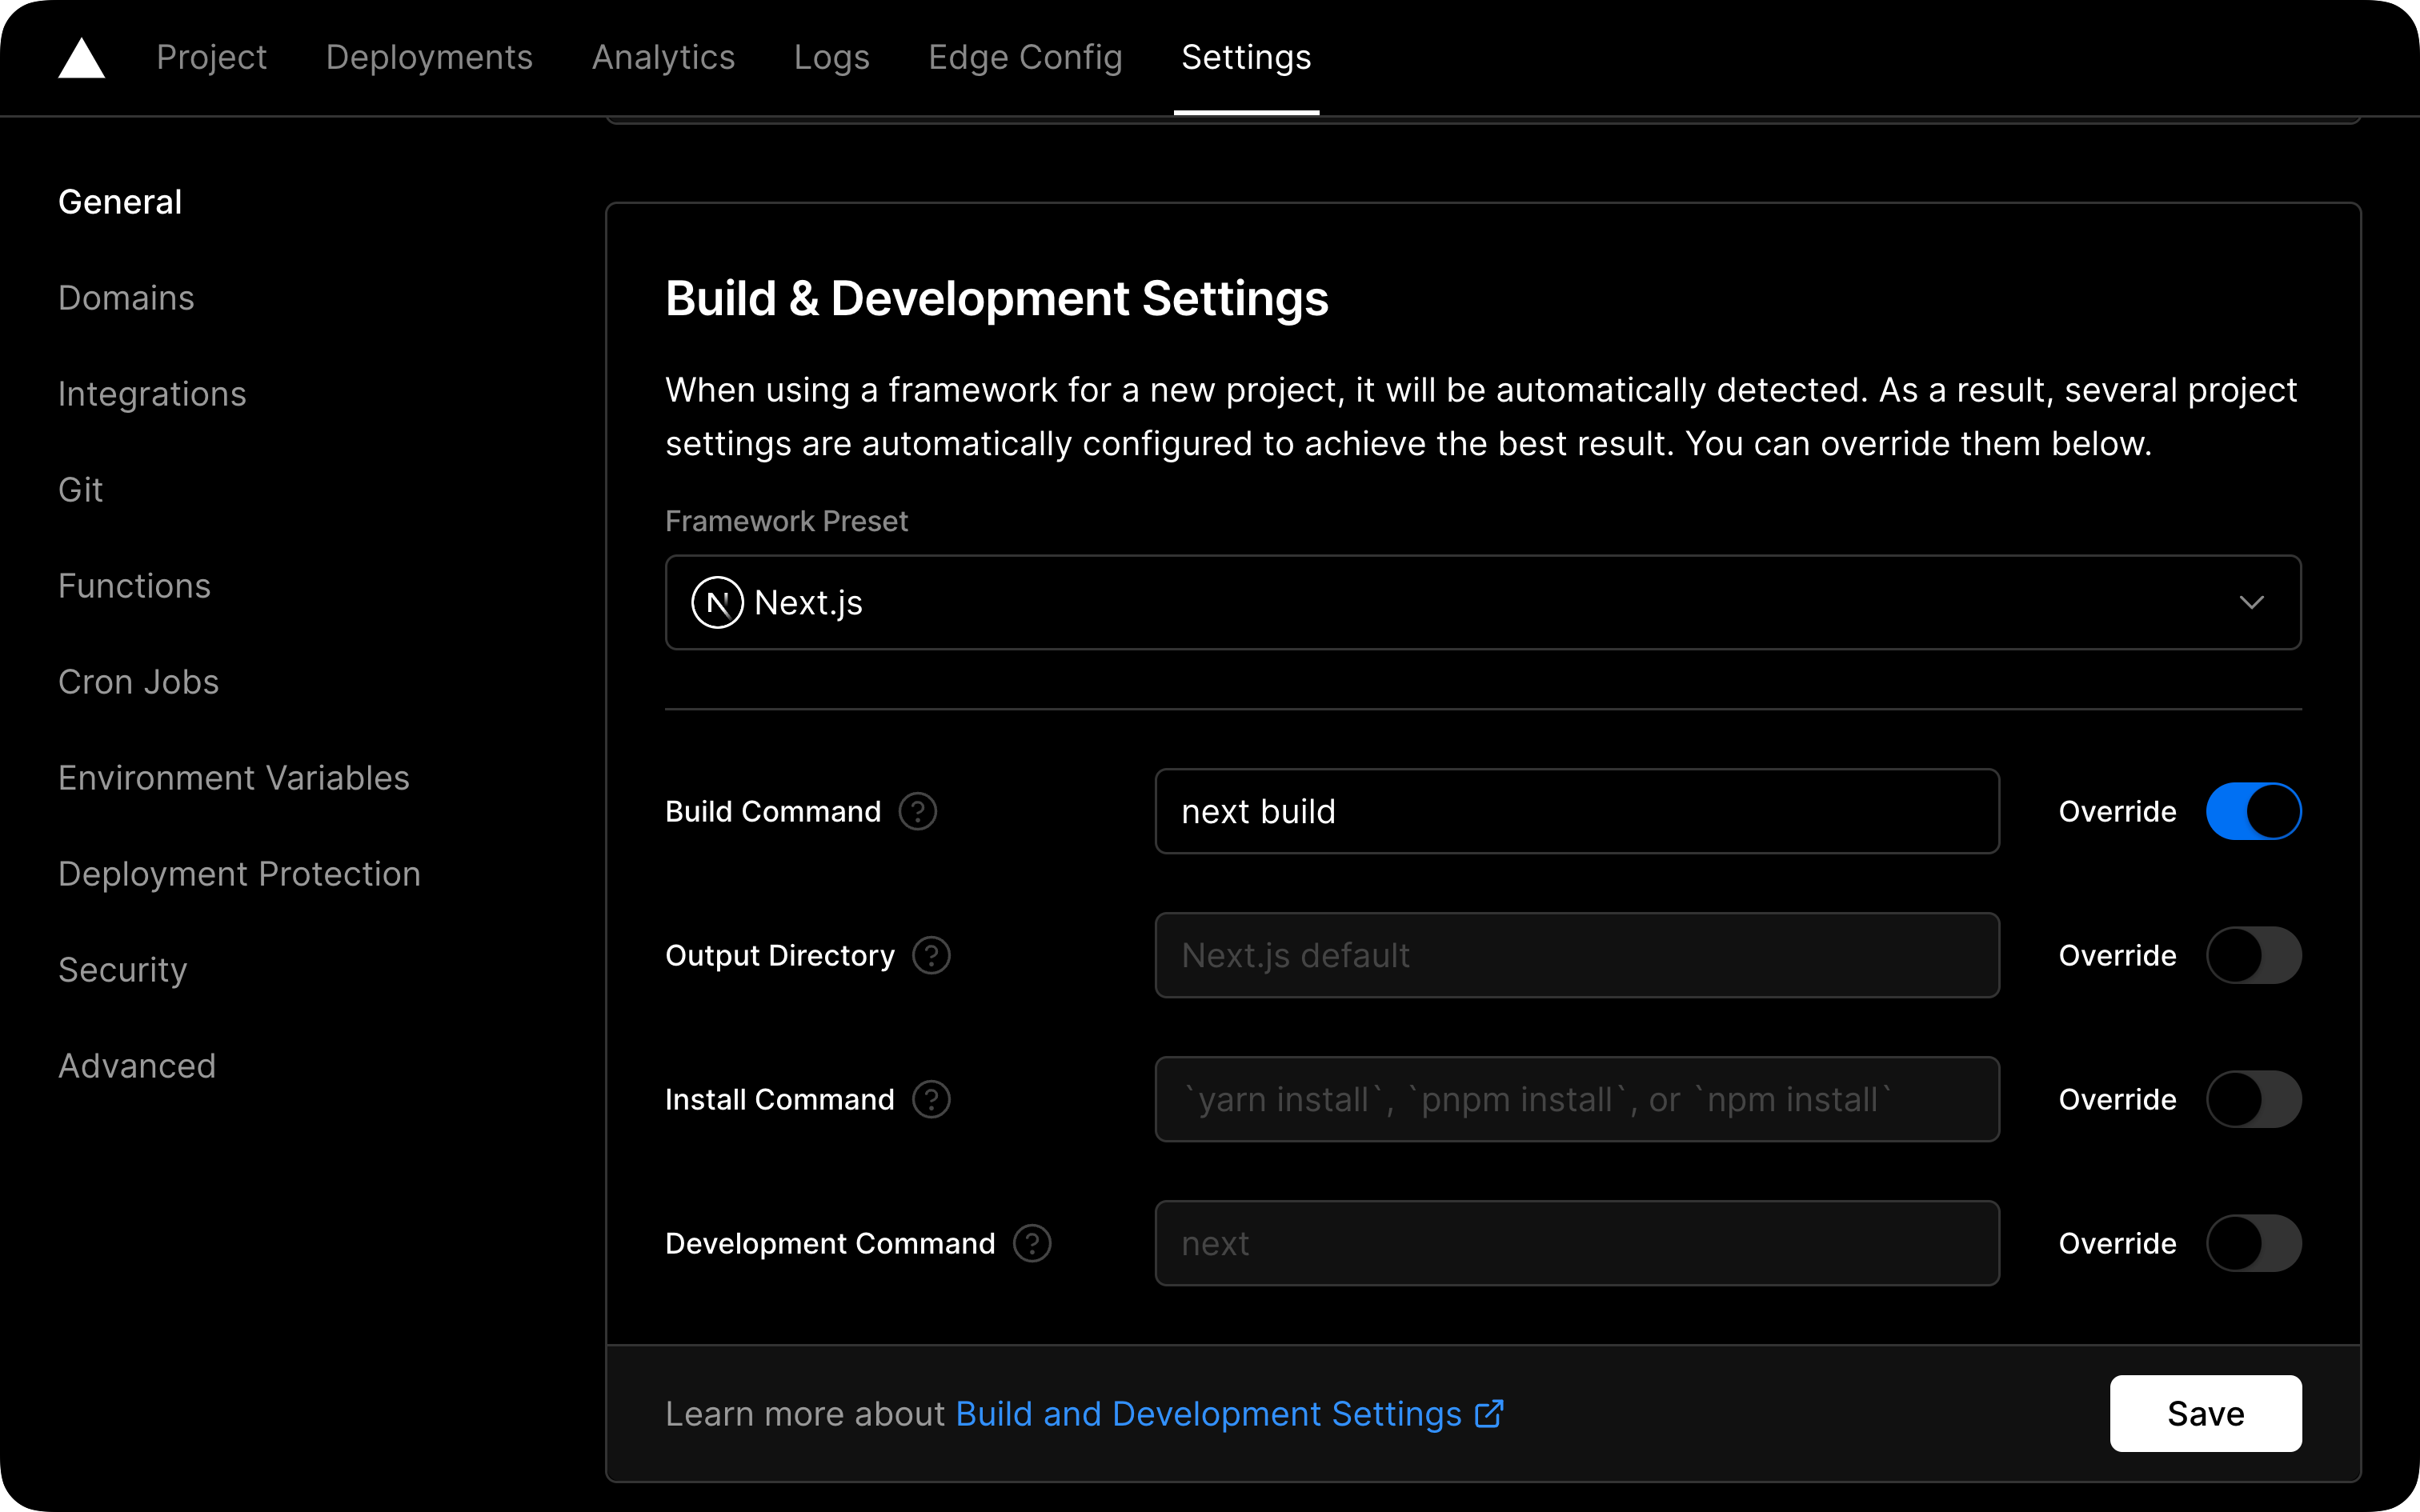
Within your project's dashboard, go to the Settings tab and find the General section. In that section you will find a box labeled Build & Development Settings that contains an input field named Build Command:
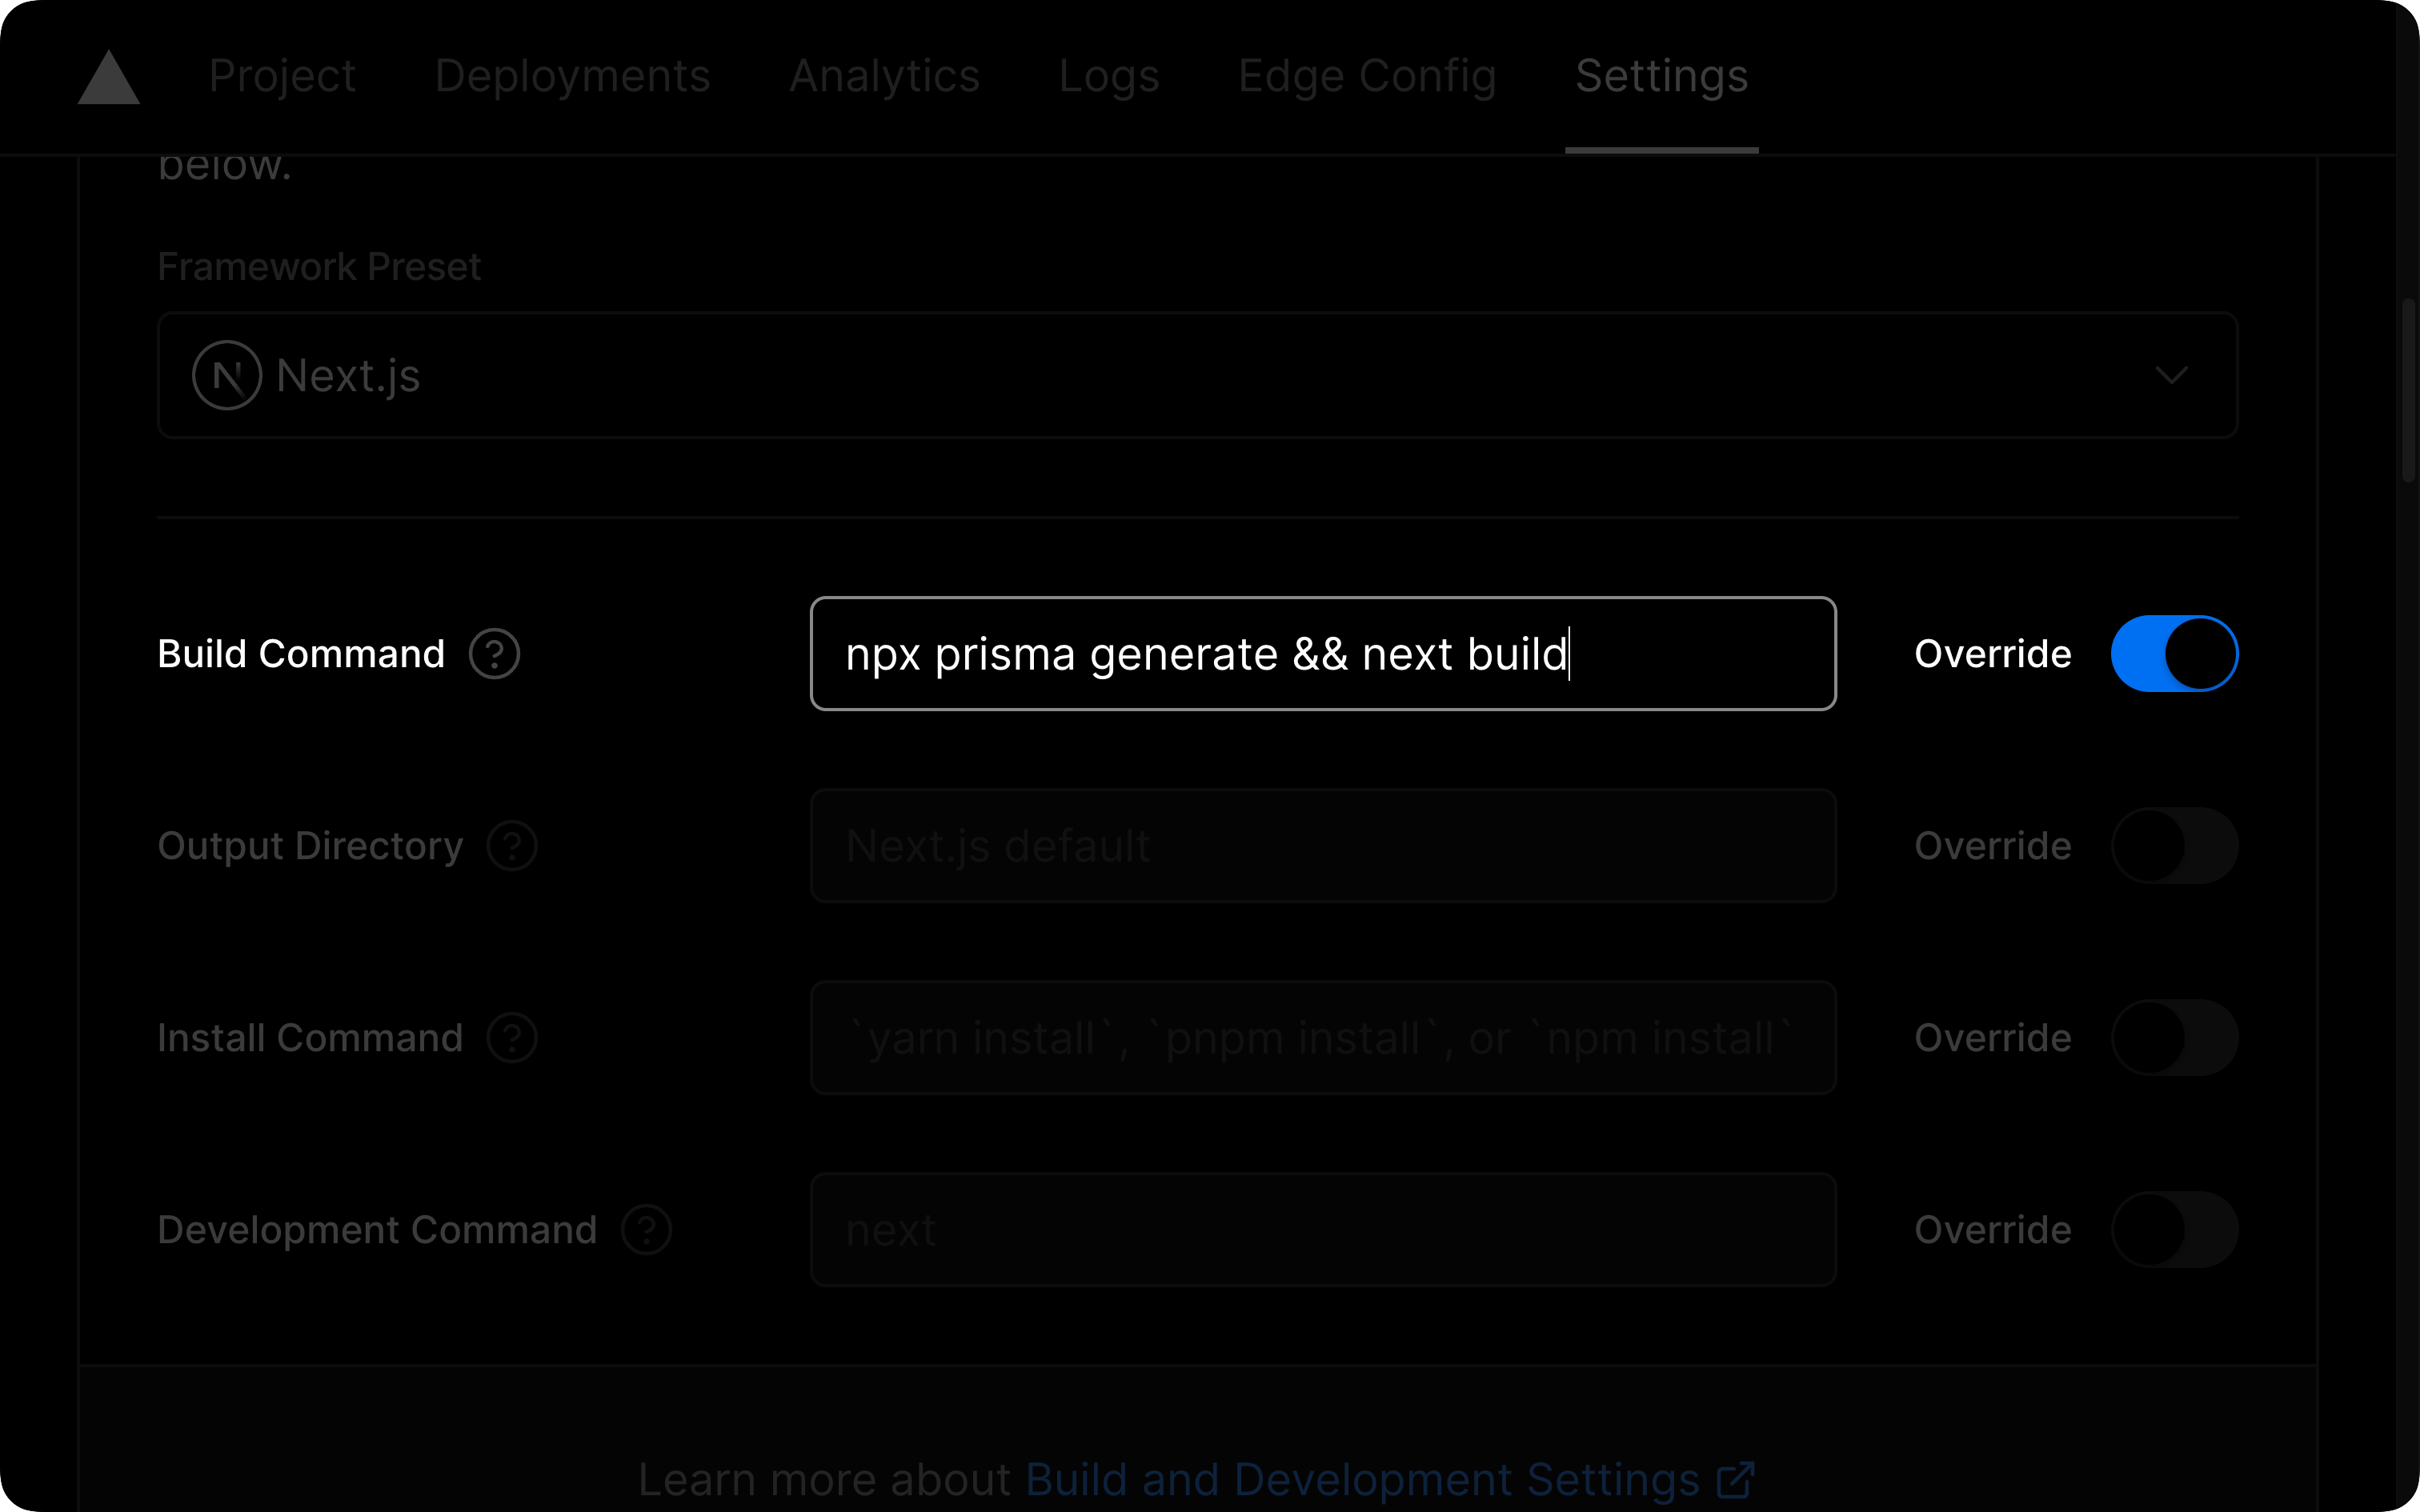
Within that field, prepend prisma generate to the existing script:
prisma generate && next buildReference: Vercel build dependency caching workaround

