USB Rubber Ducky kiler
Digispark ATTiny85(V2) is a microcontroller development board that can be used as USB Rubber Ducky alternative. While USB Rubber Ducky comes around $79.99 (~$80-$130), Digispark ATTiny85 only costs $4-$6 (10x less) making it a good alternative choice.
Now the question is why alternative (& not principal)? Because original USB Rubber Ducky looks less suspicious (similar to original pendrive) and memory upto 2GB sdcard (officially), on the other hand Digispark ATTiny85 has a maximum storage of 6012 bytes (~6kb) and also by design it looks a bit suspicious (which can be compensated by a 3D print cover).
For getting started and testing (& learning abt) some microcontroller development board, it is the way to go!
Initially when I tested the attiny85 board with latest version of ArduinoIDE nothing happened even the board was not detected. After looking through many online tutorials & articles I figured out that most of them were 5-7yrs old using a previous version of IDE with a setting missing in new one.
- System: Windows 10 (but other systems will work probably, but suguest to use windows for the ease of drivers & setup)
- Microcontroller Development Board: Digispark ATTiny85(V2) (can buy from here)
- ArduinoIDE version: 1.6.12 (which can be found here)
- Drivers: Digistump.Drivers.zip (test with latest version if failed try 1.6.7)
You can find the Drivers & IDE in the zips folder for above recommended verisons
I'm considering you are using same version as I recommended above, but your free to try different versions
- Install Digistump Drivers (download from official github releases or from zips folder)

- Open ArduinoIDE > File > Preferences > Additional Board Manager URLs >
http://digistump.com/package_digistump_index.json


- ArduinoIDE > Tools > Boards: "... > Board Manager... > Search "digi" > Install "Digistump AVR Boards" (in img it shows remove button as it is aleady installed, but for you it will come install button)


- ArduinoIDE > Tools > a. Boards: "... > Select "Digispark (Default - 16.5mhz)" b. Programmer: "... > Select "USBtinyISP"

- ArduinoIDE > File > Examples > DigisparkKeyboard > "Keyboard"

- Click on the uplaod button (below 'edit' button) & when it says "Plug in device now..." insert the digispark board in usb port
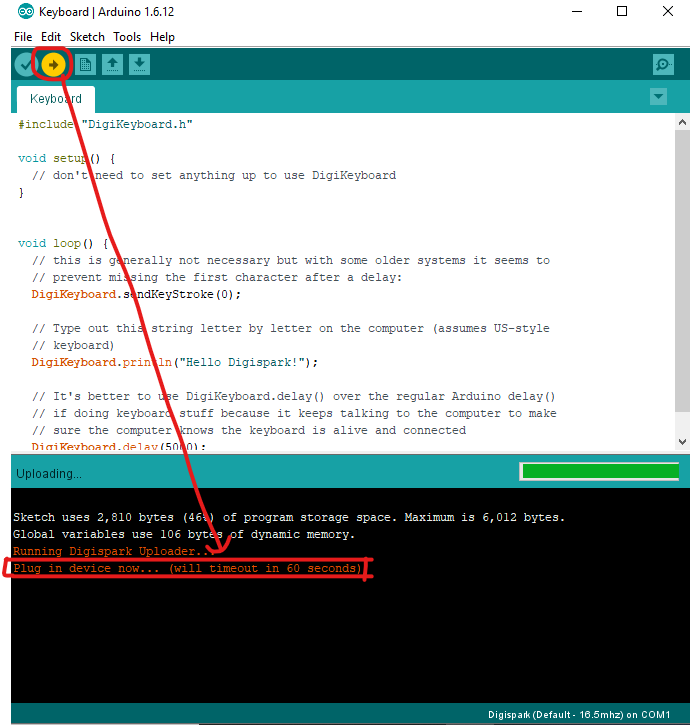
- if output is not as below, repeat uploading step & try inserting board in different ports (front & rear)
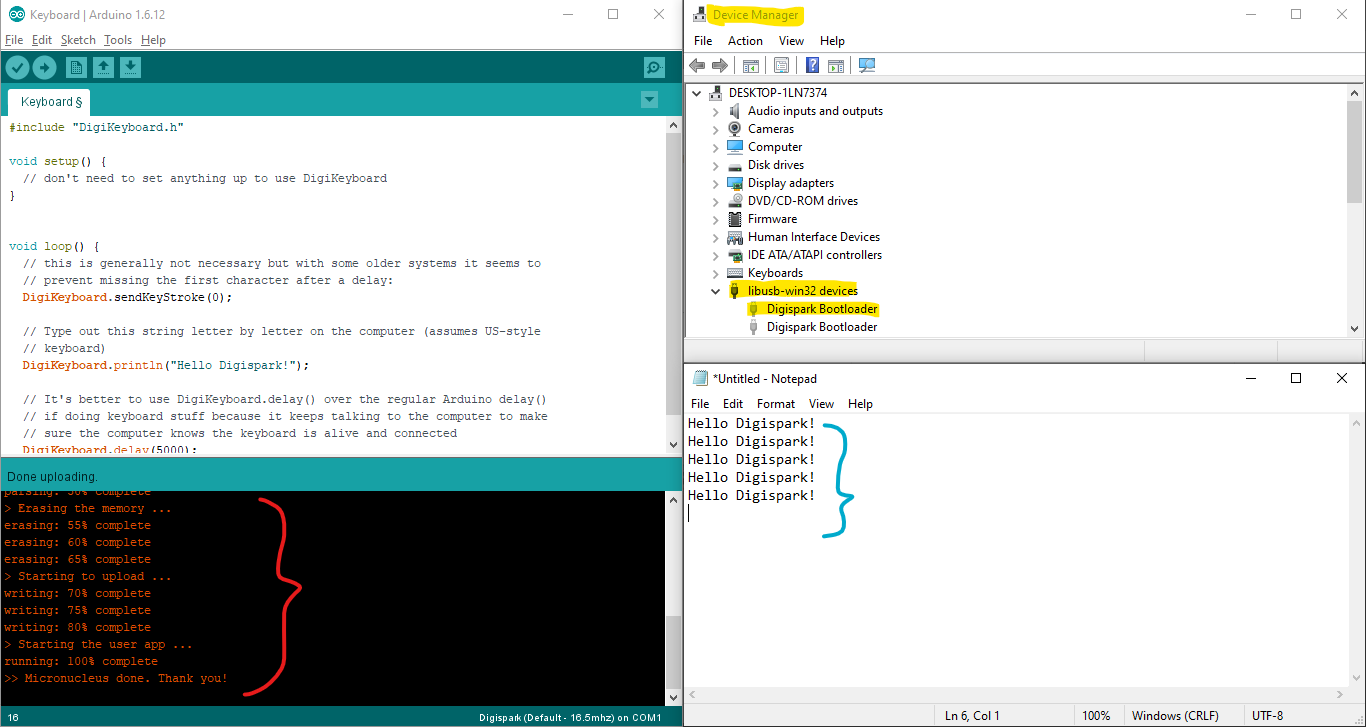
- red: sketch uploaded successfully; blue: script running successfully; yellow: device manager > libusb-win32 devices > Digispark Bootloader


- GitHub:
- YouTube:
- Blog/Articles: