A collection of Blender tools I've written for myself over the years. I use these daily so they should be bug-free, mostly. Feel free to take and use any parts of this project. gret can be typed with one hand in the search bar.
Blender 2.92 or later required.
-
Download the latest release.
-
In Blender, go to Edit → Preferences → Add-ons → Install.
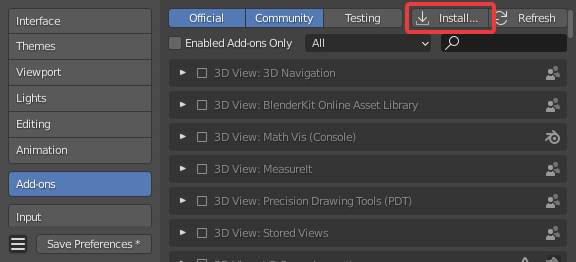
-
Find and select the downloaded zip file, then click Install Add-on.
-
Enable the add-on by clicking the checkbox. It should be listed as gret.

-
Typing
gretin the search bar should ensure it's working. Other tools and operators will show up depending on context.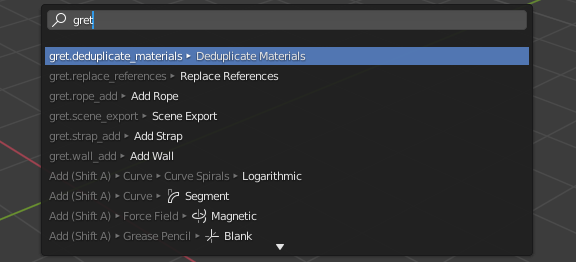


TODO
Connects boundaries of selected objects to the active object. I wrote it to deal with stylised fur in a non-destructive way that allows normals to be lifted from the body.

Refit clothing meshes to a modified version of the character mesh.

If retargeting to a different mesh, make sure they share topology and vertex order. If the retargeted mesh becomes polygon soup then it's probably the vertex order. Try using an addon like Transfer Vert Order to fix it.
Intended for use with UE4, generates collision shapes for selected geometry. For example, to make compound collision for a chair:
- Select a part of the chair in edit mode (can use Select Linked Pick if the pieces are separate).
- Click Make Collision and select an appropriate shape, e.g. capsules for the posts, a box for the backrest and cylinder for the seat.
- Repeat for every piece.

Procedurally generates vertex colors from various sources. Sources can be vertex groups, object or vertex position, or a random value. Useful for exporting masks to game engines.

Skinning tool to separately smooth weights on parallel loops. Belts and such should deform lengthwise without compressing and regular Smooth isn't too good at this. Found in Weights → Smooth Loops while in Weight Paint mode, vertex selection must be enabled to use.

The much needed ability to apply modifiers on a mesh with shape keys. Mirrors are specially handled to fix shape keys that move vertices off the center axis. Found in Shape Keys → Specials Menu → Apply Modifiers with Shape Keys.
Adds a few buttons that allow reordering UV maps. Sync UV Maps works on all selected objects to ensure UV layer names and order are consistent with the active object. It can also be used to simply switch the active UV layer for multiple objects.

Similar in function to an extruded curve. Since it's mesh and not curve based, typical mesh operators can be used to edit it. Use case is adding belts to characters.
Generates helicoid meshes, mostly useful as ropes. Can edit the base shape once created.
Allows blending poses together, similar to the UE4 AnimGraph node. Works on bones, not shape keys.

Has a performance cost, I'll try to optimize it further at some point.
A panel for quick access to actions and working with pose libraries. Pose libraries are simply actions where each frame has a named marker, and normally they're very annoying to work with. A pose library is necessary to use the Pose Blender tool.

Add any frequently used rig or bone properties here. To find the data path of a property, right click it then select Copy Data Path.
The addon Bone Selection Sets must be enabled for the second panel to show. I don't find bone pickers to be comfortable to use, and this is a workable alternative. Add and delete buttons make it easy to create temporary sets while animating.

One-click bake and export. Intended for quickly baking out curvature and AO masks.

Rudimentary tool to create tile-based UV maps. For anything more complicated use Sprytile instead.

Relaxes selected UV edge loops to their respective length on the mesh. Together with pins it can be used to rectify non-grid meshes that TexTools Rectify won't work on. Found in UV Editor → UV → Relax Loops.

Sculpt Selection: Sets the sculpt mask from the current edit-mode vertex selection. Found in the Select menu in edit mode.
Normalize Shape Key: Resets min/max of shape keys while keeping the range of motion. A shape key with range [-1..3] becomes [0..1], neutral at 0.25. Some game engines don't allow extrapolation of shape keys. Found in Shape Keys → Specials Menu → Normalize Shape Key.
Merge Shape Keys to Basis: Mixes active shape keys into the basis shape. It's possible to filter shape keys by name.
Remove Unused Vertex Groups: Originally an addon by CoDEmanX, this operator respects L/R pairs of vertex groups. Found in Vertex Groups → Specials Menu → Remove Unused Vertex Groups.
Deduplicate Materials: Squashes duplicate materials, like "Skin.002", "Skin.003", etc. Found in File → Clean Up.
Replace References: Replaces object references in modifiers. I use it to swap meshes that are shrinkwrap targets and such. Found in File → Clean Up.
TODO