-
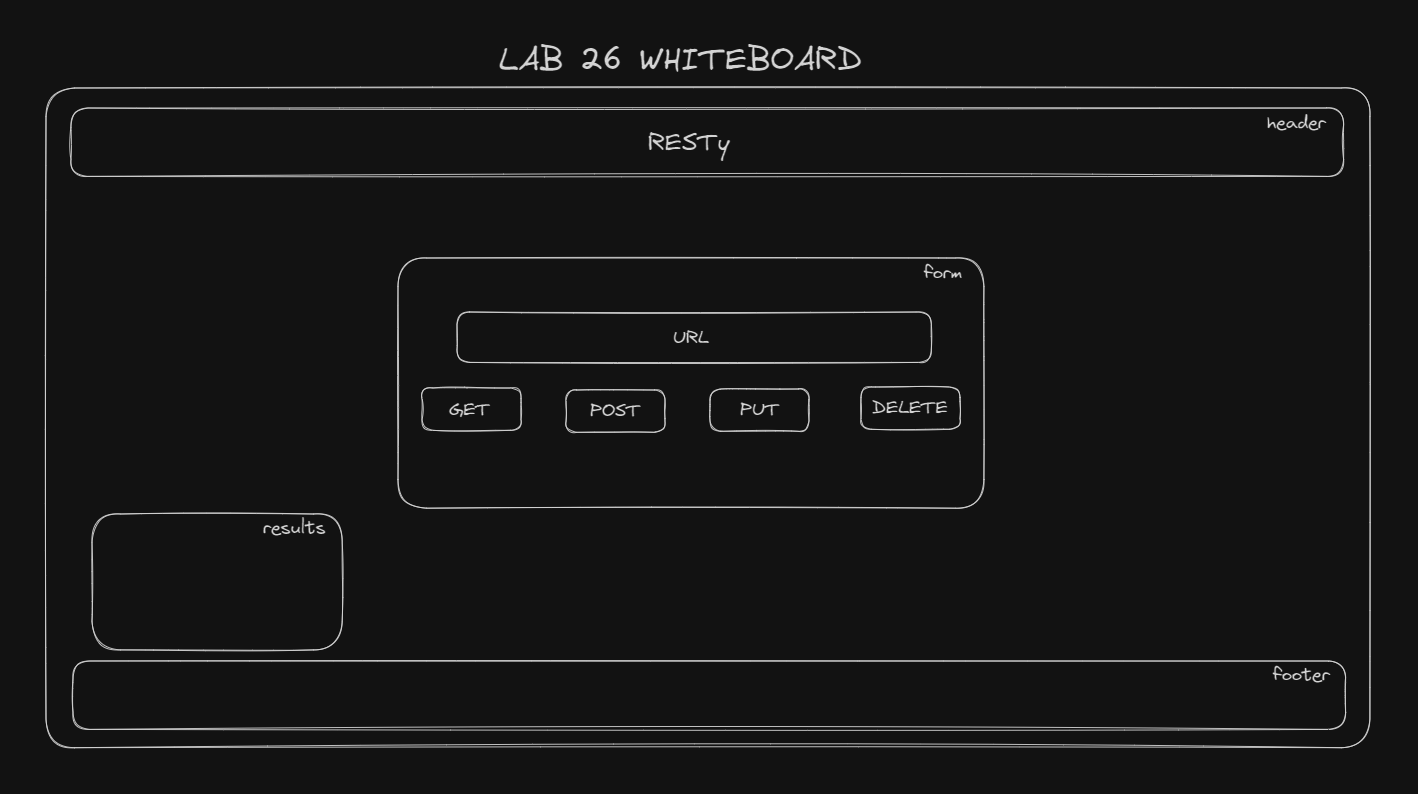
Lab 26 - RESTy: Create a RESTy application which will peform RESTful API calls to remote APIs. Today, we begin the first of a 4-Phase build of the RESTy application, written in React. In this first phase, our goal is to setup the basic scaffolding of the application, with intent being to add more functionality to the system as we go. This initial build sets up the file structure so that we can progressively build this application in a scalable manner.
-
Lab 27 - RESTy: Today, we begin the second phase of a 4-Phase build of the RESTy application, written in React. In this second phase, we will be connecting RESTy to live APIs, fetching and displaying remote data by retrieving user input and managing state. We we will be receiving user input in preparation of connecting to live APIs, using the
useState()hook in our functional components. In order to properly manage state with the useState hook, we will now convert<App />to a functional component. The following user stories detail the major functionality for this phase of the project:- As a user, I want to enter the REST Method and URL to an API.
- As a user, I want to see a summary of my request as well as results returned from an API request in my browser in a readable format. The application flow should be as follows:
- User enters an API URL
- Chooses a REST Method
- Clicks the “Go” button
- Application fetches data from URL/API
- Displays the response headers and results separately
- Both headers and results should be "pretty printed" JSON
- Ryan Gallaway
- Reece Renninger
- Nick Mullaney
- Lab 26 - RESTy Phase 1
- Create a react app named resty w/
npx create-react-app resty - Create a new repository on GitHub for this project
- Push your initial commit to GitHub
- Set up your folder structure
- Create a
README.mdfile with an overview of your project and notes about your lab - Create a pull request from the resty branch to your main branch
- In Canvas, submit a link to your pull request
- On GitHub, submit a link to your deployed application to the main branch of your repository
- After initial setup is complete and proof of life is established, begin work on the lab requirements.
- Convert all child components of
<App />from classes to functions. - The
<App />component serves as the container for all sub-components of this application. - Leave this component as a Class.
- Make sure all base styles for
<App />are included in a .scss imported within the App.jsx file. - Ensure that the
<Header />,<Footer />,<Results />and<Form />components are imported using ES6 import syntax. - Use .scss files to style each component.
- Each of the components use their own .scss file for styling.
- Core application functionality should remain unchanged.
- The
<Form />component should: - Call a function
onSubmit()that updates the<App />component via a function sent down as a prop so that the app can process the form values. - The
<Results />component should show mock API results.
- Lab 27 - RESTy Phase 2
- Continue working in the same repository from the previous lab.
- Extend React Application so that functional components are able to merge their own state variables using the
useState()hook. - Refactor any components using
this.setState()to useuseState()react API hook. - Refactor the Form components to implement user input from form elements, instead of hard coded string values.
- Suggested Component Hierarchy and Application Architecture:
index.js - Entry Point.
<App /> - Container.
Holds application state: The Request (from the form) and the Response (from the API).
Hook that can update state.
Renders 2 Child Components.
<Form />
Expects a function to be sent to it as a prop.
Renders a URL entry form.
A selection of REST methods to choose from (“get” should be the default).
The active selection should be displayed/styled differently than the others.
Renders a Textarea to allow the user to type in a JSON object for a POST or PUT request.
On submit:
Send the Form entries back to the <App /> using the method sent down in props.
Form will run the API request.
Toggle the “loading” status before and after the request.
<Results />
Conditionally renders “Loading” or the data depending on the status of the request.
Renders the data as “pretty” JSON.
For now I have none and do not require one.
- Initialize applicaton with
npm start
- Feature One: Details of feature
- GET :
/hello- specific route to hit
-
How do you run tests?
-
Any tests of note?
-
Describe any tests that you did not complete, skipped, etc
-
Lab 26 Tests: Tests are not required for this lab, but are a stretch goal.
-
Lab 27 Tests: Tests are required for this lab.
-
Utilize the React Testing Library framework installed with CRA.
- Test
<Form />component: - Test that the form renders properly.
- Test that the form calls the handler function prop on submit.
- Test that the form state is updated properly when user input is given.
- Test
<Results />component: - Test that the results render properly.
- Test that the results state is updated after the API has been called.
- Test
-
Assert that upon form submission the resulting data will be rendered in the output area.
-
Install the GitHub action that will auto-run your tests on all check-ins.
-
Stretch Goal: Connect the App component to an API and make an actual call (focusing on GET) to the URL requested in the form.

