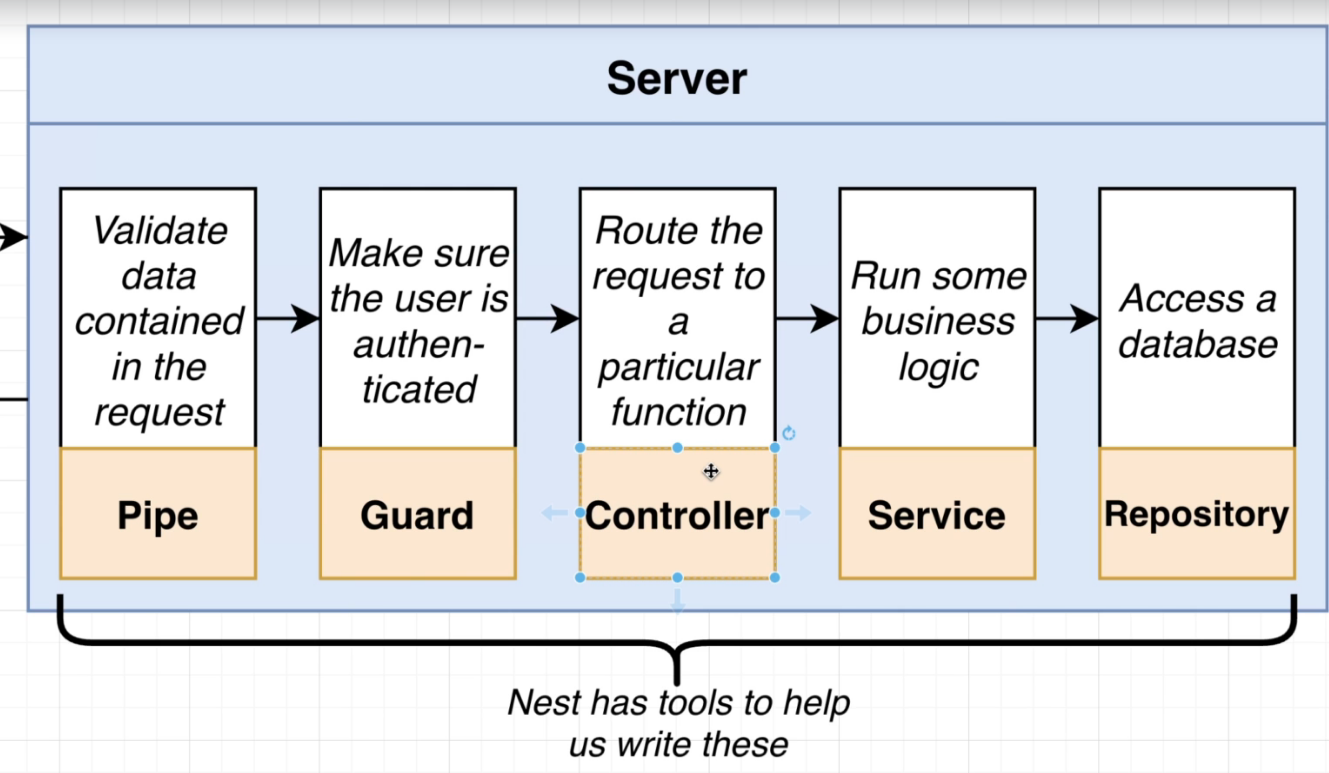
npm i -g @nestjs/cli
nest new <name>
npm run start:dev
nest generate module <module-name>

# --flat so we don't create a new folder inside the `messages` folder
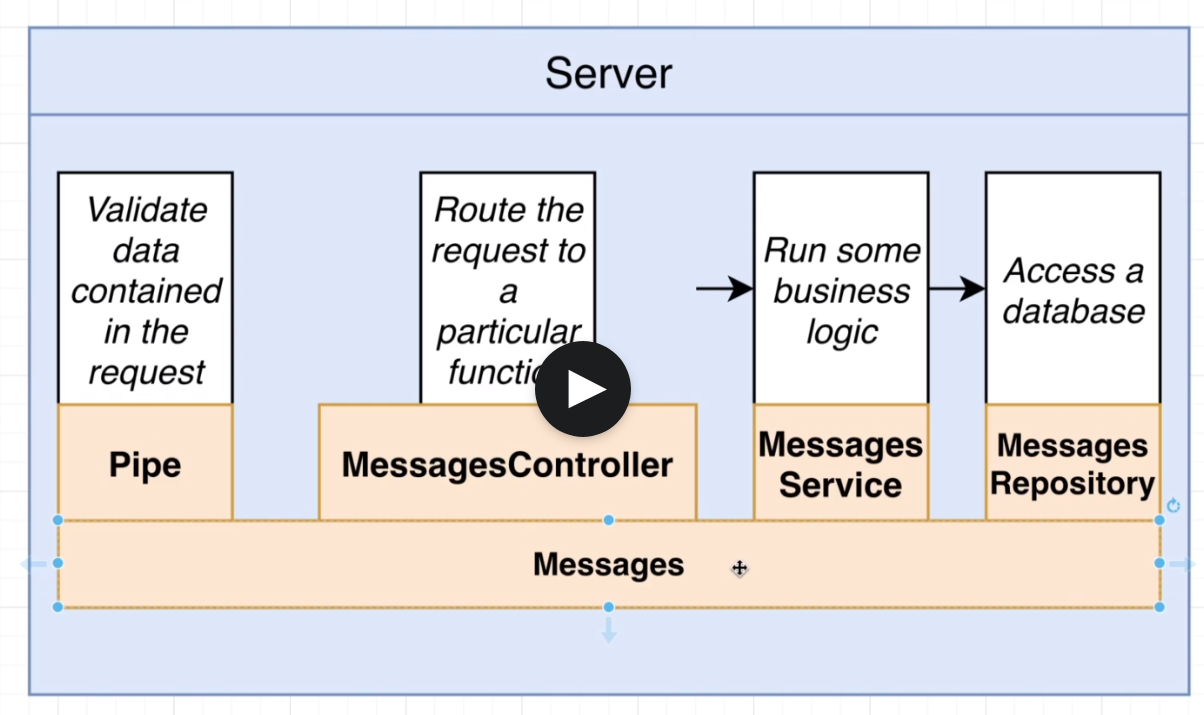
nest generate controller messages/messages --flat
There are 4 steps to setting up automatic validation with Nesjs
- Tell Nest to use global validation
- Create a class that describes the different properties that the request body should have. (Data Transfer Object or DTS)
- Add validation rules to the class
- Apply that class to the request handler
The goal of a DTO is to carry data between two places. They are simply a class to describe what data looks like as it is being transfered.
| Services | Repositiories |
|---|---|
| Its a class | Its a class |
| #1 Place to put any business logic | #1 place to put storage-related logic |
| Uses one or more Repositiories to find and store data | Usually ends up being a TypeORM entity, a Mongoose schema, or similar |
Example:
| MessageService | MessageRepository |
|---|---|
findOne(id: string) |
findOne(id: string) |
findAll() |
findAll() |
create(message: string) |
create(message: string) |
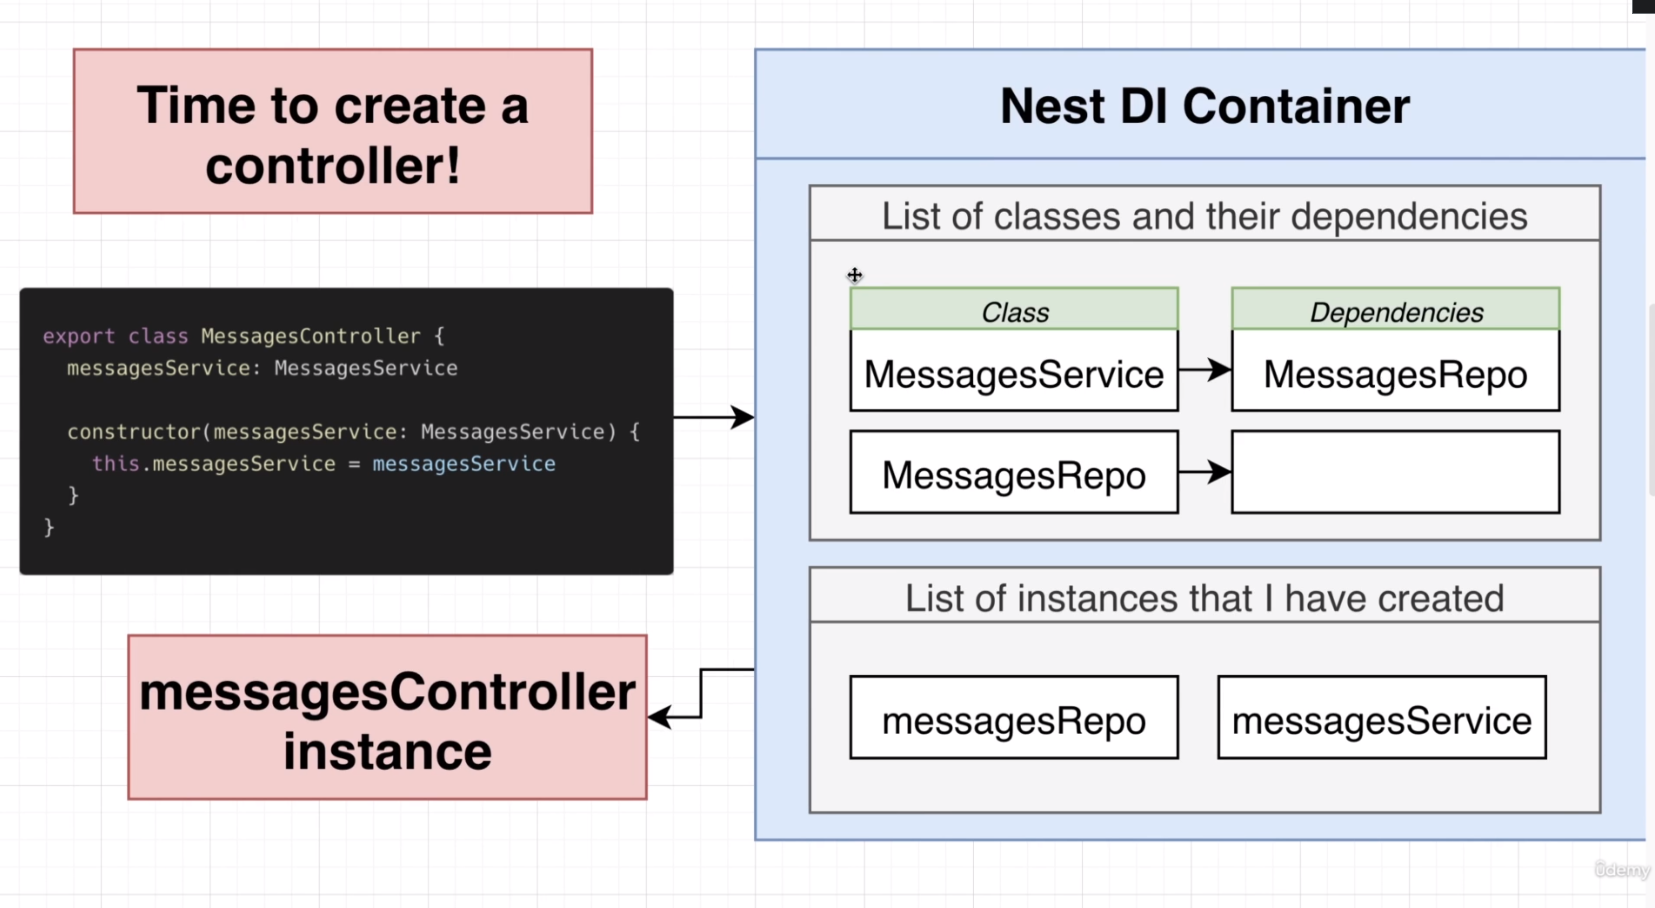
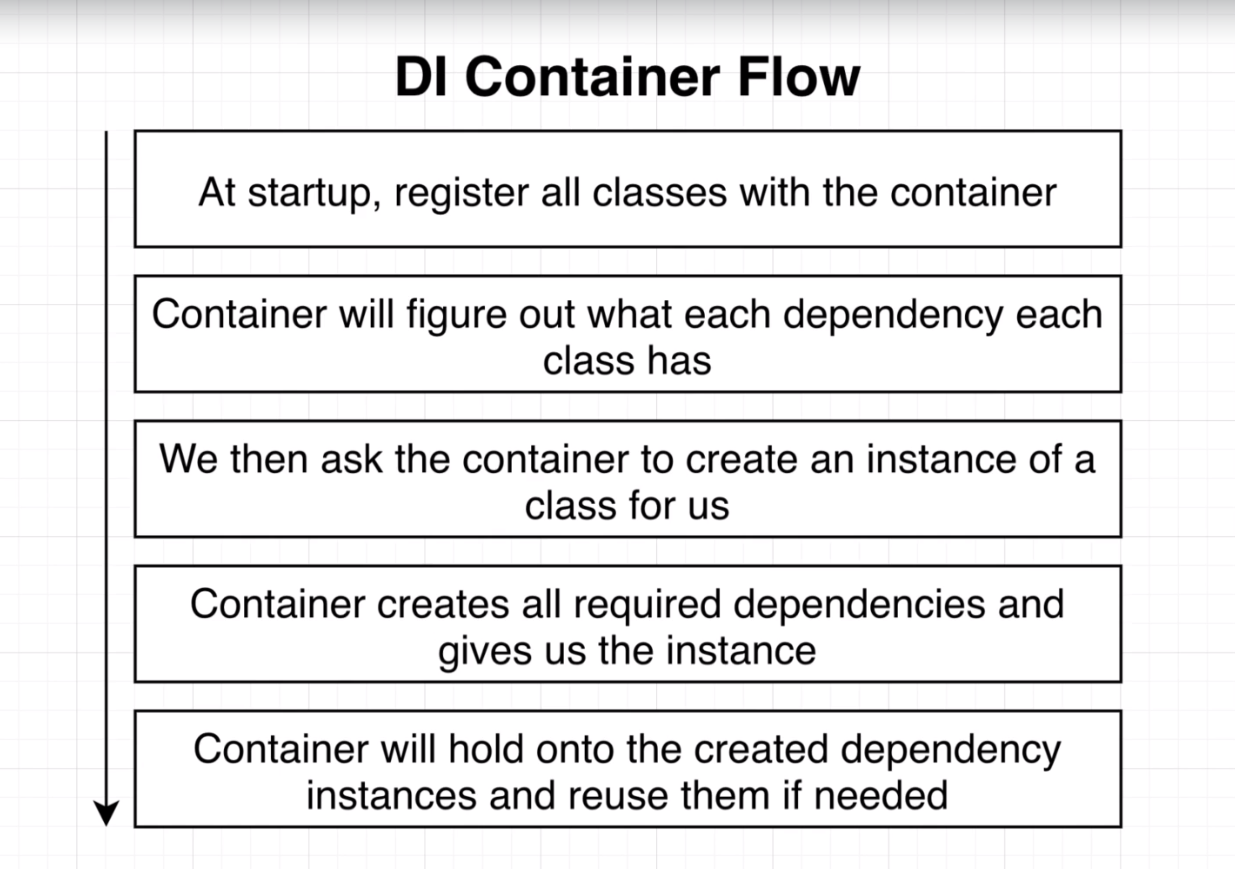
Allows us to use the Inversion of Control principle without having to create all the deps ourselves.
General Flow:
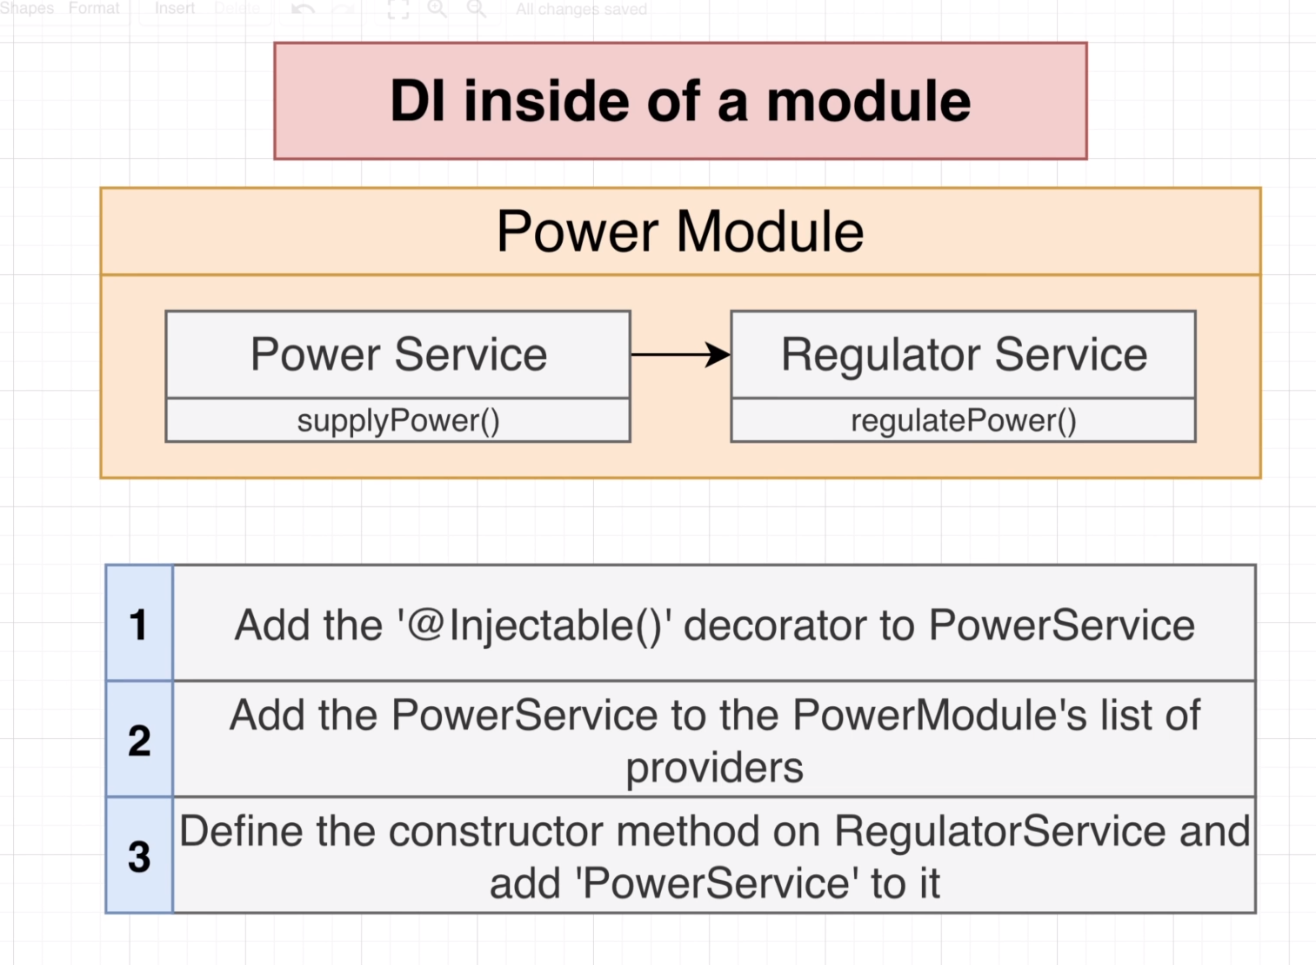
Dependency Injection only within a module
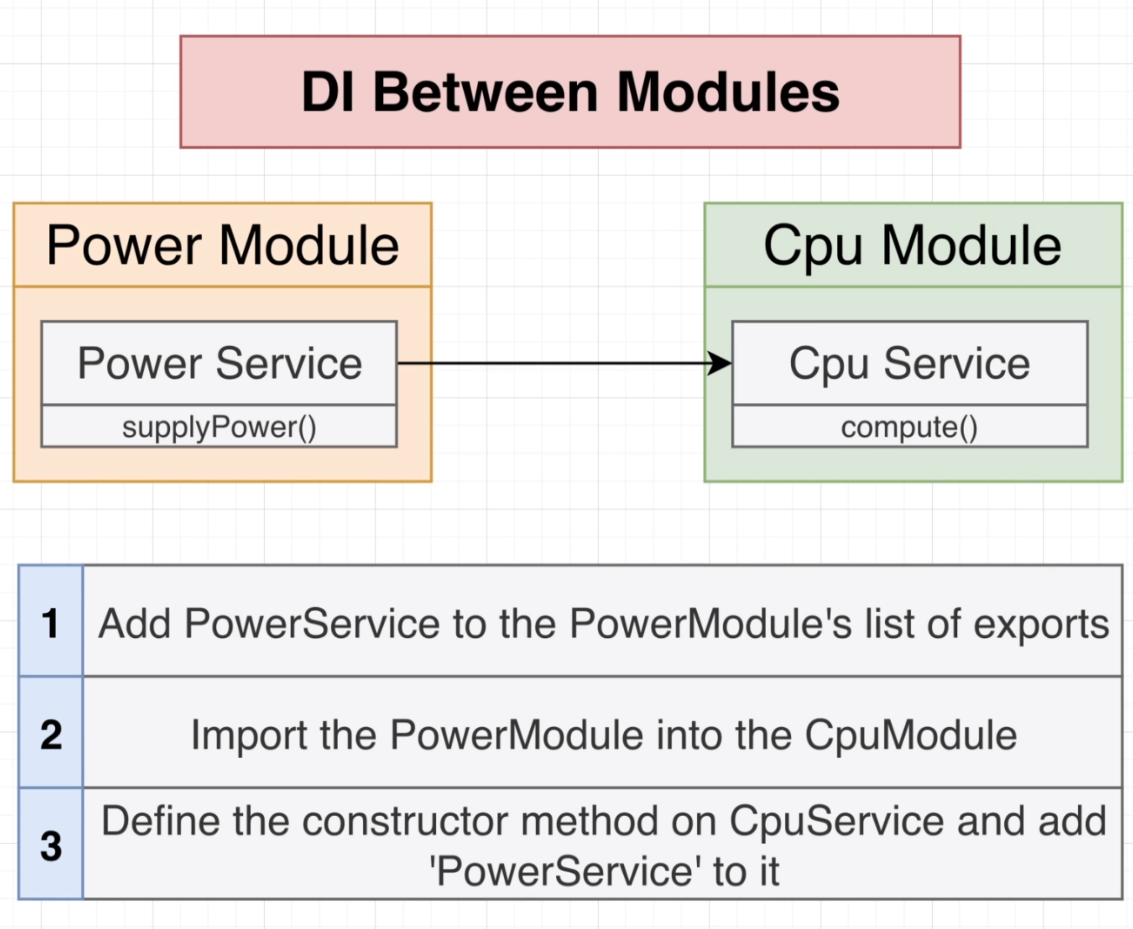
Dependency Injection between 2 modules
_______________________________________________________