Welcome friends to the Github Repo with 6 User Login Options.
The project is a trimmed-down version of a wonderful repo found here: https://github.com/sahat/hackathon-starter
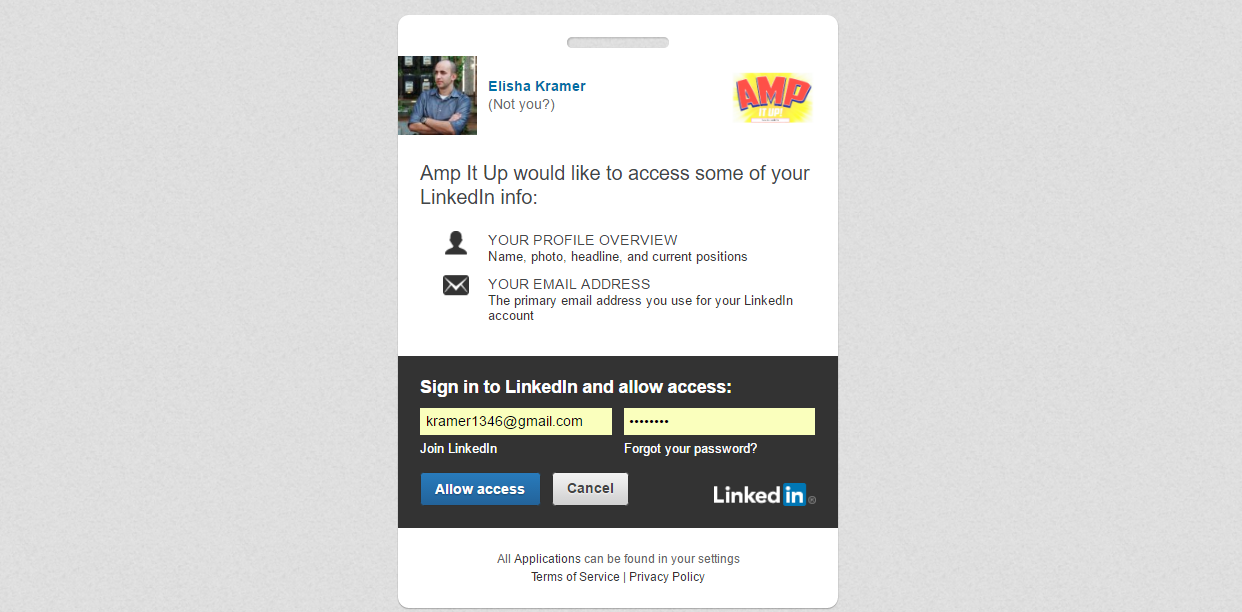
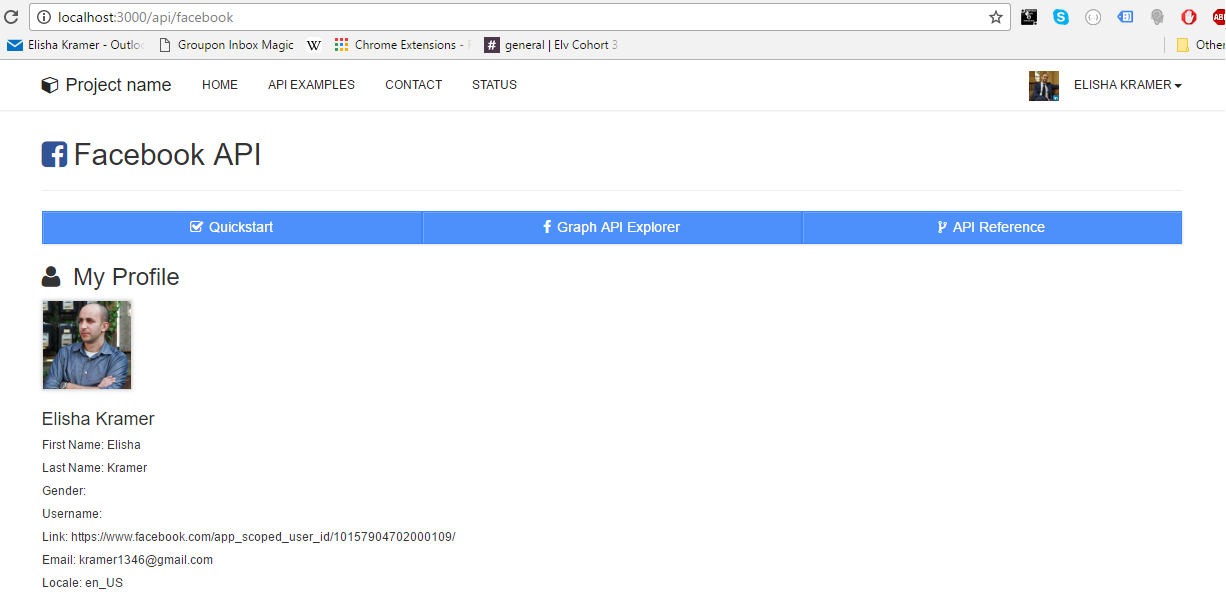
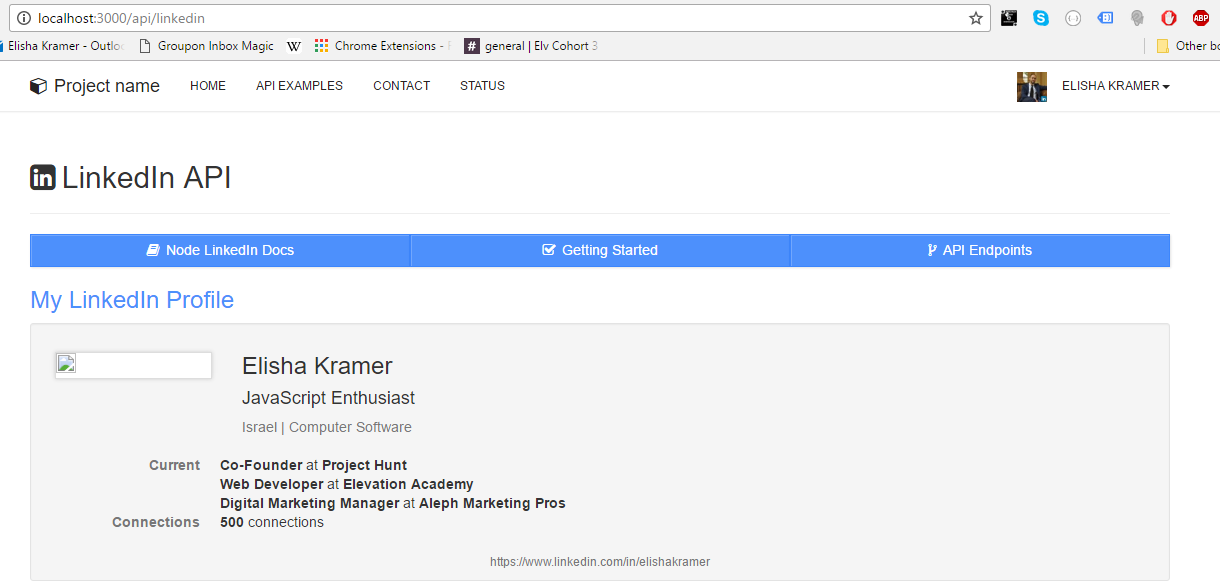
Screenshots:
LinkedIn OAuth:
Google OAuth:
FB User Page (once logged in):
LinkedIn User Page (once logged in):
- Local Authentication using Email and Password
- OAuth 1.0a Authentication via Twitter
- OAuth 2.0 Authentication via Facebook, Google, GitHub, LinkedIn, Instagram
- Flash notifications
- MVC Project Structure
- Node.js clusters support
- Contact Form (powered by Mailgun, Sendgrid or Mandrill)
- Account Management
- Gravatar
- Profile Details
- Change Password
- Forgot Password
- Reset Password
- Link multiple OAuth strategies to one account
- Delete Account
- CSRF protection
The easiest way to get started is to clone the repository:
# Get the latest snapshot
git clone https://github.com/ElishaKay/Social-Site-with-6-Authentications.git

# Change directory
cd myproject

# Install NPM dependencies
npm install

# Or, if you prefer to use `yarn` instead of `npm`
yarn install

# Then simply start your app
node app.js

or:

nodemon app.js
Note: I highly recommend installing Nodemon.
It watches for any changes in your node.js app and automatically restarts the
server. Once installed, instead of node app.js use nodemon app.js. It will
save you a lot of time in the long run, because you won't need to manually
restart the server each time you make a small change in code. To install, run
sudo npm install -g nodemon.
To use any of the included APIs or OAuth authentication methods, you will need to obtain appropriate credentials: Client ID, Client Secret, API Key, or Username & Password. You will need to go through each provider to generate new credentials.
Hackathon Starter 2.0 Update: I have included dummy keys and passwords for all API examples to get you up and running even faster. But don't forget to update them with your credentials when you are ready to deploy an app.
- Visit Google Cloud Console - Click on the **Create Project** button - Enter *Project Name*, then click on **Create** button - Then click on *APIs & auth* in the sidebar and select *API* tab - Click on **Google+ API** under *Social APIs*, then click **Enable API** - Next, under *APIs & auth* in the sidebar click on *Credentials* tab - Click on **Create new Client ID** button - Select *Web Application* and click on **Configure Consent Screen** - Fill out the required fields then click on **Save** - In the *Create Client ID* modal dialog: - **Application Type**: Web Application - **Authorized Javascript origins**: http://localhost:3000 - **Authorized redirect URI**: http://localhost:3000/auth/google/callback - Click on **Create Client ID** button - Copy and paste *Client ID* and *Client secret* keys into `.env`Note: When you ready to deploy to production don't forget to
add your new url to Authorized Javascript origins and Authorized redirect URI,
e.g. http://my-awesome-app.herokuapp.com and
http://my-awesome-app.herokuapp.com/auth/google/callback respectively.
The same goes for other providers.
- Visit Facebook Developers - Click **My Apps**, then select **Add a New App* from the dropdown menu - Select **Website** platform and enter a new name for your app - Click on the **Create New Facebook App ID** button - Choose a **Category** that best describes your app - Click on **Create App ID** button - In the upper right corner click on **Skip Quick Star** - Copy and paste *App ID* and *App Secret* keys into `.env` - **Note:** *App ID* is **clientID**, *App Secret* is **clientSecret** - Click on the *Settings* tab in the left nav, then click on **+ Add Platform** - Select **Website** - Enter `http://localhost:3000` under *Site URL*
Note: After a successful sign in with Facebook, a user will be redirected back to home page with appended hash #_=_ in the URL. It is not a bug. See this Stack Overflow discussion for ways to handle it.
- Go to Account Settings - Select **Applications** from the sidebar - Then inside **Developer applications** click on **Register new application** - Enter *Application Name* and *Homepage URL* - For *Authorization Callback URL*: http://localhost:3000/auth/github/callback - Click **Register application** - Now copy and paste *Client ID* and *Client Secret* keys into `.env` file
- Sign in at https://apps.twitter.com - Click **Create a new application** - Enter your application name, website and description - For **Callback URL**: http://127.0.0.1:3000/auth/twitter/callback - Go to **Settings** tab - Under *Application Type* select **Read and Write** access - Check the box **Allow this application to be used to Sign in with Twitter** - Click **Update this Twitter's applications settings** - Copy and paste *Consumer Key* and *Consumer Secret* keys into `.env` file
- Sign in at LinkedIn Developer Network - From the account name dropdown menu select **API Keys** - *It may ask you to sign in once again* - Click **+ Add New Application** button - Fill out all the *required* fields - **OAuth 2.0 Redirect URLs**: http://localhost:3000/auth/linkedin/callback - **JavaScript API Domains**: http://localhost:3000 - For **Default Application Permissions** make sure at least the following is checked: - `r_basicprofile` - Finish by clicking **Add Application** button - Copy and paste *API Key* and *Secret Key* keys into `.env` file - *API Key* is your **clientID** - *Secret Key* is your **clientSecret**
| Name | Description |
|---|---|
| config/passport.js | Passport Local and OAuth strategies, plus login middleware. |
| controllers/api.js | Controller for /api route and all api examples. |
| controllers/contact.js | Controller for contact form. |
| controllers/home.js | Controller for home page (index). |
| controllers/user.js | Controller for user account management. |
| models/User.js | Mongoose schema and model for User. |
| public/ | Static assets (fonts, css, js, img). |
| public/js/application.js | Specify client-side JavaScript dependencies. |
| public/js/main.js | Place your client-side JavaScript here. |
| public/css/main.scss | Main stylesheet for your app. |
| public/css/themes/default.scss | Some Bootstrap overrides to make it look prettier. |
| views/account/ | Templates for login, password reset, signup, profile. |
| views/api/ | Templates for API Examples. |
| views/partials/flash.pug | Error, info and success flash notifications. |
| views/partials/header.pug | Navbar partial template. |
| views/partials/footer.pug | Footer partial template. |
| views/layout.pug | Base template. |
| views/home.pug | Home page template. |
| .env.example | Your API keys, tokens, passwords and database URI. |
| app.js | The main application file. |
| package.json | NPM dependencies. |
| yarn.lock | Contains exact versions of NPM dependencies in package.json. |
Note: There is no preference how you name or structure your views.
You could place all your templates in a top-level views directory without
having a nested folder structure, if that makes things easier for you.
Just don't forget to update extends ../layout and corresponding
res.render() paths in controllers.
Once you are ready to deploy your app, you will need to create an account with a cloud platform to host it. These are not the only choices, but they are my top picks. From my experience, Heroku is the easiest to get started with, it will automatically restart your Node.js process when it crashes, zero-downtime deployments and custom domain support on free accounts. Additionally, you can create an account with mLab and then pick one of the 4 providers below. Again, there are plenty of other choices and you are not limited to just the ones listed below.
- Download and install [Heroku Toolbelt](https://toolbelt.heroku.com/) - In terminal, run `heroku login` and enter your Heroku credentials - From *your app* directory run `heroku create` - Run `heroku addons:create mongolab`. This will set up the mLab add-on and configure the `MONGOLAB_URI` environment variable in your Heroku app for you. - Lastly, do `git push heroku master`. Done!Note: To install Heroku add-ons your account must be verified.
- Open [mlab.com](https://mlab.com) website - Click the yellow **Sign up** button - Fill in your user information then hit **Create account** - From the dashboard, click on **:zap:Create new** button - Select **any** cloud provider (I usually go with AWS) - Under *Plan* click on **Single-node (development)** tab and select **Sandbox** (it's free) - *Leave MongoDB version as is - `2.4.x`* - Enter *Database name** for your web app - Then click on **:zap:Create new MongoDB deployment** button - Now, to access your database you need to create a DB user - Click to the recently created database - You should see the following message: - *A database user is required to connect to this database.* **Click here** *to create a new one.* - Click the link and fill in **DB Username** and **DB Password** fields - Finally, in `.env` instead of `mongodb://localhost:27017/test`, use the following URI with your credentials: - `db: 'mongodb://USERNAME:PASSWORD@ds027479.mongolab.com:27479/DATABASE_NAME'`
Note: As an alternative to mLab, there is also [Compose] but they charge after 30 days (https://www.compose.io/).
A more correct way to be to say "How do I create a new route". The main file app.js contains all the routes.
Each route has a callback function associated with it. Sometimes you will see 3 or more arguments
to routes. In cases like that, the first argument is still a URL string, while middle arguments
are what's called middleware. Think of middleware as a door. If this door prevents you from
continuing forward, you won't get to your callback function. One such example is a route that requires authentication.
app.get('/account', passportConf.isAuthenticated, userController.getAccount);It always goes from left to right. A user visits /account page. Then isAuthenticated middleware
checks if you are authenticated:
exports.isAuthenticated = (req, res, next) => {
  if (req.isAuthenticated()) {
    return next();
  }
  res.redirect('/login');
};
If you are authenticated, you let this visitor pass through your "door" by calling return next();. It then proceeds to the
next middleware until it reaches the last argument, which is a callback function that typically renders a template on GET requests or redirects on POST requests. In this case, if you are authenticated, you will be redirected to Account Management page, otherwise you will be redirected to Login page.
exports.getAccount = (req, res) => {
  res.render('account/profile', {
    title: 'Account Management'
  });
};
Express.js has app.get, app.post, app.put, app.delete, but for the most part you will only use the first two HTTP verbs, unless you are building a RESTful API.
If you just want to display a page, then use GET, if you are submitting a form, sending a file then use POST.
Here is a typical workflow for adding new routes to your application. Let's say we are building a page that lists all books from database.
Step 1. Start by defining a route.
app.get('/books', bookController.getBooks);Note: As of Express 4.x you can define you routes like so:
app.route('/books')
  .get(bookController.getBooks)
  .post(bookController.createBooks)
  .put(bookController.updateBooks)
  .delete(bookController.deleteBooks)
And here is how a route would look if it required an authentication and an authorization middleware:
app.route('/api/twitter')
  .all(passportConf.isAuthenticated)
  .all(passportConf.isAuthorized)
  .get(apiController.getTwitter)
  .post(apiController.postTwitter)
Use whichever style that makes sense to you. Either one is acceptable. I really think that chaining HTTP verbs on
app.route is very clean and elegant approach, but on the other hand I can no longer see all my routes at a glance
when you have one route per line.
Step 2. Create a new schema and a model Book.js inside the models directory.
const mongoose = require('mongoose');

const bookSchema = new mongoose.Schema({
  name: String
});

const Book = mongoose.model('Book', bookSchema);
module.exports = Book;
Step 3. Create a new controller file called book.js inside the controllers directory.
/**
 * GET /books
 * List all books.
 */
const Book = require('../models/Book.js');

exports.getBooks = (req, res) => {
  Book.find((err, docs) => {
    res.render('books', { books: docs });
  });
};
Step 4. Import that controller in app.js.
const bookController = require('./controllers/book');Step 5. Create books.pug template.
extends layout

block content
  .page-header
    h3 All Books

  ul
    for book in books
      li= book.name
That's it! I will say that you could have combined Step 1, 2, 3 as following:
app.get('/books',(req, res) => {
  Book.find((err, docs) => {
    res.render('books', { books: docs });
  });
});
Sure, it's simpler, but as soon as you pass 1000 lines of code in app.js it becomes a little difficult to navigate the file.
I mean, the whole point of this boilerplate project was to separate concerns, so you could
work with your teammates without running into MERGE CONFLICTS. Imagine you have 4 developers
working on a single app.js, I promise you it won't be fun resolving merge conflicts all the time.
If you are the only developer then it's fine. But as I said, once it gets up to a certain LoC size, it becomes
difficult to maintain everything in a single file.
The MIT License (MIT)
Copyright (c) 2014-2016 Sahat Yalkabov
Permission is hereby granted, free of charge, to any person obtaining a copy of this software and associated documentation files (the "Software"), to deal in the Software without restriction, including without limitation the rights to use, copy, modify, merge, publish, distribute, sublicense, and/or sell copies of the Software, and to permit persons to whom the Software is furnished to do so, subject to the following conditions:
The above copyright notice and this permission notice shall be included in all copies or substantial portions of the Software.
THE SOFTWARE IS PROVIDED "AS IS", WITHOUT WARRANTY OF ANY KIND, EXPRESS OR IMPLIED, INCLUDING BUT NOT LIMITED TO THE WARRANTIES OF MERCHANTABILITY, FITNESS FOR A PARTICULAR PURPOSE AND NONINFRINGEMENT. IN NO EVENT SHALL THE AUTHORS OR COPYRIGHT HOLDERS BE LIABLE FOR ANY CLAIM, DAMAGES OR OTHER LIABILITY, WHETHER IN AN ACTION OF CONTRACT, TORT OR OTHERWISE, ARISING FROM, OUT OF OR IN CONNECTION WITH THE SOFTWARE OR THE USE OR OTHER DEALINGS IN THE SOFTWARE.


