
Example Video using Qlab to OBS and also OBS to Qlab via OSC:
-
Download and Install OBS
-
Download and Install obs-websocket plugin
-
Download and Install Node.js
-
Clone or Download this repository
-
Open in preferred source code editor (ex. Visual Studio Code or Terminal/Command Prompt)
- If you use Visual Studio Code...
- Go to "View > Command Palette..."
- Type "Git: Clone" [Enter]
- Paste the Github Clone HTTPS URL. This is the same as the URL just with ".git" added to the end (https://github.com/jshea2/Node-OBSosc.git)
-
Open code editor's Terminal
-
Install obs-websocket-js & node-osc:
npm install(installs dependencies from 'package.json')or install seperately
npm install obs-websocket-jsnpm install node-osc
(Use
sudoif on Mac) -
In file 'Node-OBSosc.js' change config info.
Configure this to match your OBS Websocket plugin:
//OBS Config
const obsIp = "127.0.0.1"
const obsPort = 4444;
const obsPassword = "secret"
Configure your OSC application to send to this IP and Port (Node recieves OSC Messages on this IP and Port and Converts to OBS Websocket):
//OSC Server (IN) Config
const oscServerIp = "127.0.0.1";
const oscPortIn = 3333;
Configure your OSC application to listen on this IP and Port (OBS Websocket sends to Node, then sends OSC Messages to this IP and Port):
//OSC Client (OUT) Config
const oscClientIp = "127.0.0.1";
const oscPortOut = 53000;-
Save file, then Run "Node-OBSosc.js" in Terminal:
node Node-OBSosc.jsor
npm start
Once you run "Node-OBSosc.js" it will log IP and Port info, number of available scenes, and a list of all scenes with numbers, this is what you use as an argument in your /scene OSC message.
This can be used in any application that transmits and recieves OSC. This was mainly designed for Qlab, so to get started with examples of all the OSC commands below; do the following:
- Download the "Examples" folder where you'll find "OBS Scene Collection Example.json" and "Qlab OSC Examples.qlab4".
- Import "OBS Scene Collection Example.json" into OBS from the Scene Collection tab.
- Open "Qlab OSC Examples.qlab4" in Qlab 4 (Make sure you have a Qlab license that allows OSC, which should be all except the free one.. sorry)
/scene [index number] this message will activate a scene with the index associated from the logged list.
(Ex. "/scene 1" will activate the first scene in OBS, also floats will be rounded down (Ex. /scene 1.9 === /scene 1))
/scene/[scene_name] this message allows you to activate a scene by name in the OSC string. (Ex. "/scene/Wide" will activate a scene named "Wide" in OBS. NOTE: If a scene name contains a SPACE, replace with "_", so if OBS has a scene "Webcam 1" make OSC message "/scene/Webcam_1")
/scene [scene name] this message allows you to activate a scene by name in the OSC argument. (Ex. "/scene Wide" will activate a scene named "Wide" in OBS.) NOTE: SPACES will work ok for this format, so "/scene Webcam 1" is valid syntax
/go this message will go to the next scene in the list, if this is triggered on the last scene it will go to the first scene
/back this message will go to the previous scene in the list, if this is triggered on the first scene it will go to the last scene
/transition [name] [duration] this message sets the desired transition and duration(in milliseconds).
(Ex. "/transition Cut" will change the current Scene Transition to "Cut". "/transition Fade 500" will set the current Scene Transition to "Fade" with a "500" millisecond duration. If you do not set a duration in the 2nd argument it will keep the current duration and log it in node.
/[scene_name]/[source_name]/visible [0 or 1] this message will turn on or off the source's visibility. (Ex. "/Webcam_1/Audio_Input_Capture/visible 0" will turn OFF "Audio Input Capture" source in OBS from scene "Webcam 1". Where as "/Webcam_1/Text_1/visible 1" will turn it ON). NOTE: If a scene name or source name contains a SPACE, replace with "_", so if OBS has a scene "Webcam 1" and a source name of "Text 1" make OSC message the example from above.)
/[scene_name]/[source_name]/filterVisibility [0 or 1] this message will turn on or off the source's filter visibility. (Ex. "/Video_Input/Color_Correction/filterVisibiltity 0" will turn OFF "Color Correction" filter in OBS from source "Video Input". Where as "/Video_Input/Color_Correction/filterVisibility 1" will turn it ON). NOTE: If a filter name or source name contains a SPACE, replace with "_", so if OBS has a filter "Color Correction" and a source name of "Video Input" make OSC message the example from above.)
/[source_name]/[color_correction_filter_name]/opacity [0 thru 1] this message allows you to adjust the Opacity of a source via the "Color Correction" filter in OBS of the current scene. (Ex. "/Text_1/Color_Correction 0.5" will make "Text 1" half transparent. NOTE: If a source name or filter name contains a SPACE, replace with "_", so if OBS has a source "Text 1" and filter "Color Correction" make OSC message the example from above)
/[scene_name]/[source_name]/position [x] [y] this allows you to change the sources position by x and y values. This also changes the alignment to center the bounding box to the x and y values. (Ex. "/Webcam_1/Text_1/position 0 0" this changes the source to center of the screen. See "Qlab OSC Examples" file for how to automate positions. NOTE: This is only tested for a "Canvas Size" of 1920x1080 in OBS. Also, If a scene name or source name contains a SPACE, replace with "_", so if OBS has a scene "Webcam 1" and a source name of "Text 1" make OSC message the example from above.)
/[scene_name]/[source_name]/scale [float] this allows you to change the source's scale. "0" is nothing, "1" is original full size. Negative numbers will invert the source. Numbers larger than "1" will be larger than original size. (Ex. /Webcam_1/Text_1/scale 2 this will make the size of the "Text 1" source twice as large. See "Qlab OSC Examples" file for how to automate scale. Also, If a scene name or source name contains a SPACE, replace with "_", so if OBS has a scene "Webcam 1" and a source name of "Text 1" make OSC message the example from above.)
/[scene_name]/[source_name]/rotate [float] this allows you to change the source's scale. "0" is nothing, "360" is full 360 rotation clockwise. Negative numbers will rotate counterclockwise. Numbers larger than "360" will be more roations. (Ex. /Webcam_1/Text_1/rotate 90 this will make the rotation of the "Text 1" source 90º clockwise. See "Qlab OSC Examples" file for how to automate rotation. Also, If a scene name or source name contains a SPACE, replace with "_", so if OBS has a scene "Webcam 1" and a source name of "Text 1" make OSC message the example from above.)
/startRecording this message will start recording in OBS
/stopRecording this message will stop recording in OBS
/toggleRecording this message will toggle the start/stop recording button in OBS
/startStreaming this message will start streaming in OBS
/stopStreaming this message will stop streaming in OBS
/toggleStreaming this message will toggle the start/stop streaming button in OBS
/pauseRecording this message will pause the recording in OBS
/resumeRecording this message will resume recording in OBS
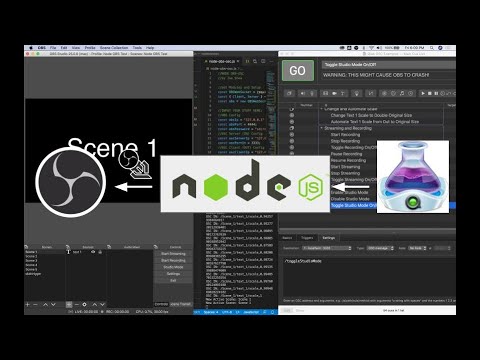
/enableStudioMode this message enables Studio Mode in OBS (WARNING: This Command Has Caused Some Computers to Crash OBS)
/disableStudioMode this message disables Studio Mode in OBS
/toggleStudioMode this message toggles Studio Mode on/off in OBS (WARNING: This Command Has Caused Some Computers to Crash OBS)
This allows OBS to send OSC to other applications when a scene is activated.
To use/enable this function, change the variable from 'false' to 'true' in the following code (on line 23):
//Enable OBS -> App Control
const enableObs2App = false- Configure the prefix and suffix for how you want your OSC application to recieve an OSC string from OBS
(Ex. In OBS when "Wide" scene is activated, Qlab recieves an OSC message "/cue/Wide/start")
const oscOutPrefix = "/cue/"
const oscOutSuffix = "/start"
Manually moving around and scaling source's in OBS isn't the quickest or most accurate. This TouchOSC layout is made to quickly edit source's alignment, scale, position, transition type, and transition duration.
The .touchosc file is included with this repository.
- Set TouchOSC device's WiFi to same network as machine running Node-OBSosc.js
- Set TouchOSC's 'Host' to match machine's IP.
- Port (outgoing) should be '3333' or whatever you configured this line of code to:
//OSC Server (IN) Config
const oscServerIp = "127.0.0.1";
const oscPortIn = 3333;- For alignment, scale, and position to work you MUST have the scene-item/source SELECTED in OBS
- For transition type and duration, it will only update the scene you are currently in. NOTE: This only changes the "Transition Override" NOT the global transition.
- To use the "Move" transition please Download and install the 'move Transtion' plug-in
This was inspired by the Python version: ObSC
Join the Discord server to chat:
