The web interface for the emergency response demo, built using Angular 7.
The web console has three main tabs.
The dashboard tab shows an overview of the status of all incidents and responders along with a map view of all ongoing missions. These values update in real-time based on events in Kafka.
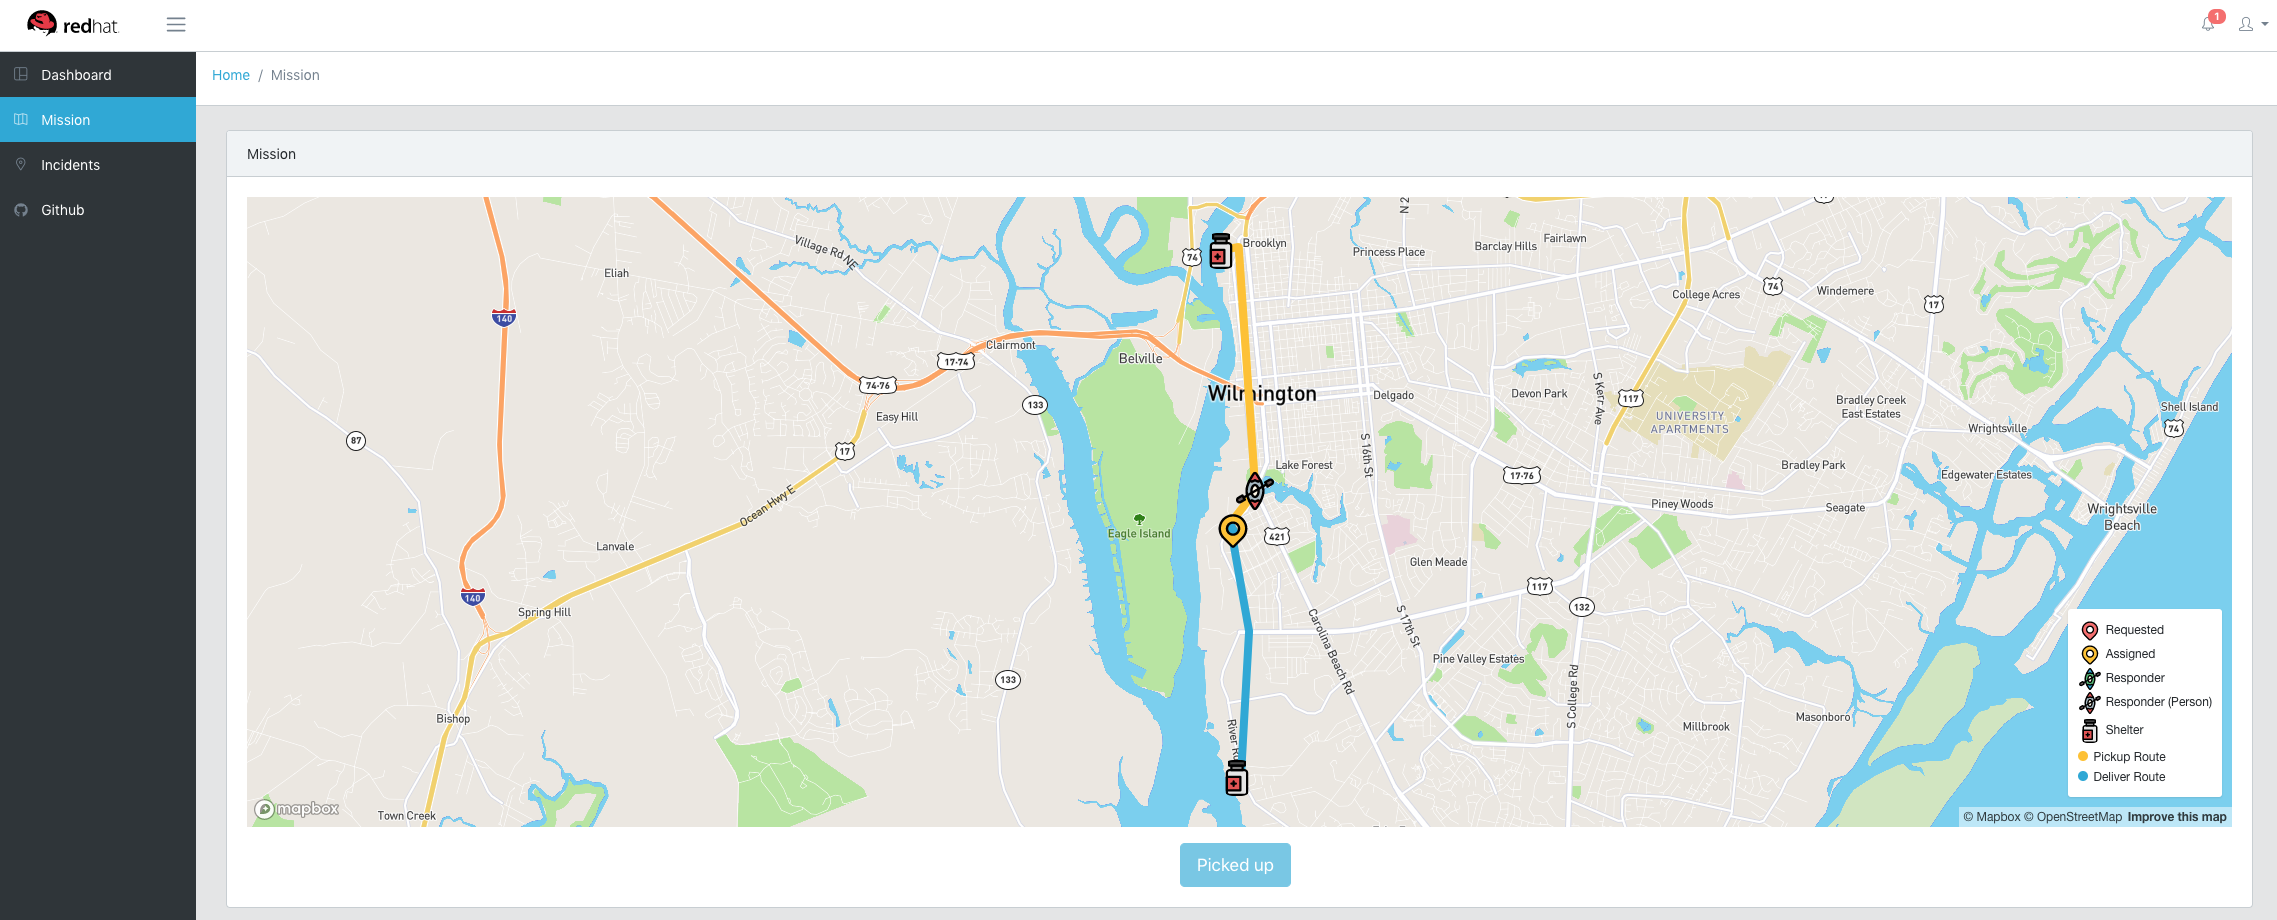
The mission tab allows the user to make themselves an available responder in
the emergency response system. To do this, select a location on the provided
map to set your current location and select Available. The user will then be
assigned a mission. Once the user reaches the waypoint of the victim, select
the Picked up button to drop off the victim. Once a mission has been
completed the user will be set to an unavailable state again.
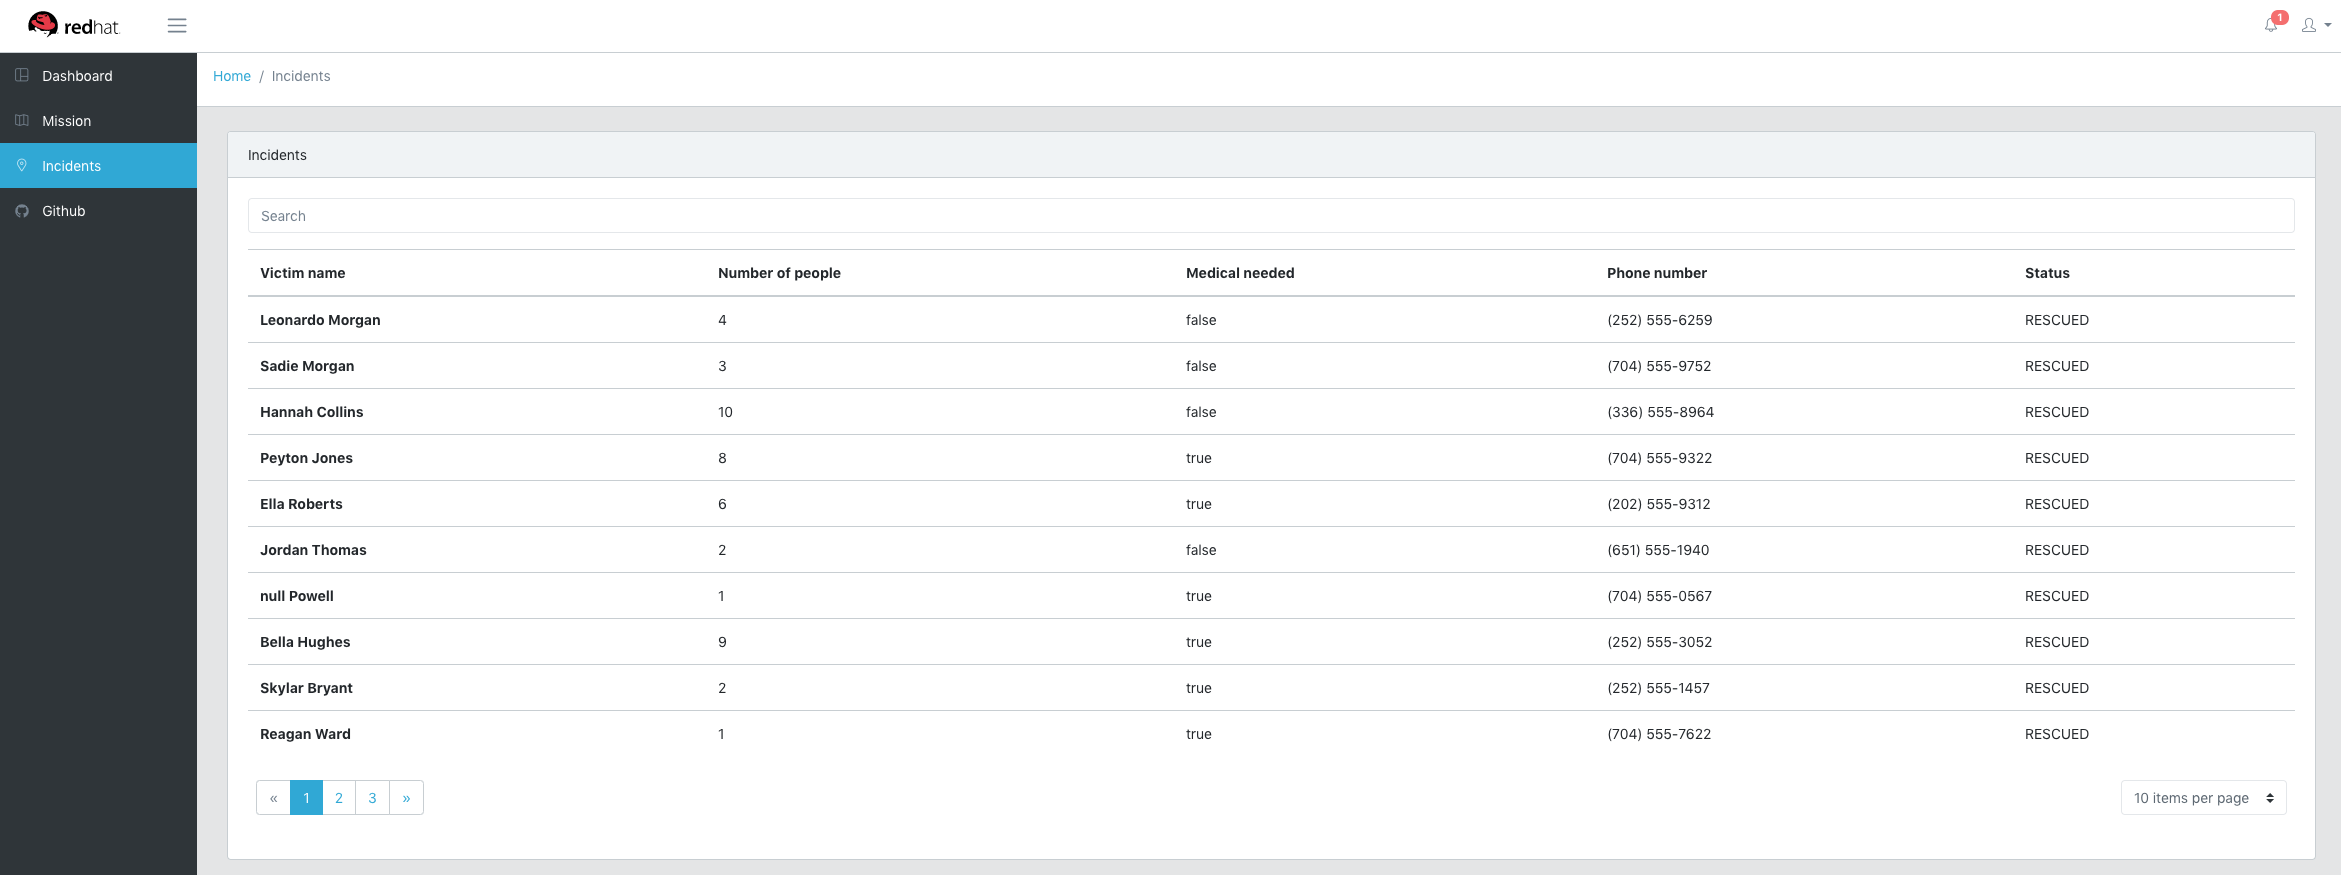
The incidents tab is a table of all incidents that have been created and their information. It has a search bar that will perform searches based on all information about the incident.
To run the webapp locally, the run-local.sh script must be updated to point
to the URLs of each of the emergency response services and a MapBox token must
be provided for the TOKEN.
Once run-local.sh has been updated, two scripts been to be executed
npm run buildDev
to watch the project and rebuild when needed, and
./run-local.sh
to start the development server.
The web console will be available on port 8080 by default, or the value of
PORT in run-local.sh if it is provided.


